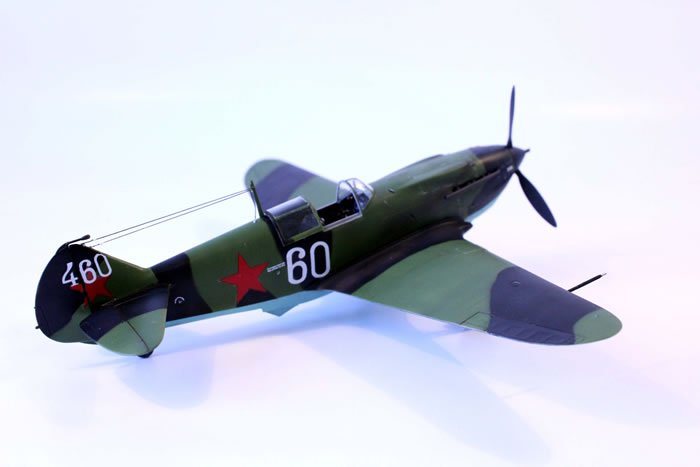
ICM's 1/48 scale
Lavochkin LaGG-3
by Fernando Rolandelli
 |
Lavochkin LaGG-3 |

ICM's 1/48 scale LaGG-3 is available online from Squadron
 Background Background
One of the three new designs choosen by the NKAP as a result of the competition originated in a requirement of January, 1939 (the other two were the future Yak-1 –I-26- and MiG-3 –I-200), the I-22, later LaGG-1 and then -3, was innovative in that it used a compound of plywood, birch and Bakelite which formed a kind of plastified wood called “Delta-drevsina” that, though heavy, could be plied and formed and was fireproof; the competition used standard mixed construction. However, the weight of the airframe and the low engine output made a sluggish fighter that always felt as if underpowered. A host of minor upgrades in the design were made along its production run (divided in Series, of about 100 machines each) which made improvements but failed to turn a basically mediocre fighter into something good. That said, the LaGG could fly and fight, was immensely tough and regarded as well armed by ex-I-16 pilots, though generally disliked by all, especially by those who had had the chance to fly the Yak. It served with 143 fighter regiments, including Guards, Regular and Naval Aviation.
The Kit
The LaGG-3 has been poorly represented in any scale. In 1/48th, I can remember a LTD kit from the nineties, one I couldn’t grab but which is said to have had severe shape issues (judging by their I.A.R. 80, I tend to believe such opinions). Now we have two decent kits, one from South Front and another from ICM. The latter comes in two boxings, one catering for the early Series 1st to 4th, while another for the intermediate ones, 4th to 7th . I got the latter, though I suspect that the plastic inside is the same. The late Seria are still missing, which is a pity, for they would be quite interesting and colourful machines.
In concordance to which seems to be the trend in Russian/Ukrainian kits, ICM’s LaGG looks to have been designed by rocket scientists and injected by children beachgear producers. Engineering is well thought, surface detail fine and consistent, the detail and quality of the small pieces stunning, the fit is very exact and positive everywhere (with some exceptions); anchorage of internal parts is firm, and the clear parts are very thin and transparent and their fit is exemplary. That is marred by what appear to be limits in the injection technology; a lot of flash, pebbly surface and edges a bit “round”, which compromise the fit. Exception has to be called on the wing to fuselage union, as the parts look to have been made for different kits altogether! A couple of internal parts are left like hanging in the air, and an extra hood to pose open would be a welcome addition. Gunsight (a PBP-1a) is very small. As an additional plus, it doesn’t look overengineered, with opening cowl panels and visible engine and armament as was fashionable with Eastern European kits. Decals look suspicious; I decided to buy some aftermarket ones (Authentic Decals 4825), which in the end proved a nightmare. To furnish the cockpit with small details, a dashboard and seatbelts I got an Eduard Zoom PE fret, while a Pavla vac canopy provided the hood.
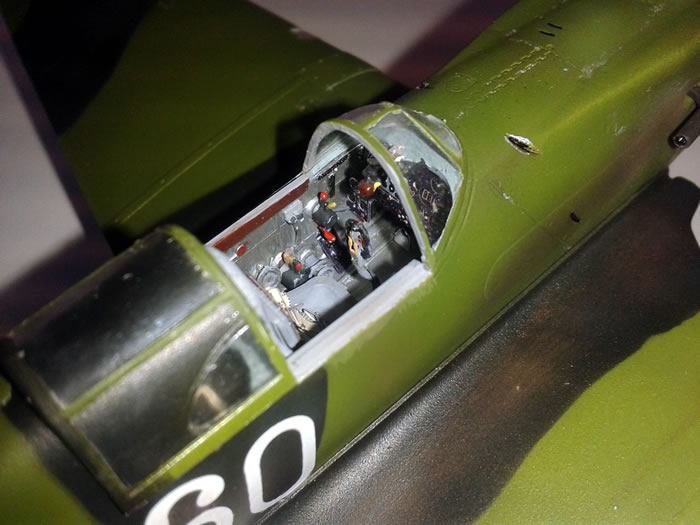
The interior of the kit is most complete and accurate, exception made of the gunsight, which looks anemic. I added the PE parts, mostly levers, handwheels and regulators’ handles.
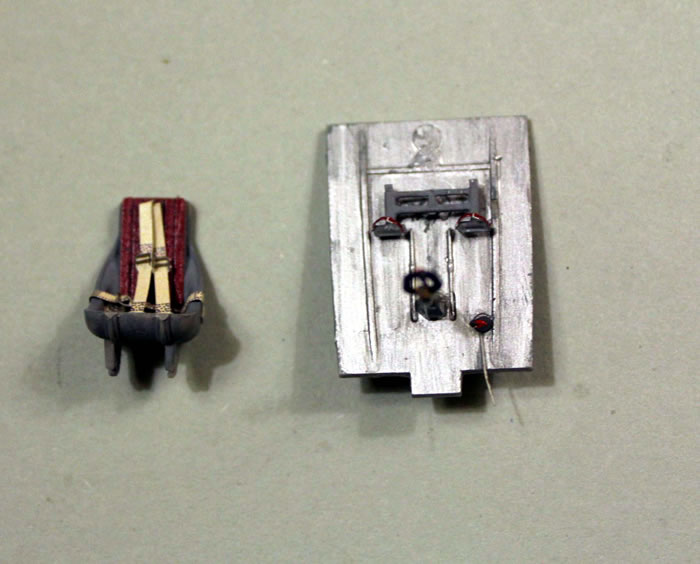
Everything almost clicked in place, including the dashboard. Choosing the colours (from an intentionally very limited palette of Revell paints) was the main problem. Most of the interior of the fuselage and structures were painted in a bluish grey, something mimicking Wood Aerolak, The cockpit walls were painted Aluminium, while the metal parts were painted a neutral light grey, for IMUP. The dashboard should be very light, while the Eduard part is Black; I let it be as is.
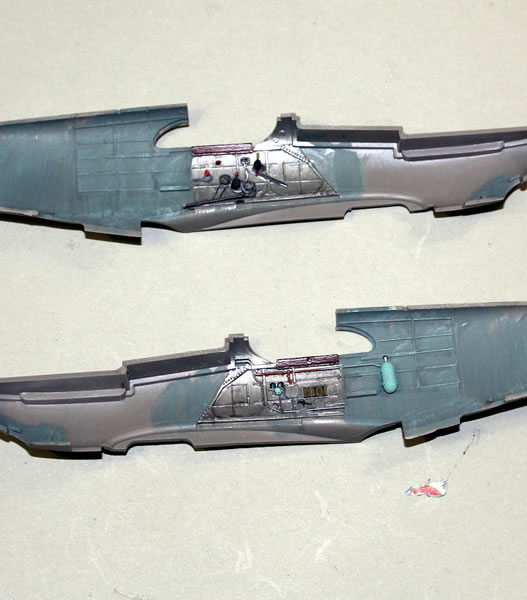
The quarterlight windows clicked in place from the inside, but the surface to glue them is very small; unavoidably, they got pushed a little to the inside as the construction went on, with unforeseeable consequences.

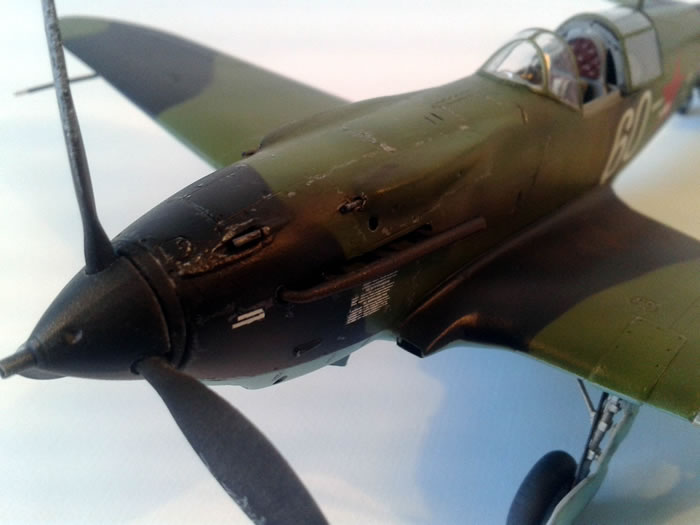
The fearsome looking “tunnel” radiator has a very positive fit for the most part, and there are no big “see-through” effects anywhere. The tailwheel should be glued before joining fuselage halves; I protected it with a stump made of part of a toothpick. Cockpit floor is added from below once the halves are joined. An unsightly gap developed in the spine aft the cockpit, which was traced to a quarterlight window having been pushed to the inside a fraction of a millimeter, bumping into the headrest and preventing the fuselage halves to lay flush. The covers for the 7.62 mm ShKAS MG are separate and they are complex and problematic; I guess it was an imposition of the injection technology.

Real problems showed when I tried to fix the wing. The opening in between the upper halves is much thinner that the wing roots in the fuselage, to the point of making the fit hopeless. I tried reducing the width of the cockpit floor to compress the wing roots, to no avail. Then I attacked the upper wing roots with sand and file, trying not to carry away the intakes at the leading edge. You cannot let yourself be carried by this procedure for the features in the wing (especially the metal reinforcement plates) will not match. Once good progress had been made, I glued the upper wing halves to the fuselage and then presented the lower part, trying to have the plates match and not to lose the dihedral entirely (not that this flying piece of furniture has a lot). The upper wing halves overhang the lower part at the tips, but I mercilessly filed the “extra” length. Be warned that it might be my LaGG lacks a couple of millimetres in wingspan.
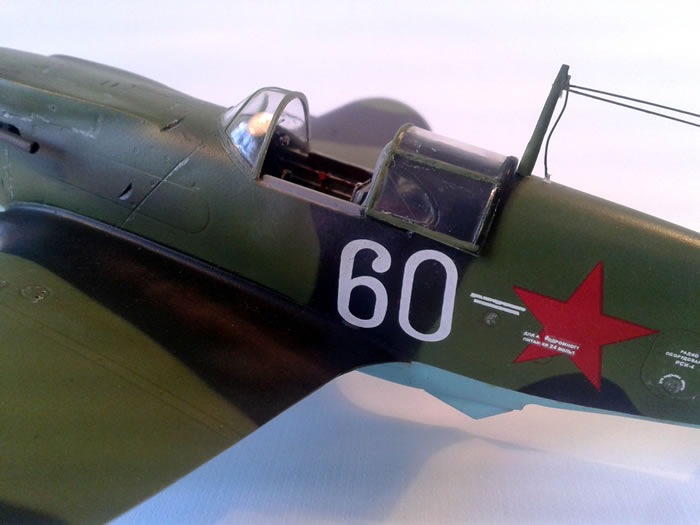
Landing gear has a very positive fit, both the leg itself and the door, though it had to be pushed to join the lower leg and glued by force. The actuator rod is actually too big and had to be trimmed; in a weird way, but truly honest to the prototype, it goes inside the wheel well. The mating surfaces of the propeller cube have to be filed to get a clean fit; the blades have a proper socket that ensures an even pitch. The fit of the windscreen is exemplary and you could leave it until after the model is painted; I am used to fix it before priming, and so I did; the injected hood I used as a mask for the cockpit (but masking it just in case)
Painting
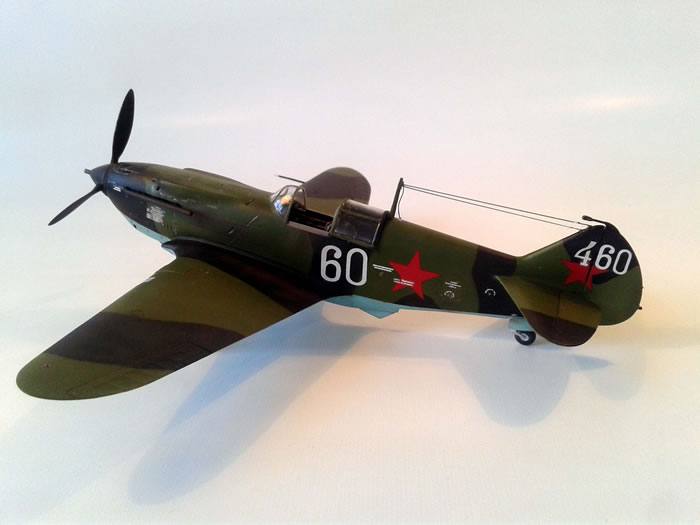
Once the model was primed and preshaded, I went for the painting stage. VVS colours are a bit of a nightmare, reminding me the situation with German colours in the 90s or Japanese ones in the 2000s: different entrenched opinions with people lobbing heavy artillery shells at each other. Many of the issues are of no consequence to a modeller (as the paint compositions, date of introduction of some colours or schemes or even the very existence of some off-beat colours); fact is that VVS fighters come in one of two different colour combinations (“Green&Black” or “Two Greys”), that the undersurface colour remained a rather vivid Sky Blue (darker or lighter according to the prophet at hand), and it looks like the passage from the “AII” paint standard to the “AMT” one, whichever the change in formula that was entailed, did not affect the colour themselves to a noticeable extent. That said, there seems to be an unrecognized consensus regarding the actual colours of the “Green&Black” scheme, the ones in the “Two Greys” being more debated. My stance, to avoid being bashed by one gang or the other is to avoid modelling machines in the later scheme entirely! Not that I model VVS planes that often.
For the undersurface I usually choose whatever Sky Blue I have at hand, provided it is rather vivid and true (i.e., not grayish, like RLM76, or greenish, like RLM65). Another trend fashionable nowadays points at a much darker colour, almost like Azure Blue.
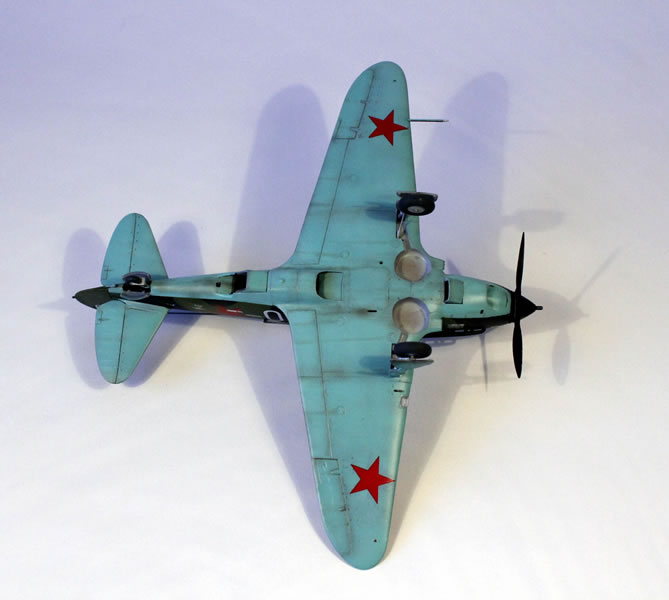
A old Testors Model Master paint, called “Russian Topside Blue” (I guess it is a Flanker colour) was a good one, as was WEM’s rendition (bashed by some together to the other colours in their line) In this case I used Revell n° Light Blue. For the Green I went for FS34151 (which both parties belatedly accept; true that some would claim this machine was finished in AII paints and that AII Green was more lurid). The Black is just that… mixed with a good proportion of Tan (Humbrol 93), which can be used to tone it down without it becoming a dark grey or blue. Wheel wells remained in IMUP, as the u/c doors. The legs themselves were painted in Aluminium.
Decals
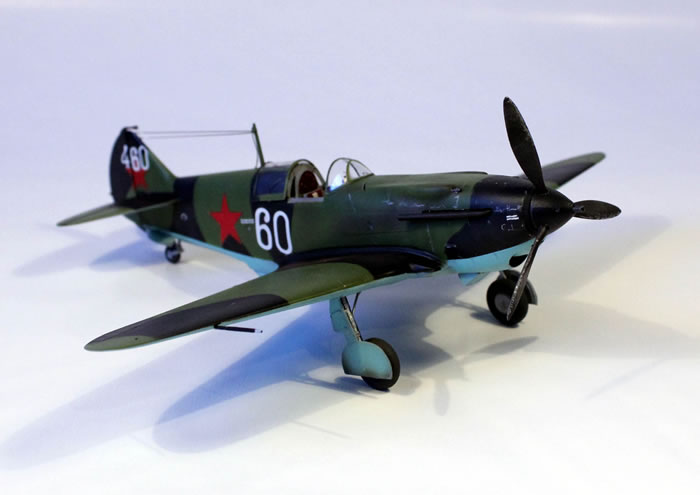
Choosing a particular airframe proved a chore; these LaGGs were nothing like standardized and gathering the correct group of features for a single airframe is anything but easy. From the two presented in the decals, the most representative offered (Mironov’s machine from 609th IAP) cannot be built (pictures prove it had an extra UBS on the cowling, and some features of a later airframe), while the second, though more properly represented, is a whitewashed machine (Red “46” of 3rd GvIAP, Baltic Fleet Air Force) which may or may not appeal to you. I decided to model “White (4)60”, which can be seen in a rather dilapidated state after a force landing in German territory, as the details in the model seem to more or less match it (probably, a 5th series Gor’ki Zavod 21 produced machine from 1941).
Decals proved a nightmare; the ones in Red ink virtually disintegrating as you tried to move them from the backing paper, the White ones being a bit more resilient. I resorted to overcoat the stars with Xtracrilyx Gloss before wetting them. That worked; the featureless nature of the surface helping the more rigid decals to stick to it. The star and number on the separated fin and rudder was also a chore; I “reconstructed” the star and cut the number in an inaccurate but manageable fashion. In hindsight, some generic, high-quality Red stars would be advisable.
Final Assembly
Undercarriage was fitted without any trouble in itself; I was wary that after all the mishandling of the wings, the tips would be off. While I had a couple of millimetres of difference, I compensated it by not pushing one of the legs deep into its socket, making for a weaker joint that made things a bit more complicated, but cured the seat of the model. The landing light I made with a round slice of sprue. The small MG muzzles were cumbersome but they were replaced by rod and fixed, as were the pitot tube and antennae mast, for which the original parts were used. The vacuformed hood was just a bit small (or it might be the slightly wider spine didn’t help) but it could be made to ride convincingly.
An interesting excursion to a barely trodden (by me) field in aircraft modelling, this build was suggested by members of my home town modelling club. As I am presently dwelling at Bonn, Germany, and was keen to start something like a short Bundesluftwaffe series; building a Soviet VVS plane didn’t look too… polite to me, but I went ahead and I am satisfied by the results. I would be tempted to build another, if only a late series LaGG is ever issued.
Sources
- “LaGG Fighters”, Squadron Signal n° 1163;
- “LaGG and Lavochkin Aces of WWII”, Osprey Publishing;
- “MiG-3, LaGG-3, La-5”, Voronin
- “Lavochkin LaGG-3, La-5, La-7”, AjaKS Militaria Fakty 2008.5;
- “LaGG-3”, Air War 68;
- “Soviet Air Force Fighter Colours”, Pilawskii, Classic Publications
Model, Images and Text
Copyright ©
2015 by Fernando Rolandelli
Page Created 27 February, 2015
Last Updated
27 February, 2015
Back to HyperScale Main Page
|
 Home
| What's New | Features | Gallery | Reviews | Reference | Resource Guides | Forum |
Home
| What's New | Features | Gallery | Reviews | Reference | Resource Guides | Forum |