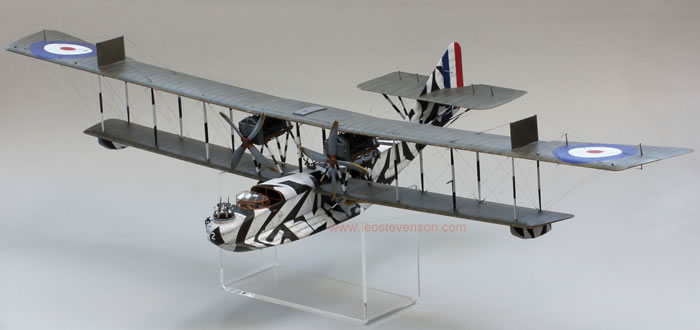
Wingnut Wings' 1/32 scale
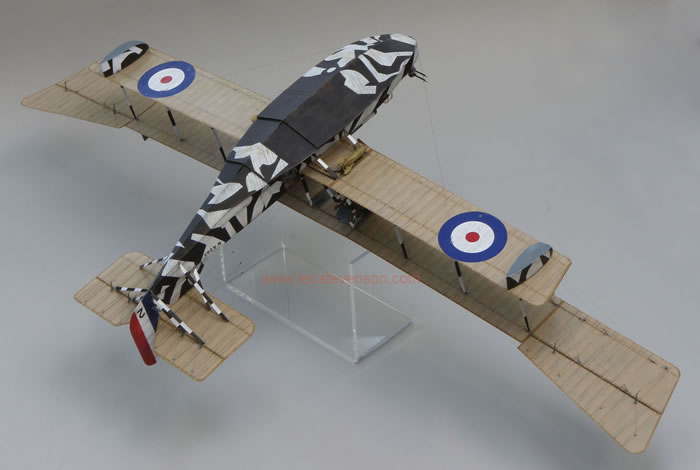
Felixstowe F.2a (Early)
by Leo Stevenson

Airfix's 1/72 scale Hurricane Mk.I is available online from Squadron
One of the many things I like about Wingnut Wings is the way that they suddenly announce surprise new kits. Apart from producing some very good kits they are also very good at keeping their cards close to their chest!
They came out with yet more surprise kits just before last Christmas; firstly with the Hansa Brandenburg W.12, then as if that wasn’t enough they quickly followed this with two Felixstowe F.2a kits, an early and a late one.
I couldn’t resist these temptations, so with smoke coming off my credit card I bought the new W.12 and then its most common adversary, the fearsome F.2a. I chose the early version, mainly because I am fascinated by the snazzy dazzle camouflage scheme which is one of the kit’s options.
History and Opinions
The Felixstowe flying boats were probably the most successful flying boat designs of the first World War. These had a very complicated history that I won’t go into here, but to cut a long story short they were a development from Anglo-American designs that pre-date the war.
The Felixstowe F.2a was probably the first true flying boat in the sense that its radically new design of hull was so much more than merely a conventional aircraft that was made to float. The Felixstowe F.2a fulfilled and combined the complex and contradictory requirements for structural strength and stability in both in the air and on water in an elegant way that is very beautiful.
I won’t be the first to say that the best and most successful aircraft always seem to be the ones that looked very attractive too, for example the Spitfire, Concorde and [add your own favourite aircraft here!], and this is yet another case in point.
There was some problem with distribution so my kit didn’t arrive until early January, but this coincided with me taking some time off after a large project I was about to start was cancelled at the last minute, which meant that it was perfectly timed. When the massive box arrived I got on with making the model straight away.
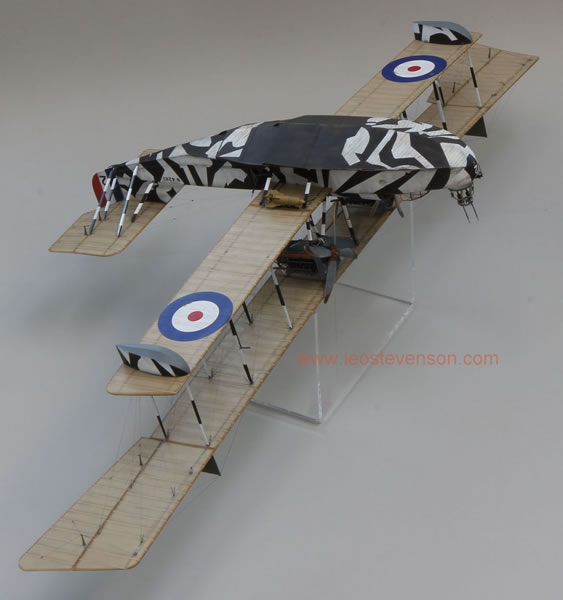
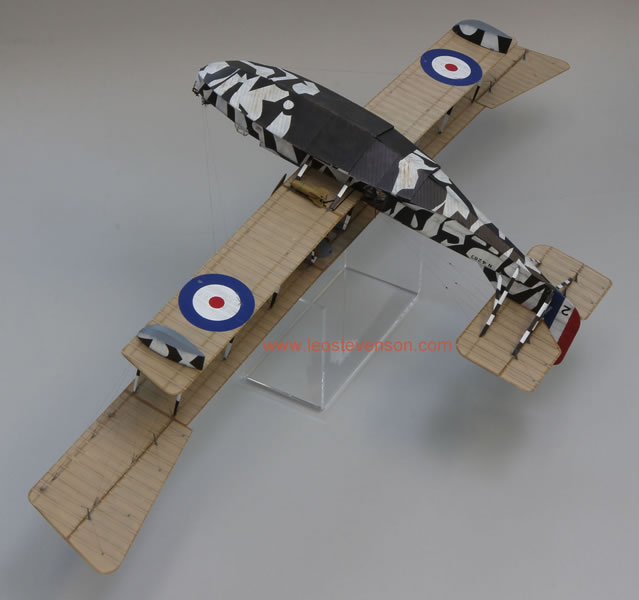
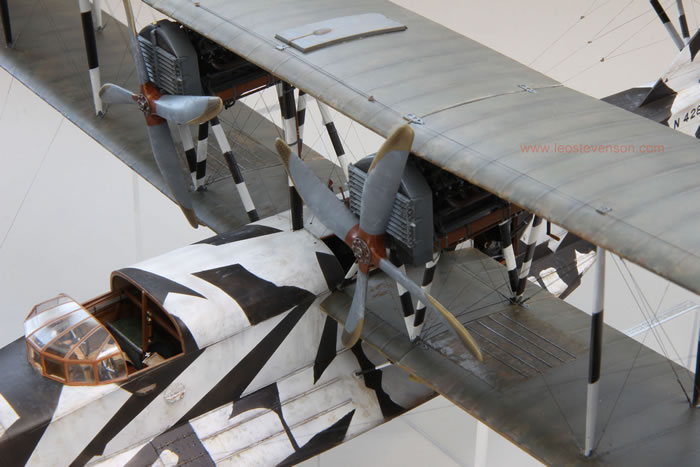
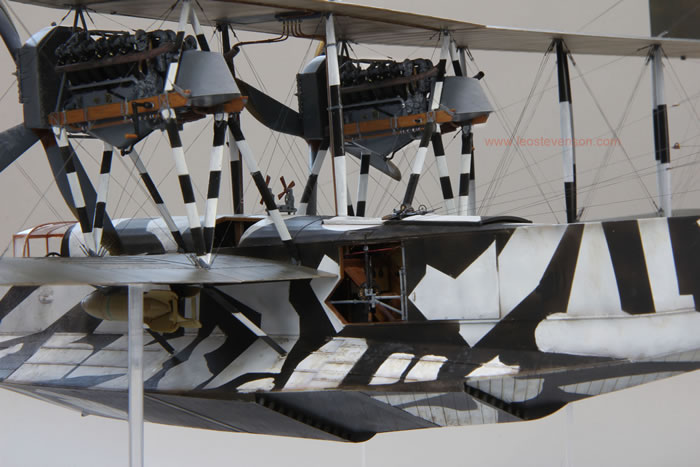
The size and generally busy nature of this aircraft’s structure is a big challenge, so I have to warn anyone who isn’t already an experience aircraft modeller to avoid this kit. This isn’t just because of the overall number of parts or the rather daunting engines and their supports between the wings, or even because of all that rigging, but because this is a very large model (wingspan 91cm). This means that as soon as you start work on building up the wings you realise that it is difficult to handle and extremely delicate. This is made worse by the extreme accuracy and authenticity of the components, and by that I mean that WNWs have made all wings and all the struts dimensionally exactly right, but at 1/32 scale this means that this mass of plastic teeters towards the limit of the natural strength-to-weight ratio of polystyrene, and so you need space, time and patience to avoid accidents.
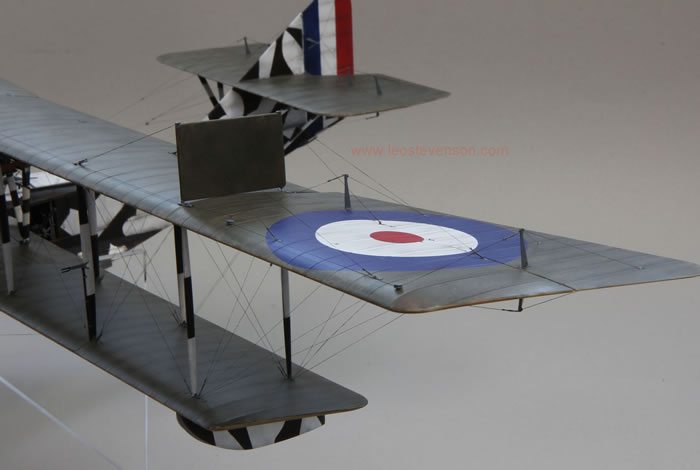
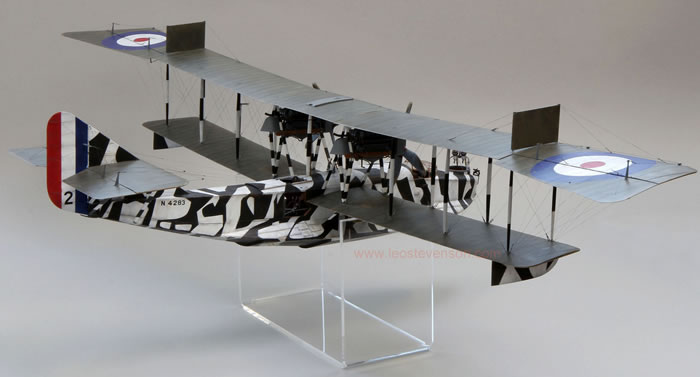
The kit’s instructions do have to be followed very carefully. They are excellent, as usual, but it’s easy to miss some details if you’re not really concentrating, and the exact sequence of construction is more important with this kit than most. Having concentrated as much as I can I still came into some trouble with the wings which should not have much dihedral angle to them, but this model is made to have a fairly jaunty angle initially - the instructions say that “wings will settle to correct 1 degree dihedral after seven days”. Mine didn’t do that, in fact they settled more quickly than that, and a few of the inner supporting struts bent during this process too.
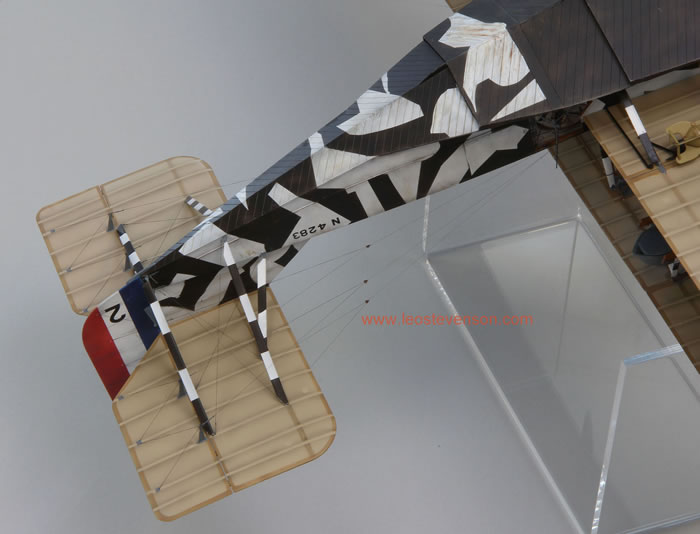
I corrected those bent struts, but because I was worried about yet more settling I also rigged the ‘landing wires’ (the wires that between tops of the inboard struts that slope down to the bottom of the outboard struts) with strong but fine black nylon ‘repair thread’, instead of Uschi van der Rosten’s rigging thread which I used elsewhere on the model. Uschi’s thread is very similar to ‘EZ Line’ in that it doesn’t actually have any structural value as it’s so weak, it is purely a visual accessory, whereas the nylon thread is very strong. For these landing wires you could use fine fishing line and paint it instead.
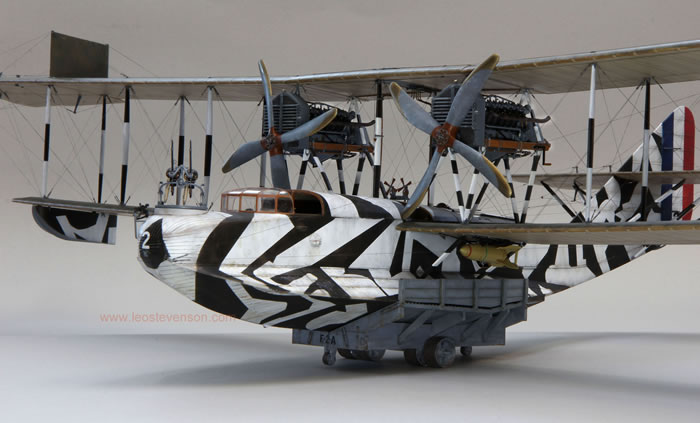
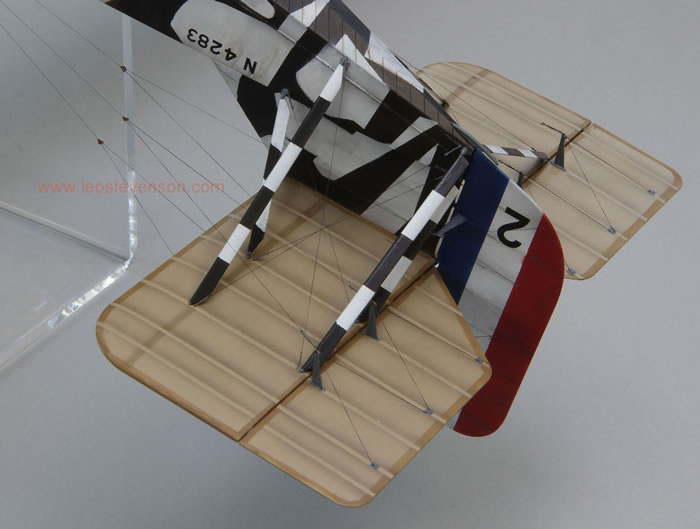
This trick did arrest any further sagging of the wings, but it left me with the wings having more dihedral than they should have. I must admit that I don’t actually mind this. Although it is, strictly speaking, inauthentic, it does look quite attractive with this more jaunty angle! The way I will display my model, on the Perspex stand you see here, implies its flying, and so I could perhaps argue that this dihedral represents a strong downward flexing of the wings as it descends rapidly…maybe…!
I know that the folks at WNW go to a lot of trouble to get things right, far more than many other kit manufacturers, so I am saying all this not as a criticism of them or of this kit, but as a warning to you that if you want to make a fine model from this kit please go carefully and rig it as I suggest here. If you do, then you can’t go far wrong, and you’ll end up with a truly magnificent showpiece.
Extras
The kit can be made up ‘OOB’, but you’ll still need to buy rigging accessories. I also used some of Bob’s Buckles turnbuckle bits, as well as Gaspatch Models’ turnbuckles - both 1/48 & 1/32 scale, depending on the location of the rigging and the work it has to do.
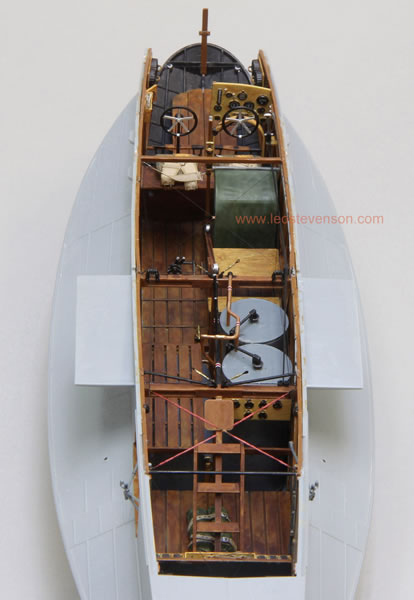
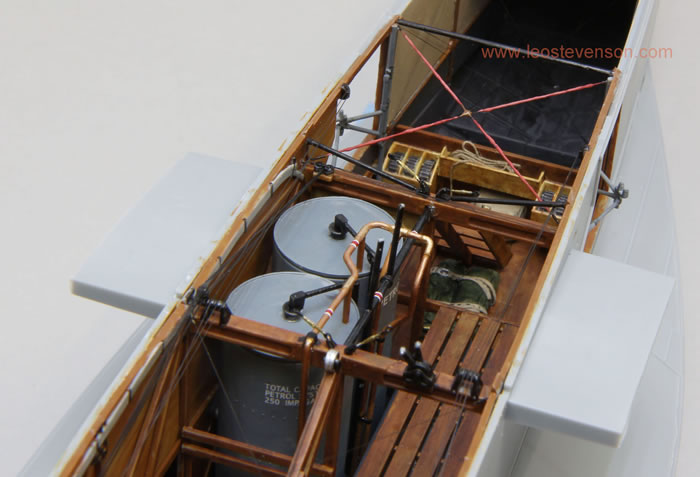
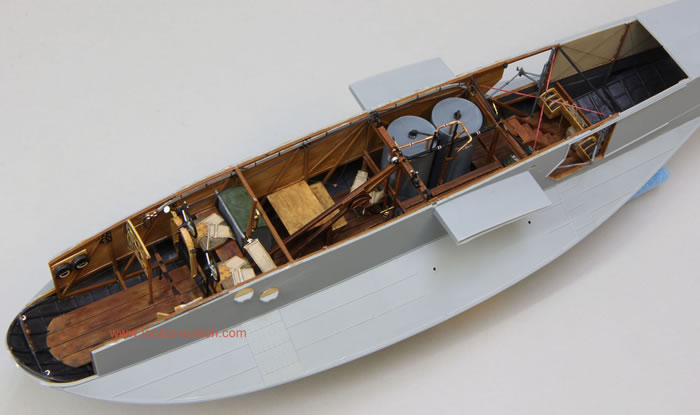
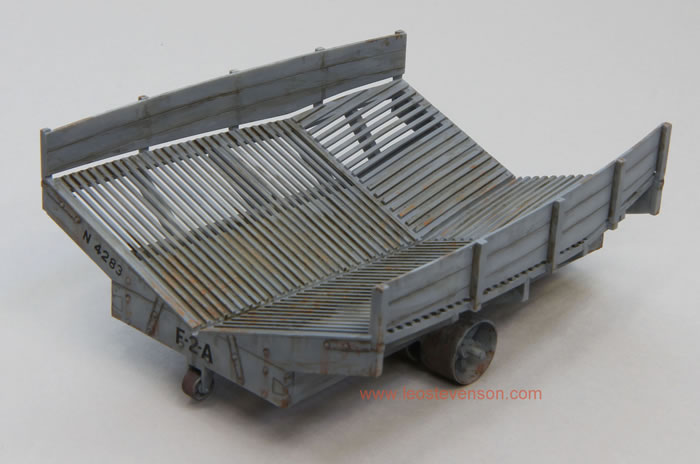
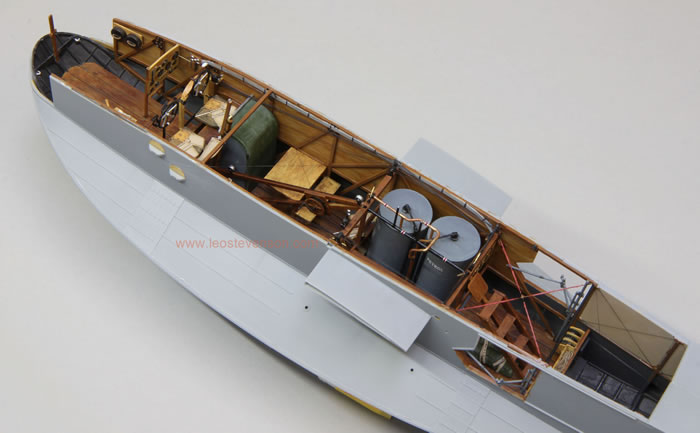
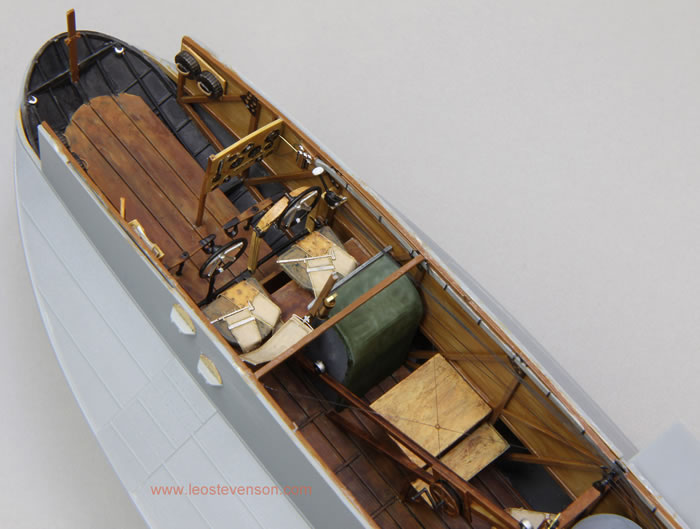
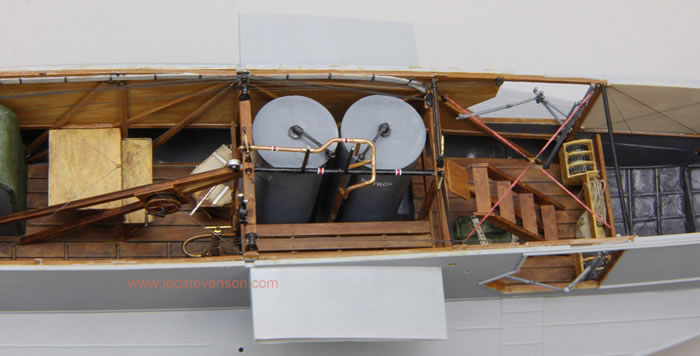
I also added a folded and bound tarpaulin and a canvas satchel from Value Gear¸ and a scale length of rope in the plywood tray thing between the magazine storage in the rear compartment, just to ‘busy it up’. Plausible, but as with most of the work on the interior of this particular aircraft these things are hardly visible when the fuselage/hull is fully assembled.
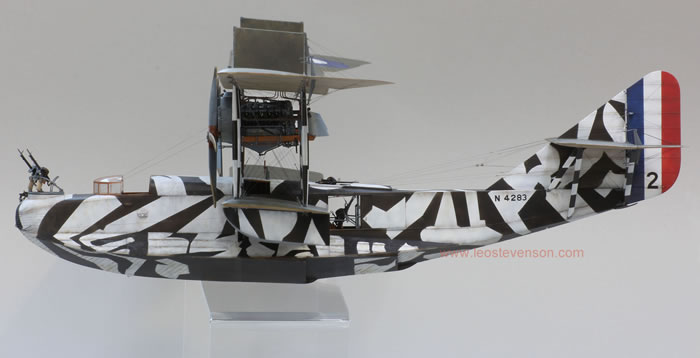
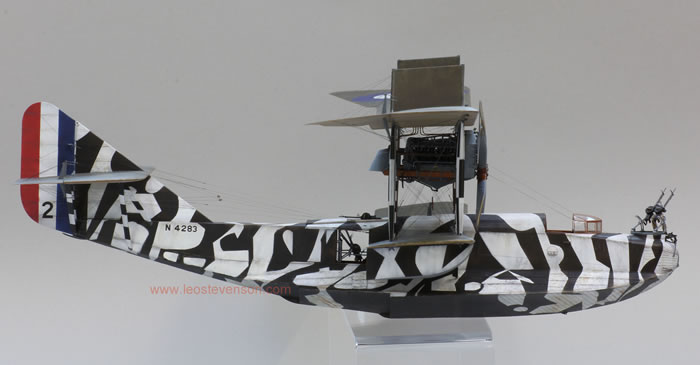
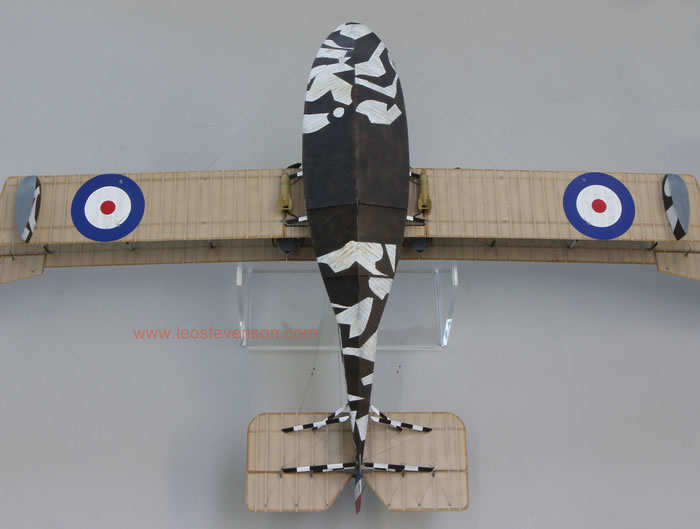
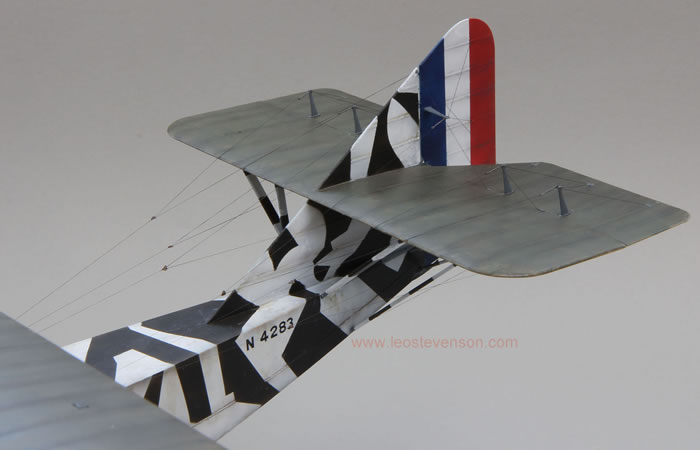
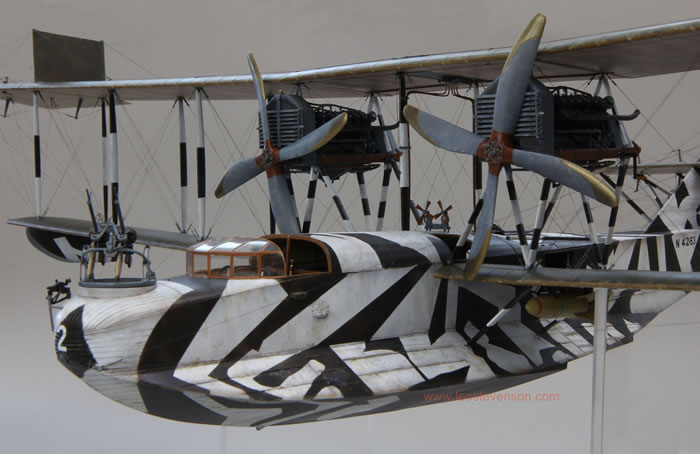
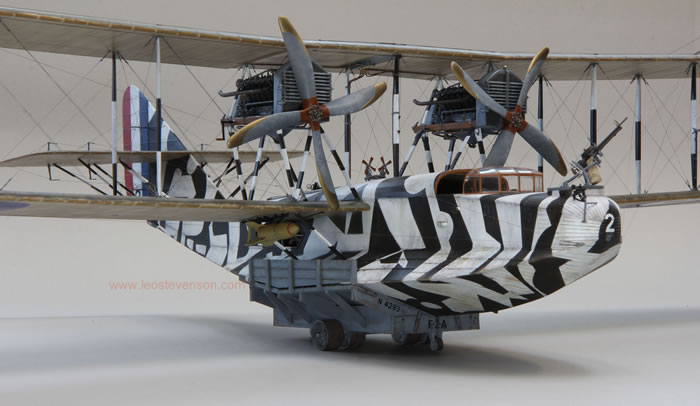
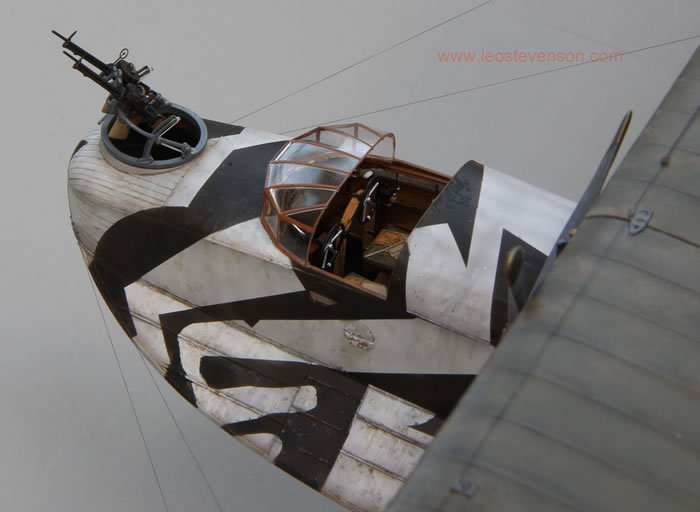
There are five options for markings with this kit. All are interesting and tempting, but as I said I just had to have a go at the most difficult option, the dazzle-camouflaged aircraft N4283 ‘2’ based at Great Yarmouth in April 1918. This scheme involved a lot of masking, and also a lot of informed guesswork because there is only one good photograph of this aircraft that shows its port side, but the starboard side is only guessed at by WNW’s excellent profile artist Ronny Bar, basing his work on a rough but unreliable sketch done years after the war by someone who saw it.
I didn’t follow Ronny’s illustration for the starboard side because if I did that’d only be an interpretation of an interpretation of an interpretation (!), preferring to make my own dazzle design on this side based on the logic/illogic of the dazzle principle as shown on the port side, and also on countless ships of the period too. As an art historian and artist I also had visual echoes inside my head of Picasso and cubism, which are entirely appropriate for this historical period. By the way, strangely the photograph that does survive of the port side of this aircraft is not reproduced in the instruction booklet.

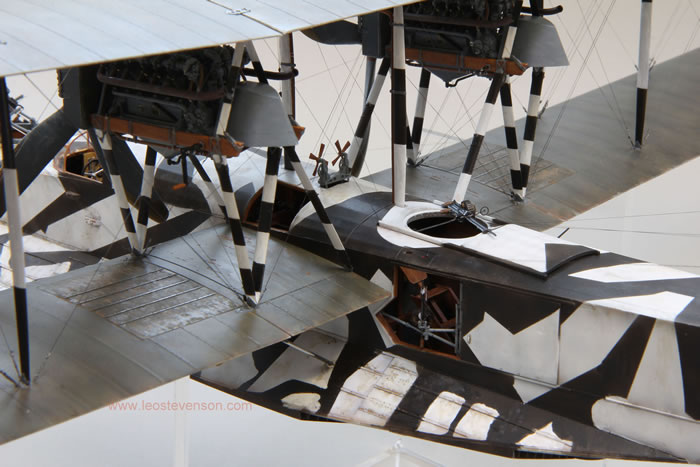
My dazzle scheme was painted using a slightly ‘killed’ white (i.e. slightly warmed and greyed down), and the black is actually a 50/50 mix of Tamiya acrylic black and brown. It still looks black on this model, but it has a warmth and subtlety that is probably authentic both visually and historically because on the real aircraft a lot (but not all) of the black on the hull was painted using a bituminous paint.
The very weathered dark green on the top of the wings was actually based on an Xtracrylix paint called ‘RAF Dark Slate Grey’ which is actually a very beautifully subtle green. Under the green I had pre-painted the stains, faded patches and repaired patches with various browns and greys splotched on with small torn pieces of damp sponge.
This was not the most enjoyable model that I’ve ever built, but that is more down to my own attitude and lack of skills or foresight than the actual kit itself.
It is a really wonderful kit in so many ways, for example the fit quality of the parts, the quality of the instructions as well as the decals and photo-etched parts etc. My lack of enjoyment was mainly because of the fact that after a certain point it became scary to handle because of its size and the threat that any accident would pose to the accumulating investment of time spent on it, and also because I must have done something wrong to make things go awry with the settling of the wings and then over-correcting this ending up with a happy but inauthentic dihedral on my wings.

Thinking back to my far off days working in the British Museum, I remember that things of great value were best left alone rather than work on them with the wrong frame of mind. However, I’m not suggesting that you leave this kit alone; if you like the look of it as much as I do and you want it - and you have the room, the patience and the money - then I am sure that you will be very pleased with it. Good luck.
www.leostevenson.com www.leojubilee.co.uk
Model, Images and Text
Copyright ©
2015 by Leo Stevenson
Page Created 10 March, 2015
Last Updated
10 March, 2015
Back to HyperScale Main Page
|
 Home
| What's New | Features | Gallery | Reviews | Reference | Resource Guides | Forum |
Home
| What's New | Features | Gallery | Reviews | Reference | Resource Guides | Forum |