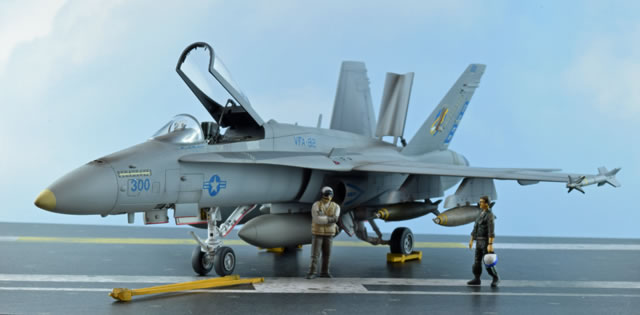
Hasegawa's 1/72 scale F/A-18C
Gulf War Gladiator
by Rafe Morrissey
|
|
McDonnell Douglas F/A-18C Hornet |

Tamiya's 1/32 scale Tamiya P-51D Mustang is available online from Squadron.com
Background
If any aircraft defines adaptability, versatility and longevity for the modern era of the United States Navy, it surely must be the F/A-18 Hornet.
First introduced in the late 1970s, the Hornet has been the aircraft on modern carrier decks for going on four decades. While its younger brother, the F-18E series is now the preeminent combat aircraft, so-called “Legacy Hornets” are still relied upon to support ground forces in combat. This remarkable track record is a testament to the flexibility of the initial design.
Hasegawa’s Hornet
Hasegawa’s kit of the F/A has been around almost as long as the real thing. Over the years, Hasegawa has added extra parts to account for the various bumps and bulges of the later Legacy Hornet variants. The moldings remain crisp and flash free with fine engraved detail. As is the case with most Hornet kits, the kit utilizes different parts for single-seater and two-seater configurations on the same basic airframe.
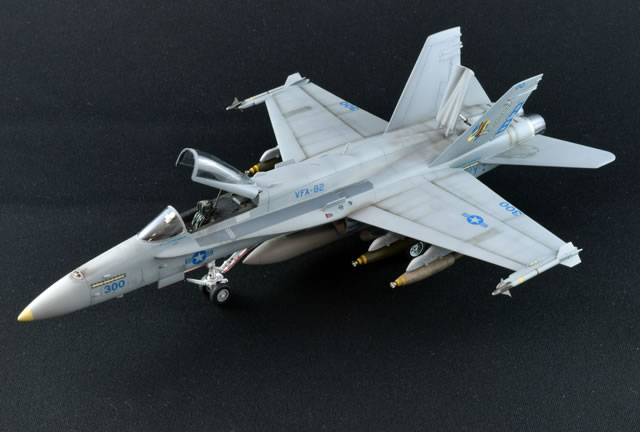
The cockpit is very basic and not up to modern standards. Unfortunately, this kit also hails from the “less is more” marketing era in which Hasegawa omitted ordinance for its aircraft kits requiring aspiring modelers to purchase separate bomb sets. A couple AIM-9 Sidewinders and 2 AIM-7 Sparrow missiles are provided along with a selection of targeting pods.
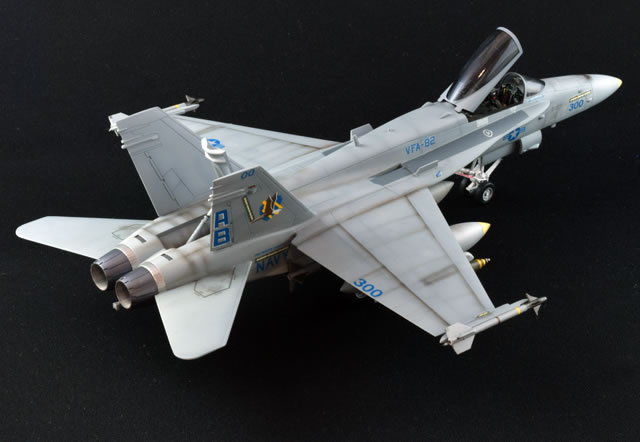
While I am much more familiar with World War II aircraft, the basic dimensions of the kit appeared to conform well to the reference books I had on hand. With some help from the after-market, the kit can be made into a respectable replica of this famous airplane. Like the real thing, adding a few upgrades can extend the viability of this veteran.
While no doubt stellar for the early 80’s, in this day and age he kit pretty much requires a nose to tail upgrade. In that order, the first task was to replace the cockpit.
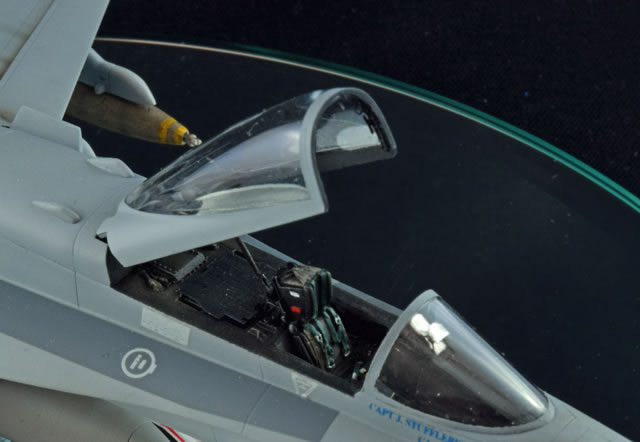
I used an Aires set with some trepidation as these sets invariably require more grinding than a coffee mill. Happily, the set went in with a minimum of cutting and really makes a big improvement.
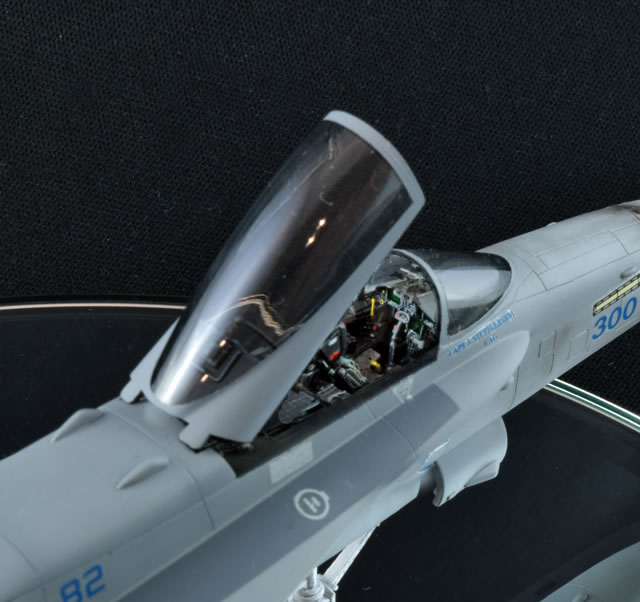
Another weak spot is the intakes which are basically open gaping holes on the kit. Fortunately, Quickboost makes a set of intakes with engine faces. Unfortunately, they fit very poorly and require a lot of grinding and cutting on both the kit parts and the resin to get them to fit. One step ahead, one behind, I guess.
Hasegawa’s ordnance sets provided the necessary explosives. I patterned my load out based on a nice photo from Time-Life showing a bombed-up F/A-18C with three Mk. 83 1000lb. bombs. The kit missiles could stand replacing but I elected to use them and, when painted, look pretty nice.
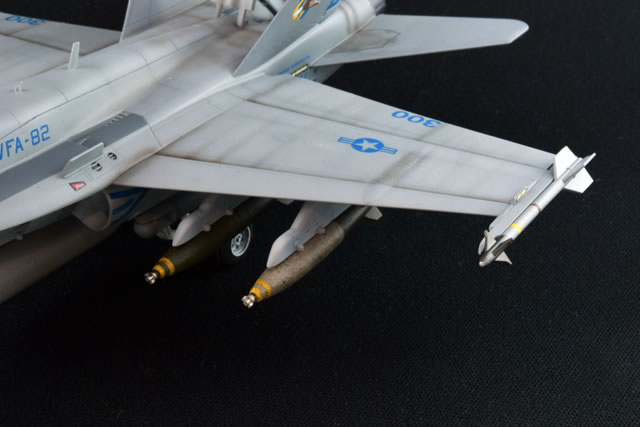
The exhaust nozzles are actually pretty nice and much better than the overall nicer Fujimi kit. I purchased a set of Quickboost nozzles but, in the end, ended up saving them for my Fujimi two-seater.
Painting
Color scemes for Legacy Hornets are pretty easy. Pick any color you want as long as it’s gray!
Actually, it is a bit more complicated as the official color scheme calls for Light Ghost Gray undersides and Dark Ghost Gray upper surfaces.
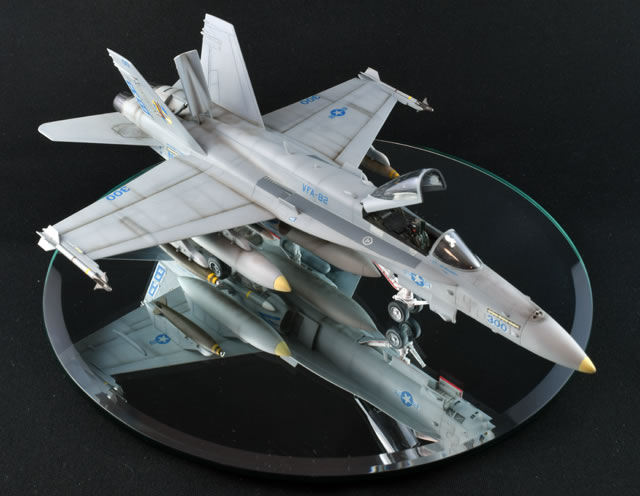
I mixed my colors from Tamiya XF-53 Neutral Gray. Two parts Tamiya XF-2 Flat White to one part Neutral Gray produced the Light Ghost Gray shade while a one-to-one ratio provided the Dark Ghost Gray.
Weathering
Deeply weathered finishes on U.S. Navy aircraft are a good option for preshading. I utilized both preshading and post shading with a 50:50 mix of Tamiya XF-1 Flat Black and XF-64 Red Brown to show grime in and around panel lines and streaking.
I used an HB pencil to add chips and dings to the landing gear and outline structural features. Graphite dust and pastels rounded out the weathring to produce the grime on the landing gear and powder gun gas exhaust, respectively.
I always like to build an paint a new figure or accessory with each model I complete. I makes for a nice break and they help give a sense of proportion and environent to any model.
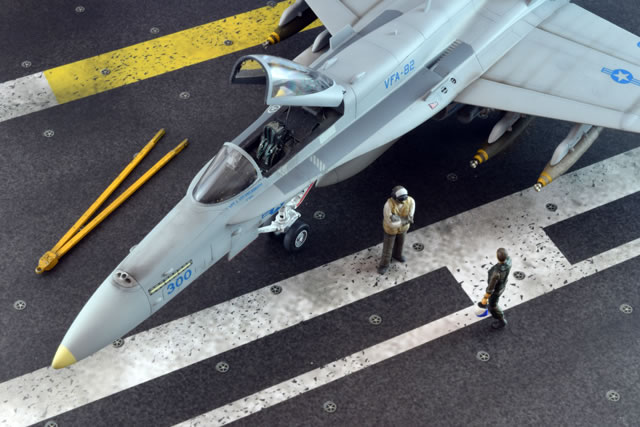
I sourced my figures from a Testors 1:72 carrier deck crew set and a tow bar and checks from Verlinden.
Looking at the airplane in its operational environment adds an entirely different perspective.
Model and Text Copyright ©
2015 by Rafe Morrissey
Page Created 18 September, 2015
Last Updated
18 September, 2015
Back to
HyperScale Main Page

|
Home
| What's New |
Features |
Gallery |
Reviews |
Reference |
Forum |
Search