Roland C.II
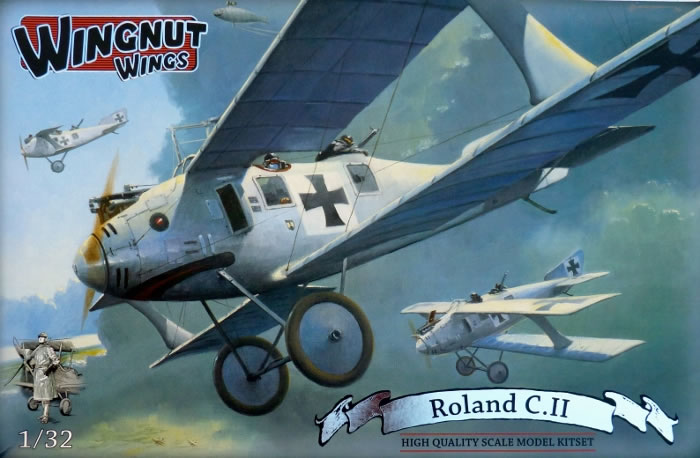
Wingnut Wings, 1/32 scale
| S u m m a r y |
Catalogue Number: |
Wingnut Wings Kit No. 32026 - Roland C.II |
Scale: |
1/32 |
Contents and Media: |
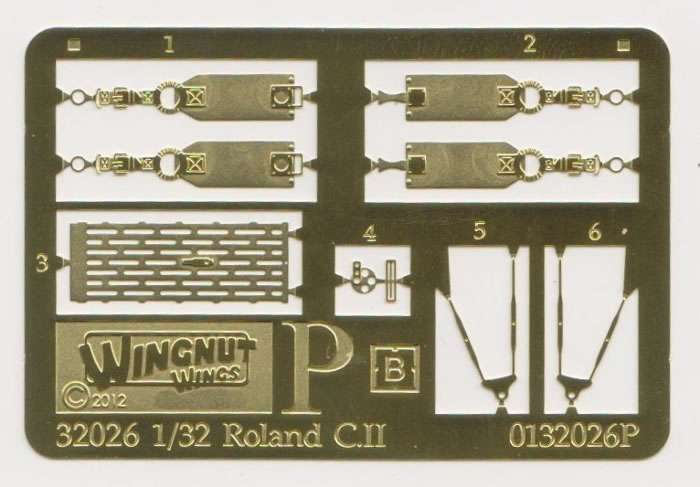
Fully formed plastic with excellent detail and no distortion; useful fret of photo etched parts; excellent fit thanks to clever engineering; decal sheet in perfect register with stencil data, placards and instrument faces; instruction booklet with an abundance of reference photos. |
Price: |
USD$99.00 with free shipping worldwide, available online from Wingnut Wings' website. |
Review Type: |
First Look |
Advantages: |
Fully formed plastic with excellent detail and no distortion; useful fret of photo etched parts; excellent fit thanks to clever engineering; decal sheet in perfect register with stencil data, placards and instrument faces; instruction booklet with an abundance of reference photos. |
Disadvantages: |
|
Conclusion: |
The Roland C.II is a perennial favourite amongst WWI modellers. This release from Wingnut Wings is another quality package that captures all the graceful lines of the original. The detail is plentiful and well executed, with all the various subassemblies coming together with a minimum of fuss. Thanks to clever engineering from WNW and the aircraft’s uncomplicated design, it’s the perfect kit for those that haven’t tackled a two-seater before. |
Reviewed by Rob Baumgartner

HyperScale is proudly supported by Squadron
Few two-seaters are as elegant as the Roland C.II.
The “Walfisch” (Whale) resulted from the design engineers wanting to produce a much cleaned up airframe. The idea was to remove the need for conventional interplane and centre section struts, which along with its associated wire bracing, created a lot of unwanted drag.
Allied to this concept was the fuselage, whose radical departure from standard practices created one of the first semi-monocoque configurations. Narrow strips of thin three-ply were spirally wound around a skeleton of wooden formers and longerons. This was then covered with linen fabric and doped to create a “shell”.
The result was an aircraft that initially performed very well and was used in the bombing, artillery spotting, reconnaissance, and escort roles. Its high speed was an advantage but this was soon negated by better designs from both sides as the conflict moved into the early months of 1917.
Every now and then, Wingnut Wings decide to spring a surprise on the WWI modelling community.
This time around it was the unexpected release of the beloved Roland C.II and later C.IIa. There are quite a few differences between the two types with each boxing containing sprues that are specific to that version. Amongst other things, the most obvious are the interior, armament, wings, and tail fin.
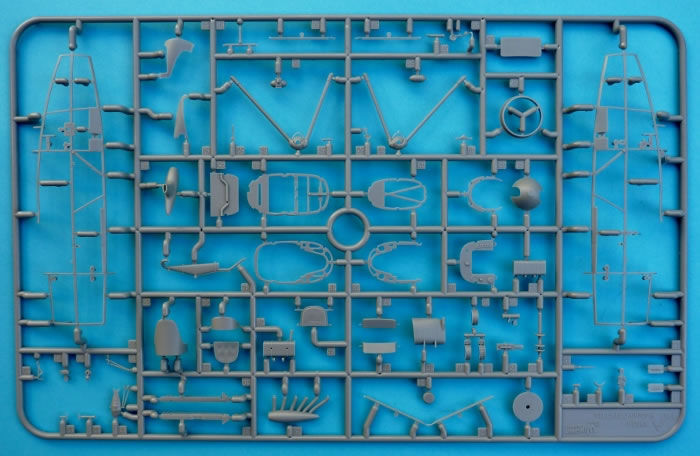
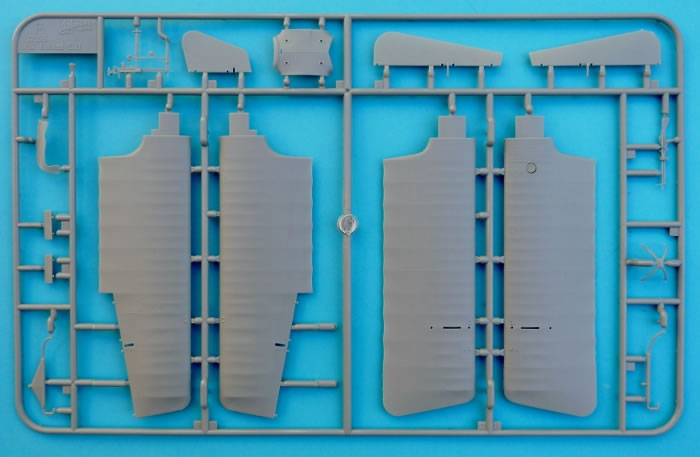
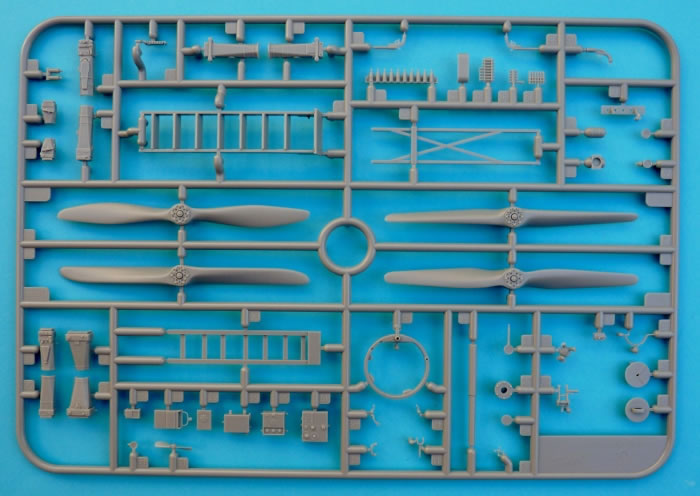
Inside the box are 10 sprues of injection moulded plastic that contain a total of 295 plastic parts. There’s also a photo etched fret with another 8 items, a decal sheet with markings for 5 aircraft, and of course the renowned instruction booklet with its accompanying reference photos.
A lot of thought has gone into designing this kit as can be seen by the parts layout. The unavoidable ejection pin marks are not conspicuous on the finished model, and those that may give concern are almost flush with the surface of the plastic. The result is that they can easily be scrapped off with a sharp scalpel.
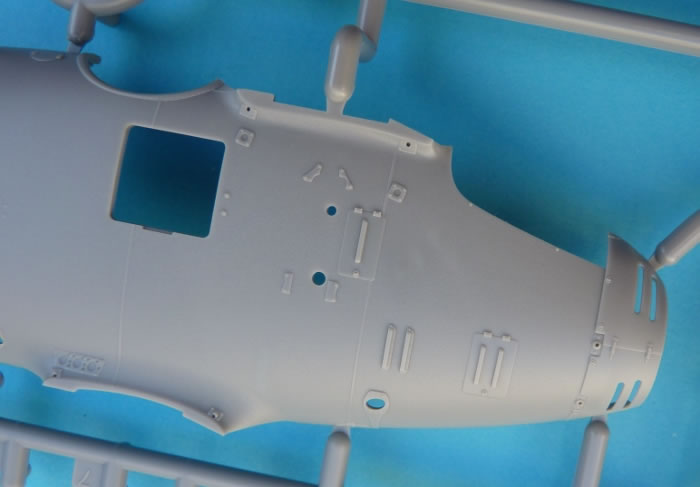
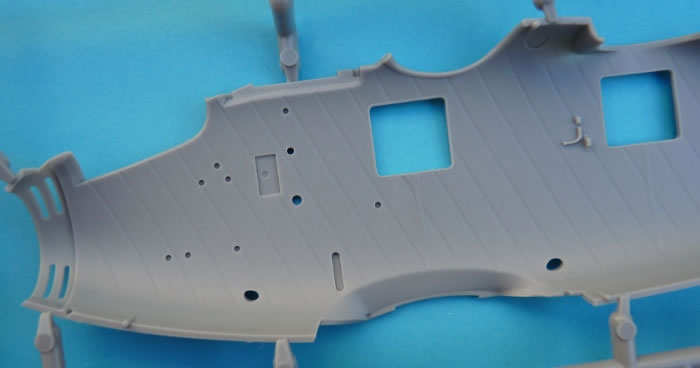
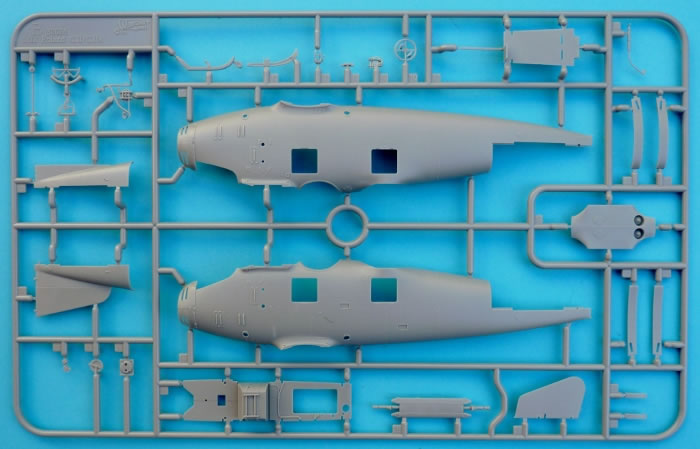
Another plus are the sprue attachment points. Where possible, these have been kept well away from any adjacent detail. Some of these are cleverly located on the mating surfaces which also helps the removal process. This can be seen on the exquisitely moulded fuselage halves.
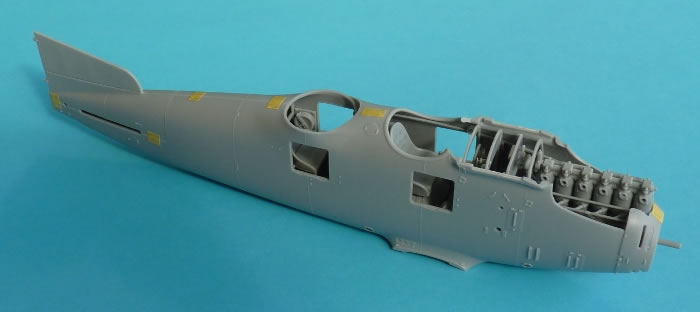
Construction
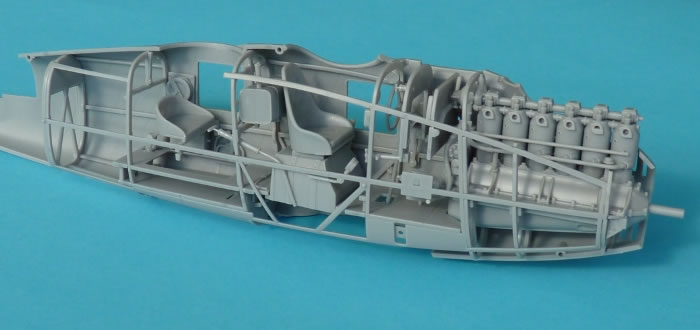
Assembly begins with the interior which consists of no less than 40 parts. The aforementioned p-e makes its appearance in the form of lap belts for the pilot and observer. Another nice touch are the decals which not only detail the instrument faces, but also the grease pump, generator, starting magneto, and Telefunken wireless box.
There are just a few points that need mentioning to ensure a trouble-free assembly. Some stray plastic needs removing on the fuel tank before the filler stem (A57) sits at the correct angle. Make sure you install the bulkhead (A44) before fitting the cardboard tube for the wireless aerial (A34). Doing otherwise will not allow the frame to slide over the floor (B3) and into its locating slots. Don’t ask me how I know this…
Although not mentioned in the instructions, one can easily drill holes through the rudder cable pulleys (D17) thanks to a couples of conveniently placed dimples. This will simplify the rigging process and also make it look a lot more realistic. Don’t worry about filling the awkward seams found at the extremities of the auxiliary fuel tank (A24, A33). These are conveniently hidden against the fuselage halves.
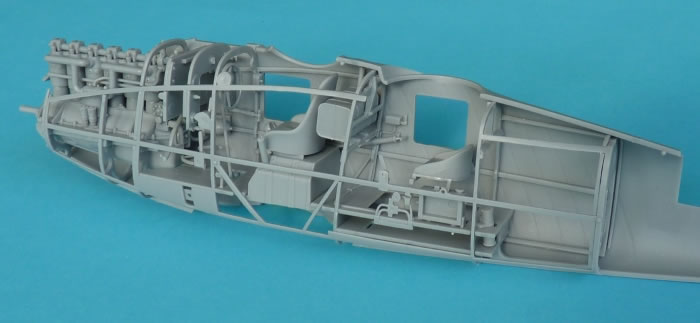
The separate internal framework is a real work of art. To accomplish this complex design, numerous nodules had to be incorporated into the design to ensure the successful flow of plastic. These are simple enough to remove, as are the extremely shallow ejection pin marks. Once again, the latter disappears with a few scrapes of a sharp scalpel blade.
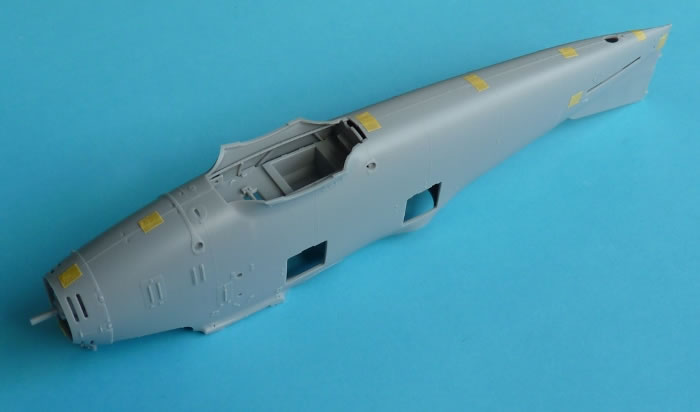
There were no problems at all when enclosing the complete assembly between the fuselage halves.
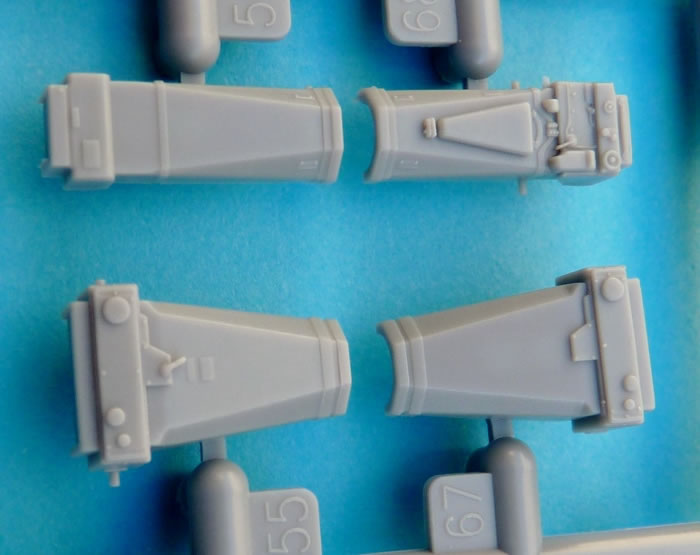
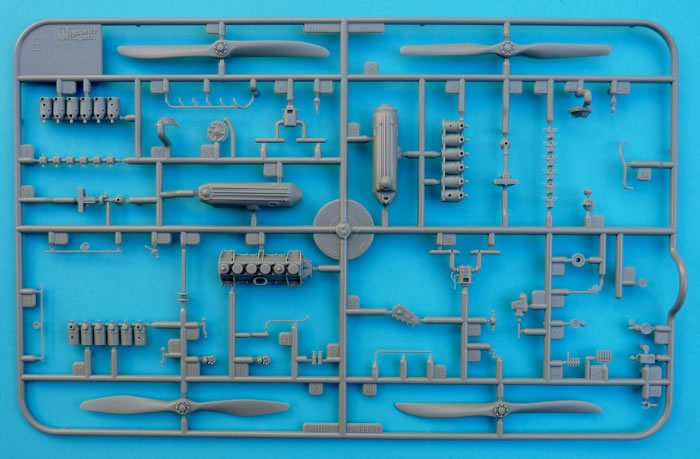
Sprue “E” makes a welcome return to allow the building of the 160hp Daimler-Mercedes D.III engine. Twenty one parts make up this gem and as before, everything aligns itself perfectly. Note that the instruction sheet lists one of the cylinder bank halves as E13 instead of E16.
As WNW have also released the C.IIa, the tail unit is moulded separately from the fuselage for economic reasons. Fortunately the fit of this assembly is quite good although care is needed to make sure that the neighbouring raised vertical line remains consistent with others on the fuselage.
This was where adjacent pieces of the fabric covering overlapped and study of photographs reveals that these edges were not always in the same place. They are quite pronounced on the finished model so many builders may wish to give them a light swipe with wet ‘n dry paper.
Eagle-eyed modellers will also notice that the width if the upper tape on the tail assembly is slightly wider than that on the joined fuselage halves. Two solutions come to mind. One can sand off the wider tape on the tail and replace it, or insert a sliver of plastic into the area behind the observer’s position to match that found on the tail section.
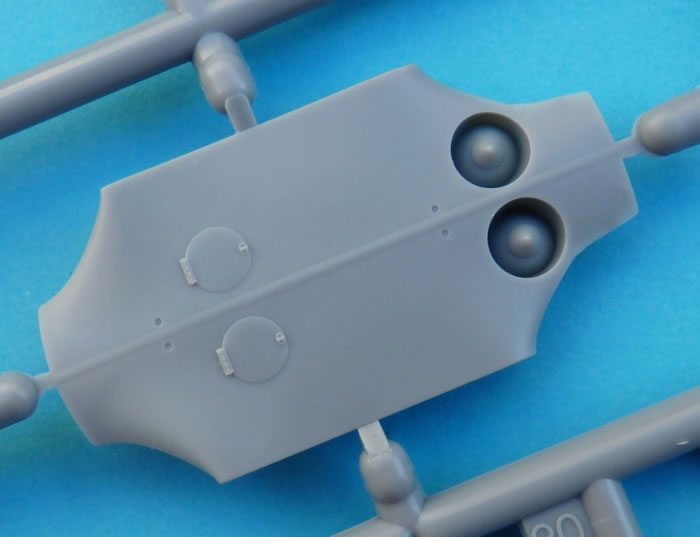
The wings are beautifully engineered and feature the correct wire trailing edges and shortened rib detail of the C.II. There is no distortion at all on these large surfaces and the detail is sharp and consistent. Hefty tabs give these flying surfaces the strength they need to stay in place.
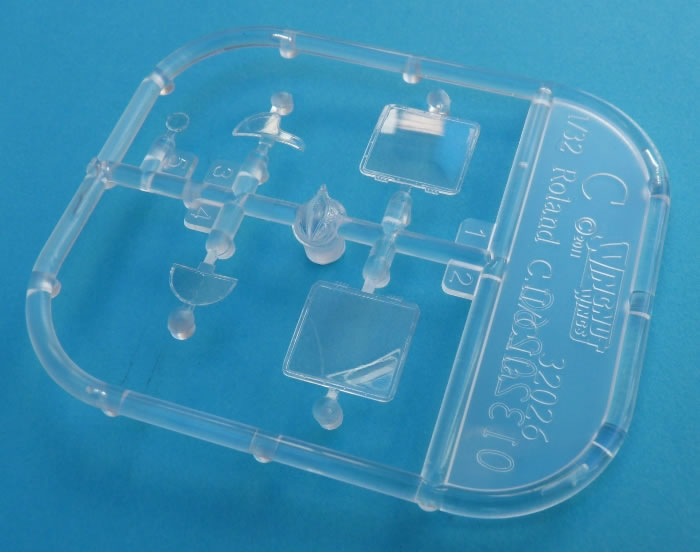
The windows are represented by clear parts that logically include the external frame. The fit is sublime and matches the fuselage perfectly. It is important not to mix up parts “C1” and “C2” as the subtle contours beneath the bulged observer’s opening ensure that the two are different.
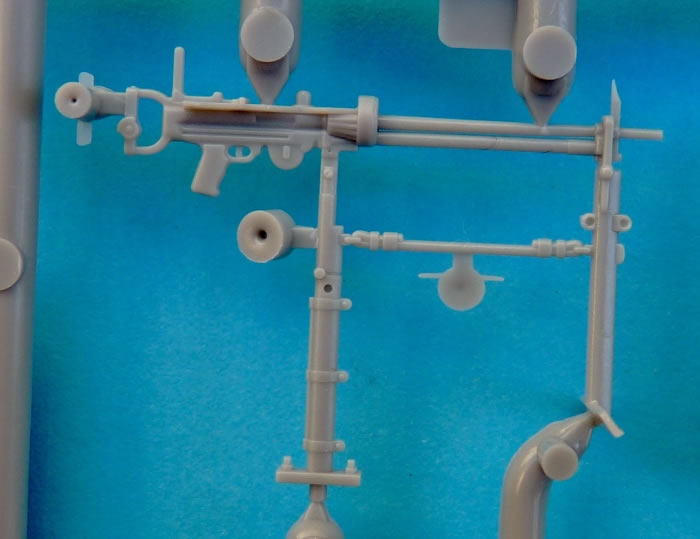
The undercarriage and cowling go on without any fuss, then depending on the option chosen, you add your choice of tailplane struts, rudder, header tank/radiator pipe and wheel covers. An assortment of armament includes a captured Lewis gun with a 47 round magazine, and a Parabellum LMG 14 with a 250 round magazine, the latter utilizing the supplied photo-etched jacket and gun sight.
Sprue “G” supplies a wealth of goodies including a selection of cameras, flare pistols, first aid kit, homing pigeon box, ladders, and the indispensable toy bear. As usual, there is plenty left over for other projects.
A helpful rigging diagram leaves no doubt as to where everything terminates, and this includes the important crossing over of the starboard aileron cables.
Marking Options
The customary 5 aircraft are catered for on the well-appointed decal sheets.

Each subject is significantly different from the others so there should be a machine to suit all tastes. Everything was printed in perfect register and surrounded by a minimum of carrier film. Not only do we get the National and personal marking, we get a plethora of stencil data as well.
-
Roland C.II, Eduard Ritter von Schleich (35 victories), Johann Czermak (1 victory), FFA 2b, January (?) – March 1916.
-
Roland C.II, “Meerkatze”, FFA 18, Early to Mid 1916.
-
Roland C.II, Rudolf Windisch (22 victories) & Maximillian von Cossel (1 victory), FFA 62, October 1916.
-
Roland C.II, “stripes”, Kasta 8, Kagohl II, Mid 1916.
-
Roland C.II, “spots”, Kasta 8, Kagohl II, Mid 1916.
The decals adhered well but I elected to use MicroSet and MicroSol for some of the more complex surfaces. They react well although I would stay away from any of the stronger solutions.
One area that caused anguish was the application of the port side fuselage cross. WNW should have left a hole in the decal to line up with the crew member’s step. This would have saved the builder an aspirin or two as they try to cut away the overlap and potentially damage the decal. The same goes for the equivalent circle in option “E”.
The older generation will remember the first kit injection moulded kit of this popular 2-seater when Airfix unveiled their 1:72 scale offering over 45 years ago.
This larger incarnation takes advantage the latest technology to produce a highly detailed release that’s packed with extras.
For those that haven’t tackled a 2-seater before, this is an ideal introduction. To ease construction, many complex structures have been presented as single items. The interior framework is a case in point, especially how it integrates with the flooring and bulkheads. To further entice the wary modeller, there’s also the presence of “I” struts and the uncomplicated colour schemes.
For the rest of us, the fact that it’s a “state of the art” Roland CII is reason enough to celebrate.
Review Text and Images Copyright © 2014 by Rob Baumgartner
Page Created 5 August, 2014
Last updated
5 August, 2014
Back to HyperScale Main Page

|
 Home | What's
New | Features
| Gallery |
Reviews | Reference
| Forum
| Search
Home | What's
New | Features
| Gallery |
Reviews | Reference
| Forum
| Search