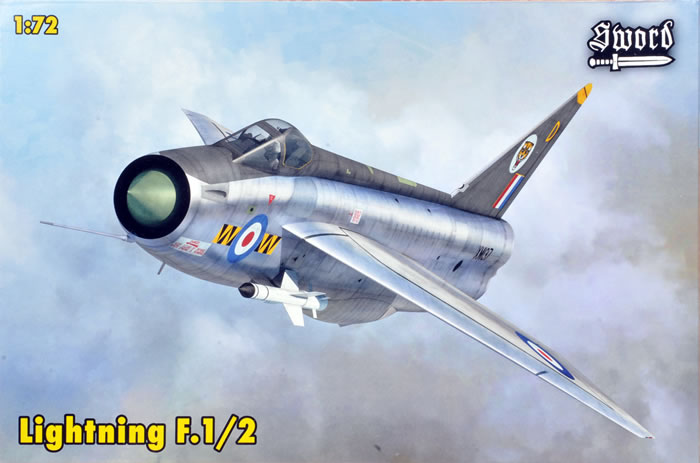
Lightning F.1/2
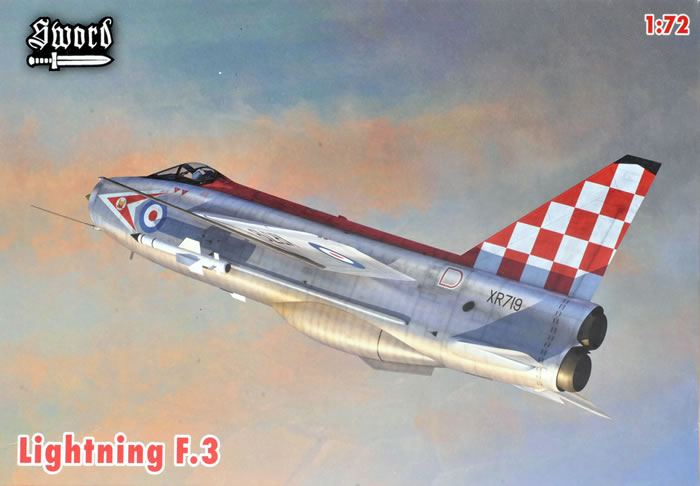
Lightning F.3
Sword, 1/72 scale
S u m m a r y : |
Catalogue Numbers: |
SW72081 - Lightning F.1/2
SW72082 - Lightning F.3 |
Scale: |
1/72 |
Contents & Media |
Version |
Grey Styrene |
Clear Styrene |
Resin |
Coloured & Plain PE parts |
Decal Options |
F.1/2 |
71 |
3 |
2 |
41 |
2 |
F.3 |
79 |
3 |
2 |
41 |
2 |
Price: |
Available on-line from Hannants:
F.1/2 £12.49 plus shipping
F.3 £12.49 plus shipping
Click here for currency conversion. |
Review Type: |
First Look. |
Advantages: |
Accurate in appearance, good production quality, very nice airframe detail, and some good cockpit detail. Good value too, from the right supplier. |
Disadvantages: |
No harness for the ejection seat, no placement guide for wing-walk decals, and guidance on cable duct placement is inadequate; there is also no mention in the instructions of the in-flight refuelling probe. |
Conclusions: |
These are very good limited-run kits, exhibiting almost long-run characteristics and quality in some respects. They are accurate in appearance, well engineered with very nice surface and generally good cockpit detail. They look straightforward to build. I think that they also represent excellent value from the right supplier.
However, there are oversights that leave me with the impression the kits have been rushed to market. The failure to provide PE seat harnesses, that previous Sword practice would indicate was intended, is both surprising and disappointing. The failure to mention the refuelling probe is an oversight most will live with. I can advise that placement of wing walk markings is not as straight forward as might be assumed, so Sword’s failure to illustrate the placement of these markings is a serious oversight in my view. The failure to advise the cable ducting should be fitted to both sides of the fuselage is also surprising.
Despite my concerns above, these are the best 1/72-scale Lightning F.1, F.2 and F.3 kits to date by far (although an Alley Cat/Airfix conversion will give a very good result too, but at much greater cost). I definitely recommend both Sword boxings. |
Reviewed by
Mark Davies

Sword's 1/72 F2H-2P Photo Banshee and F2H-2 Banshee
are available online from Squadron.com
The English Electric Lightning was a supersonic jet fighter aircraft of the Cold War era. It was designed and manufactured by English Electric, who was subsequently integrated into the unified British Aircraft Corporation, after which point the aircraft was marketed as the BAC Lightning. The Lightning was the only all-British Mach 2 fighter aircraft and was the first aircraft in the world capable of supercruise.
The Lightning was renowned for its capabilities as an interceptor; pilots commonly described it as "being saddled to a skyrocket". It was powered by the Rolls-Royce Avon turbojet engine; each aircraft had two Avon engines in an unusual stacked arrangement in the main fuselage with the cockpit perched on top. The Lightning was developed to counter increasingly-capable bomber aircraft, and thus had remarkable climb, altitude and speed flight performance in order to perform rapid interception. The type was subsequently developed for greater range and speed, as well as to perform reconnaissance and ground-attack missions.
The Lightning was used by the Royal Air Force, Royal Saudi Air Force and the Kuwait Air Force. It was operated as the RAF's primary interceptor for more than two decades, during which the type was never required to shoot down a hostile aircraft. Following retirement in the late 1980s, many of the remaining aircraft became museum exhibits; until 2010, three examples were kept flying at "Thunder City" in Cape Town, South Africa. In September 2008, the Institution of Mechanical Engineers conferred on the Lightning its "Engineering Heritage Award" at a ceremony at BAE Systems' site at Warton Aerodrom.
The first operational Lightning, designated the F.1, was designed as a point defence interceptor to defend mainland Britain from bomber attack. To best perform this intercept mission, emphasis was placed on rate-of-climb, acceleration, and speed, rather than range and combat endurance. It was equipped with two 30 mm ADEN cannon in front of the cockpit windscreen and an interchangeable fuselage weapons pack containing either an additional two ADEN cannon, 48 two-inch air-to-air rockets, or two de Havilland Firestreak air-to-air missiles; a heavy load-out optimized for damaging large aircraft, weapon guidance and ranging, as well as search and track functions, mainly were provided via the Ferranti AI.23 onboard radar.
The next two Lightning variants, the F.1A and F.2, were steady but relatively minor refinement of the design, while the next variant, the F.3, was a major departure. The F.3 had higher thrust Avon 301R engines, a larger squared-off fin and strengthened intake bullet allowing a service clearance to Mach 2.0 (the F.1, F.1A and F.2 were limited to Mach 1.7). The A.I.23B radar and Red Top missile offered a forward hemisphere attack capability and deletion of the nose cannon. The new engines and fin made the F.3 the highest performance Lightning yet, but with an even higher fuel consumption and resulting shorter range.
Source: Wikipedia. I think that this is one of Wikipedia’s more interesting aircraft entries; it gives some insight as to the Lightning’s stunning performance and outstanding handling. It is worth reading if you want to know more about this remarkable and unique design.
Previous 1/72 Scale Lightning F.1 & F.2 Kits
Airfix released an F.1A kit in the very early 1960’s, and this tooling later served as the basis for their F.3. The Kits were typical of their time and brand. They have served modellers of early Lightning’s for over five decades, but should have been retired long ago.
Maintrack provided a more modern but costly solution in the mid-1970s, when they issued a resin conversion for the Hasegawa/Frog or Matchbox F.6 kits. This consisted of the F.1/3 belly tank and two styles of tailfin.
Trumpeter issued several Lightning kits about six years ago that included an F.1/2 and F.3. These were nicely detailed modern mouldings and assembled easily.
Unfortunately, they suffered from some shape issues, including horrendously narrow tailpipes. The F.1/2 and F.3 kits had fewer issues than the F2A/F.6 kit, but still needed Aeroclub or Aires aftermarket resin parts replace the engine nozzles and rearmost part of the fuselage to look halfway decent, and preferably a Quickboost nose ring to replace the oversized kit item. This could result in a reasonable Lightning model, but there were still less obvious accuracy and shape issues elsewhere. An expensive (I would say overpriced) kit in most markets, the cost of the fixes only makes things worse.
Just recently, Alley Cat released a very nice resin conversion that provided wings, small belly tank, and F.1 tailfin to convert the excellent new-tool Airfix F.2A/F.6 kits into either an F.1, 2 or 3. This was clearly the best route to a good Lightning F.1, F.2, or F.3 in the One True Scale, until now that is...
Contents
The kits come in end-opening boxes with digital artwork on the front. In each case, the decals, plastic and resin parts come in a zip-lock bag, with the clear and coloured PE parts further enclosed in small bags of their own. Aside from decals, the contents of the two kits are the same, with some parts specific to either version (different tailfins, cannon troughs only applicable to the F/1/2, and Redtop missiles only applicable to the F.3).
For simplicity’s sake, I shall refer to the kits in the singular from here on, unless discussing differences between them.
The Instructions
The instructions provide a brief history of the aircraft, a parts map, and what appears to be a generally easy to follow diagrammatic assembly format. The diagrams are well drawn; however, I could not help but notice that the belly tank is drawn as the much larger F.2A/F6/T.55 pattern on page 7 of the instructions!
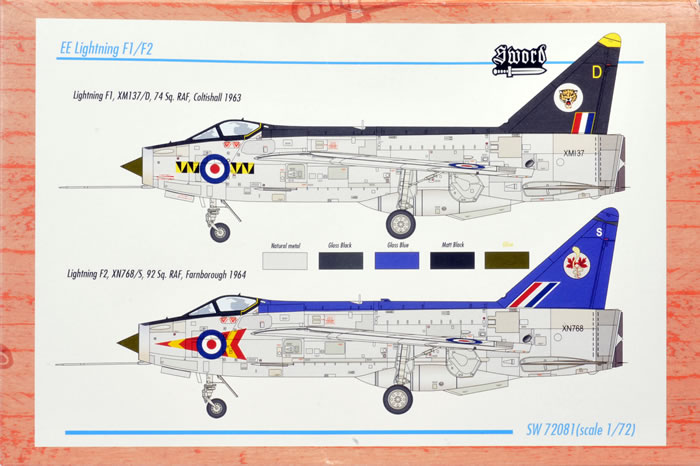
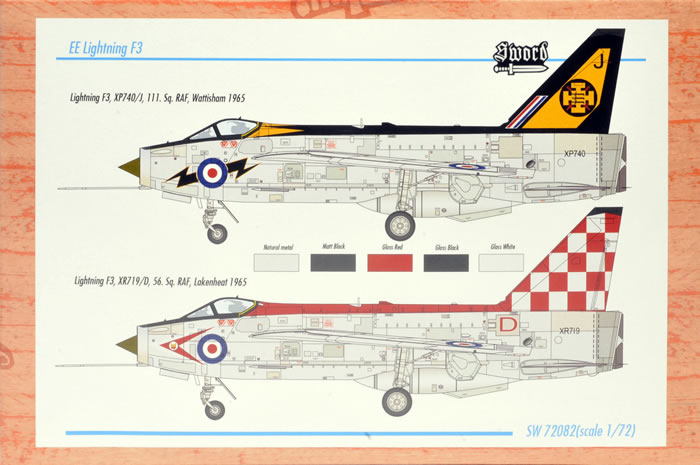
Generic paint colours are given in Czech and English, with all other text in English. The painting and decal guides use generally adequate black & white shaded drawings in the instructions, and colour profiles on the rear of the box. I feel that Sword could do better here, and cross-reference the colours using BSC or FS codes equivalents, or list popular paint brand numbers.
A further page guides the extensive stencil placement. However, there is no guidance or illustration of where to place the 12 wing-walk decals, their precise placement is not given; this is not as obvious as might be assumed, and as such is a significant oversight in my opinion.
The Kit
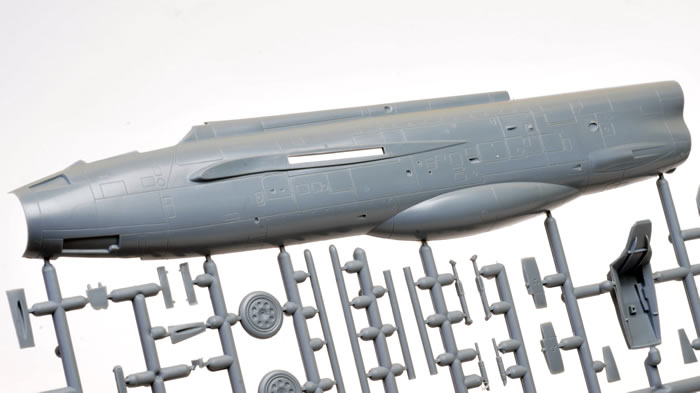
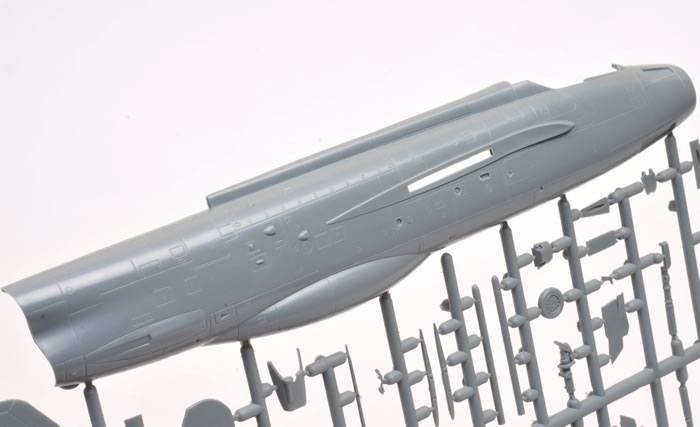
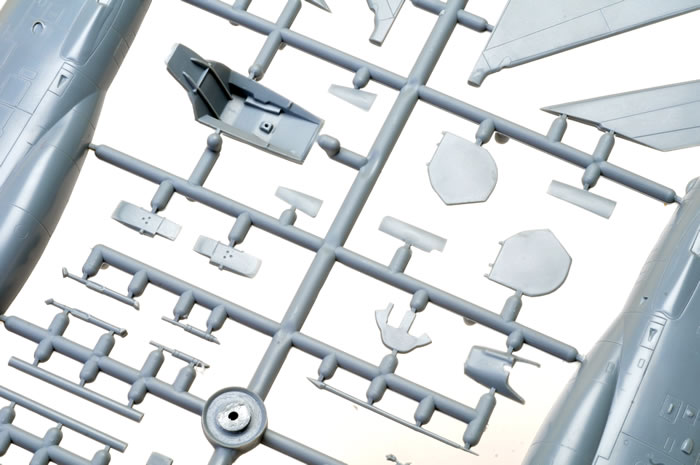
This is a typical Sword kit with cleanly moulded parts, very fine surface detail, and reasonably narrow sprue gates. There is just a little hint of flash in places, but this is easy to deal with. Parts break down is conventional for the type.
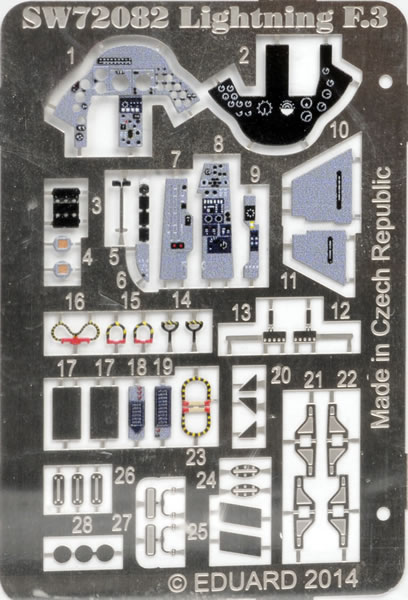
The cockpit tub is garnished with coloured PE and a very fine control column.

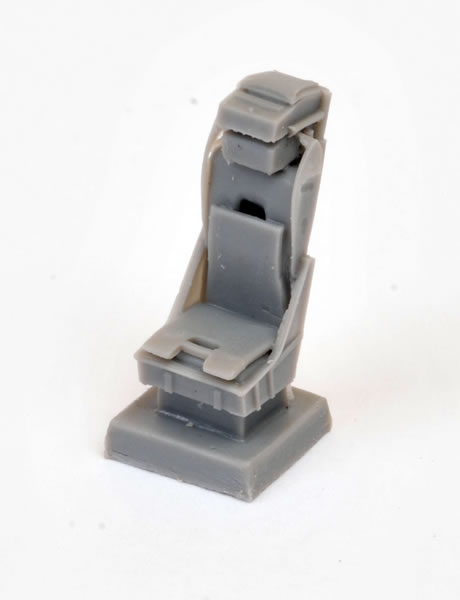
The resin ejection seat appears to be designed to have coloured PE harnesses, as with the seats in Sword’s Lightning T.4 & 5 kits, but only coloured PE firing handles are provided in a choice of double-loop or D-ring styles. This is a disappointing omission; either a PE harness should be supplied, or the resin seat should have this equipment cast in place. Interestingly, page 3 of the instructions illustrates the seat without harness, whilst page 6 shows it with one fitted. There are PE rudder pedals provided, unlike with Sword’s Lightning T.4 & 5 kits, although these will be hard to see. In fact, a harness would be the most noticeable of the coloured PE items in the cockpit, had one been supplied.
Coloured PE also provides the instrument panel (fitted to a styrene backing plate), and there is PE detail to fit under the cockpit coaming mounted on folded PE brackets.
There is also a PE radarscope screen made from three discs, although a styrene or resin item would make more sense in my view. A clear part forms the gun-sight; however, I am unsure if this should be fitted to the gun-less F.3, despite the instructions indicating that it should.
The cockpit should look very good when finished provided a harness is found for the seat, or more likely, it is replaced with a resin one incorporating the missing detail.
The fuselage halves enclose a number of sub-assemblies; these include:
-
The cockpit tub sub-assembly;
-
The combined radome/inlet shock-cone and nose-wheel well, which the instructions advise you to fill with ballast, but not how much;
-
Lower engine compressor face, which unlike the Airfix and Trumpeter kits, has no separate inlet ducting, although I do not think this will matter much as not a lot can be seen between the intake ring and the shock-cone; and
-
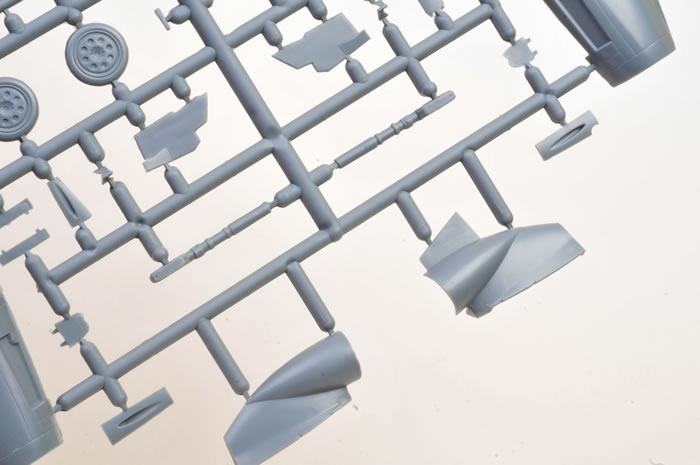
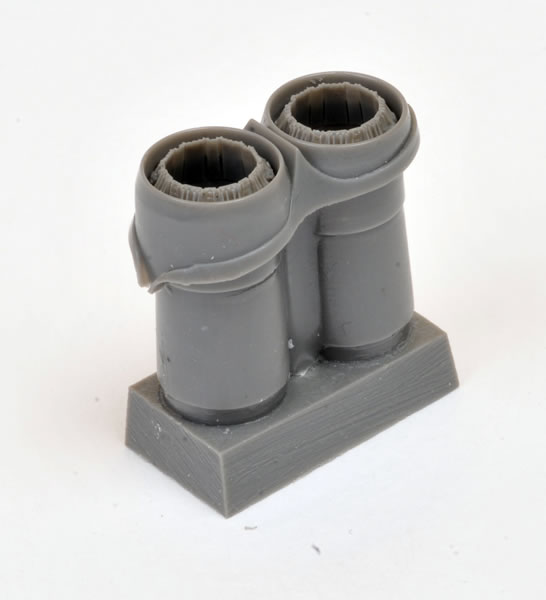
A pair of very nice resin exhausts nozzles with deep jet pipes, the ends of which are capped with styrene pieces incorporating flame-holder detail.
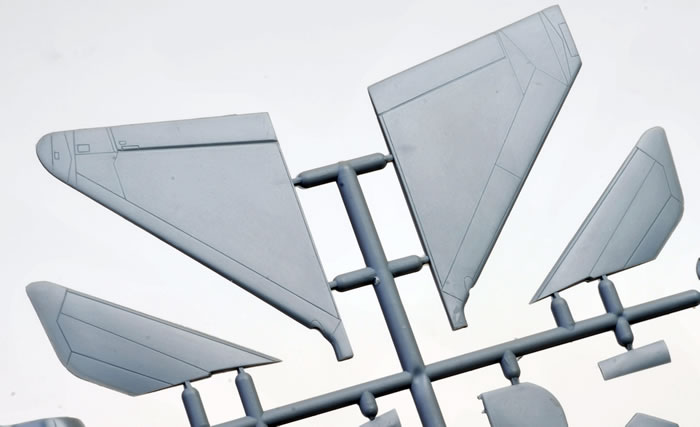
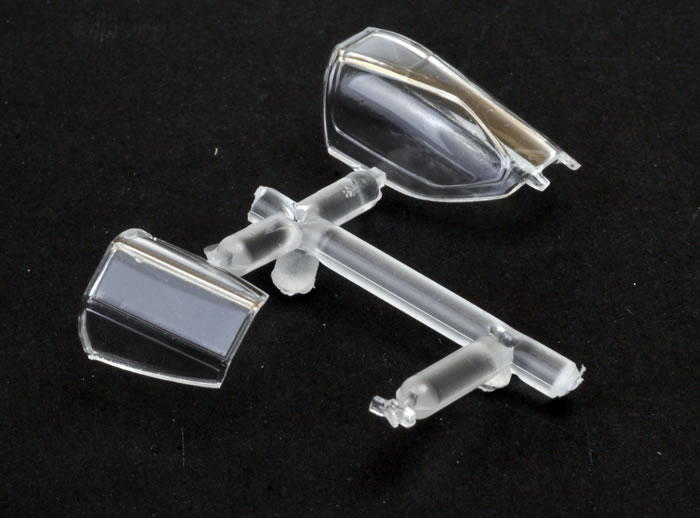
The two-piece canopy can be modelled closed or open. There is a PE handle to fit inside the sliding portion and a triangular PE IFF vane to attach to its top. The main fuselage structure is completed by the addition of the tailfin applicable to the version being modelled.
The F.1 carried cannons in the upper nose, as could the F.2, although this could also have cannons fitted in the lower nose (in place of the Firestreaks or a free-flight rocket pack). F.2’s often had the lower cannon troughs in place rather than blanked off even when carrying missiles and no cannons were installed. Separate parts provide either blanking plates or cannon troughs to fit in the four indentations around the nose. Blanking plates apply to all four positions on the F.3 as it dropped the cannon option (Redtop avionics filled the upper cannon bays of the previous marks I believe). I would be unsurprised if there were some fit issues with the cannon troughs and blanking plates. I suspect the plates will require thinning, or the recessed spaces they insert into will need cutting out, if they are fit flush with the fuselage.
Several very small air scoops locate on various parts of the fuselage. One dorsal scoop (for ram-air generator cooling) applies only to the F.2 option in the F.1/2 kit, although it is mandatory for the F.3.
The instructions mention the fitting of the prominent cable duct to the fuselage at the very beginning of the instructions below the parts map in a smallish diagram that is easy to overlook. None is applicable to the F.1 (although it is to the F.1A), whilst the F.2 has a shorter length duct than the F.3. The kit provides ducting lengths as two lots of three parts; yet the instructions advise to use the same three parts on both the F.2 and F.3. It took a while before I realised they instruct to cut one part to obtain the correct length for the F.2, but fail to say by how much it should be reduced; relying instead on a small drawing. The instructions also fail to mention that the ducting is fitted on both sides of the fuselage.
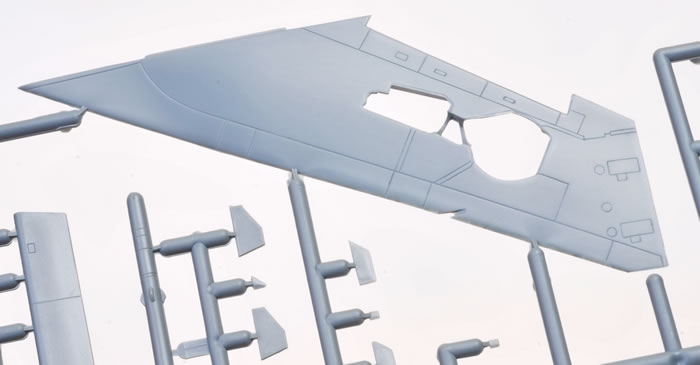
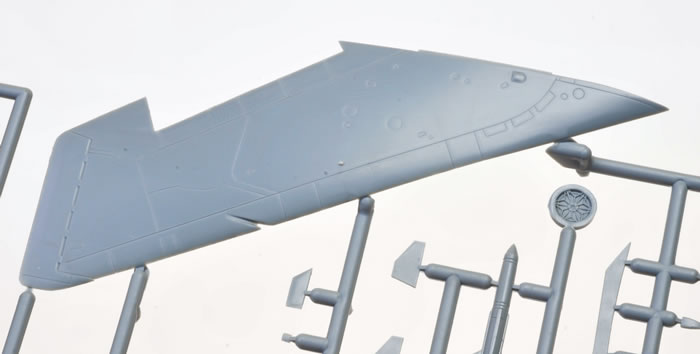
The wings are split between upper and lower halves, as would be expected; and unlike some limited run kits, the trailing edges are fortunately included with the upper halves, thus ensuring a sharp finish. The flaps are separate parts, and can be positioned in accordance with the builder’s choice.
The main-wheel wells are boxed in and include some basic interior detail. The undercarriage is nicely moulded with good levels of detail, including PE torque-links. The nose-wheel is a separate item, rather than the more common approach of moulding this part with the nose-leg.
The tailplanes are single pieces, and the instructions helpfully provide a head-on view with angular measurements indicating the correct relationship for these and the wings to the fuselage.
Parts for a pair of both Firestreak and Redtop missiles, plus a pair of Redtop training rounds are provided. Unlike with their T.4 & 5 kits, only one style of launch rail is provided (unlike Sword’s T4 & 5 kits, which have both types). The differences are minimal in this scale, and it matters little I feel. Both missile types have quite thin wings and guidance fins for injection-moulded items. The respective instructions correctly show the Firestreaks as being for the F.1/2 and F.3, with the Red Tops only for the F.3. Of course, the aircraft can also be depicted without missile armament.
Not much remains to mention; the long nose pitot, a number of PE blade antennae to add to the fuselage, and the ventral fin to add to the belly tank. There is an optional refuelling probe for all three marks, but this item is only illustrated in the parts map and not mentioned in the instructions of either kit. The probe fits under the port wing root angled outwards.
Overall, I should think that this kit should be a simple and enjoyable one to build. My “First Look” examination leads to me to believe these kits are accurate in appearance.
Marking Options
Eduard prints the decals, and these are well registered with what appears to be good opacity. I am sure they will prove to be excellent to apply based on my experience of this brand.
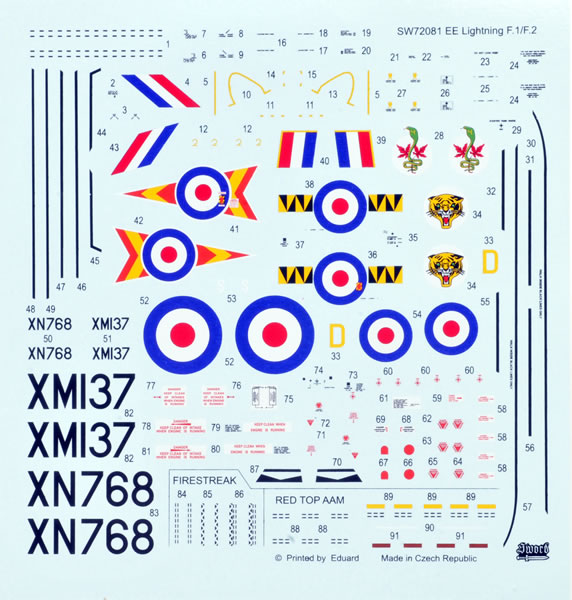
The instructions provide a page of four-view drawings with the national insignia and unit markings for each of the two schemes, plus a page covering the extensive stencil placement, including missile markings.
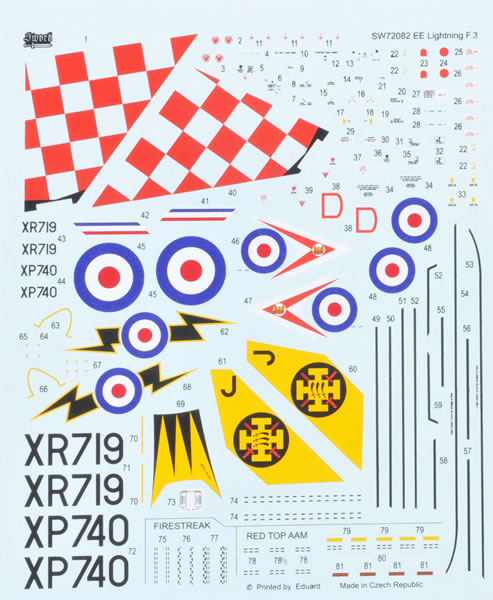
As mentioned already, the wing-walk locations are regrettably not shown.
The subjects covered are listed below:
- F.1:XM137, D, 74 Sqn RAF, Coltishall, 1963;
- F.2: XN768, S, 92 Sqn RAF, Franborough, 1964;
- F.3: P740, J, 111 Sqn RAF, Wattisham, 1965; and XR719, D, 56 Sqn RAF, Lakenheath, 1965.
These are very good limited-run kits, exhibiting almost long-run characteristics and quality in some respects. They are accurate in appearance, well engineered with very nice surface and generally good cockpit detail. They look straightforward to build. I think that they also represent excellent value from the right supplier.
However, there are oversights that leave me with the impression the kits have been rushed to market. The failure to provide PE seat harnesses, that previous Sword practice would indicate was intended, is both surprising and disappointing. The failure to mention the refuelling probe is an oversight most will live with. I can advise that placement of wing walk markings is not as straight forward as might be assumed, so Sword’s failure to illustrate the placement of these markings is a serious oversight in my view. The failure to advise the cable ducting should be fitted to both sides of the fuselage is also surprising.
Despite my concerns above, these are the best 1/72-scale Lightning F.1, F.2 and F.3 kits to date by far (although an Alley Cat/Airfix conversion will give a very good result too, but at much greater cost). I definitely recommend both Sword boxings.
Thanks to Sword Models and Hannants for this review sample.
Review Text Copyright © 2014 by Mark Davies
Review Images Copyright © 2014 by Brett Green
Page Created 18 November, 2014
Last updated
18 November, 2014
Back to HyperScale Main Page

|
 Home
| What's New | Features | Gallery | Reviews | Reference | Resource Guides | Forum |
Home
| What's New | Features | Gallery | Reviews | Reference | Resource Guides | Forum |