Tamiya's 1/32 scale
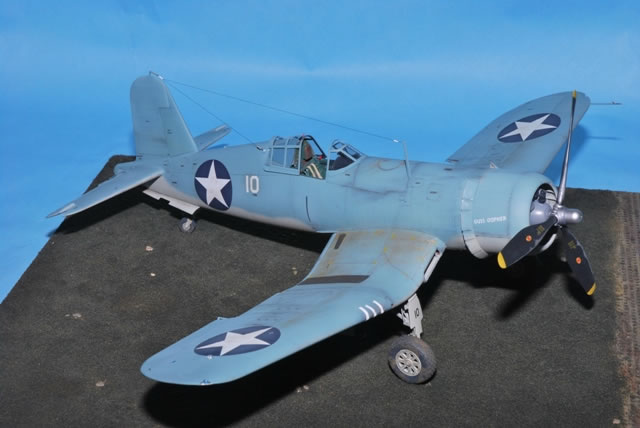
F4U-1 Birdcage Corsair
by Robert Ulrich
 |
F4U-1 Birdcage Corsair |

Tamiya's 1/32 scale F4U-1 Birdcage Corsair is available online from Squadron
 There is not much I can add to the well deserved praise this kit has received, but I will say that in 40+ years of serious modeling this is the finest kit I have ever put my hands to. The only downside is that it will spoil you for lesser kits. There is not much I can add to the well deserved praise this kit has received, but I will say that in 40+ years of serious modeling this is the finest kit I have ever put my hands to. The only downside is that it will spoil you for lesser kits.
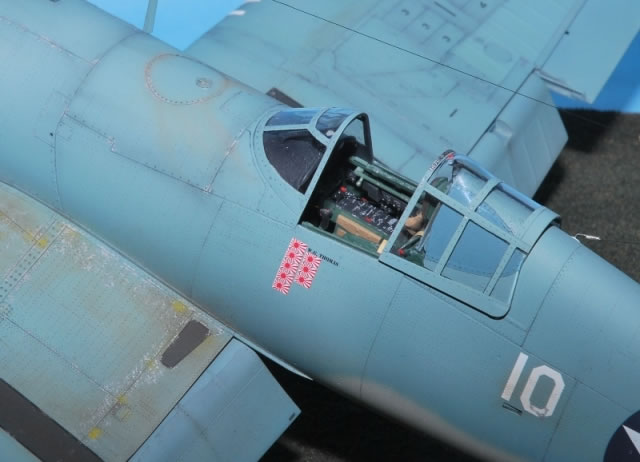
The cockpit features Barracuda's stencil and placard decals, which are simply gorgeous and add the finishing touch to Tamiya's superb work - thanks, Roy! Other additions I made were a completely scratch built throttle assembly, tiny bolt heads on the armor 'wing' plates, rudder peddle adjusters, wiring and a lot of tubing. Except for what is just visible on the firewall and the wiring above the consoles much of this cannot be seen and I wouldn't do it again.
Worn paint on the seat and foot troughs was achieved by first covering the parts in Bare-Metal foil, painting, and rubbing off the paint with a q-tip and a bit of rubbing compound. The seat belts are HGW fabric belts. It took almost an hour and a half to assemble these, but considering the time I wasted on plumbing that can't be seen it was time well spent on these very visible items. The oxygen mask was taken from the Hasegawa P-40E kit and lightly modified to suit. The canopy emergency release handles were scratch built.

All the plumbing in the main gear wells was added using fine lead wire. The detail around the door opening cylinders was added using styrene hex stock, micro sized brass tubing and more lead wire. Wheels are Barracuda resin (again, superb).
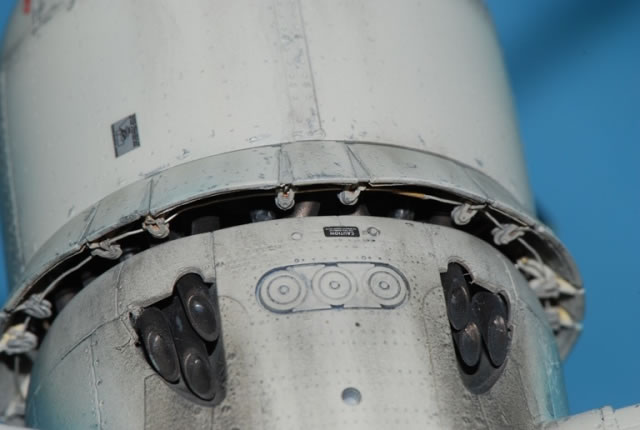
The engine features Barracuda's corrected ignition parts, which are a drop fit. Wiring is .010" lead wire. Note that the wires to back side of the cylinders pass through holes in the air baffles. These holes need to be drilled in the kit parts. The internet has plenty of pictures of R-2800 engines that can guide you in this, although if you do not leave the cowling pieces removable it really can't be seen. Other additions were the oil return lines on the cylinder heads and gear case. The cowl flaps were detailed with Eduard's brass set, which really adds a lot of authenticity to the open flaps. I did not, however, use the Eduard parts for the torsion springs that force the flaps open - flat photo etch just doesn't work for such items. I made a small jig and wound my own springs from fine wire - yes, I'm an engineer, why do you ask? These are not visible in the pictures but can be seen in person.

Paints used were Model Master and some of my dwindling stock of Floquil's old military colors.
For the salmon areas I used Floquil's Zinc Chromate Primer straight from the bottle. Markings came from Eagle Editions and the kit decals.
Weathering was done with pre shading, post shading, pin washes, and pastels. Paint chipping was done with a silver artist's pencil, and as a final touch to the heavily worn areas on the wings I lightly dry brushed spots with yellow zinc chromate to simulate partially worn through spots.
Model, Images and Text
Copyright ©
2014 by Robert Ulrich
Page Created 17 March, 2014
Last Updated
17 March, 2014
Back to HyperScale Main Page
|
Home
| What's New | Features | Gallery | Reviews | Reference | Resource Guides | Forum |