Trumpeter's 1/48 scale
Westland Whirlwind Mk.I
by Roger Hardy
 |
Westland Whirlwind Mk.I |

Trumpeter's 1/48 scale Whirlwind is available online from Squadron
S
u m m a r y |
| Catalogue Number: |
Trumpeter Kit No. 02890 - Westland Whirlwind Mk.I |
| Scale: |
1/48 |
| Contents and Media: |
4 sprues light grey plastic parts; two clear; markings for two aircraft. |
| Price: |
Purchased online from Hannants for £29.99 plus shipping
Also available from Squadron for USD$34.29 plus shipping |
| Review Type: |
Build Review |
| Advantages: |
Crisp mouldings. Adequate cockpit and wheel well detail. Two variants. Exceptional fit. Not over-engineered. |
| Disadvantages: |
Poor bomb racks, no bombs. Decals too glossy and incorrect colour code letters. A bit expensive for what you get. As ever, Trumpeter have been a little careless here and there. |
| Conclusion: |
Despite my nit-picky reservations, a very acceptable model can result straight-from-the-box. |
 History History
(see http://en.wikipedia.org/wiki/Westland_Whirlwind_%28fighter%29 for full details)
Seldom if ever was a British airplane as wrapped in red tape as was the Westland Whirlwind. Designed in response to Air Ministry Specification F.37/35 of 1935, the prototype flew in October 1938 (a year before the start of WW2!) and entered service in 1940 as the first single-seat twin-engine fighter used in any numbers by any of the leading air forces. A closely-guarded secret from the British public, the Whirlwind appeared in a French technical paper in 1938, and was featured in a German aircraft recognition handbook profile in 1940; it was not officially revealed by the Air Ministry until August 1941 and details were not released to the press until February, 1942.
The basic feature of the Whirlwind was its four closely grouped 20mm cannon in the nose, with a rate of fire of 600 rds/min., which placed it ahead of any fighter in the world prior to the introduction of the Bristol Beaufighter. Along with heavy firepower, it had first-rate speed and climb performance, excellent maneuverability and a pilot's fighting view hitherto unsurpassed. In its day, the Whirlwind was faster than the Spitfire low down, and with light lateral control was considered one of the nicest "twins" ever built. The airplane's nickname, "Crikey," was inspired by a famous Shell advertisement of the day which depicted a worker with a swivel neck seeing something flash past him at high speed, exclaiming "Crikey, that's Shell, that was!"
The Whirlwind was a contemporary of the Supermarine Spitfire and Hawker Hurricane and was one of the fastest aircraft in service when it first flew plus it was much more heavily armed than any other fighter in existence. It was powered by two Rolls-Royce Peregrine engines which were the ultimate development of the Kestrel with a "sea-level" supercharger and it was generally felt that the resulting Peregrine would be the "standard" fighter engine for the impending war. However, the Merlin was a parallel development, was more powerful and became the dominant engine as the Peregrine was just too small.
The Whirlwind was only slightly larger than the Hurricane in overall size, but smaller in terms of frontal area. The landing gear was fully retractable and the entire aircraft was very "clean" with few openings or protuberances. Radiators were in the leading edge on the inner wings rather than below the engines. This careful attention to streamlining and two 885 hp Peregrine engines powered it to over 360 mph (580 km/h), the same speed as the latest single-engine fighters.
But there were problems as well. The aircraft had limited range, under 300 miles combat radius, which made it marginal as an escort. More troublesome were the continued failures of the Peregrine engine. It was originally intended to be one of Rolls' main designs, but the Merlin had become much more important to the war effort and the Peregrine was relegated to a secondary status and development cancelled (there being no other aircraft needing the engine); the first deliveries of Peregrine engines did not reach Westland until January 1940.
By 1940, the Supermarine Spitfire was mounting 20 mm cannons, so the "cannon-armed" requirement was also being met, and by this time the role of escort fighter was becoming less important as RAF Bomber Command turned to night bomber missions. The main qualities the RAF were looking for in a twin-engine fighter were range and carrying capacity (to allow the large radar apparatus of the time to be carried), in which requirements the Bristol Beaufighter could perform just as well as or even better than the Whirlwind.
Development and delivery problems with the Peregrine engines, along with a number of flying accidents and the aircraft’s high landing speed (which restricted the number of airfields from which it could operate), resulted in Whirlwind production being ended in January 1942, after the completion of just 112 production aircraft. Westland campaigned for the creation of a Mk II model, initially designed around a more powerful 1,010 hp Peregrine which was aborted owing to Rolls-Royce's cancellation of further development of the engine.
During the Second World War only two RAF squadrons were equipped with the Whirlwind, and despite successful use as a fighter-bomber it was withdrawn from service in 1943.
The Kit
This is the third kit of the Whirlwind in this scale, the first being the vac-form from Cooper details and the second was the Classic Airframes model that used the Copper Details resin and photo-etched parts. Both are difficult to find these days. I started the Cooper details model but hate vac-forms and never finished it. The Trumpeter kit was reviewed in the box in a Britmodeller forum which you can access here:
http://www.britmodeller.com/forums/index.php?/topic/234961361-westland-whirlwind-heavy-fighter-148/.
The reviewer noted a few deficiencies, most of which seem to be minor or easy to correct:
-
Incorrect panel line on rear nacelle where aft section rotates to accommodate the deployment of the flaps.
-
Top section of the rudder depicted as panel line rather than section of rudder.
-
Slightly bulged profile of the windscreen from ahead.
-
Taper of front of nacelles a little shallow, or nacelles too short.
-
Wing fuel tanks should be raised all around with a bevelled edge due to addition of self-sealing layer top and bottom from early 1941, or flush before that date.
-
Roll-over diagonal brace missing from cockpit.
-
Curve on landing gear bay hinge-line absent.
-
No retractable foot-step on port side.
The reviewer was less than impressed with the decal sheet but mine looked fine, if too glossy (but I always spray satin varnish at the end, so no problem).
Overall, the quality of the mouldings is very good, clean with subtle surface detail – what we have come to expect from Trumpeter but there are times when I wonder whether the pattern maker actually understands how aeroplanes work. Maybe he’s doing an aircraft today and a tank tomorrow. OK, let’s see how it goes together.
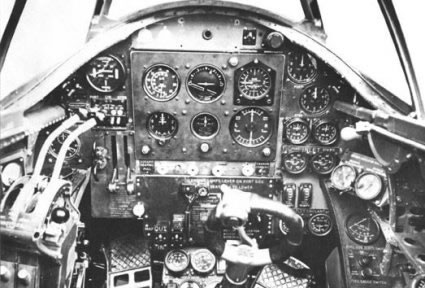
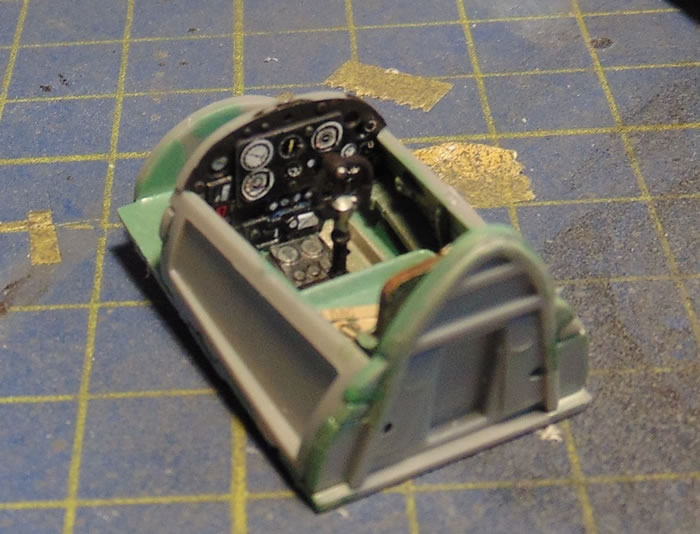
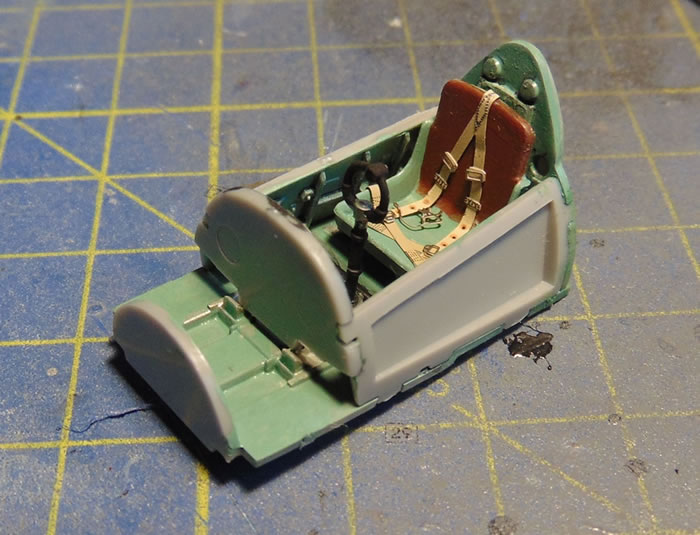
Construction starts with the cockpit which has adequate detail moulded into it but the seat needs an after-market Sutton harness and Eduard do a nice one. The first problem is that the decal instrument panel bears no resemblance to the moulded one and, in any case, looks completely wrong, with a large HSI in the centre, like a 1970s jet fighter. The moulded panel is, in fact, correct with a basic T layout of the main six instruments that you might expect. Here is a link to Pavla Model’s website with some pictures to show what it really looked like:
ttp://www.pavlamodels.cz/images/aircraft/72037/more/more.htm.
At first sight, there appears little room for the pilot’s feet to get to the rudder pedals and I cut a little away to give him a bit more space but the main problem is that the cockpit is far too shallow. The sidewalls are nice and three-dimensional but the fastidious will want to add some throttle levers to the quadrant and maybe some other details as there is plenty of scope for super-detailing, as per the original Cooper Details kit. No doubt the cottage industry will oblige in due course but there is nothing at the time of writing unless you have an old CD/CA kit in your stash. Colours I used were: British interior green overall, black instrument panel and control column with silver details, seat back NATO brown, footwells titanium silver, then a wash of black and white dry brush. I used some spare decals for the individual instruments and also cut up the provided decal sheet to provide some more. In the end, the cockpit actually looks quite good.
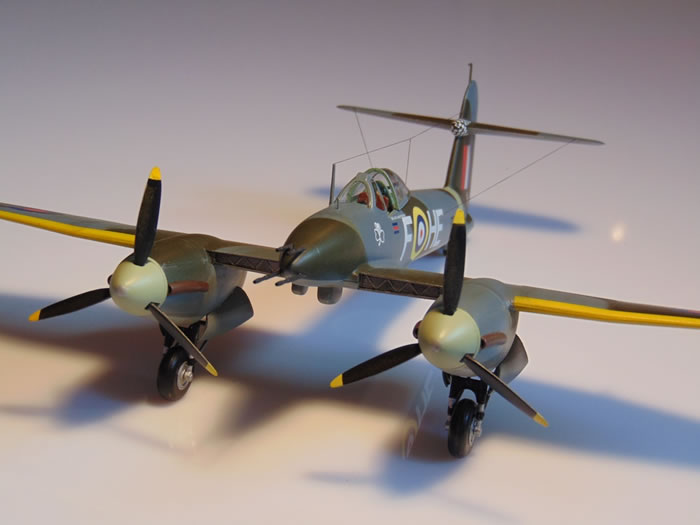
The next step is to assemble the nacelles with undercarriage. The instructions would have you paint the interior silver but I think Interior Green (zinc chromate, but much less bright than the US version – more like RLM02) is far more likely as it was generally applied as a corrosion-resistant etching primer on the insides of most British aircraft of this period. The main undercarriage legs were mostly black; black where the retraction struts join and then a little silver section and black into the nacelle. The rear struts were silver. I didn’t add the wheels at this stage as they can be popped in later.
As an aside, I must praise Trumpeter’s pattern-makers as the fit of the parts is amongst the best I have ever seen; this kit almost clicks together. It’s something that I’ve got accustomed to with Trumpeter and I really appreciate it. This model, along with many of Trumpeter’s has the sprue attachments on the mating surfaces rather than the external surfaces. This makes it much easier to get a clean external finish but means that you have to be a little more careful in cleaning up the tags to get a good joint.
Next comes the fuselage and it is as well at this stage to scribe the correct upper rudder which is incorrectly marked as a panel line on the kit – a ten second job. Incidentally I have used a Tamiya Plastic Scriber for years and strongly recommend it. The tailwheel insert is put into place but please note that the tailwheel doors are moulded with the fuselage sides (which I appreciate) so doing a retracted undercarriage version will require extra work – but who does that anyway? I didn’t add the tailwheel at this stage as it can be added later. The fuselage went together perfectly, sandwiching the cockpit tub. I added the rollover structure diagonal bracing. This is the first time I’ve ever put a fuselage together without requiring any tape! A word of criticism: the cockpit tub sidewalls look a little too prominent but it’s too late to do anything about it now although I chamfered the edges to make them look less obvious. In future, I’d be inclined to leave them floating and bevel the upper edges so that they settle close to the fuselage sides. I fixed the nose as well but not the cannons as they can be added later and likewise the tailplanes. Actually, the latter are also a precise fit and sit in position quite happily without any glue. There is a very fragile pitot head mast moulded into the fin and I recommend protecting this with a length of sprue taped into position as it is otherwise bound to get knocked off.
The wings are a simple assembly sandwiching the radiator fronts. The radiator outlets were actually at the trailing edge of the wing and were often open when the aircraft was on the ground. Opening these up would not be too difficult but I had decided to make this kit straight from the box so didn’t bother. This aircraft had large Fowler flaps to reduce the high landing speed and posing flaps-down requires major surgery. The extended way past the wing trailing edge on tracks (provided by Trumpeter) and were hinged at the bottom of the engine nacelles. I once did this on an Airfix Whirlwind and don’t recommend it as the amount of work does not justify the finished result. Flaps were usually up on the ground in any case. I don’t normally agonise too much over the undersides of models but there are those who will look at this one and wonder where these massive Fowler flaps are, they ran right under the fuselage as well without a break….but they are there…. as panel lines! Scribing them is easy but it also means scribing the lines over the rear of the nacelles which is a bit tricky. Actually, the ailerons are also marked as panel lines so these need rescribing as well. Incidentally, if you’re going to rescribe the flaps it’smuch easier to do it before the nacelles go on.
Assembly of the wing to the fuselage was stress-free and the only parts where the fit was not completely perfect were the engine nacelles which needed a tiny bit of trimming at the front of the wing. Then I realized that it was my mistake because the nacelles are handed and I’d got them the wrong way round! They are almost identical and the only clue was that the undercarriage legs weren’t at quite the right angle. Damn. Anyway, I managed to get them off with minimum damage and put on the correct sides. The clue here is that the long exhausts go on the insides of the nacelles.
So, that’s all of the major assemblies together and there was no need for filler on any of the joints, just a little Alclad grey primer brushed along one or two of the seams. I decided not to add the bomb racks as they are the poorest part of the kit and don’t look right, plus there are no bombs and the photos I have seen of the original aircraft do not show the racks fitted. I added the main undercarriage doors and windscreen at this stage so now it’s only missing the rear canopy (which I blu-tacked into position to mask the canopy), wheels, cannons, propellers and aerials. So, ready for painting.
Painting, Markings and Finishing Touches |
Paint was applied with my Testor Aztek A470 airbrush.
I masked the transparencies and wheel bays with Kabuki tape then brush-painted gloss varnish over the transparencies to stop paint bleed, then painted the canopy frames interior green so that they had an internal colour. Then it was ready for the primer: I use either Tamiya rattle-can or Alclad grey primer, both of which are excellent. I used the latter this time.
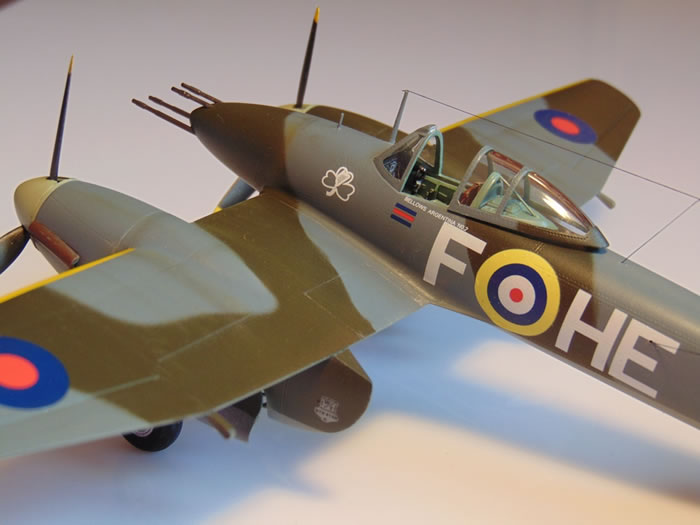
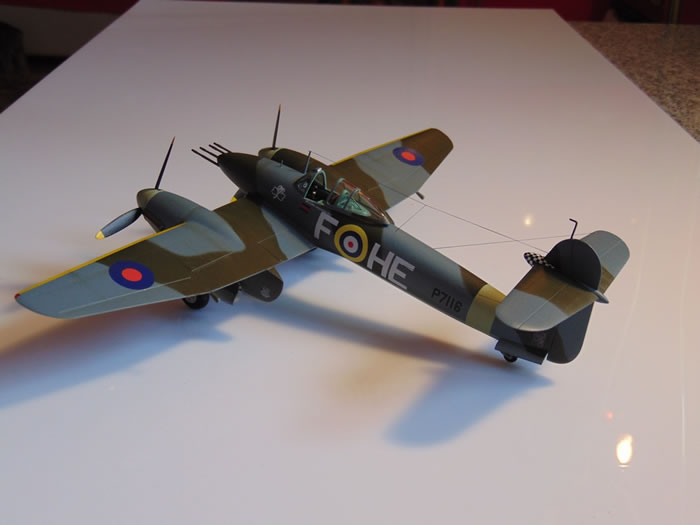
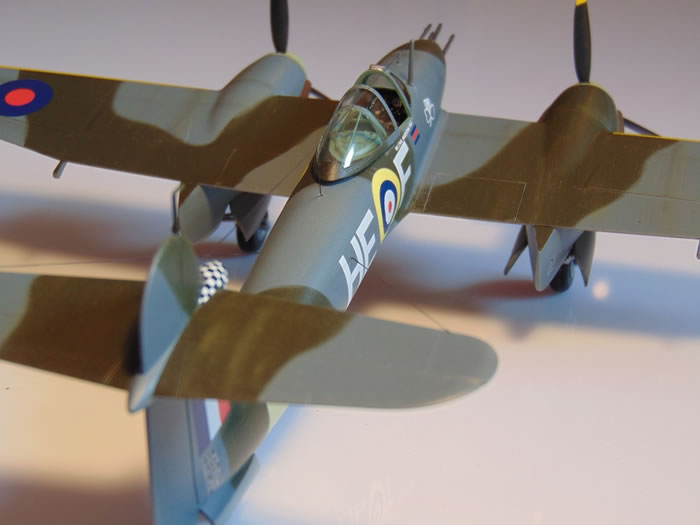
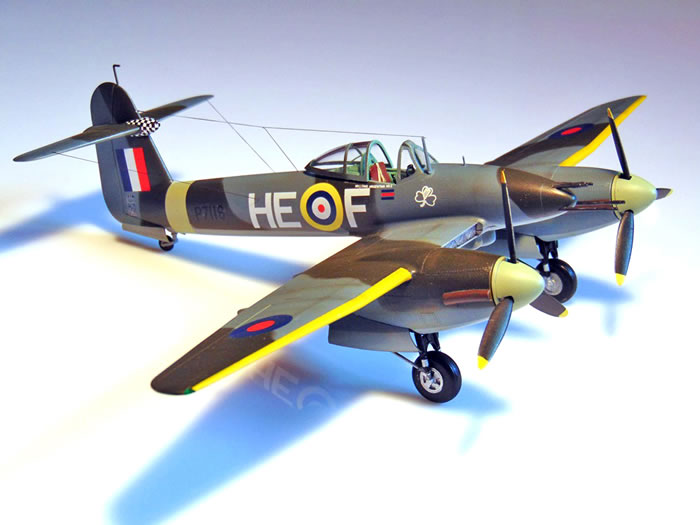
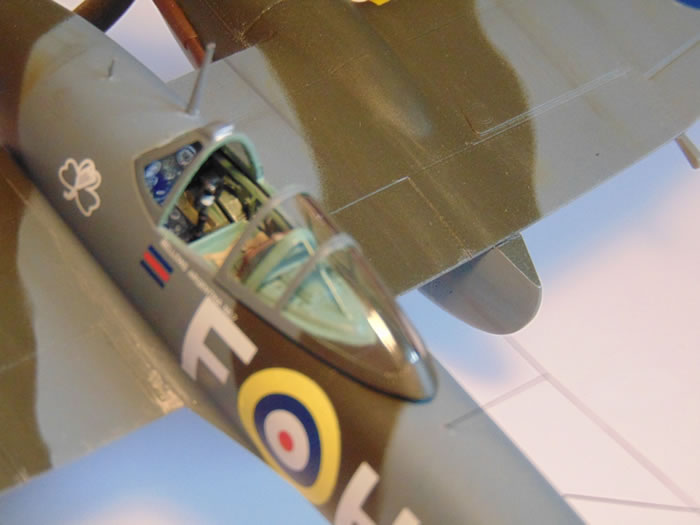
The two marking options provided are both 263 sqn, one early (dark earth/dark green) and the other later (grey/dark green). I had decided to do the grey/green camouflage option HE-F, P7116, with the chequerboard fin bullet and consulted an ancient Camouflage & Markings booklet which confirms the correct colours (post August 1941) as:
-
Upper: Dark Green and Mixed Grey (7 parts Medium Sea Grey, one part Night – lighter than Dark Sea Grey, close to Ocean Grey which is what I used)
-
Lower: Medium Sea Grey
-
Spinners and rear fuselage band: Sky Type S
-
Yellow leading edge strip outboard of the engines.
The colour scheme option for the other, HE-V, P6969, seems to be correct and the only debate is whether it should have black-and-white underside. A good photograph shows that it was Sky, but the aircraft was very scruffy…I mean really untidy, paint flaking off everywhere, so whether it had the earlier undersurface colours when it was in better condition, I don’t know.
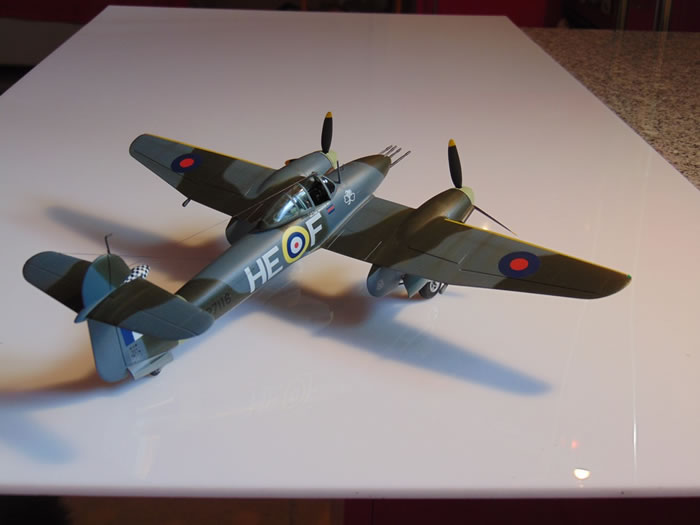
I first sprayed the Sky spinners and fuselage band, then the yellow wing leading edges and prop tips. Then these were masked and the Ocean Grey (XF-82) sprayed over the upper surfaces, then the blu-tak sausages to get a nice feathered edge to the dark Green (XF-61), then the underside colour of Medium Sea Grey ( XF-83) with a hard mask between the upper and lower colours. I think that these colours are closer to reality than those suggested by Trumpy. Incidentally, the camouflage demarcations on the instructions are not quite correct but I don’t suppose many will notice. For the record, I use an Aztek A470 airbrush with a turquoise head because it doesn’t clog too easily….I tend not to use the airbrush for anything fancy using the other finer heads because they are a pain when they get blocked.
Once the paint was dry and the camouflage masking removed, I sprayed it gloss to receive the decals. I’ve always had a problem getting a really good gloss finish and have found that Tamiya’s TS-13 rattle can is perfect, although not cheap. I had decided to take my courage in both hands and use the kit decals although there is one immediately noticeable error in that the codes are white whereas they should be either Medium Sea Grey or Sky. As far as I am aware, there is no aftermarket sheet to provide these so I used the decals provided as I had little choice. There are no proper maintenance stencils and some rather poor W/T decals that just don’t look right.
The decals are actually nice to handle, quite thin and settle down well without decal softener. The only problem area was the chequerboard on the tail bullet but it was predictable that getting a 2D object to drape around a 3D form was going to be fraught. I cut it into more pieces but it will still need some touching up to make it look right. Once all was done, I sprayed Alclad Klear Kote Light Sheen to matt everything down and bring it all together.
Finally, I added the aerial wires from EZ line fine (nice and stretchy) and did a bit of weathering using a Tamiya weathering set (similar to female eye shadow) and a silver pencil.
Once the model was more-or-less complete I thought that the main wheels might be a wee bit too small and the tailwheel is definitely too short, looking at photos. The latter is easy to rectify, the former I leave to your own judgement.
I am actually very pleased with the finished result because it looks exactly as it should and was an easy build. It ain’t perfect and could have been better but that’s mostly detail stuff and I think it’s worth offsetting the poorer points against the excellent fit and the fact that it needed no filler anywhere.
Overall, it was a satisfying build straight from the box and I’ve finally finished a 1/48 scale Whirlwind.
It took me two days part-time (10-12 hours) and there were no moments of frustration that I recall, which is unusual for me. The fit of the parts is very good and it’s been well engineered even though Mr Trumpy took his eye off the ball occasionally.
If you don’t mind the little quibbles I’ve outlined, I would recommend this kit.
Model, Images and Text
Copyright ©
2014 by Roger Hardy
Page Created 3 November, 2014
Last Updated
3 November, 2014
Back to HyperScale Main Page
|
 Home
| What's New | Features | Gallery | Reviews | Reference | Resource Guides | Forum |
Home
| What's New | Features | Gallery | Reviews | Reference | Resource Guides | Forum |