Revell 1/32 scale conversion
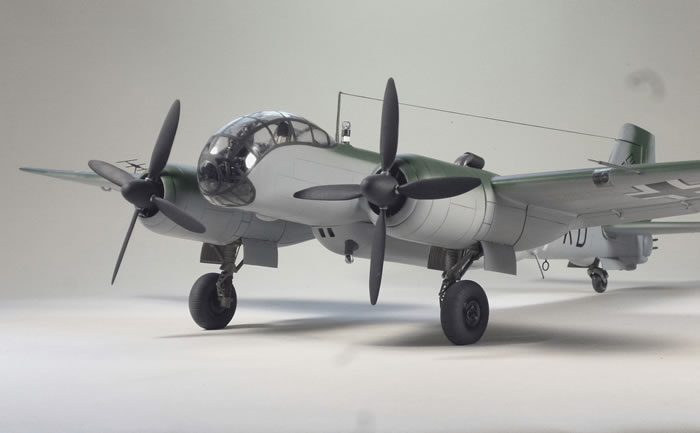
Junkers Ju 388 L
by Frank Mitchell
|
|
Junkers Ju 388L |

Revell's 1/32 scale Junkers Ju 88 A-1 is available online from Squadron.com
 The Ju-388 has always been a favorite of mine; not, of course, because of it’s success, since it hardly became operational, but simply because I thought it looked cool. A number of years ago, I built a 48th resin kit, but always wanted to do a 32nd scale version. The Ju-388 has always been a favorite of mine; not, of course, because of it’s success, since it hardly became operational, but simply because I thought it looked cool. A number of years ago, I built a 48th resin kit, but always wanted to do a 32nd scale version.
In recent years, we have, of course, gotten 1/32 kits of a Ju-88A and an ‘88A-4 from Revell, along with a very nice resin conversion for a G and a soon to be Ju-188, but still no ‘388 (until probably about a month after I finished this one). Therefore, I came to the conclusion that the only answer for would be to do (what turned out to be) a major (and lengthy) conversion.
Obviously, this is not a quick and easy conversion, but it does allow the use of a number of different techniques, which is a bonus (I keep telling myself). It is also big, which is both a blessings and a curse, as you will see.
Fortunately, I had lots of information on the aircraft, including some pretty good, but not perfect, drawings from the Black Cross and Aircraft Monograph series of books, and the outstanding book by Verrnalaken and Handig (Thanks to John Colvin for the loan of that one). However, because it reached production so late in the war, there are still some gaps in information.
As usual, the photos tell most of the story, but this write-up is maybe a bit longer than my normal, because I thought that some expanded explanation might be useful to others (or give them some ideas--).
Fuselage:
The first issue to be dealt with was the fuselage since major changes are needed both fore and aft.
Rear Fuselage and Tail:
A mold was made for the extension of the lower rear fuselage area, which included the tail wheel well and the lower turret mount. Styrene was used to heat-and-smash the new shape, but before it was glued in place, the rear of the fuselage was carved away to match the shape of the turret and detail was added as needed to the wheel well and the fuselage interior. Sheet styrene was used to strengthen the lower mount and form the top turret mount, which, in turn, was carved from basswood. Slots were cut into the turret for two turned-brass MG 131 barrels and holes for the receivers. The turret is mounted with a piece of brass rod. The kit tail wheel structure was used, the only change being necessary was to add a bit of detail and make sure the model would sit correctly.
Molds for the vertical fin and rudder were carved in one piece from balsa and then vacuum formed. The plastic skins were epoxied to the mold and sanded to final shape. The fin, rudder, and trim tabs were then separated and pinned with brass wire for re-assembly later.
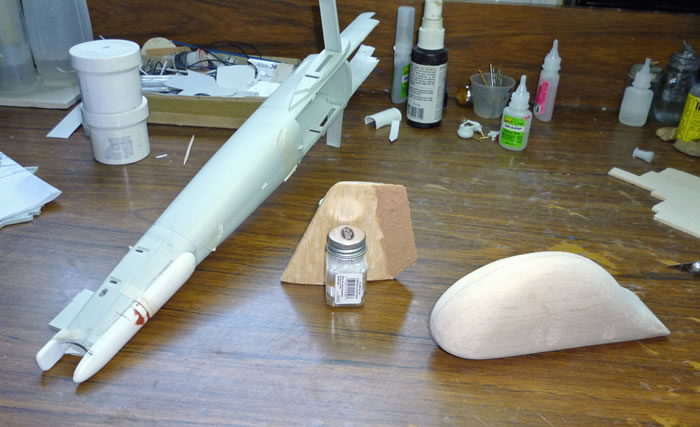
The kit horizontal tail surfaces needed only some lengthening and the addition of basswood tips that were more “square” and slightly lengthened.
Forward Fuselage:
Deciding how to approach the large clear nose area required some contemplation.
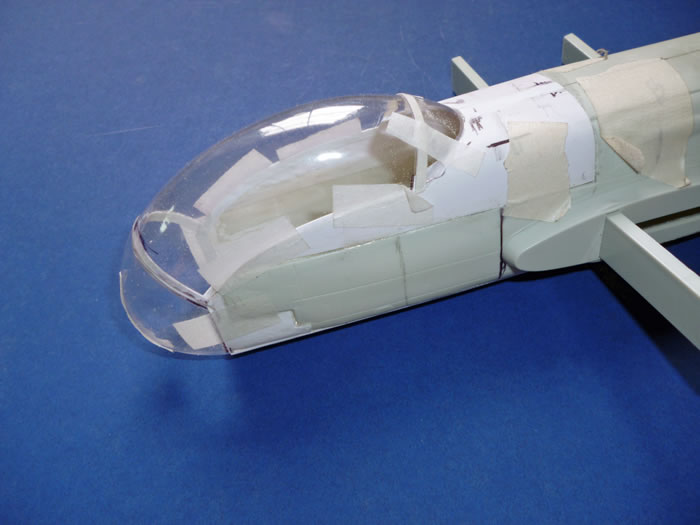
One basic goal was to remove only those parts of the kit fuselage that were absolutely necessary in order to maintain a strong base for the new clear parts. That approach I chose was to carve the entire forward fuselage as one big mold, but use that one mold to form and cut smaller pieces that could come together to make the finished shape. That, theoretically, would help to make the various clear pieces fit together more easily and accurately. Somewhat surprisingly, it actually worked out pretty well:
Once the basic mold was carved from balsa, a threaded rod from the hardware store was epoxied into a deep hole in the mold. That allowed the mold to be clamped, in several positions, into a vise while making the different canopy parts (the pictures make better sense of all this). It does require some care and careful sanding, marking, and cutting, but the end seemed to justify the effort.
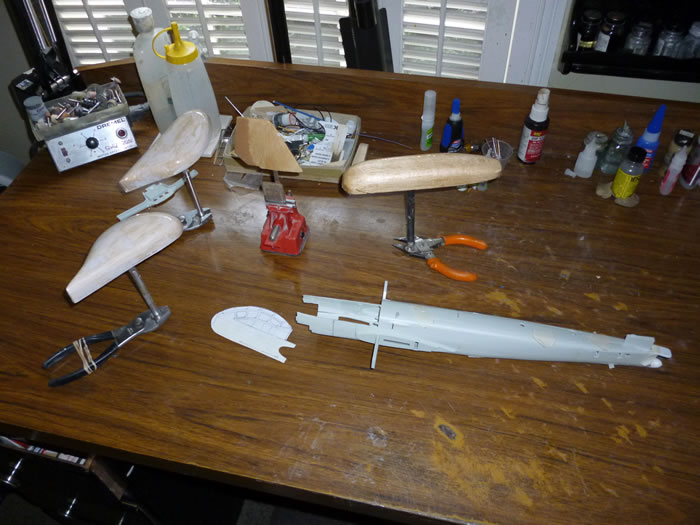
After laying out and drawing all the windows onto the mold, .030 clear acrylic sheet was heat-and-smashed into four parts (3 for the cockpit and one for the observation windows on the underside. This also meant that the 3 major pieces could be made larger than necessary which made the final fitting of the individual pieces to be much more precise.
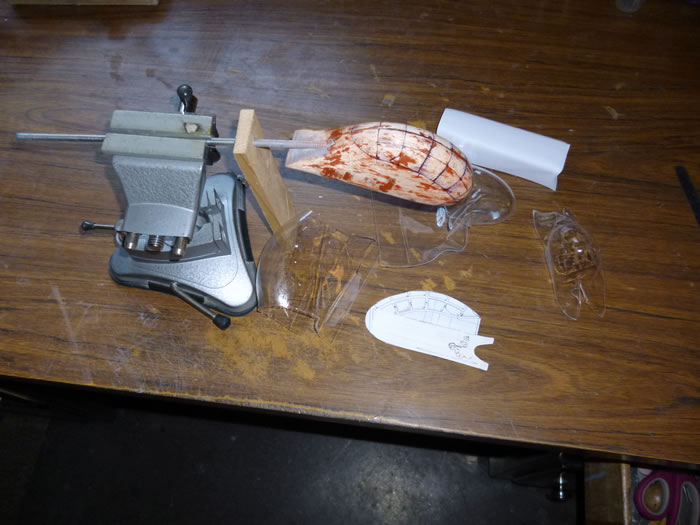
After cutting the clear pieces to a rough shape, a very piece of thin styrene was carefully glued along one edge of each joining edge to serve as the gluing surface. The completed sections were not, however, finally glued together until the entire model was nearly finished, simply because I wanted to be able to fix anything that came loose.
The next step was to build the interior, which was rather different from the Ju-88, but there are enough interior photos around to make it mostly a case of blending some kit parts, some parts scrounged from the scrap box and scratch-building for some others.
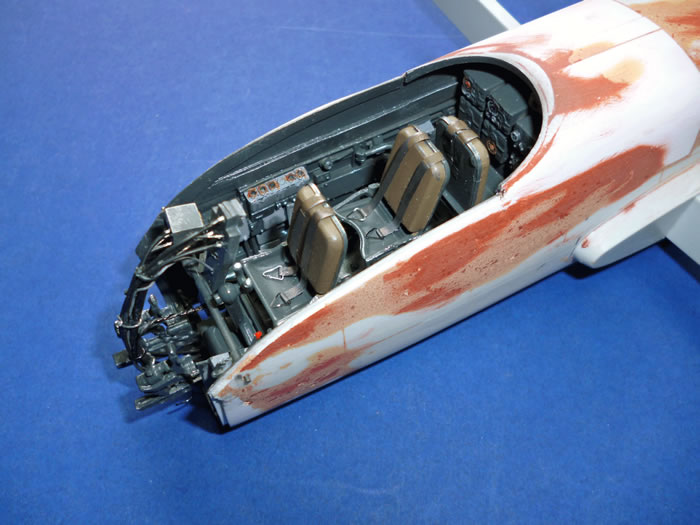
The gondola was a simple balsa mold which was vacuum-formed and fitted to the fuselage with brass pins.
Engines:
Thankfully, the engines and nacelles of this airplane are a very clean design, so were not that hard to build. A basswood mold was turned on a small lathe and then vacuum-formed, in halves, which were then joined to produce the basic shapes. The spinners were also vacuum-formed from a turned wood mold.
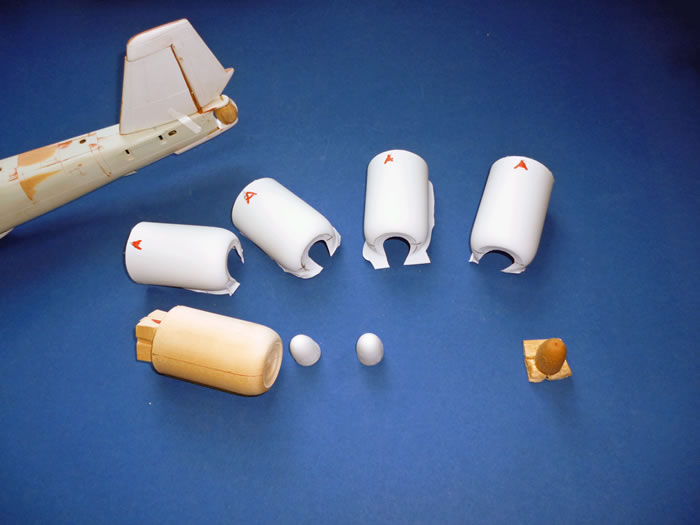
The engines of this airplane are all but hidden from view by the fan and prop. So, in order to provide something to hold them in their proper place, a couple of engines from an ancient and long deceased Beaufighter were pressed into service, and a balsa disk was used to fine-tune the fit between the engine and the firewall.
The fan and rings around the cowl were resin fan/ring assemblies from Eagle Additions. Although intended for an FW-190, they worked perfectly because the 388 used (almost) the same BMW 801 engines.
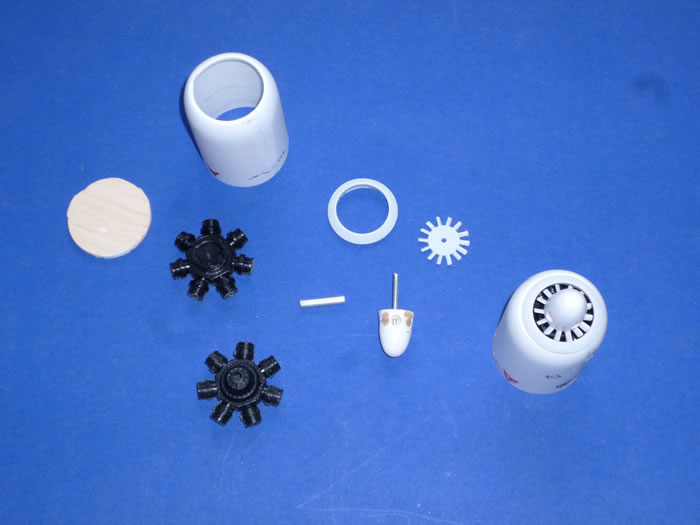
The exhausts were a combination of vinyl and brass tubing.
The propeller blades were pieced and shaped from several props found in the scrap box mixed with styrene inserts. They were mounted directly to the spinners by means of a wooden insert.
By the way, for those who are curious, the injection air intakes were inside the cowling on some early aircraft, but this varies among aircraft; one of those “check your references” things. Many aircraft had relatively large intakes on the lower cowls.
Wings:
The original idea was to wait for Revell to issue the Ju-88A-4 kit and use those wings.
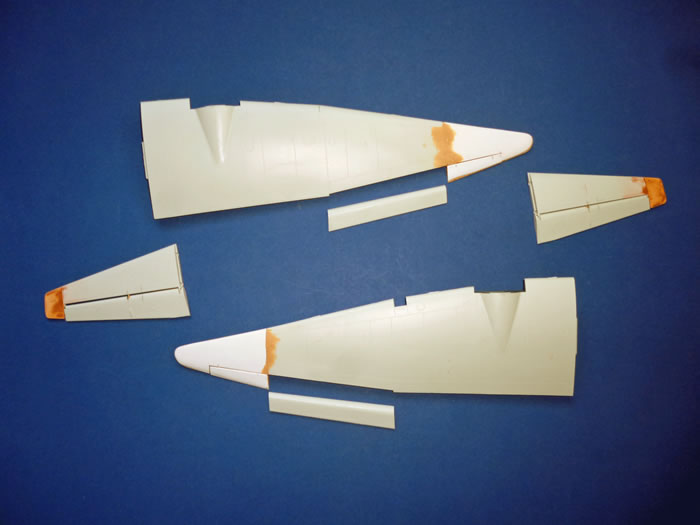
Alas, it was discovered that the span of the ‘388 was 7 feet longer that those of the A-4 and had small outer ailerons. Therefore, the wings were cut at the appropriate place and outer wings of the correct size and shape were carved, vacuum-formed, and glued into place along with new outer ailerons.
Miscellaneous:
The kit landing gear was used, but resin main wheels/tires were substituted for the stock pieces.
The radar arrays on the top of the wings were made with soldered brass wire as the loop antenna beneath the rear fuselage.
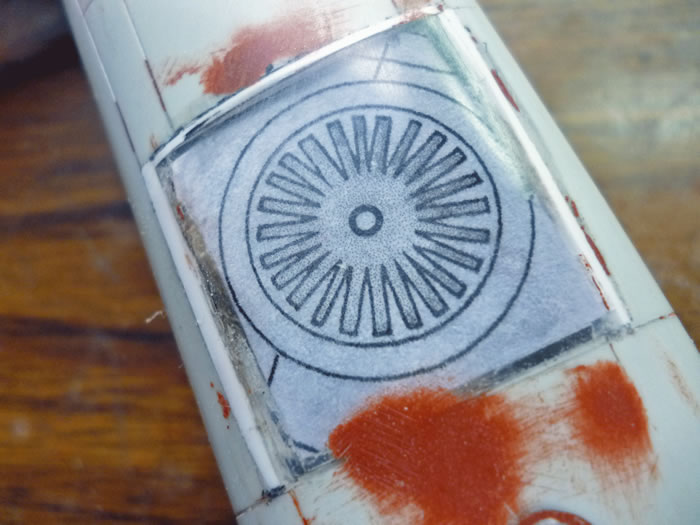
The sight mechanisms for the tail guns (just behind the cockpit) were made from aluminum, tubing and plexiglass rod.
 The paint was Model Master and the markings were a combination of kit, aftermarket, and homemade using the computer. The paint was Model Master and the markings were a combination of kit, aftermarket, and homemade using the computer.
While the model was finished as an early production Ju-388L-1, which was chosen because it was one of the few for which I could find multiple photos (I did cheat to the extent of adding spinners; thought it looked neater that way).
An interesting, but a large, long, and tedious build that I would not be anxious to repeat. However, it does look nice sitting on the shelf, even if some other models have to go to make room for it.
Images and Text Copyright ©
2014 by Frank Mitchell
Page Created 21 February, 2014
Last Updated
21 February, 2014
Back to
HyperScale Main Page

|
Home
| What's New |
Features |
Gallery |
Reviews |
Reference |
Forum |
Search