Airfix's 1/72 scale new-tool
Folland Gnat T.1
by Roger Hardy
 |
Folland Gnat T.1 |

Airfix's 1/72 scale Folland Gnat is available online from Squadron
 History History
This kit was previewed by various people and there is a HyperScale forum entry covering it so I won’t go into any more detail here: http://www.network54.com/Forum/578046/thread/1328273764/Airfix+1-72+Folland+Gnat+T.1+in-box+review
The Folland Gnat was developed as a reaction to the growing size, weight and cost of post WWII jet fighters . The Gnat was the creation of W.E.W. "Teddy" Petter, a British aircraft designer formerly of Westland Aircraft and English Electric; he was also the Chief Engineer of the Canberra and was instrumental in the design of the massive (and expensive) Lightning fighter.
In a previous life I was in flying training in the RAF myself and arranged a detachment from my University Air Squadron to Little Rissington in the summer of 1972. I managed to cadge 6 flights in one of these pocket rockets and note from my logbook that the pilot of one of them was a Flying Officer Jock Stirrup, who eventually became RAF head honcho, the Chief of the Air Staff!
The Gnat is clearly a small aircraft but you don’t realize how small until you look down on it; they say you don’t get into it, you strap it onto your back! I recall that there was barely room in the cockpit for a man with a g-suit but the experience of flashing around Welsh valleys at 50 feet and 400 knots was one I’ll never forget, or the demonstrations of Mach tuck. Anyway, enough of this meandering. What about the kit?
The Kit
This is Airfix’s second Gnat. The original was issued in 1964 and I recall building several as a kid. The original cost was 2 shillings…10p, about 15 cents! This kit was typical of its generation and was actually quite good, apart from the slightly pinched nose. It is still available as a Red Arrow, with paints, etc. Matchbox issued one as well but I never built it as it looked a bit clumpy. Now we have a new mould that makes all previous kits obsolete. It has 49 light grey parts (including two quite credible crew members) and an option for wheels up (you need a stand – not provided) or wheels down. The plastic is soft, the gates are larger than Tamigawa, but the surface detailing is all subtly engraved and looks very good indeed. The only disappointment is a one-piece canopy so posing canopy open would need some risky surgery with a razor saw. Enough. Let’s get building!
Okay, first gripe: I know that Airfix is basically paint-maker Humbrol and they want to sell Humbrol paints but I can’t get them in Portugal where I live, don’t like enamels and prefer to use Tamiya or Gunze Sangyo if I can get them. So it’s necessary to refer to paint-equivalent charts. Here’s one:
http://www.ipmsstockholm.org/colorcharts/stuff_eng_colorcharts_humbrol.htm.
However, I have enough experience of these ‘equivalents’ to be a bit skeptical and I always take them with a pinch of salt.
Construction starts with the office and the first thing you have to do is to work out what color H80 is. It’s grass green as it happens. Grass green? For a seat? I used RLM 82 which looks right. Incidentally, these don’t look like normal ejection seats but are correct. The cockpit of the Gnat was so small that normal martin-Baker seats would not fit so MB designed some special baby ones; they should, incidentally, have the pull handles mounted to the top of seat and as the canopy is very ckear, these are worth fitting – I made mine from fuse wire and painted them yellow and black. The rest of the cockpit is medium grey with a few details in silver and black. I’m not a great believer in amazingly detailed cockpits, especially in 1/72 scale, as most of it cannot be seen. However the bits immediately above the sill line are worth a little attention and I added some generic Eduard harnesses. Airfix provide two well-detailed crew member if you prefer to have the office manned (and you don’t need to add the belts). The instrument panel decals fit well with no trimming around the edges.
The cockpit and the intake sidewalls are a very snug fit. The intake fronts need a tiny bit of scraping to fit properly but otherwise the assembly is straight-forward. Be careful when cleaning up the fuselage parts as there are a number of lumps and bumps that look like flash but aren’t! There is a UHF aerial below the fuselage which is prone to be knocked off when fitting the intake parts.
Next comes the main undercarriage which is simple and very neat. The whole undercarriage is assembled before gluing to the insides of the fuselage. This includes the undercarriage doors which also doubled as airbrakes on the Gnat. Don’t worry about the alignment of the undercarriage because the good design of this kit ensures that this is pretty well foolproof. I didn’t paint these parts as they are all basically natural metal and would be sprayed silver with the remainder of the aircraft when assembled. So, ready to seal the coffin.
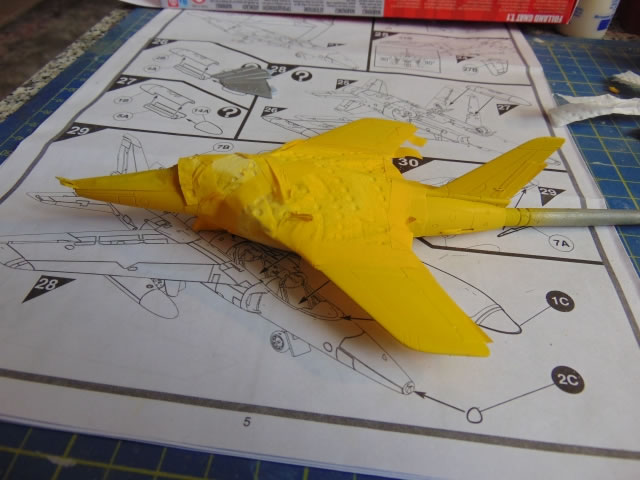
Oops. Almost forgot. The instructions do not tell you to add a nose weight. Do. I have never known a jet aircraft that didn’t need one. I added a couple of lead pellets (I can still get lead fishing weights in Portugal) and will wait to see whether they’re enough, by which time it will be too late to add more, of course. I taped up the fuselage with kabuki tape and applied the liquid poly, then left it to set. The noseleg fitted well but I didn’t add the wheels at this stage (the tyres are weighted – nice touch).
The wings are commendably thin; the trailing edges are better than many found in much larger scales and speaks a lot for Airfix’s new mould technology but be careful not to damage them. And don’t forget to drill the holes for the slipper tanks! The flush fit of upper and lower parts of the wings is so good that you need very little liquid poly, just a soupçon along the seams; too much and it will squeeze out when pressed so less is more here. The wing assembly need a little persuasion to mate well with the fuselage but a clothes peg applied to the fuselage spine (and a little superglue) cured this but be careful you don’t accidentally knock off the aerials or undercarriage which get in the way of your fat fingers as you struggle to get everything to fit. Add the tailplanes and assemble the slipper tanks, and the model is ready for final fettling. The slipper tanks need a little attention to eliminate the seams and to ensure a smooth joint with the wing. I let it dry overnight after applying some Milliput to a few joints; round the intakes, lower wing joints and the rear wing/fuselage joint. Apart from the canopy, slipper tanks, wheels, jet-pipe and a few aerials it’s compete. It’s looking rather sweet, even now. Oh, and it’s not a tail-sitter!
Painting, Markings and Finishing Touches |
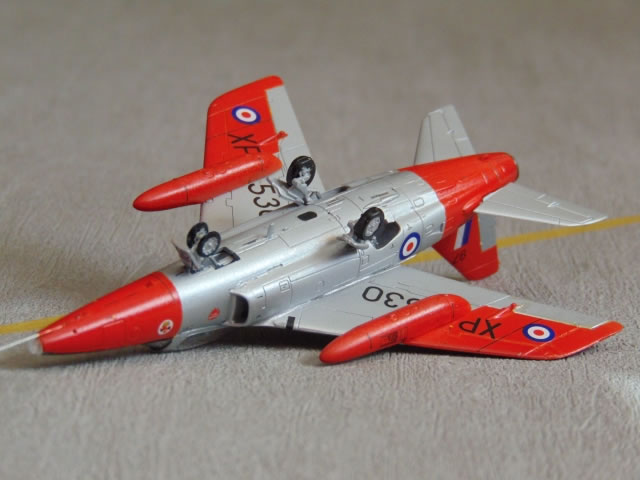
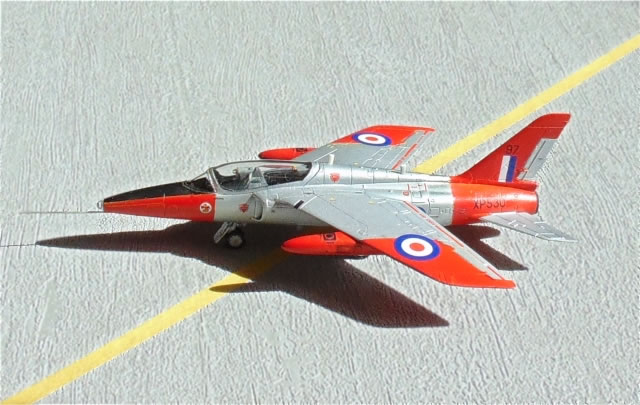
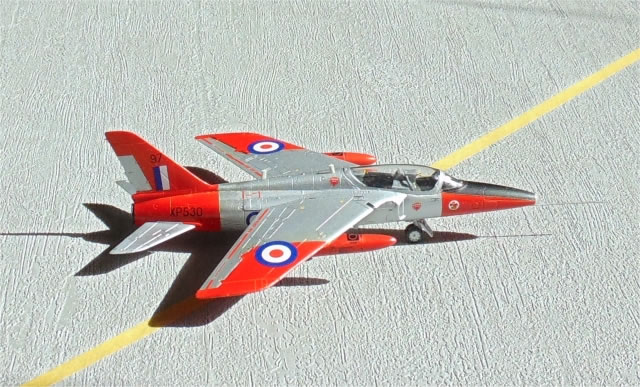
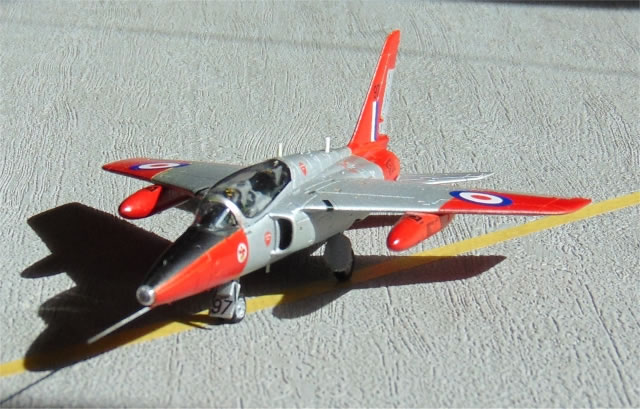
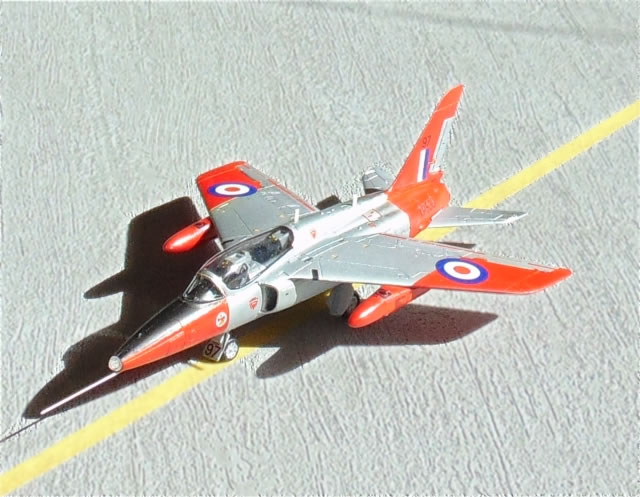
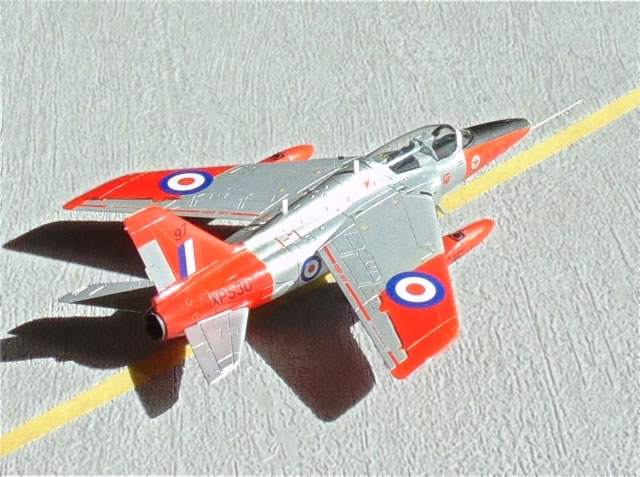
Only one version is provided: XP530 of the Central Flying School, Little Rissington, 1964. The decal sheet looks good and is in perfect register but is matt, rather than gloss. S&M Models produce a big decal sheet to cover pretty well every Gnat colour scheme:
http://www.hannants.co.uk/product/SSM72002.
The colour scheme for this kit is provided on the back of the box, as is normal for Series 1 kits. This is all-over silver with ‘fluorescent fire orange’ extremities. This appears to have been like dayglo but was painted on rather than being stick-on panels as for the Chipmunks and Jet Provosts.
All paints were applied with my Testor Aztek A470 airbrush.
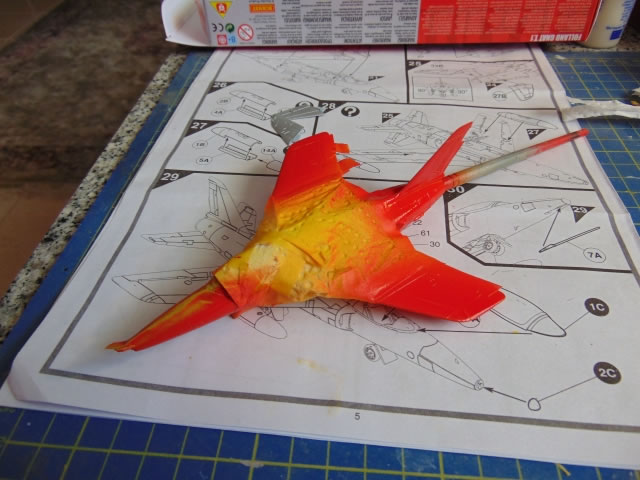
So, onto the masking. It’s the usual story – 30 minutes masking (Tamiya kabuki tape), ten seconds spraying.
First the canopy, then spray black for the internal framing. Then Tamiya primer, then Alclad II Aluminum. Then more masking for the fire orange ( Humbrol 209). There’s no Tamiya equivalent so I decided to simulate it by spraying XF-6 Yellow then X-27 Clear Red to try to simulate a degree of fluorescence. Finally, the black anti-dazzle panel on the nose. When touch dry, the masking is taken off to reveal a few areas where the yellow had bled through to the silver down the rather deep engraved panel lines which I corrected with a sharpened wet toothpick before the red had cured to avoid having to match Alclad with pot silver, which is almost impossible. With hindsight, it would probably have been better to have mixed Tamiya Orange with Clear Red and apply it as one coat as I could see the yellow undercoat peeping through here and there.
Then the decals. These went on fine except that the ‘keep off’ decal for the ailerons was too long. The white of the decals could be more opaque to avoid a slight ‘pinkiness’ when the roundels are put on red-paint. There are dozens of stenciled instructions and I sometimes wonder whether anyone really cares. I put them all on in the correct places anyway. I used a little Microset as the decals tended to stick where they were put unless persuaded otherwise.
Final Bits
I replaced the nose probe with 0.5mm brass rod as the one provided looked a bit clumpy. The wheels all fit fine but the upper fuselage aerials needed a little fettling. Adding the nose light, jet-pipe and slipper tanks were the final bits. I didn’t spray satin varnish to tone the decals to the paint sheen because I didn’t want to upset the nice Alclad metal finish, so had to live with the matt markings.
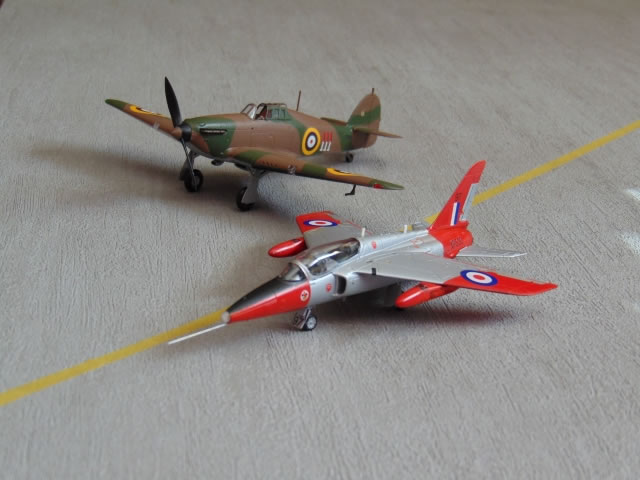
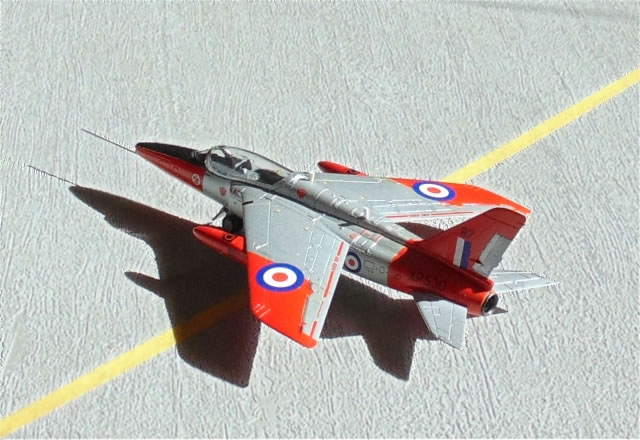
This is a really nice little model and looks exactly right. I haven’t compared it to drawings but it really looks the part; it sits ‘right’. Incidentally, I’ve added a picture of the Gnat with the new Airfix Hurricane Mk I so you can see just how small the Gnat is. Looking at the final model the panel detail looks a tiny bit excessive under the silver finish but it looks fine to me. Overall, it looks the part and it’s nice to have a current technology Gnat. Now…when do we get it in 1/32 SCALE? Dream on!
My congratulations and thanks to New Airfix. This kind of quality is normally only available at double the price and I hope they can maintain the standard in the future which will ensure that Airfix will resume its position at the top of the hobby model business. I am also pleased that Airfix are again producing high quality kits at pocket money prices which might encourage more youngsters to take up the hobby. Highly recommended!
Model, Images and Text
Copyright ©
2014 by Roger Hardy
Page Created 3 October, 2014
Last Updated
4 October, 2014
Back to HyperScale Main Page
|
 Home
| What's New | Features | Gallery | Reviews | Reference | Resource Guides | Forum |
Home
| What's New | Features | Gallery | Reviews | Reference | Resource Guides | Forum |