Revell's 1/48 scale
F-15I Ra'am
by Miro Adamovic
|
|
F-15I Ra'am |

Revell's 1/48 scale F-15E Strike Eagle is available online from Squadron.com
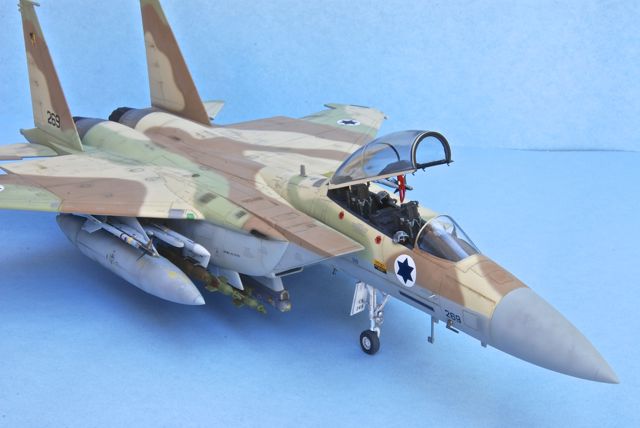
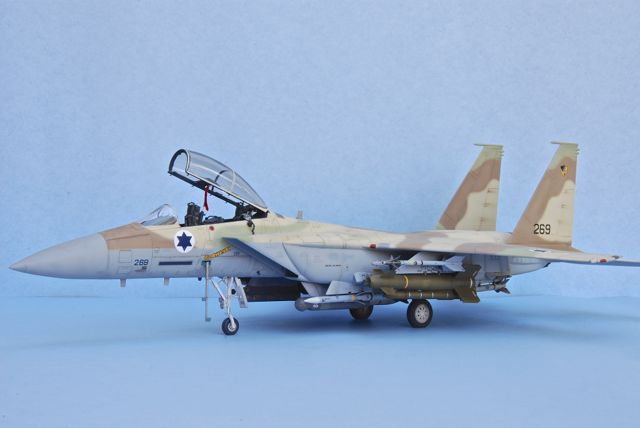
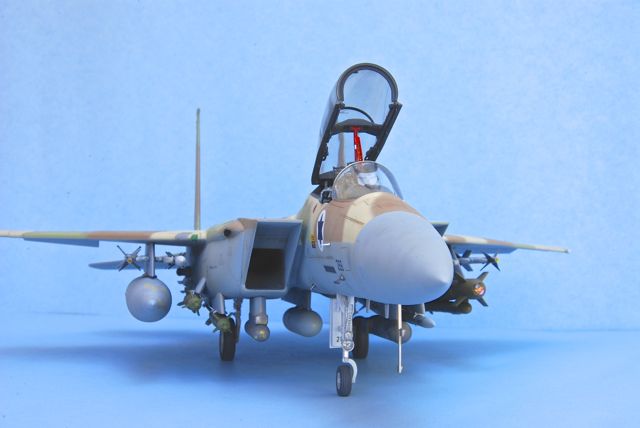
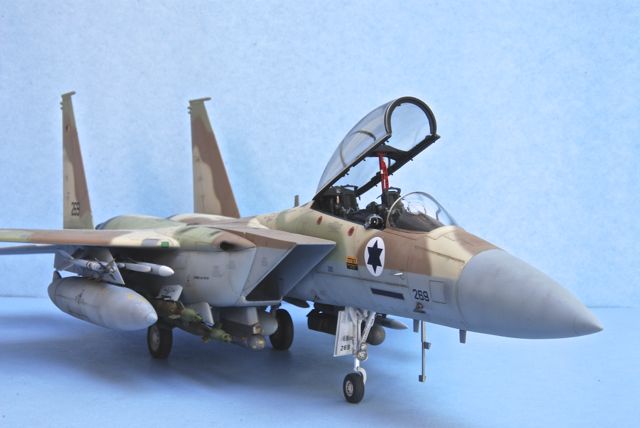
A dual-role long range fighter for attack and interception. The plane - the best of its type in the Middle Eastern arena - entered service in January of 1998, and is the IAF's lead plane. The Ra'am is a special version of the F-15E Strike Eagle that was designed specifically for Israel by McDonnell Douglas (now Boeing). Its tremendous payload capacity, combined with its advanced systems, enable it to carry out depth attacks with a large weapons load, at long ranges, at low altitude, in all hours of the day and night and in any weather conditions.
This model started it's journey as Revell's excellent 1/48 F-15E Strike Eagle kit. Being a fan of the mighty Eagle ever since I found interest in military aviation,last year I decided that it was about time to add a model of this iconic plane (104 Air to Air kills,0 losses) to my modeling cabinet. It just had to be an Israeli Ra'am as the desert camouflage colours are so attractive and Israeli Air Force is one of my favorite modeling subjects. So,I acquired the above mentioned Revell kit and the whole plethora of aftermarket items;Aires F-15I Cockpit and Exhaust Nozzles,Eduard Brassin Sidewinders and AMRAAM missiles and Royale Resin wheels. I quickly robbed one of my Tamiya ANG F-16s for a couple of GBU-12 bombs and AGM-130 missile came from Academy Strike Eagle kit.
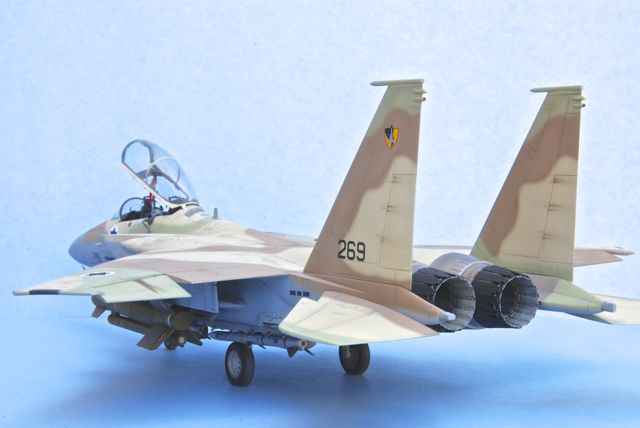
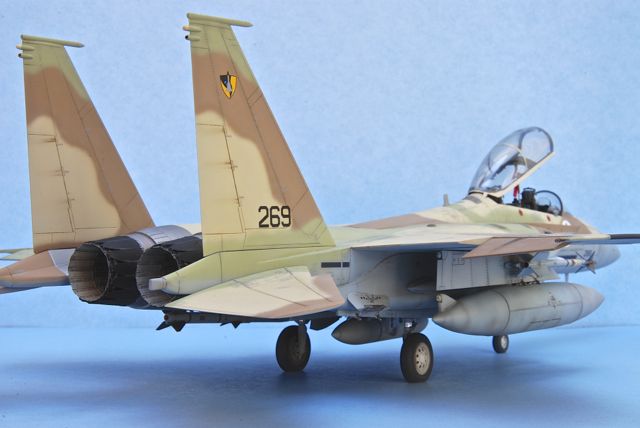
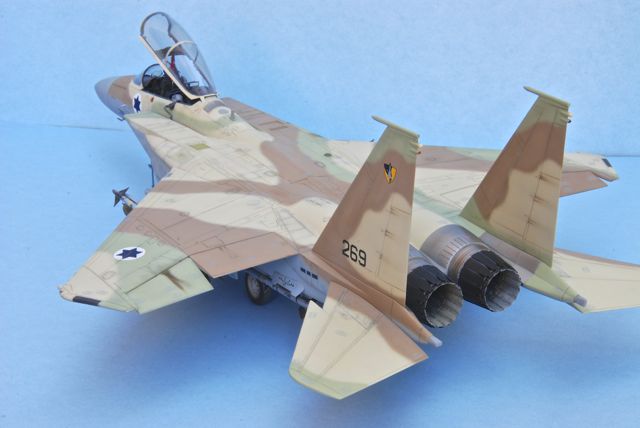
The build started back to front as exhaust nozzles were addressed first,they were quickly painted and internal burn stains added using oil wash,pastel dust and very diluted and airbrushed Tamiya Buff acrylic paint. To achieve a convincing look of Pratt & Whitney F100-PW-229 powerplant Turkey Feathers,I used Model Sports Carbon Fibre continuous decal sheet,trimmed to size. With exhausts completed,focus was moved to the rear fuselage which went together without any major dramas,the only modifications done were removing horizontal stabs (originally they came molded to the upper fuselage) and cutting out wing ailerons so they both could be repositioned later in the lowered position to depict a jet at rest.
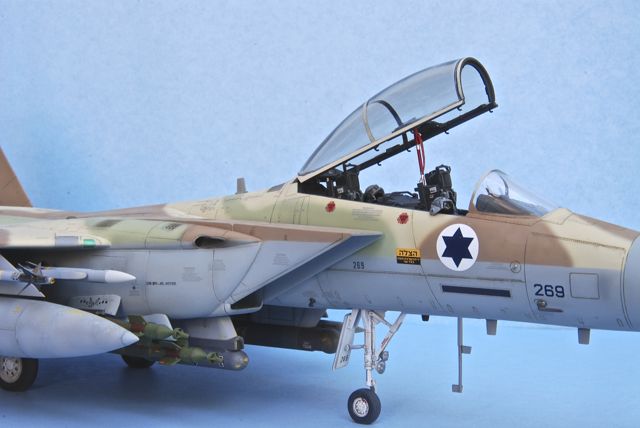
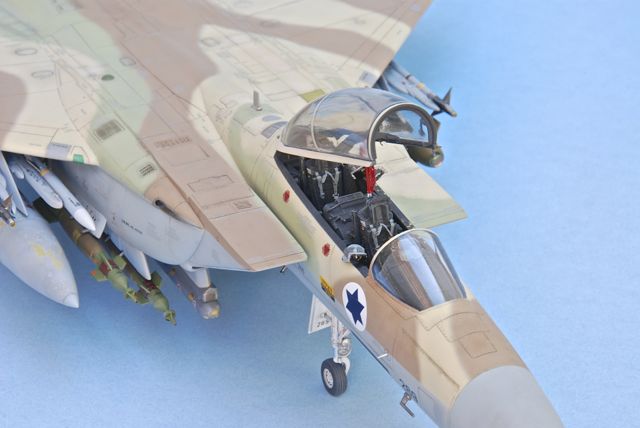
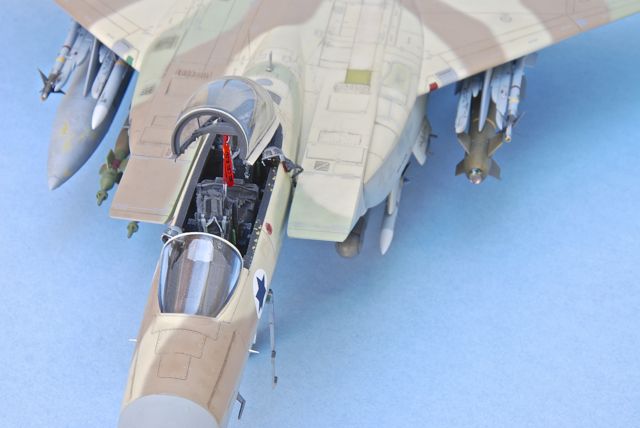
Moving on to the forward fuselage/nose section,well,Aires Cockpit gave usual resistance,typical of resin cockpit sets being shoehorned into it's place,but after a few hours of sanding,scraping,grinding,trimming,dryfitting it was successfully instaled. Cockpit was painted in Israeli manner,various shades of black,ie. NATO Black,German Grey,Rubber Black and fine details and switches were picked out with white and grey paint. Front and rear fuselage mated together surprisingly well and it was time to move on to my favorite part of model building....
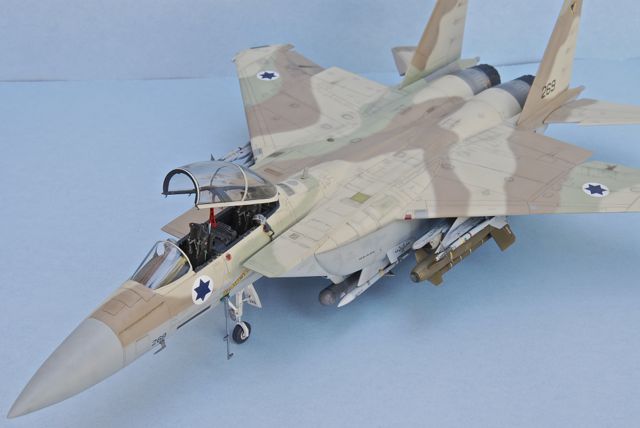
The model was painted in standard Israeli Desert colours;Mr.Color lacquers were used,FS36375 Light Ghost Grey for undersides and FS33531 Sand,while Tamiya Sky served as Israeli Pale Green and the final camo colour,Dark Tan (FS30219) was decanted from Tamiya AS-15 spray can,thinned and lightened a little and shot through my airbrush. Bare metal areas were painted using various shades of Alclad lacquers. I preshaded the model and have done a bit of post shading. One of aircraft's panels was painted in Zinc Yellow Primer to depict a freshly replaced panel,as seen on one of the reference photos from IsraDecal Publications F-15I book.
The surface of the model was glossed using 50-50 mix of Tamiya Gloss Clear and lacquer thinners laid down in a few light coats,and when satisfied with gloss level,I started the decaling process. Decals are from IsraDecal Studio and they really gave me some grief due to their stubborn refusal to succumb to Micro Set/Sol combination,so I pulled out a heavy artillery,Mr.Mark Softer,and sure enough,it kindly melted one of the wing roundels,so I was left with fixing the mess and using a spare roundel from my decals folder. Also,some silvering appeared which was dealt with to the best of my abilities. I put all decal problems down to the fact that they sat in my stash for a good eight years before being used,IsraDecal Studio is a reputable company and I have never experienced any problems using their decals before.
Final Touches
After decals settled down,I sprayed another couple of coats of Clear Gloss to seal them in,panel line wash was done using oil paints and everything was sealed in with a couple of coats of Mr.Color Flat Clear. Final touches of weathering the airframe were done with pastel dust and "salt technique" on the nose cone and around walkways.
I attached the weapons load,external fuel tank and canopy. Hollowed out pilot's helmets were placed to a canopy rails,they probably shouldn't be there,but it adds more interest to the model.
After roughly four months filled with a numerous hours of modeling fun,my Ra'am finally adorns the top shelf in my modeling cabinet,until it gets replaced at the premier spot by my next build...
Text and Images Copyright ©
2014 by Miro Adamovic
Page Created 24 October, 2014
Last Updated
24 October, 2014
Back to
HyperScale Main Page

|
 Home
| What's New |
Features |
Gallery |
Reviews |
Reference |
Forum |
Search
Home
| What's New |
Features |
Gallery |
Reviews |
Reference |
Forum |
Search