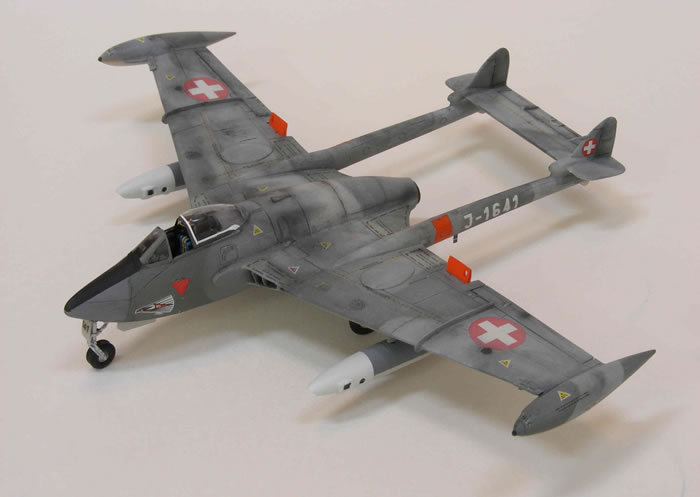
Czech Master Resin's 1/72 scale
De Havilland DH 112
Venom Mk. 1R
by Thomas Muggli
|

|
De Havilland DH 112 Venom Mk. 1R |

Revell's 1/72 scale Vampire FB.5 is available online from Squadron.com
In 1956, the Swiss Air Force introduced DeHavilland Venom fighter bombers to replace the aging batch of 130 used P-51D Mustangs that were bought in 1947 from USAAF inventories in Germany. It was then, back in 1947, that the Swiss Air Force was introduced to armed tactical reconnaissance, since there were eight camera-equipped F-6D Mustang reconnaissance planes among the Mustangs they bought. So it was decided that the Venom would replace the Mustangs not only as fighter bombers, but also as reconnaissance planes.
Twenty four Venom Mk.1’s were equipped with one camera in the lower fuselage and multiple cameras in modified wing tanks. These Venoms were designated as Mk. 1R. They served their purpose well until being replaced by supersonic Mirage III RS’ in the late 1960s. However, the Venom Mk. 1R’s were not entirely abandoned. Of the twenty four, eight were retained for training of Mirage reconnaissance pilots, the remainder were converted back to combat aircraft.
I decided to build a reconnaissance Venom to join my CMR Venom fighter bombers that I had built previously. These have been featured in a separate article on Hyperscale. CMR also makes and excellent resin kit of the Swiss Venom Mk. 1R, which I used for my project.
Construction starts with the cockpit, using the pre-painted Eduard photo-etched parts, which are included in the kit, makes for a very nicely detailed cockpit. Unfortunately, it is painted almost entirely in black and once it is installed, most of the nice detail is hidden.
The major components of the kits are very crisply molded and the detail is excellent. The wheel wells and internal wing details are beautifully done. The biggest challenge with these kits, as with most resin kits, are the ill fitting components. I first came across this issue when I tried to join the fuselage halves. There were quite a few gaps, mainly at the bottom of the fuselage, that I had to fill with styrene strips and CA glue. The edges of the jet pipe were cracked and chipped. I wound up replacing the rear portion of both pipes with brass tubing.

Because there are no locator pins, I was concerned about aligning the wings and tail. So I built a rig from styrene to ensure proper dihedral of the wings and alignment of the tail. After gluing the wings to the fuselage, more styrene strips and CA glue were needed to fill gaps in a number of spots. Next I tackled the landing gear, flaps and airbrakes which are well detailed but as they are thin and brittle, they must be removed from their stubs with care to avoid breaking them. The wing fences are cast in resin as part of the wings and are extremely thin. Not surprisingly, they were chipped and cracked out of the box. I replaced them with new ones I shaped from sheet styrene. The kit also contains stubs with various tiny antennas and other small parts. Many of these were not fully cast and those that were would have been almost impossible to remove from their stubs. I replaced these parts with bits of styrene strip and stretched sprue. The vacuum-formed canopy is well done and fits well.
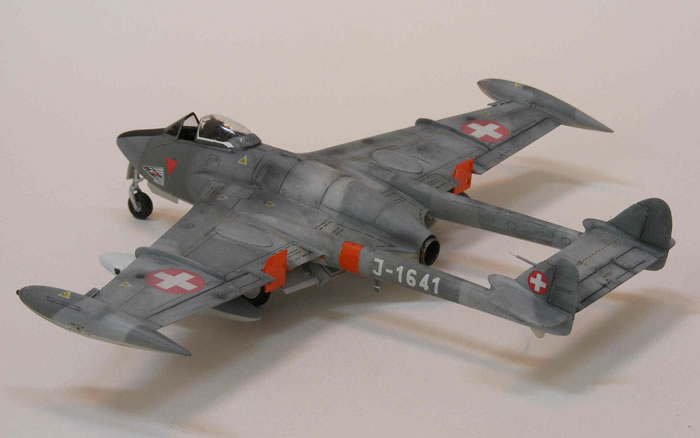
The “piece de resistance” of this project was the finish. Even though the Swiss Military prides itself to keep its equipment in immaculate condition, the camouflage finish of its Venoms badly deteriorated towards the end of their careers. I wanted to reproduce one of these well worn Venoms. Having little experience with weathering, I decided to try most of the techniques that I had read about over the years. I used Tamiya and Model Master acrylic paints. After airbrushing a coat a base coat of light gray, I preshaded the bottom of the model with flat black. This was followed by the basic colors of light gray on the undersides and the camouflage scheme of Dark Sea Gray and RAF-Dark Green on the upper surfaces.
Next, I post-shaded with lighter shades of the basic colors. After a coat of Future floor cleaner, I applied the national insignias. Then I airbrushed a filter coat of Light Ghost Gray followed by another coat of Future. I applied a wash of oily black to highlight the panel lines and also painted oil streaks as well as various scratches and discolorations using a small stiff brush. The rest of the decals were applied next. I used MC-One decals instead of the decals provided with the kit. They are of better quality and feature finer print which looks more realistic. I followed up with another filter coat of Light Ghost Gray. Finally, I applied pigments to simulate stains and worn areas. During the whole process I frequently checked my references to ensure that I was achieving the effects I was looking for.
After installing the landing gear, wing tanks, and various small parts, my Venom-Aufklärer (Venom-Reconnaissance plane) was ready for action.
Model and Text Copyright ©
2013 by Thomas Muggli
Page Created 6 May, 2013
Last Updated
6 May, 2013
Back to
HyperScale Main Page

|
Home
| What's New |
Features |
Gallery |
Reviews |
Reference |
Forum |
Search