Azur's 1/72 scale
Dassault Mystere IV
by Joe Youngerman
|
|
Dassault Mystere IV |

Hasegawa's 1/48 scale P-39Q/N Airacobra is available online from Squadron.com
I’ll skip the aircraft’s history as Mark Davies covered it well with his review of the kit contents late last year here on Hyperscale.
Let me begin by saying I build primarily 1/72 World War Two subjects so building an Israeli operated jet from the 50s/60s period was a somewhat new to me. The basics of modeling most any subject are generally the same so I gladly gave it a shot. Azur’s Mystere IV is a very buildable limited run kit with some of the challenges one might expect from such a model. As with many limited run kits these days, there are some parts cast in resin, and others provided as photo-etched brass bits. The combination results in what is the best 1/72 scale kit of the Mystere IV offered to date.
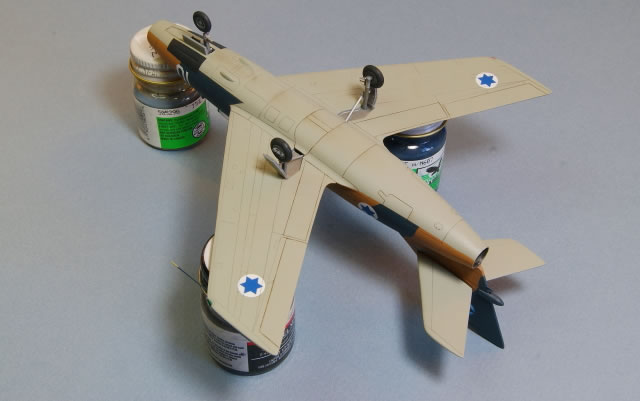
Not surprisingly, I started with the cockpit, which is a fairly basic affair enhanced by a resin ejector seat and a good PE instrument panel and assorted levers. The interior consists of a tub which is built up in several parts and must be carefully constructed to keep everything in line. Mistakes here will be amplified as all the components begin to be placed into the fuselage halves. Once the cockpit has been built up the intake trunks must be assembled and installed in each side of the fuselage nose intake. Locating the intakes properly is important because there will be gaps to deal with later if you’re careless. Gaps that will be somewhat challenging to fill. I added some significant nose weight at this stage since she’ll be a tail sitter without it and there’s plenty of room for weight just behind the cockpit tub. It’s also at this time that I installed the resin tail pipe which fit perfectly and is well cast. The final item before joining the fuselage halves is the main wheel well bays which are plastic parts and a bit soft on detail and fit. Fortunately, the Mystere IV’s main gear doors remain closed except during gear extension, retraction, or when maintenance crews needed to access the areas.
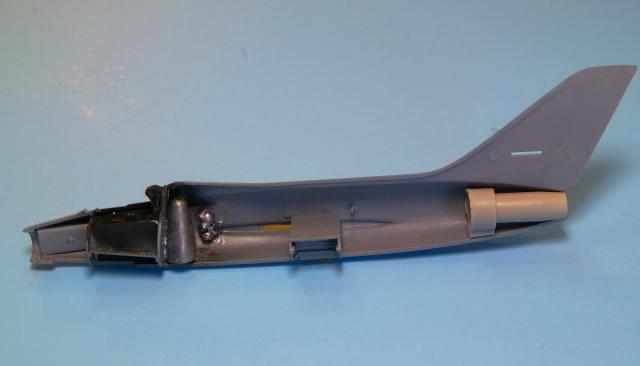
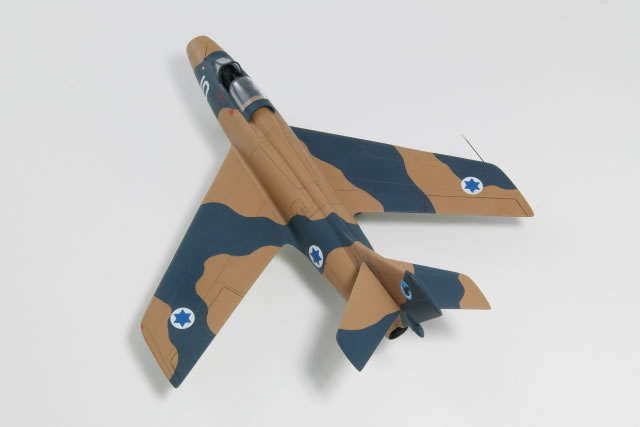
The fuselage halves fit together well needing only a little filler here and there and for that I used Zap’s gap filling glue. The flying tail planes should be used on all of the Israeli versions despite the instructions telling you to use the surfaces with elevators. The wings are actually molded as solid parts but I found no sink holes anywhere on my kit and this does serve to speed up the build time a bit. The same was true of the tail surfaces which fit well with a little trimming of the mating slots in the tail. The wings did require some filler to join the fuselage but I was pleasantly surprised by the lack of drama in this area.
I found the panel line detail to be a bit light so I went over most of it with a sewing needle mounted in a pin vise to keep from losing detail during painting. The molding on the gear legs and actuators is a bit crude with large sprue gates that made considerable clean up necessary. I actually just scrapped some of the actuator arms and made new parts from plastic rod. The splitter for the nose intake is a bit undersized so I added some girth to the back side of the part to get a better fit to the intake trunks. The nose and main gear have no locating pins so I made some for my parts using plastic rod to get a sturdier joint…I would highly recommend doing this on your build as well. The gear gets dressed up a bit by the addition of PE scissor links on each strut. This is a nice touch and looks much better than plastic parts would have. The wheels are resin and beautifully cast adding to the realistic look of the finished model. I didn’t add brake lines but probably should have as they are a fairly prominent feature on the real Mystere I’s.
The canopy fit is less than great but it can be overcome by some careful trimming of the canopy and fuselage. The canopy itself is well molded and thin making a replacement optional but not needed by most. There are small resin antennas that are added to the tail and a very nice clear molded landing light given for the nose gear. Note that as you install the nose gear only the aft door remains open with the gear locked down. The instructions are weak in this area and careful looks at reference photos are highly recommended throughout the build. Azur seems to have been in a rush with this kit as in addition to errors in the instructions, there are no under wing pylons or any wing stores offered in the kit. This is an unfortunate omission as almost every photo I found of these aircraft in service shows them in place. Also missing is a pitot tube and while it’s shown on the instruction sheet’s 3 views, there’s no part for it included in the kit. I simply cut a section of Albion brass tubing, drilled a hole in the starboard wing, and installed it. There is a small PE part for the wip antenna just forward of the windscreen but I found it’s two dimensional shape to be unconvincing so I replaced it with a section of stainless steel wire painted black.
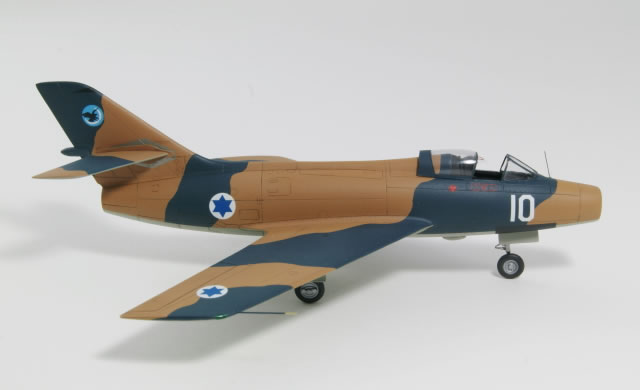
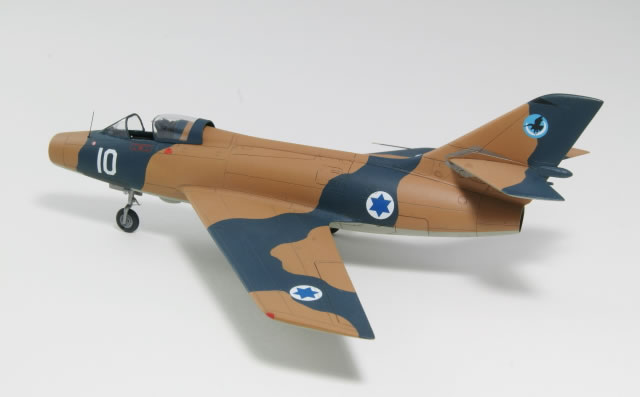
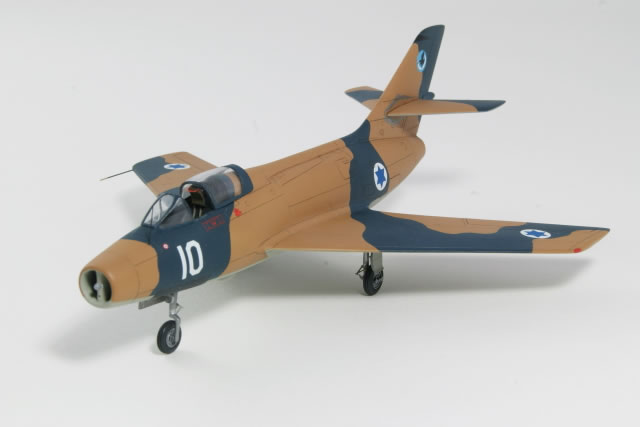
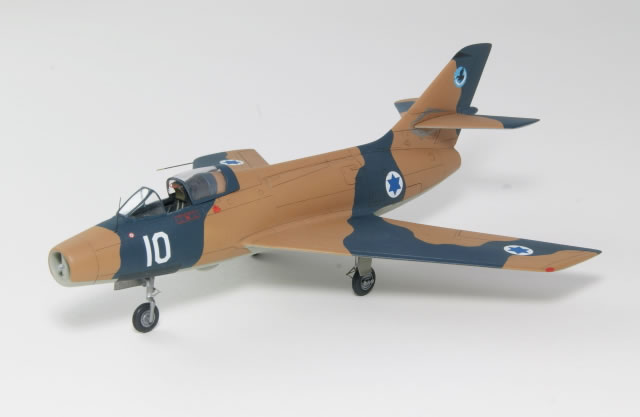
Decals are provided for three Israeli operated machines, two in camouflage and one bare metal aircraft. I chose option number one, an aircraft operated by the 109th “Valley Squadron”.
The decals went on very well over a coat of Future and the paints used were Pollyscale RLM 79 and Sea Blue for the uppers, and a mix used for the undersurfaces. While I’m happy with the upper surface colors the lowers should be a bit more beige than what I came up with. As mentioned, this is new territory for me.
There are definitely some minor accuracy issues and the nose looks slightly undernourished compared to drawings I found but overall the shape and look of the Azur Mystere IV is quite good in my opinion. This is not a weekend build for most modelers but with some effort it can be built into a very pleasing model. Hopefully some additional details will be offered for the interior by the aftermarket crowd which would really enhance the end result.
I was pleased to have the chance to build the kit and would recommend it to anyone wanting a Mystere IV in their collection.
Available online from West Coast Hobbys
Model and Text Copyright ©
2013 by Joe Youngerman
Page Created 20 March, 2013
Last Updated
21 March, 2013
Back to
HyperScale Main Page

|
 Home
| What's New |
Features |
Gallery |
Reviews |
Reference |
Forum |
Search
Home
| What's New |
Features |
Gallery |
Reviews |
Reference |
Forum |
Search