ProModeler (Hasegawa) 1/48 scale
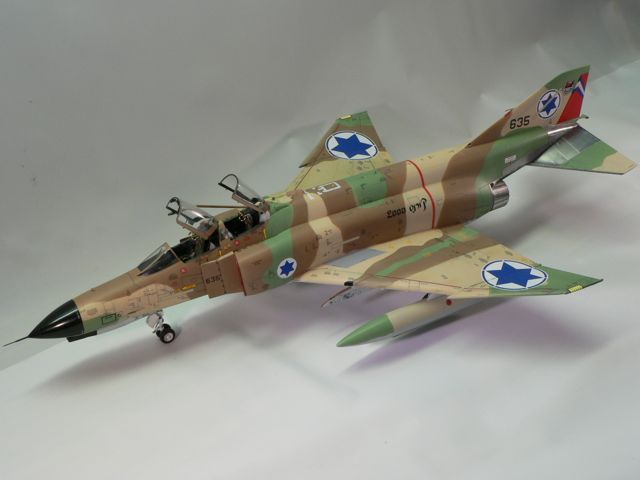
F-4E Kurnass
by Bill Dedig
|

|
F-4E Kurnass |

Trumpeter's 1/32 scale Harrier GR.7 is available online from Squadron.com
 I am in the middle of a theme project of Israeli flown,American designed aircraft. I am in the middle of a theme project of Israeli flown,American designed aircraft.
I have completed a P-51,F-15,A-4 and now the F-4 Phantom.
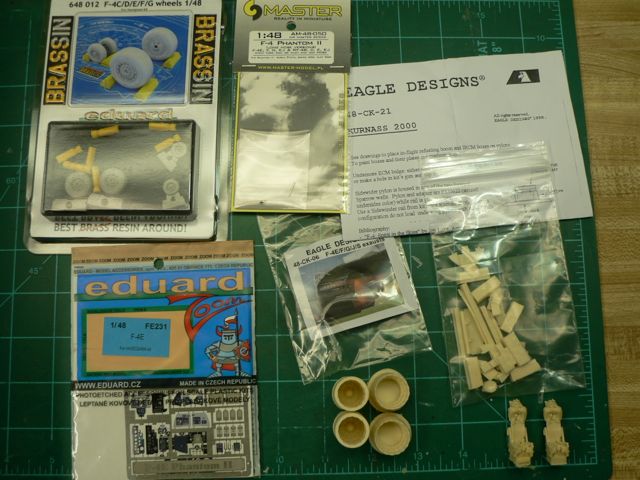
This is the Monogram Pro-modeler kit, with a bunch of add-ons I have obtained with this project in mind. The add-ons include Eduard Brassin tires and wheels,Master pitot and sensors,Isradecals and most important, the Eagle Designs Kurnass 2000 upgrade kit. I also used Black Box resin for the interior and the seats.

I used Testors acrylic paint for all the colors and I used Testors Dullcote lacquer for the final finish. I used my Grex airbrush for this model just to try and get a feel for the airbrush. I used Tamiya thinner on all the Testors acrylic colors.This is my thinner of choice for all acrylic paints I use.
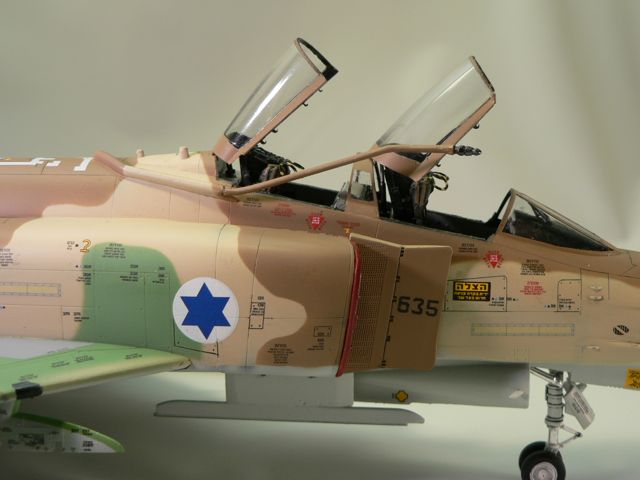
I believe this is the Hasegawa model of the F-4E. The interior was not bad, but I wanted to jazz it up and use some resin seats. I placed a bit of weight in the nose(as much as I could fit) before I attached the nose. There were a few bumps and pieces that were removed from above and below the wing( check resources). The Eagle designs Air Refueling Probe and the lower missile launcher are the most dominant features visible of the Kurnass upgrade. The ARP required a little fitting and filling but nothing major.

I did use the Eagle Designs resin exhaust cans and was pleased with these items. Note: a bit of material needs removed inside the fuselage because the cans could not be inserted totally. I used Alclad on the cans and on the rear exhaust section. I also used Alclad on the elevators. I applied the Alclad and masked prior to adding all the other colors and finishes
I used Mr Surfacer for primer and thinned with Tamiya Lacquer thinner. Thanks Barak(inside reference).This is now my thinner of choice for Mr Surfacer. I pre-shaded panels and hatches with Testors flat black. The four colors used where all the recommended FS colors and I used some small amounts of white to break up the overall sections. I used low tack putty worms for upper color separations.
I used a 4000 grit sanding pad on the colors just to blend and then over-coated with Future. I assumed this was a demonstration aircraft based on the very large and extra Stars of David. I could not find any reference materials for this particular aircraft and the markings. so i limited the weathering. I was disappointed that I received no support from Isradecals when I asked for help. I didn’t get much help from the internet either, so I made a wild guess.
There were over 200 decals provided by Isradecals that I used. I had fantastic layouts from Isradecals for all the stencils but only a 2inch by 2inch side photo for the main markings. The decals performed very well over Future with the use of Solvaset as the setting solution.
MAJOR NOTE: The white was very translucent and I had to cut out white circles for under all the national markings quite surprising for a decal sheet of today.
Finally I used Testor's spray Dullcote, decanted and with a small amount of Tamiya lacquer thinner applied over a final coat of Future floor polish to seal the decals.
This finish is more flat than I normally apply, however the flat finish seems perfect for the desert scheme. The intake covers add quite a bit with a perfect fit. (Thanks agin Barak)
Images and Text Copyright ©
2013 by Bill Dedig
Page Created 16 July, 2013
Last Updated
3 August, 2013
Back to
HyperScale Main Page

|
Home
| What's New |
Features |
Gallery |
Reviews |
Reference |
Forum |
Search