Alley Cat's 1/32 scale
Bristol M1.C
by Leo Stevenson
|
|
Bristol M1.C |

HyperScale is proudly supported by Squadron.com
This is my build of Alley Cat's 1/32 scale Bristol M1.C.
It is surprising that this aircraft hasn’t been better represented by model manufacturers over the years, and I can only assume that this is partially a legacy of the fact that when the original aircraft was first made it was snubbed and side-lined by the government because of a stupid and unjustified prejudice against monoplanes. If this had been taken up as a front-line fighter and built in large numbers, the course of the war might actually have turned out very differently, and we’d all be far more familiar with it. Anyway, that was then, this is now. The clean lines and rather jaunty dihedral angle of its wings make it look an quintessentially British aircraft of the period, like a flying handlebar moustache.
Now this beautiful but rather neglected aircraft is available as a 1/32 scale resin kit from Alley Cat Models; it is sold by A2Zee Models (and others). This is their first in-house World War One resin kit, and it’s an inspired choice considering the stiff competition it faces from the ubiquitous high-quality kits from Wingnut Wings. I hope this is a precedent for other Great War aircraft from them; for example, wouldn’t it be nice to have some early war aircraft such as the Rumpler Taube? Hint hint!
The following isn’t so much a review as a quick snapshot look at my particular build.
This model was a joy to build for a number of reasons. Firstly because this kit is beautifully made, and secondly because it is by far the simplest resin kit I have ever worked on. Although I wouldn’t recommend this to first-time kit makers (who should initiate themselves into our arcane craft with a plastic kit), thanks to its simplicity and quality I would highly recommend it to any modeller who has never made a resin model before and/or also to anyone who is afraid of World War one models because of their sometimes complex rigging or because they have two main wings. This kit has neither of the latter (ok, it has some rigging, but it is really easy).
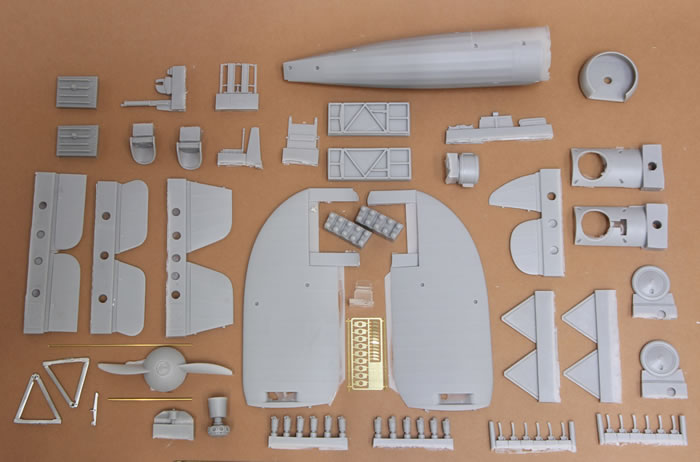
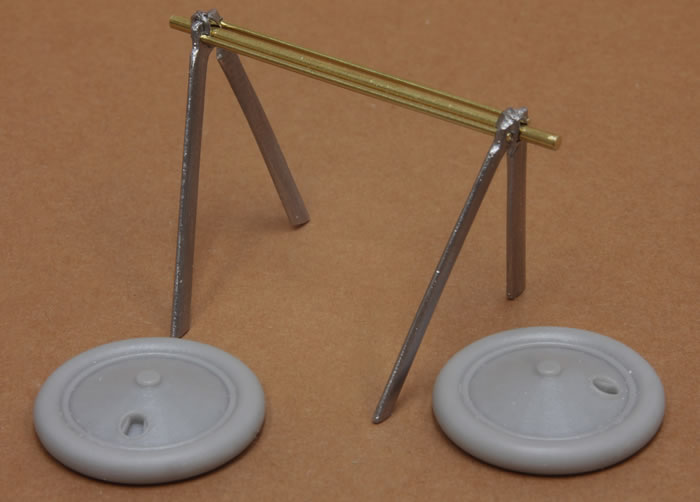
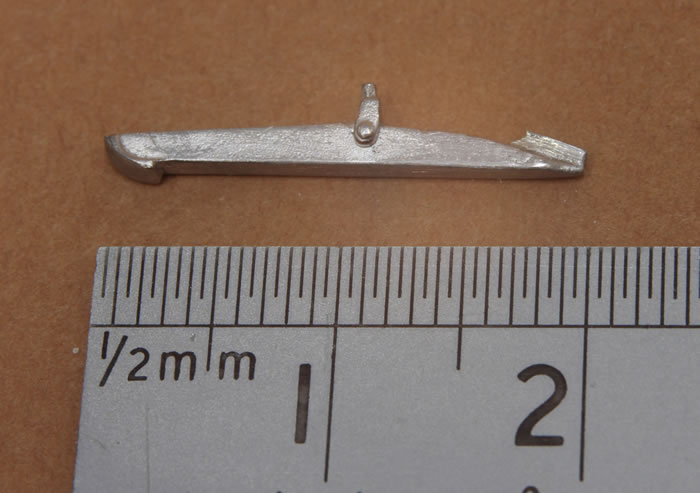
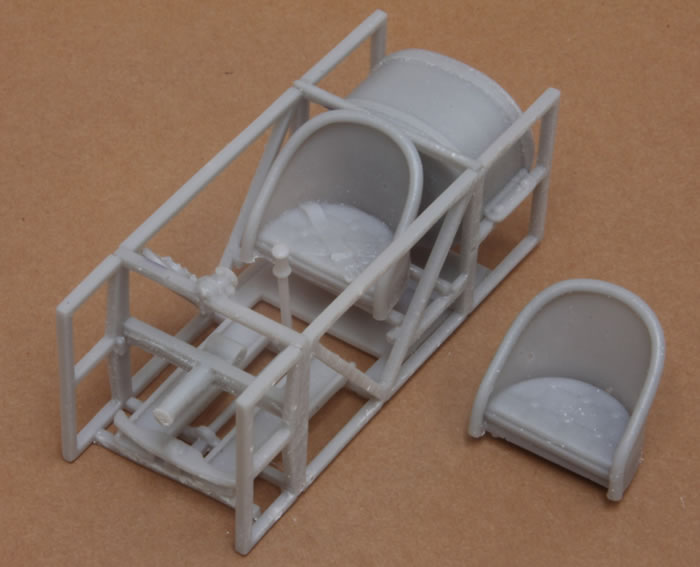
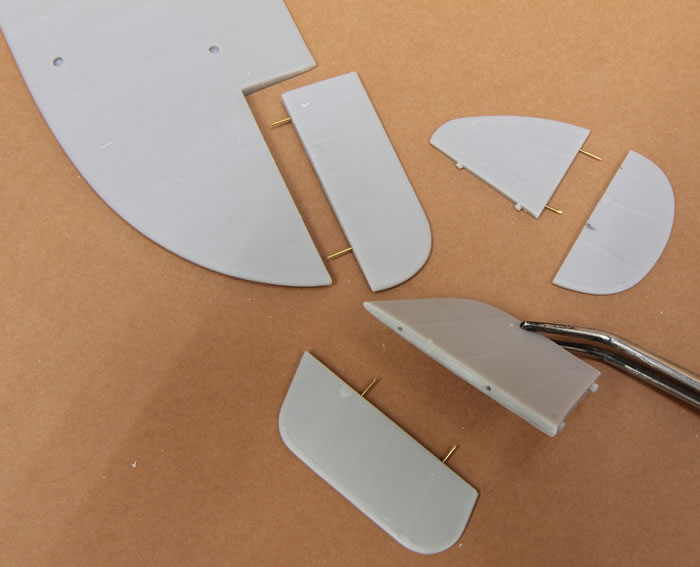
The kit consists mostly of polyurethane resin cast components, with some white metal parts for the undercarriage and tail skid - very useful considering that the finished model weighs, despite its small size, about 135 grams. There are also some brass rods for the axles and a sheet of photo-etched brass parts, plus a very well printed sheet of decals for seven options - three operational aircraft and four training aircraft. There are also two seats that come with the kit, offering a plain seat for you to add your own seatbelts (the kit doesn’t come with any) or a time-saving alternative is to use the other seat on which the seatbelts have been cast on top of the seat cushion. The pre-cast seatbelts are not quite as realistic as after-market or scratch-built seatbelts would look, but this cockpit is very tight and cosy and you’d have to be really nosy and fussy to notice or care about the difference because the seat is very low-set within the narrow and dark space of this tiny cockpit.
In my kit there were some spare parts that doubled up on what was actually needed to build the model, I'm not sure how deliberate this was. If it was deliberate then that’s very thoughtful as I am slightly more prone to accidents with a scalpel than most people - it’s why I had to give up being an eye surgeon (only joking!).
Clever Touches
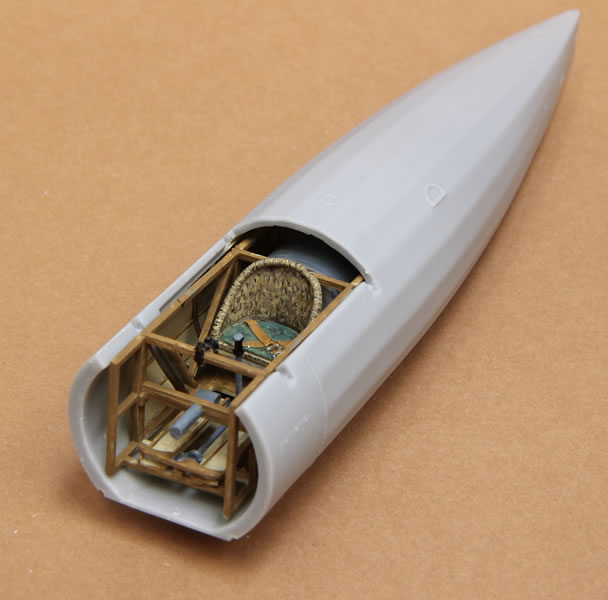
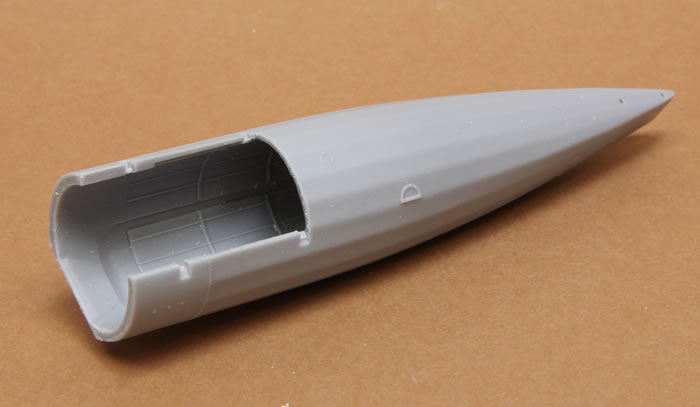
A very neat trick has been done with the fuselage of this model. It has almost all been cast in one piece, so there are no problems such as I’ve had with some other resin kits where the two halves don’t match exactly, or if they do there is precious surface detail that is damaged or destroyed adjacent to the seam line. Casting it in one big piece is as neat as it is clever.
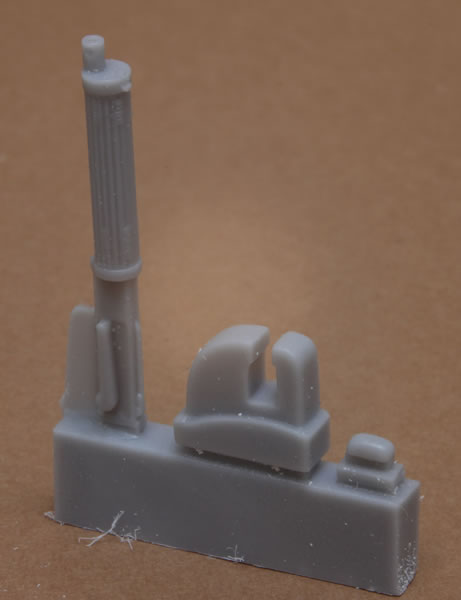
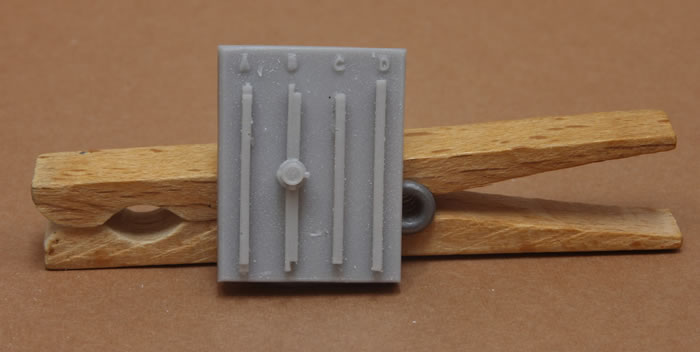
The way that the resin parts have been cast is very nicely done, with the casting blocks and tabs very sensibly and delicately attached to the components making them much easier to remove than with many other resin kits. This is especially true of the block that contains four parts for the fuselage framing, which are also helpfully labelled on their block with the letters ABCD referring to the way they’re described in the kit instructions; why can’t other resin kit manufactures do this?
The quality of the resin components is very good in terms of the casting quality (I only found one bubble hole in the whole kit) to the surface quality, which is subtle and very well judged, for example in the canvas wheel coverings and the fuselage and wing surfaces. The quality of the resin is also very user-friendly, neither being too soft nor too hard, with a firm but buttery quality that lends itself well to most blades, scrapers and abrasives.
The fit of all the components is very good throughout. For example, the way that the entire cockpit framework, seat, joystick and instruments are all made as one complete unit that can then slide magically into the open end of the one-piece fuselage is easy and trouble-free. In fact it’s almost surreally good. All that’s needed to anchor it in place is two small blobs of superglue inside the front edge of the framework that sits behind the engine.

The seat backs have a plain smooth surface, and I thought that this ought to look like wickerwork, so I painted it to look like this, but rather too hastily because I was assuming, wrongly, that the seat was so low down in the cockpit that it wouldn’t be very visible on the finished model. If I’d have realised that it was actually more visible than I had thought I would have taken more trouble over this bit of painting or, if I had more time, actually engraved a wicker texture onto this plain surface. Ah well, lesson learned.
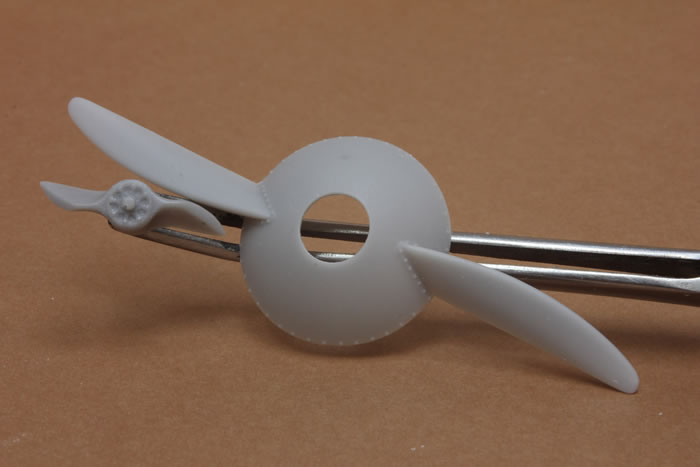
I didn’t like the propeller hub, which was a bit too soft and vague in detail. This is visible behind a large hole in the large spinner, so I just had to improve it. To do this, I utilised a spare British propeller hub from a Wingnut Wings kit (from their RE.8, I think), sanding off the kit’s own hub, slicing the replacement off the spare prop and gluing it on with super-glue. Then I added thin slithers of metal to imitate the spacer-bars than run from the centre of the prop to the inner rim of the hole in the spinner, one of only a few improvements I made that went beyond what the ‘OOB’ kit offered.
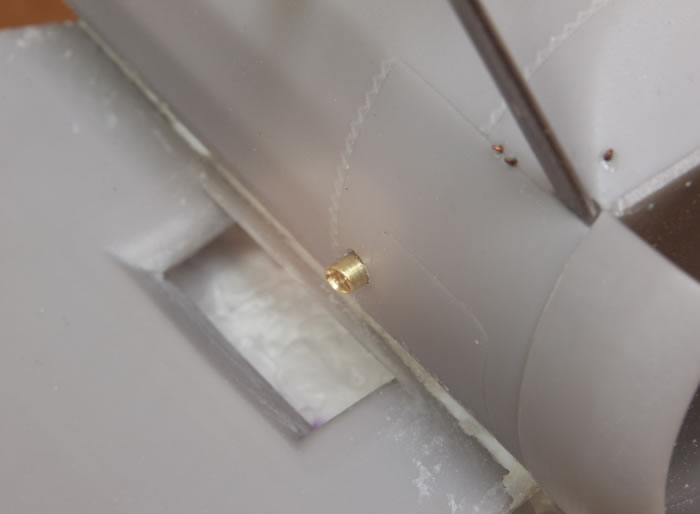
Another thing I added, more in a spirit of whimsy than historical accuracy, was a wind-driven fuel pump attached to the forward starboard undercarriage strut. This isn’t shown in the surviving photographs of this particular aircraft, but it does appear on many other period photos of the Bristol M1.C, so I found such a component in my WW1 British spare parts draw (coming from a Wingnut Wings FE.2b, I think), and adapted it for this machine, scratch-building a bracket and plumbing to support it.
One thing that is missing from the kit are parts for the pipes sticking out from the fuselage sides under the wings (carburettor intakes?); most but not all period photos show these, so I added these, making them from thinned-down brass tube.
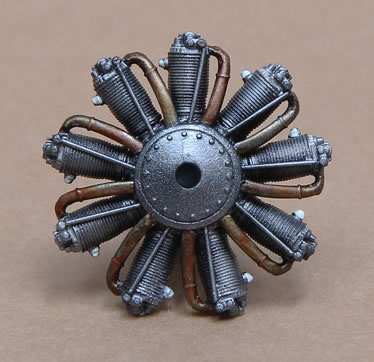
The radial engine is also very easy to construct and, with the addition of some self-supplied push rods (made from fine brass wire), it makes up into a nice little replica in itself. This isn’t seen much behind the enormous propeller spinner, so unless you’re a masochist don’t spend too much time and trouble on this engine, or at least not all 360 degrees of it!
I added little brass rods to connect the rudder and ailerons.
The rigging was accomplished with the aid of ‘EZ Line’ (from Wingnut Wings) and turnbuckles made by Bob’s Buckles.
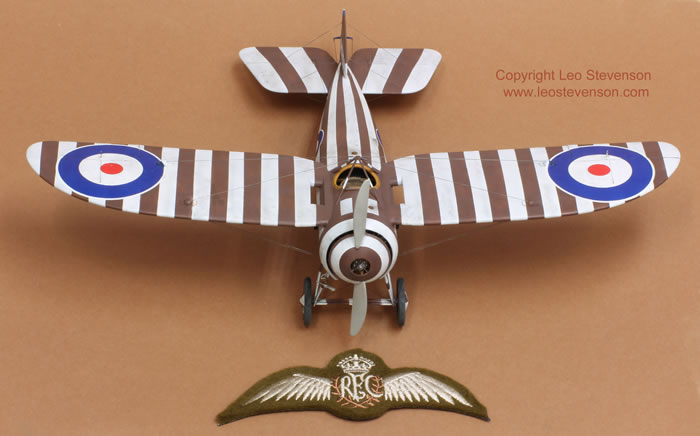
There is little or no information about the version of this aircraft that I chose from among the kit options. It seems that almost all that is known stems from two poor-ish quality black and white photos. It was probably a training aircraft, not least because it has no gun. The kit’s instructions recommends painting it in stripes of ‘PC12’ (‘protective covering twelve’) and white, which is plausible, but now that I’ve done this I have a feeling that it’s just as likely that the lighter coloured stripes were just CDL (clear-doped linen).
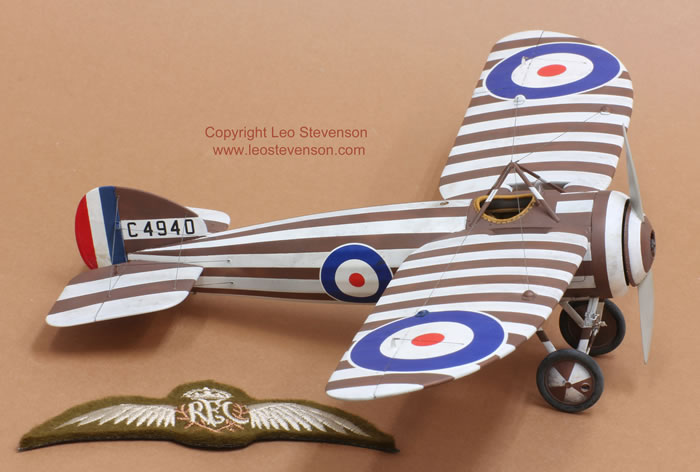
The darker colour could have been almost anything, perhaps dark red (?) like a barber’s pole, but I struck with the kit instructions and used a home-made PC12 is what I used (Tamiya Dark Earth with a dash of red in it, as per the kit instructions, but also with some white to lighten it a bit). All I do know about the lighter coloured stripes is that if they were white then the following has to be considered - the only dense white available during the First World War was based on using lead carbonate as the pigment. I know from my ‘day job’ as an artist mainly painting in oils that, cumulatively, when used over a large area, this means that the weight of lead-white paint on the aircraft might have been considerable compared to if they had used other light colours or CDL. Having said that, perhaps it was white after all because this would have been compensated for by not having a gun on board. In short, the choice is yours!
The decals are very thin and strong, crisply printed and in good register, but they’re not quite dense enough to cover a very contrasting paint scheme (I almost said camouflage!) as this, and so this shone through the white areas of the roundel a bit too much for my comfort, so I had to carefully mask off the applied decal when dry and lightly boost the white of the roundels with a spray of white paint. Job done.
Any complaints? Yes, but only minor ones; in addition to the slightly soft-detail surface on the prop hub, the photo-etched control horns are too thin in scale. Also, it would have been nice to have known more historical information about the other options that the kit offered, if they are known, but apart from these quibbles this is a very fine kit indeed.
I’d very highly recommend this kit, especially to any modeller who hasn’t made a resin kit yet or who wants to venture into making a First World War aircraft for the first time. This kit is also currently extremely good value considering that so many of the parts are cast by hand, a factor that usually makes resin kits very expensive compared to injection-moulded plastic ones.
www.leostevenson.com
www.leojubilee.co.uk
Model and Text Copyright ©
2013 by Leo Stevenson
Page Created 12 March, 2013
Last Updated
12 March, 2013
Back to
HyperScale Main Page

|
 Home
| What's New |
Features |
Gallery |
Reviews |
Reference |
Forum |
Search
Home
| What's New |
Features |
Gallery |
Reviews |
Reference |
Forum |
Search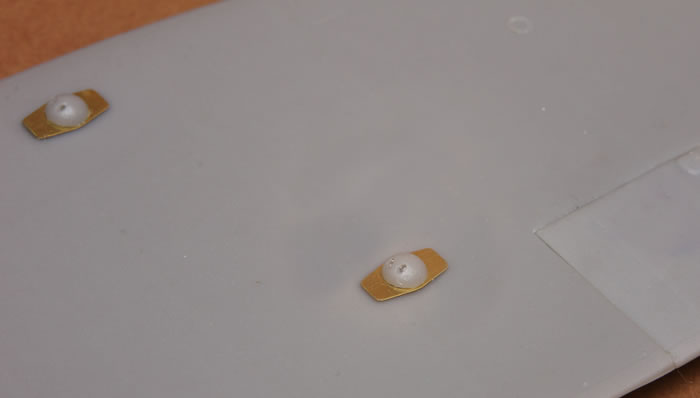
_IMG_4709_fs.jpg)
_IMG_4726_fs.jpg)