Wingnut Wings' 1/32 scale
SE5A
by Joel Rawson
|

|
SE5A
56 Squadron RFC
|

HyperScale is proudly supported by Squadron
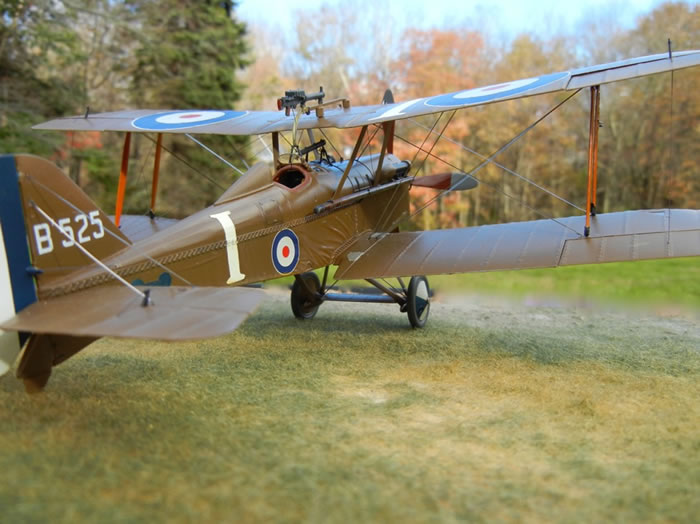
This 1/32 scale Wingnut Wings SE5A is finished in the markings of Lt. Arthur Rhys Davids on Sept. 23, 1917 when he shot down Werner Voss in one of World War I's greatest dog fights. Voss, flying an early production Fokker F.1 triplane, attacked an SE5 of 60 Squadron. Seeing their countryman in trouble B and C Flights of 56 Squadron attacked Voss who took six of them on. Voss shot up every SE5 fighting against him until Rhys Davids killed him.
On the model, the white identification letters, wheel covers and blue dumbbells were hand painted. The aircraft serial number on the vertical fin and black ID letter under the wing are from the Pheon decal sheet. The other markings are included on the sheet as well, but I was already into the build before I ordered the decals, mostly to get the tail number.
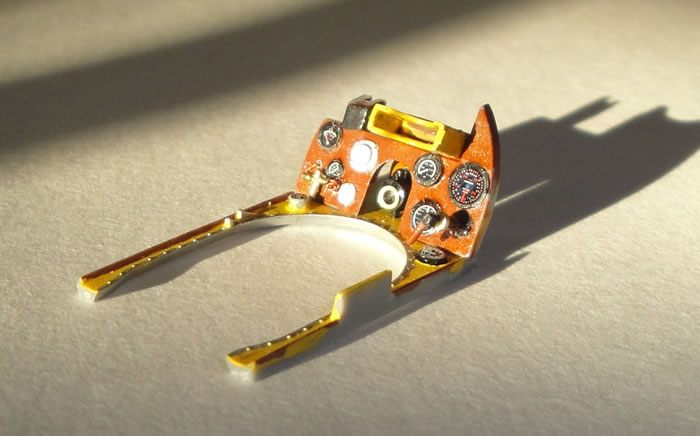
The model was built pretty much out of the box. The kit goes together very well, with great detail and very tight fit, so tight that fine wire used to replicate the fuselage bracing prevented the two halves from mating until parts were trimmed. One problem for me, was the fit of the engine and the cowling. The engine was built up. painted and detailed with copper ignition wires and glued onto the kit's engine bearer's.

I had hoped to be able to display the model with a removeable cowling. No way. The engine sits too high. After much fiddling, I decided to just glue the cowling on. It still didn't sit right and if you look closely you'll see the shims at the front. What you won't see is the engine, known but to me and the modeling gods.
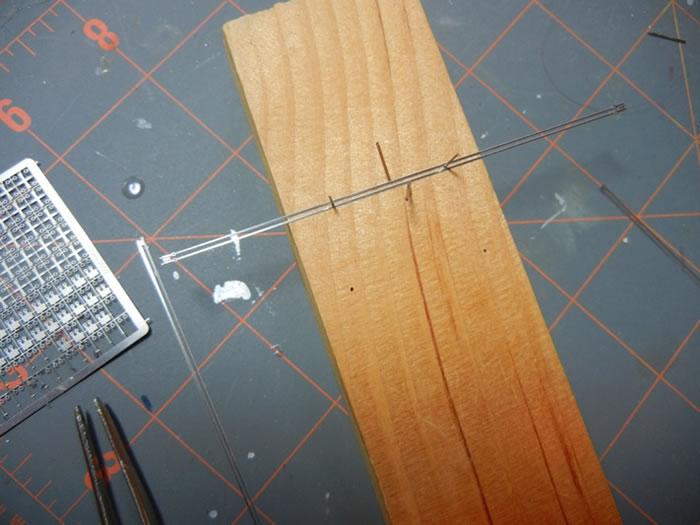
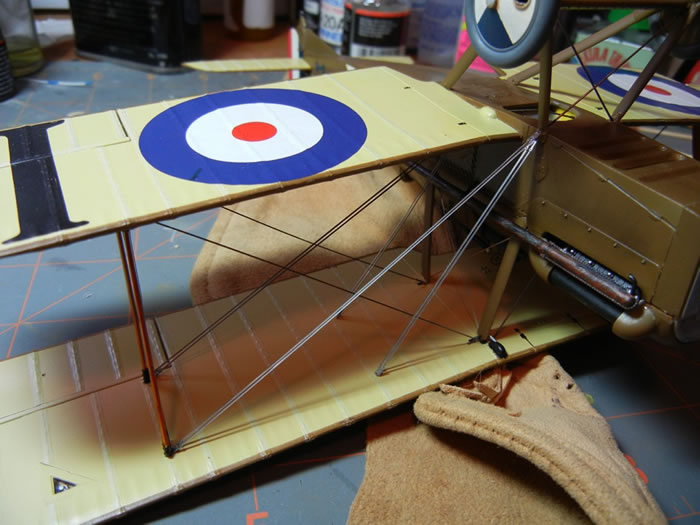
The model was rigged using RB Productions flat steel wire and end terminals. I used narrow wire for the cross wires between the wing struts and also the cabanes and tail wires. Wider wire was used for flying and landing wires. At first I tried to rig the double wires one at a time, but I kept knocking things lose and there would be a SPROING and the wire would fly across the desk. I made a simple jig out of round wire and straight pins. Calipers were used to get a rough measurement, a piece of flat wire would be cut just a bit too long, and then I'd trim it back with end-cutters one tiny clip at a time until the wire test-fit. Then I'd cut a second wire to the same length, put them in the jig and use photo-etch terminals to super-glue them together.

In theory a set of wires for the port side should fit on the starboard. They probably would on a perfectly built model, but mine is not perfect and each set had to be fit individually. I would attach one end of the double wires to the model, let the glue set up a bit, flip the model over and glue the other end. Then I'd get up and walk away, both to recover my patience and to let the glue harden. Still rigging took five days of staring through an Optivisor and inhaling glue fumes, which can't be good for you.

The control surfaces were rigged using EZ line. My wife and I visited New Zealand last spring and we attended the Omaka warbirds show. Great event. I spent too much time hanging around the Wingnuts booth admiring their beautifully built display models.
"So how did you rig them?" I asked. EZ Line the man said. Just touch the end with super glue., pull, touch the other end and ZAP, there you are. So I ordered some EZ Line and that stuff really works. Easy to use and unbreakable. However, it adds no structural strength to the model. I like to use steel wire to brace the landing gear and the center section.
The simple jig for double flying wires was made from piano wire and straight pins.
Gluing in the flying wires. They were set in place and then a hit with just a touch of super glue on a toothpick.
The landing gear and center section are braced with heavier round piano wire to strengthen the model.
Model, Images and Text Copyright ©
2011 by Joel Rawson
Page Created 25 November, 2011
Last Updated
25 November, 2011
Back to
HyperScale Main Page

|
Home
| What's New | Features | Gallery | Reviews | Reference | Resource Guides | Forum |