MPM's 1/72 scale
Vickers Wellington Mk.II
by Alan Sannazzaro
 |
Vickers Wellington Mk.II |

MPM's 1/72 scale Wellington Mk.II is available online from Squadron
Of all the Wellingtons on the market I decided to go for the MPM kit, partly because I have a thing for Czech kits, and was quite pleased with the care taken in the detail of the kit parts.
I guess the fact it’s the only Mk.II on the market may have had something to do with it also.

My Wellington looks like a Wellington, however when placed next to a Trumpeter Wellington it is clearly different in size and shape. I’m not sure which kit is correct, and don’t particularly care, as I have a model I’m quite happy with.
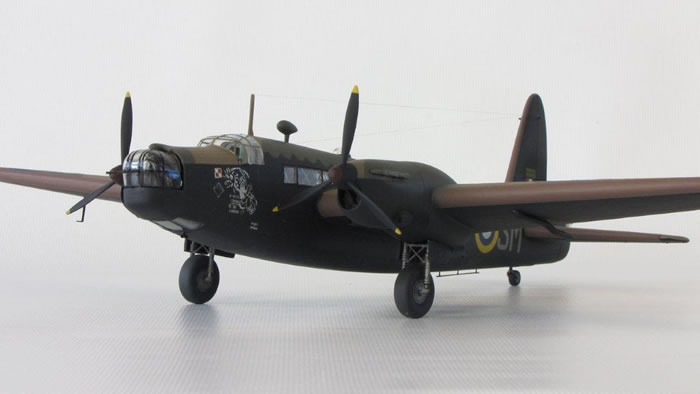
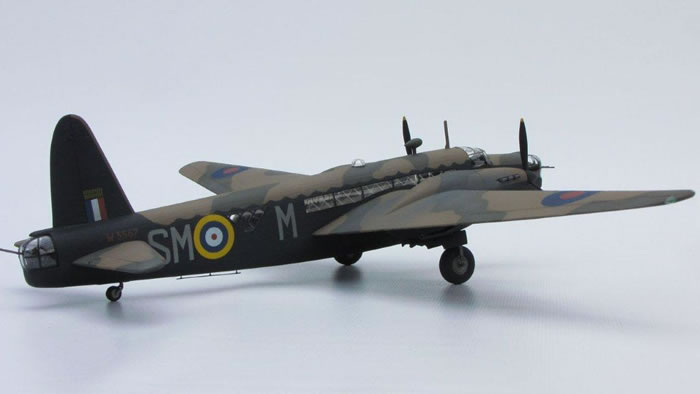
The kit parts are very well moulded with plenty of detail, although I added a set of photo etch seatbelts to the seat, and throttles to the throttle quadrant in the cockpit. The geodetic frame work is represented on the fuselage interior sidewalls, so I’ve picked out the detail using a sharp pencil. I masked the side windows from the inside, painting them silver to represent the geodetic framing, which took hours to mask to get the angles right. The black framing has been painted on the outside of these windows, like the real aircraft. The clear part under the nose has had framing added to the inside, which is quite prominent in photographs.
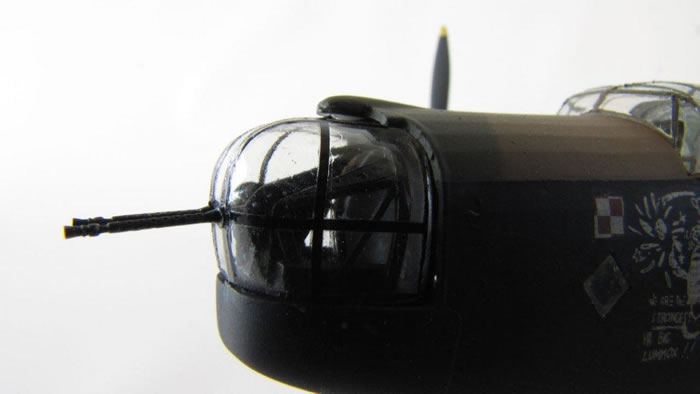
The gun turrets use the basic kit parts, which have then been detailed, drilling holes, adding internal framing for the MB5 turret, along with the operator sight and controls. I used the gun butt of the kit’s gun mechanism as they are well shaped with good detail. Quickboost gun barrels have been added to the external part of the turret as the kit parts were a bit basic. The clear parts of the turrets and cockpit are plunge moulded from the original kit parts which were bit thick. (Just a note, the Valcon canopy set does not fit, as it’s designed for the Matchbox kit: it is far too wide).

The fuselage and wings went together without a hitch, although I did have to add a strip of thin card to the wing, to ensure a perfect fit to the starboard wing root. I also thinned down the wing tip as I thought it looked a little thick. The horizontal stabiliser position tabs were not present on the stabilisers, despite the holes being available in the fuselage sides. After much looking at photos I decided on what I think the correct angle of incidence was and quickly superglued them in place.
The main gear struts are a rather tight fit, but I managed to get them in place without too much hassle. The fit from the wheel to the strut is pretty loose, but once again a bit of super glue to hold them in place did the trick. I found the gear doors needed a bit of a reshape both to get them to fit, but also to have the correct look. I’m not terribly happy with the result, but I can live with it.
I’ve scratch built the navigation lights on the wingtips, drilling out the lights and adding colour to the tip of the drill to get the desired effect.
The kit has been painted with Xtracolour colours on top, and Tamiya underneath. The anti-icing leading edge colour is a mix of colours, as is the red on the prop spinners. The exhaust staining I’m not happy with, as I think I’ve chosen a colour too light, despite the aircraft being leaned which would create a light colour smoke.
I’m still trying to decide if I’ve become a bit nerdy by drilling out the venturi tube.
I am happy I drilled out the fuel dump tubes, but I forgot to drill out the exhaust ports, which I usually do. The trim actuator, rudder counter weights, and pitot tube were scratch built.
The rugby ball antenna is a reshaped B-17 one as the kit part looks terribly wrong.
Overall I am quite happy with the result. I’m now half way through my MPM Mk.IC Wellington, so the MPM kit can’t be that bad.
Model, Images and Text Copyright ©
2011 by by Alan Sannazzaro
Page Created 8 June, 2011
Last Updated
8 June, 2011
Back to
HyperScale Main Page

|
Home
| What's New | Features | Gallery | Reviews | Reference | Resource Guides | Forum |