|
Academy and Hasegawa 1/72 scale
Swiss F/A-18 Hornets
by Thomas Muggli
|
|
Swiss F/A-18 Hornet |

Academy's 1/72 scale F/A-18A Hornet is available online from Squadron.com
 When the pilots of the Swiss Air Force patrol the skies over the Alps in their F/A-18 Hornets, they are confident that they are flying one of the most powerful and advanced fighter jets in Europe. Thirty-three Hornets have been in service in Switzerland since 1998 when they replaced the ageing Mirage IIIs. Since that time, the Swiss Hornets have been continuously upgraded with the most advanced avionics and armament. When the pilots of the Swiss Air Force patrol the skies over the Alps in their F/A-18 Hornets, they are confident that they are flying one of the most powerful and advanced fighter jets in Europe. Thirty-three Hornets have been in service in Switzerland since 1998 when they replaced the ageing Mirage IIIs. Since that time, the Swiss Hornets have been continuously upgraded with the most advanced avionics and armament.
The purchase of the Hornets was not without controversy. Several political groups in Switzerland opposed acquiring the planes, questioning the necessity of modern jet fighters after the end of the Cold War. In what may be a unique occurrence in history, the deal was finally approved by a popular vote after a referendum. This was unique because normally the public does not get to vote on the purchase of military hardware.
A few years ago, I had built a pair of Swiss Hornets. Recently, I was motivated to revisit the subject after purchasing the fantastic Swiss Hornet decals from MC-One. Since there are three Swiss Air Force Hornet squadrons, I decided to build three 1/72 scale Hornets, one per squadron, and each sporting the special livery of its lead aircraft. So I opted to use the Hasegawa kit that was already in my stash to build one model, and bought two Academy kits for the other two. The Hasegawa Hornet is a decent kit, but Academy’s Hornet kit is clearly superior with a more accurate shape and better details.
To do the decals justice, I also opted to use Eduard photo-etched sets to detail my models further. When I saw pictures of a Hornet model, with folded wings, made by Wolfpack, I decided to build one of my Hornets with this modification, and another model with Wolfpack’s replacement wings with dropped flaps.
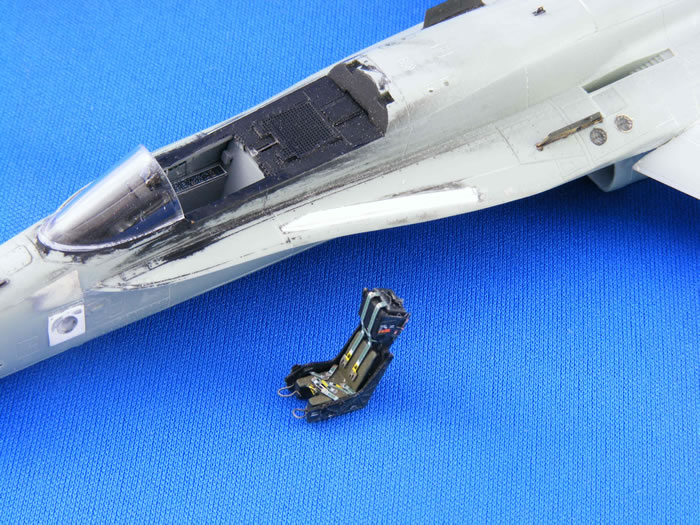
The construction was started with the cockpit and ejection seats; these are small gems, once built, using the Eduard pre-painted photo-etched parts. The fuselage components were assembled according to the kit’s instructions, and photo-etched details were added, as per Eduard’s separate instruction sheet. I also made a few additional modifications. There is a decal for the searchlight available on the MC-One sheet, but I felt that it would not look realistic. So, I scratch-built searchlights from both regular and clear sheet styrene, using chrome bare-metal foil for the reflectors. I cut holes in the left forward fuselage halves to accommodate the new lights. Because US Naval Hornets are not equipped with searchlights they are not provided in the kits.
The intakes, which came with the Hasegawa kit, were too shallow for my taste, so I cast resin copies of the Academy intakes, which are a bit deeper. After some coaxing, I was able to fit the replacements to the Hasegawa fuselage. The shape and size of the dispensers found on Swiss Hornets are different from the ones found in the kits. New fairings for the chaff/flare dispensers were fashioned from sheet styrene and glued to the underside of the intakes. Finally, even though I did not plan on it originally, I scratch- built a refueling probe for one of my models. I used a piece of brass rod for the body, added a tip made from a piece of landing gear leg, as well as ribs and a cover made from sheet styrene for the probe. The fuselage bay that houses the probe was also built from sheet styrene parts.
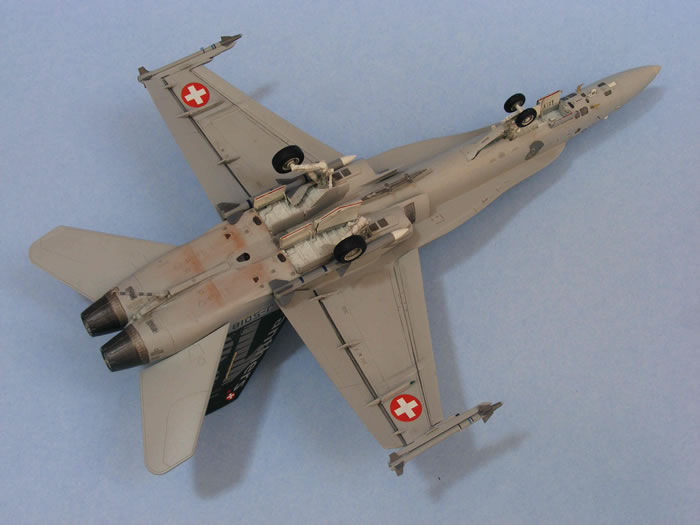
Once the fuselage was completed, it was time to install the wings. I used the kit-supplied wings for the Hasegawa Hornet. The Wolfpack resin wings, which sport excellent surface details, were installed in the Academy kits for which they are designed. I was concerned about how the wings would fit to the fuselage, and how I would glue the dropped flaps to the small attachment points. My worries turned out to be unfounded.
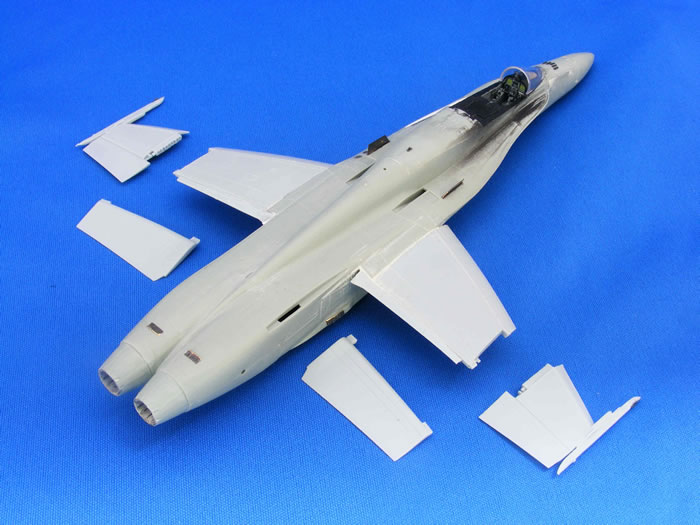
The fit was problem free, and installing the flaps was a breeze. Next, the vertical and horizontal stabilizers were glued in place. The kit landing gears were detailed with Eduard photo-etched parts, painted, and put aside until final assembly.
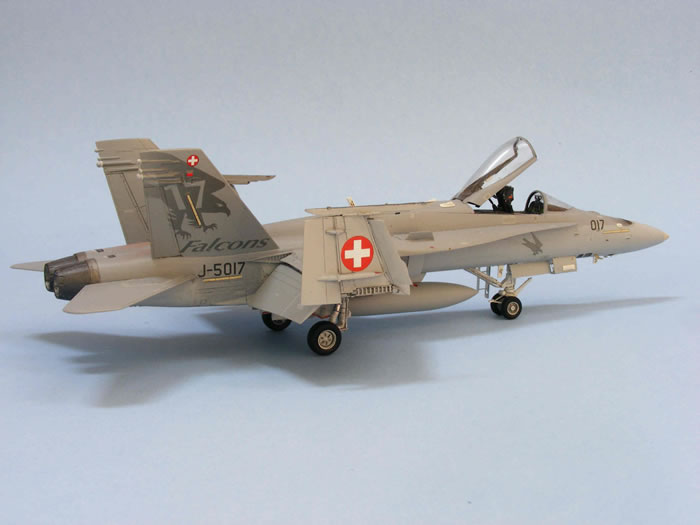
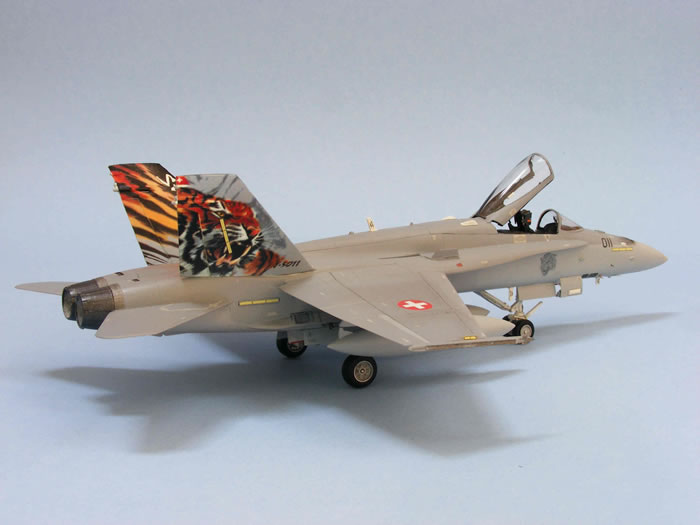
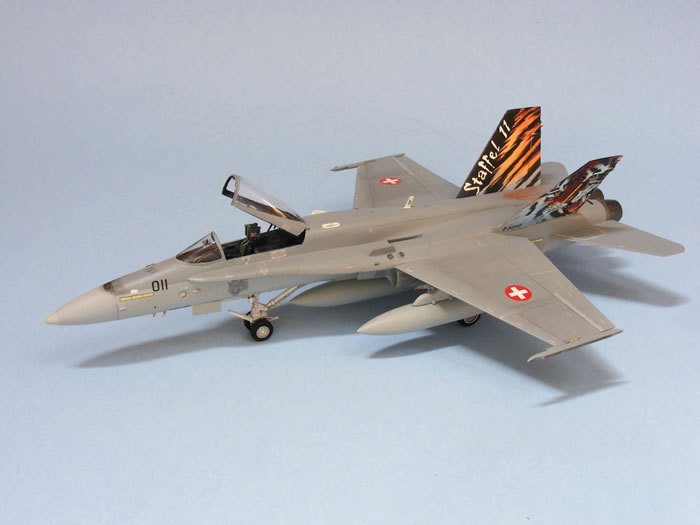
I used Polly Scale acrylic light ghost gray and dark ghost gray to finish my models. Both shades seemed a little dark to me, so I lightened them with some white paint. Decaling was the highlight of this project. The MC-One decals are printed razor sharp and are very easy to work with. Each decal sheet allows options for several different aircraft and has enough stencils for one.

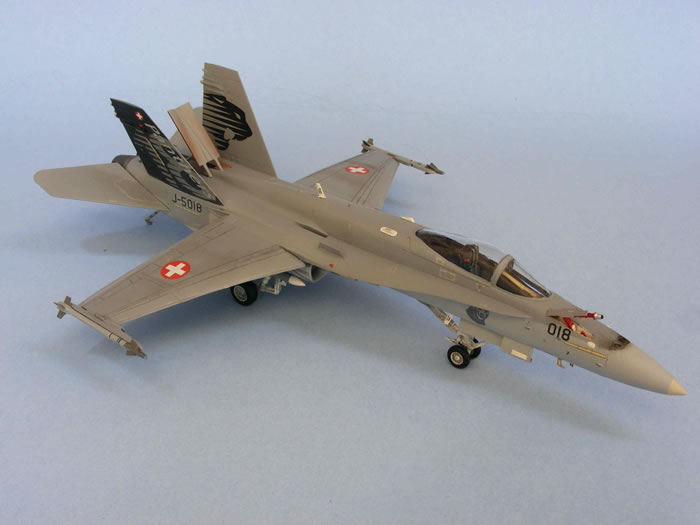
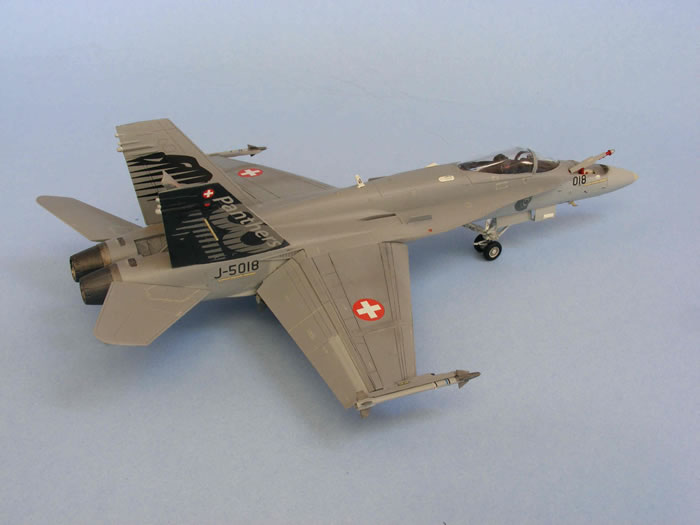
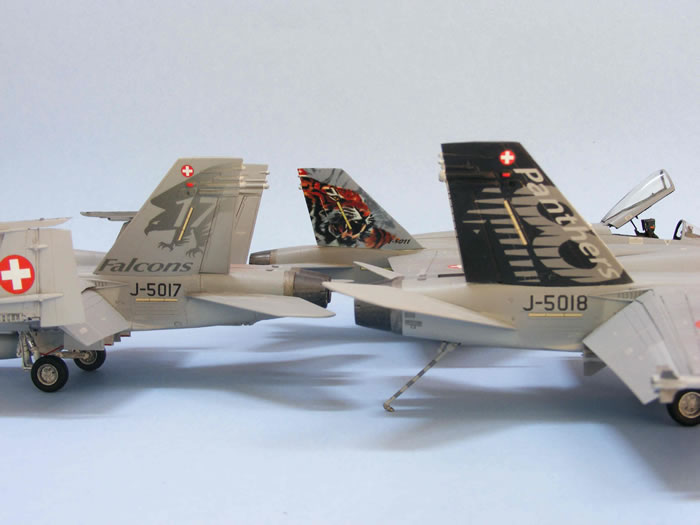
I chose the liveries of the lead aircraft of No. 17 Squadron (Falcons), No. 18 Squadron (Panthers), and supplemented decals from a Zotz decal sheet from Mexico for the No. 11 Squadron (Tigers) bird. After I added landing gears, canopies, weapons, and antennas, my Swiss Hornets were ready to buzz.
This project was a lot more involved than I had anticipated. Since I was working with three decent kits, excellent photo-etched parts, great replacement wings, and wonderful decals, I thought the build would be straight forward. But the literally hundreds of photo-etched details and decals stretched my patience, as well as the time needed to complete the models.
If I were to start over, I would likely skip some of the photo-etched parts, like the replacement gear doors which turned out to be quite troublesome.
Nevertheless, my efforts proved to be worth the while and I’m happy with my Hornets.
Model, Images and Text Copyright ©
2009 by Thomas Muggli
Page Created 31 October, 2011
Last Updated
31 October, 2011
Back to
HyperScale Main Page

|
 Home
| What's New |
Features |
Gallery |
Reviews |
Reference |
Forum |
Search
Home
| What's New |
Features |
Gallery |
Reviews |
Reference |
Forum |
Search