|
Tamiya 1/48 scale
US Navy Skyray Part One
by Mike Robertson
|

|
F6A (F4D) Skyray
VU3 |

Tamiya's 1/48 scale F4D Skyray is available online from Squadron
This is the first of three planned 1/48 scale Tamiya Skyray builds.
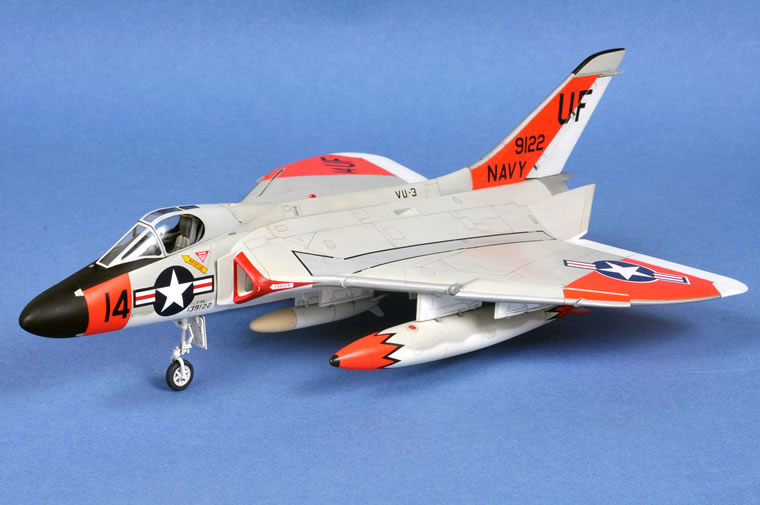
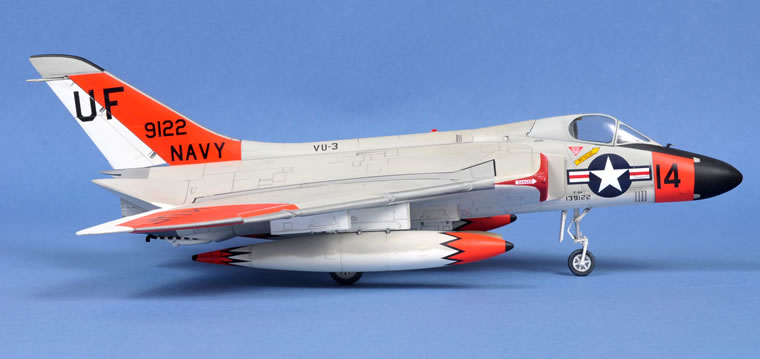
This is an F6A (F4D) finished in the markings of Utility Squadron VU3 based at NAS North Island in the early to mid 60,s and is inspired by photos in Steve Ginters Naval Fighter Series No 13 F4D Skyray book. Additional photos, and inspiration, can be found in the recently published Killer Rays by Mark Frankel.
The Scheme
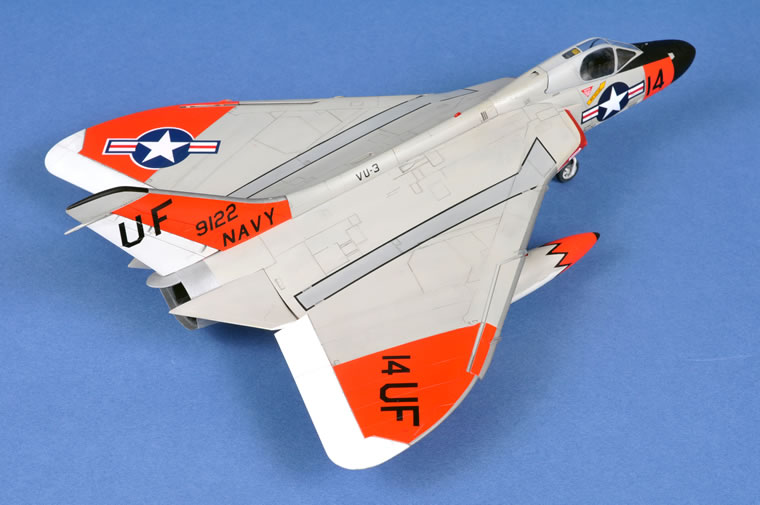
This Skyray is finished in an attractive scheme of Light Gull Grey/White and Fluorescent Red Orange which includes the drop tanks, a huge selling point for me. An interesting photo in Ginter (page 101) and Frankel (page 147) shows a formation of VU3 jets and each features a variety of marking and painting variations. I chose F6A BuNo 139122 “14” as it features a White rudder, Grey fin cap with Black Trim and no Squadron badge (way beyond my hand painting skills) on the fairing aft of the canopy as seen in the photograph in Ginter (page 102). Also, the Unit designation VU3 is moved forward on the spine.

This aircraft should feature a Martin Baker ejection seat. I’m still working on sourcing a suitable seat so in the interim, the kit supplied Douglas seat is fitted temporarily. Additionally, these jets feature anti collision beacons on the spine and under fuselage, these were added with shaped sprue.
Quite straightforward overall though, a few issues are noteworthy. Placing the wings in the extended position required more work than anticipated. Matching the cockpit/forward fuselage to the aft fuselage required patience and care to achieve optimal fit.

Finally, the positioning of the pitch dampers due to the way it is trapped between the upper/lower aft fuselage halves creates difficult to get to seams to deal with, particularly if you elect to make in moveable. I chose to fix it in the often seen upward position.
The kit was first given an undercoat of Humbrol Flat White before an application of Xtracolour Gloss White. Next, she was masked and the appropriate areas for the Fluorescent Red Orange were undercoated in Humbrol Flat Orange followed by Testors Gloss Fluorescent Red Orange. With further masking, the Xtracolour Gloss Light Gull Grey was applied. Finally, the Intake warning Red trim and Black details were masked and sprayed. The wing walk areas were initially intended to be the decals supplied by Cutting Edge however, the first one when applied separated into many pieces on application so, more masking with the Grey applied followed by further masking for the black outline. A final coat of Xtracolour Semi Gloss varnish applied after decal application.
The colourful drop tanks were masked and sprayed in the same manner. I used triangular shaped pieces of Tamiya masking tape and with trial and error eventually achieved a respectable resemblance of the tanks as they appear in photographs.

The Nav Pack on the centreline station was sprayed White with a Radome Tan nose cap. It is possible that the nose cap may have been Light Gull Grey or possibly Fluorescent Red Orange as noted in some captions of photographs featuring this Units jets.
Decals were sourced from a variety of Skyray and generic number/letter sheets and applied with the assistance of Micro Set/Sol. On this note, I was fortunate to have a limited number of white boarded national insignia. If a decal manufacturer was to produce a sheet with a selection of sizes of white boarded national insignia I’d be very happy as there a number of future US Navy projects of aircraft from the 50’s and 60’s that feature these national insignia that I intend to do.
Oops Factor
When spraying the airframe, at the same time spray the canopy. I didn’t and the result is a colour mismatch. Lesson learned.
A great build despite some construction issues - two to go
Model and Text Copyright ©
2011 by Mike Robertson
Images Copyright ©
2011 by Brett Green
Page Created 21 March, 2011
Last Updated
21 March, 2011
Back to
HyperScale Main Page

|
Home
| What's New |
Features |
Gallery |
Reviews |
Reference |
Forum |
Search