Encore's 1/48 scale
F-102A Alaska Scheme
by Bill Dedig
|
|
F-102A Delta Dagger
Alaska Schem |

Encore's 1/48 scale F-102A Delta Dagger is available online from Squadron.com
Model Choice
I obtained the F-102 kit for a Christmas present from my wife, what a wonderful person. I was going to do this in black tailed PA ANG markings from Pittsburgh.However I was reading a build article in January 2011 edition of “Scale Aviation Modeller International”, and low and behold there is a photo of a F-102 in front of the hangar at Galena Alaska.
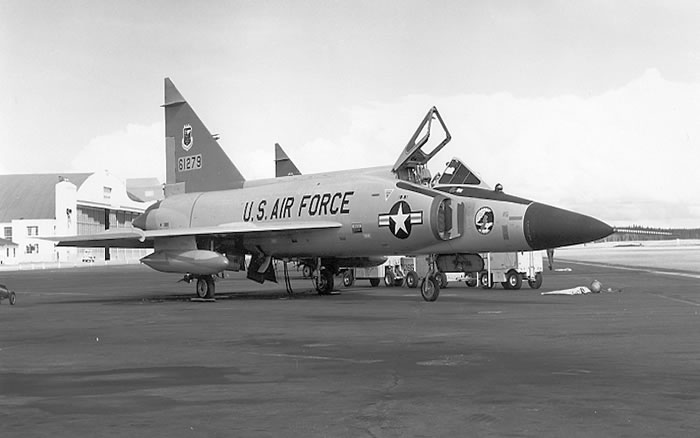
I had been stationed at Galena Airbase, Alaska in 1979, one year remote tour. When I saw this photo my mission was clear. I ask Hyperscaler’s for any decals relating to the F-102 in Alaska. A gentleman from Alaska, Corbin Haldane, replied and provided the Promodeller sheet with Alaskan F-102 markings. I was still lacking a marking on the nose of the aircraft.
I lucked out on a visit to the Hamilton Canada model show when I found a decal sheet from “Fox- One“ decals. This sheet had the nose marking that would match the photo and the aircraft.
I start all my aircraft by preparing the clear parts by separating them from their sprue’s and Futuring them. This gives them plenty of time to dry and cure.
This aircraft has you accomplish a few exhaust construction steps and then attaching the sides. Just a note on the photo-etched and resin parts added into the exhaust component...you cant see any of it. Too bad because I did a great job making sure these were perfect!
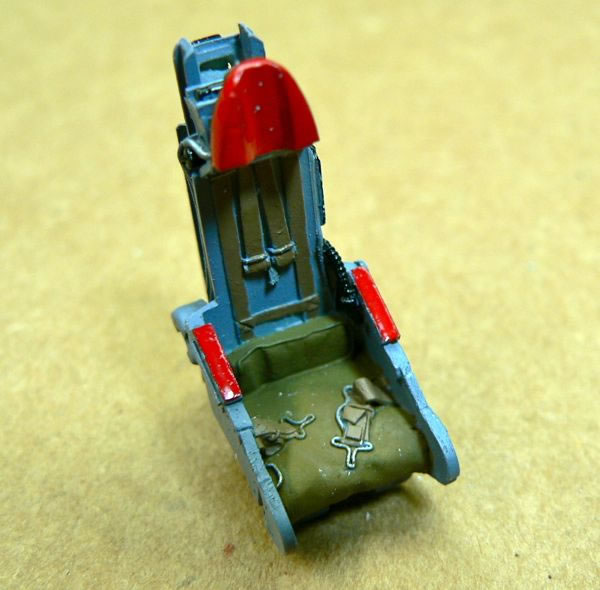
I did a lot of dry-fitting the resin cockpit and it was a bit challenging.
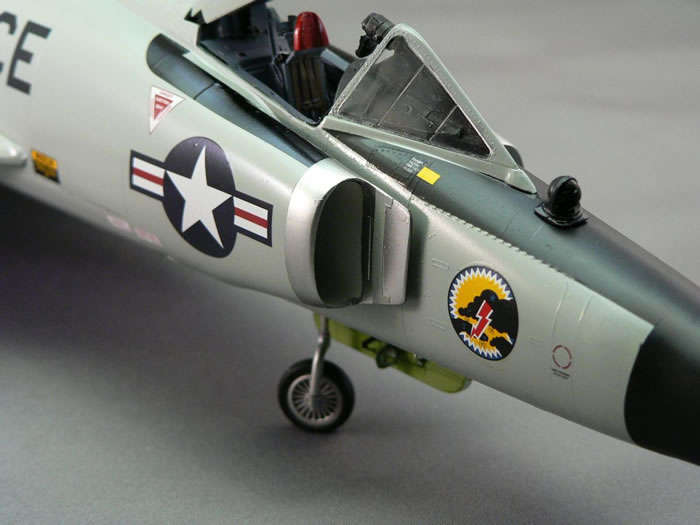
The cockpit detail is fantastic and I enjoyed this part of the project.
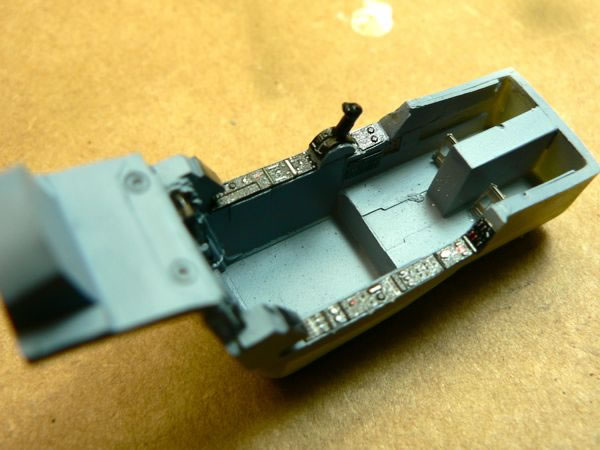
The instructions tell you to attach the instruments and the cover before inserting the cockpit, I did not, and I’m glad for it. There is quite a bit of fiddling to get the cockpit assembly into the fuselage. The instrument and top section were not even close to fitting.
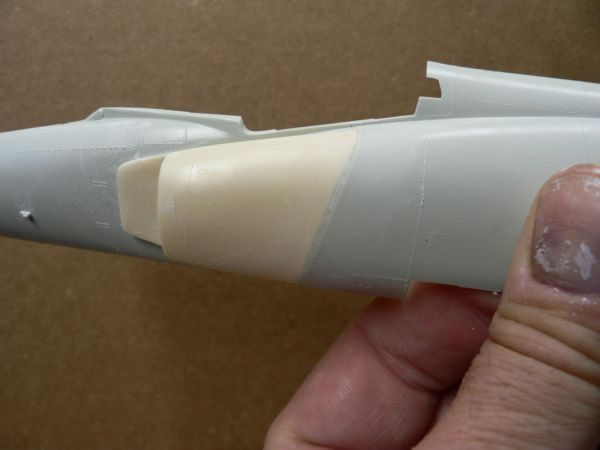
After the fuselage was together. It was time for the resin components.
-
The resin nose was a poor fit and shape is just ...weird. Lots of effort required here.
-
I removed the kit rudder and used the resin part just to show some offset control surfaces. The resin part was a little short (hard to see after painting)
-
The resin intakes both need a lot of filling and shaping.
The wings were attached and filled with 2 part epoxy and very little sanding was required to save the raised panel lines.
NOTE: I have never completely rescribed a model. This is a principle thing of mine not a skill thing. So the whole model still retains the raised panel lines. These do not change the apperance of the completed project in my opinion.
I was going to remove the wing control surfaces, but almost all references showed these as level when on the ground. I cut them, but left them neutral. The wings were a bit “strange” where the case XX VS case X changes were accomplished. I cheated here as I wanted case X so I just changed the control surface outline and left the tip-dip alone. Lazy mans mod.
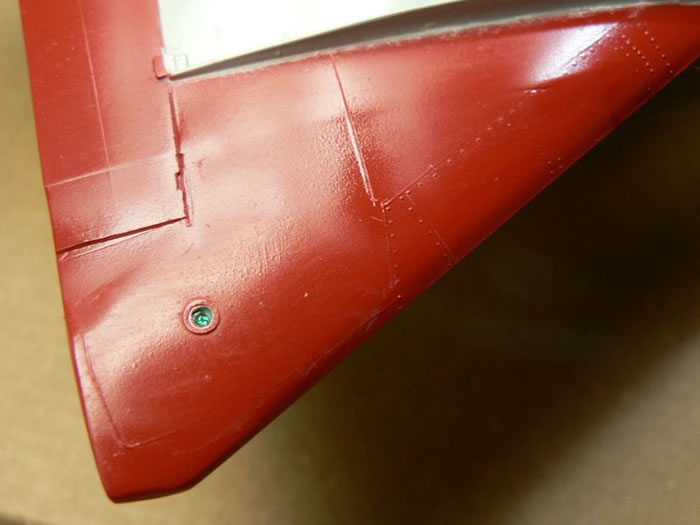
I did drill out the formation lights that were just “bumps” in locations. I used MV lenses for these lights. I was happy with these effects (See wing tip photo above). I did open up some vents and these add a bit to the overall presentation.
The photo-etched in the wheelbays was a bit of work for something impossible to see. As we say, “at least we know its in there”.
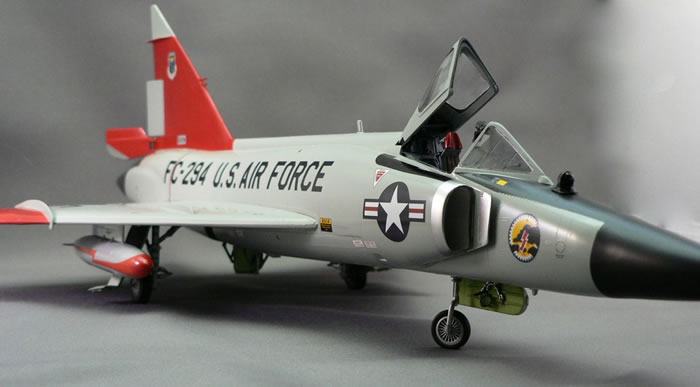
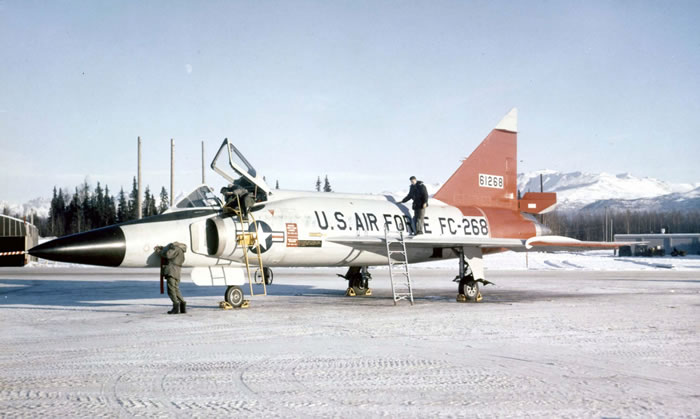
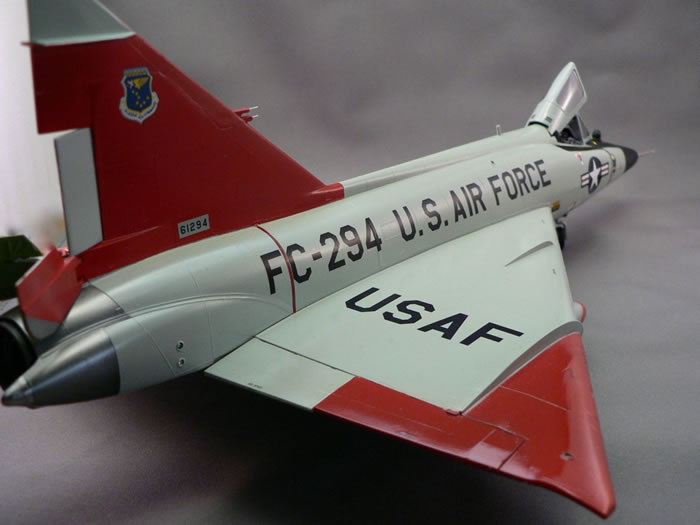
My finish was based on the photos and reference materials for Alaskan F-102 aircraft. gloss gray and I used Insignia red for the artic highlights. I read a few articles that stated this was not a day-glow color, but strictly bright red. I like the look.
 I used Testors Aircraft Gray enamel becasue I can get a better gloss finish with enamel paints. I thin it 1-3 first, then1-6, then 1-10 paint to thinner. These thin coats eliminate almost all orange peel effect. Alclad for the exhaust and for the intakes. I used Testors Aircraft Gray enamel becasue I can get a better gloss finish with enamel paints. I thin it 1-3 first, then1-6, then 1-10 paint to thinner. These thin coats eliminate almost all orange peel effect. Alclad for the exhaust and for the intakes.
I used Testors acrylic Insignia Red for the Artic panels.
I mixed this flat color mixed with Future and sprayed, trying for a gloss finish, 90% successfull.
I used Future as the overall finish for decalling, I used decanted Testors Lacquer with a mix of Satin and Gloss for the final finish.This aircraft was very large and difficult to paint because I kept getting small dust and particles in the finish. I sanded and remove 99%. I used Semi-gloss black for antiglare & nose.
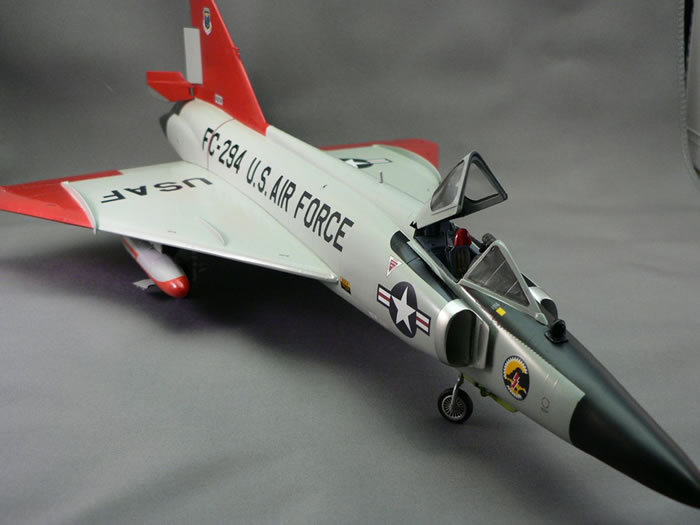
I love the end result,but this is not a project for the faint-hearted. Lots of filling and adjusting to get components to work together, but worth it in the end.
Model and Text Copyright ©
2011 by Bill Dedig
Page Created 4 August, 2011
Last Updated
5 August, 2011
Back to
HyperScale Main Page

|
 Home
| What's New |
Features |
Gallery |
Reviews |
Reference |
Forum |
Search
Home
| What's New |
Features |
Gallery |
Reviews |
Reference |
Forum |
Search