|
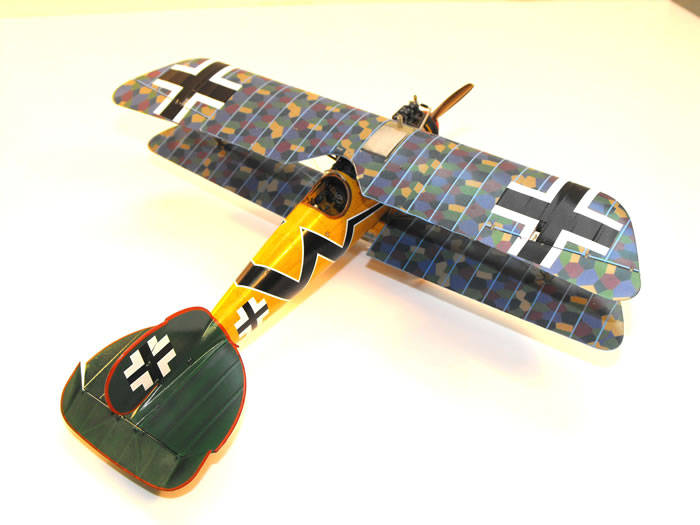
Wingnut Wings 1/32 scale
Albatros D.Va
by Jerry Creager
|
|
Albatros D.Va |

HyperScale is proudly supported by Squadron
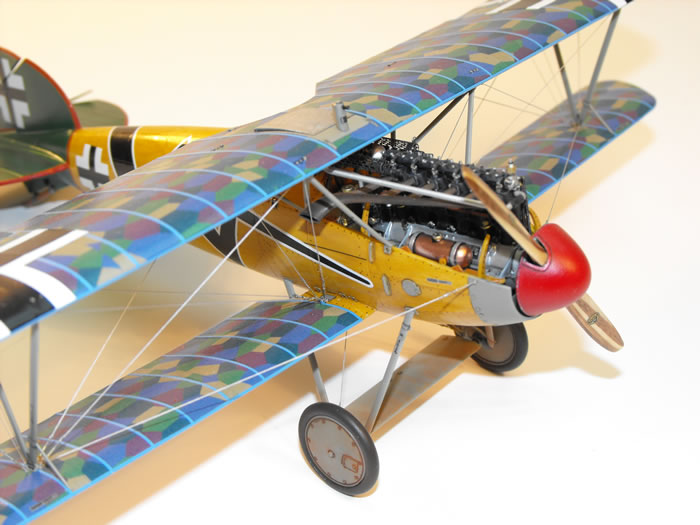
So much has been written about the WNW Albatros lately that it would seem redundant to repeat a narrative of its history and expound on the kit’s many virtues.
The kit was built pretty much box stock except for some added details which I describe later. I followed the instructions almost exactly as outlined in each section with only a few minor exceptions. Basically the interior builds up as a series of subassemblies that all come together when the fuselage halves are closed up.
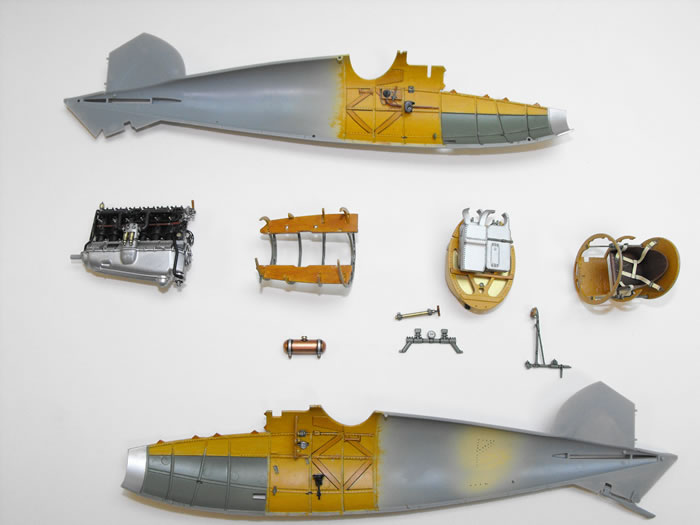
One important point to keep in mind when building Section 4, Engine Bay, is to dry fit everything several times before closing the fuselage. I found that bulkhead A29 must have the bottom of the small notch, located near the top, flush with the top of the fuselage sides because the forward leg of the cabane strut fits into this notch. Also place the spinner back plate, F11, on the propeller shaft to make sure the alignment of the engine is dead center. Otherwise the small space between the spinner back plate and the fuselage may not be equal when looking at it head on. Mine wasn’t and I had to do some minor rework to get even spacing.
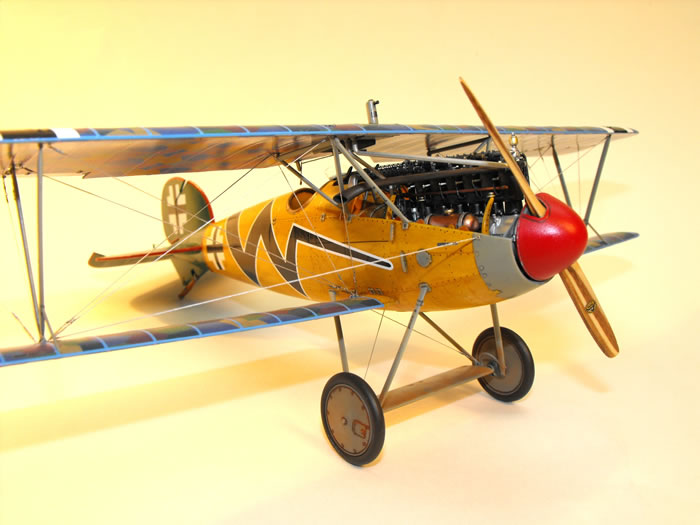
As others have done, I added the valve springs, spark plugs and wiring to the engine. I used a very fine lead wire for both the magneto and spark plug wiring.

Before closing up the fuselage I added some detail to the cockpit such as the stick mounted throttle, all control cables, auxiliary throttle, fuel and air pressure selector switches located on part A39 and the spark advance push rod.
I found that the publication of the National Air and Space Museum on the restoration of their Albatros D.Va to be an invaluable help in answering many of the questions that kept popping up during this build.
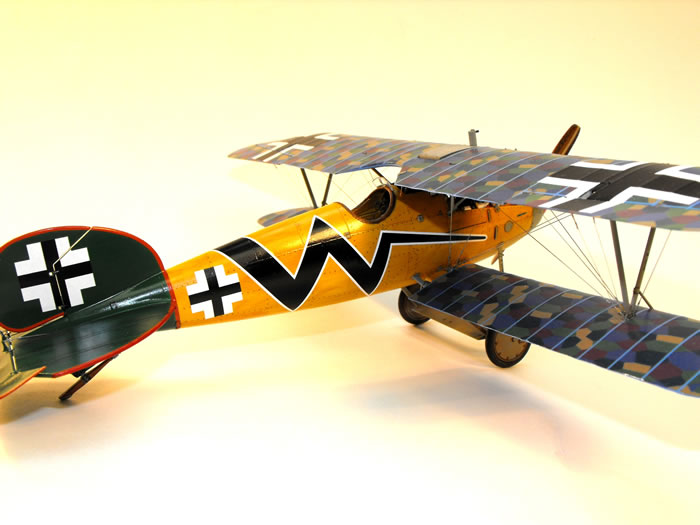
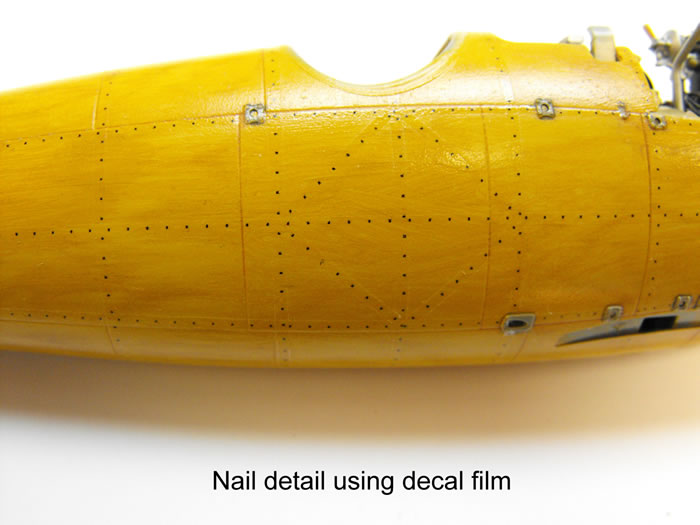
My biggest challenge was the wood finish on the fuselage. I used oils of yellow ocher with a touch of burnt sienna laid over an acrylic base of light tan. After this was dry I worked each panel using a very thin but slightly darker mix to add in the wood grain detail. After this was dry I gave the entire fuselage two coats of future. I was impressed with several models that I saw where the builder had replicated nails which are very visible up close. It was at this point that I outsmarted myself.
I added nail detail on the framework of the interior around the cockpit and engine bay. I used a .005 ink pin with sepia ink and it worked pretty well. However, when I applied the same technique to the exterior I experienced some unexpected problems. Consistency in size and alignment were the biggest and I wasn’t happy with the results. I experimented with using my ink jet printer and putting a line of periods (dots) and spaces . . . . . . . . . which give me an acceptable nail pattern.
I printed this on some Walters decal paper and let it dry overnight. I then sprayed the entire sheet with Testers decal spray. So far, so good. I cut strips of “dots” that were a little smaller than 1/8” and placed them in place following a drawing I had copied and marked up showing the nail patterns. I was delirious with joy at how simple and easy this was. Next, another coat of Future. Something just didn’t look right. The reality of using decals became too obvious. I could see every strip of decal. Another coat of Future, then another. The #@*%$ decals were still visible though not quite as bad through four coats of Future.
I couldn’t face the fact that I had done all of this work just to screw it up this close to being finished. After I had stopped beating my head against the wall I decided that I had no choice but to press on.
I had ordered a set of the WNW lozenge decals and they went down superbly. I didn’t use any setting solution as recommended and had no problems. I did use Micro Sol when I applied the rib tape decals and they snuggled down perfectly over the lozenge decal without any problems.
For some reason WNW missed the radiator shutter handle and linkage for the Daimler-Mercedes radiator but this was easy to fabricate using a thin piece of brass and plastic.
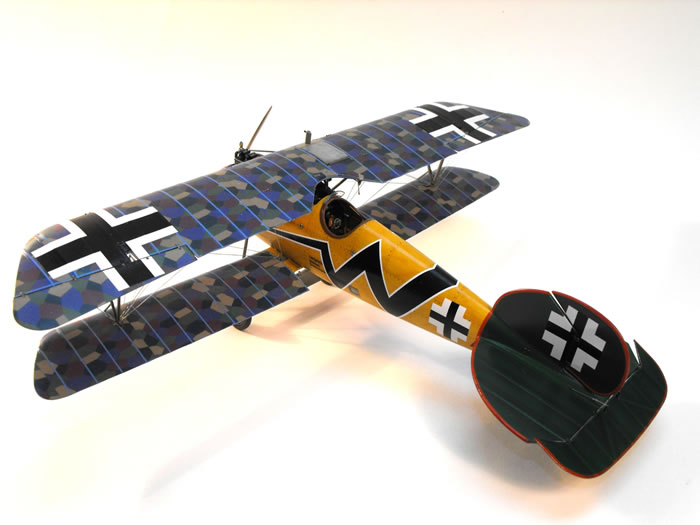
The Jasta 5 decals are those from Pheon Models and went down beautifully. Fortunately, the “blitz” decal scheme covered the area where the decal strips were the most obvious. In the end, a couple of very light, thinned down, coats of dull coat made the nail decal strips almost completely disappear.
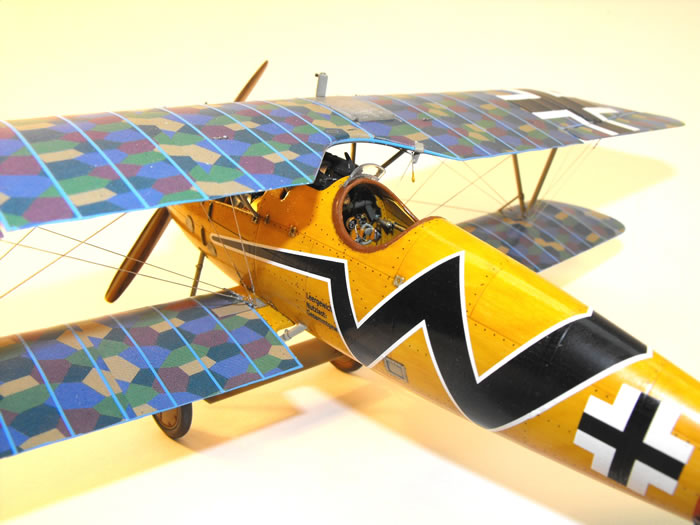
After all of this I decided that this project needed a real laminated wood prop. It wasn’t that hard and was worth the time spent carving one.
This won’t be my last Albatros and I am already planning on how to do “nails” next time.
Model, Text and Images Copyright ©
2011 by Jerry Creager
Page Created 5 April, 2011
Last Updated
5 April, 2011
Back to
HyperScale Main Page

|
 Home
| What's New |
Features |
Gallery |
Reviews |
Reference |
Forum |
Search
Home
| What's New |
Features |
Gallery |
Reviews |
Reference |
Forum |
Search