|
Su-22M-4 (NATO “Fitter K”)
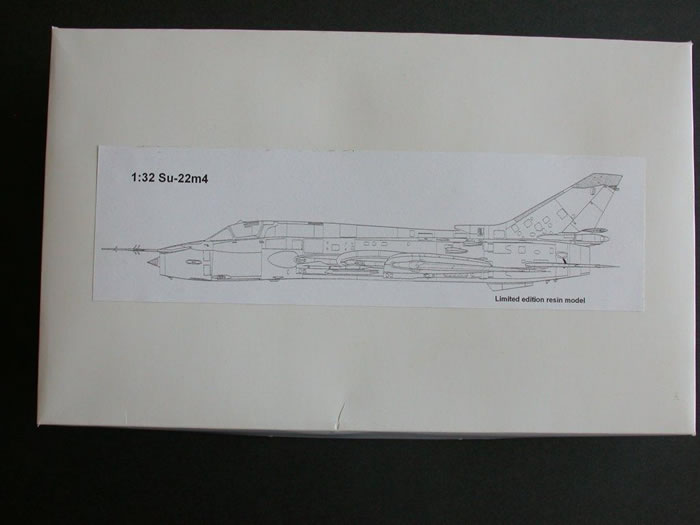
LEM, 1/32 scale
S
u m m a r y |
| Description and Catalogue Number: |
LEM - Su-22M-4 (NATO “Fitter K”) |
| Scale: |
1/32 |
| Contents and Media: |
99 parts in grey injection moulded plastic; two parts in clear plastic; markings for two aircraft |
| Price: |
$180 + $25 postage (Kiev, Ukraine) . Obtained via eBay bidding . |
| Review Type: |
FirstLook |
| Advantages: |
High quality casting; fine engraved detail; minimal flash; stout packaging. |
| Disadvantages: |
Rudimentary cockpit; expensive |
| Conclusion: |
This senior citizen’s not gonna kid himself; very few HS brethren will be tempted to rise to the (resin) bait of this very decent limited edition kit, preferring instead to dream for perhaps years, waiting for one of the new Eastern companies to crank out an injected version of same. When they do, don’t forget , y’all owe me! |
Reviewed by "Bondo" Phil Brandt
The Su-22M-4 “Fitter K” represents the developmental end of the popular, longlived, swingwing line of Sukhoi fighter-bombers that started way back in the Sixties with the fixed-wing Su-7. This powerful, single-engined aircraft was used in great numbers by not only the Soviet Union/Russia, but has been exported in many versions, some of which are still in use, but will probably be retired somewhere between 2010 and 2012.
General
From out of the Ukraine comes another 1/32 subject in resin; the first was the fairly recent (and excellent) release of he Mig-27M Flogger G which was quickly “Trumpetered” by the CHICOMS with a beautiful injected version of the earlier Flogger B variant; a future, injected Flogger G has also been announced. So far, the only way I’ve seen to obtain these LEM kits is through an eBay seller, “Ruperator”, aka Viktor Titarchuk of the Ukraine. He’s a straight shooter and takes PayPal, but unfortunately does not usually offer the “Buy Now” option for these specialty kits, and so I won the auction at $180 (it was down around $120 when I started bidding).
The small–some 1/48 boxes are much larger–plain white kit box arrived well-packed in the yellow Ukrainian equivalent of the USPS box. Inside, large parts were individually secured in bubble wrap, with small parts placed in small plastic bags.
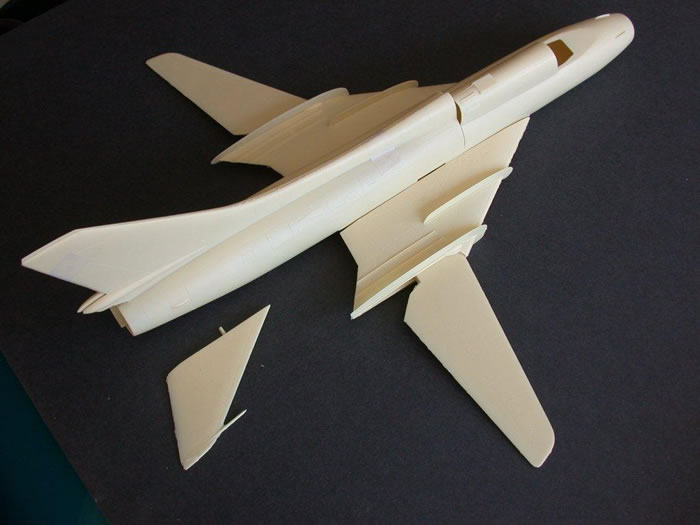
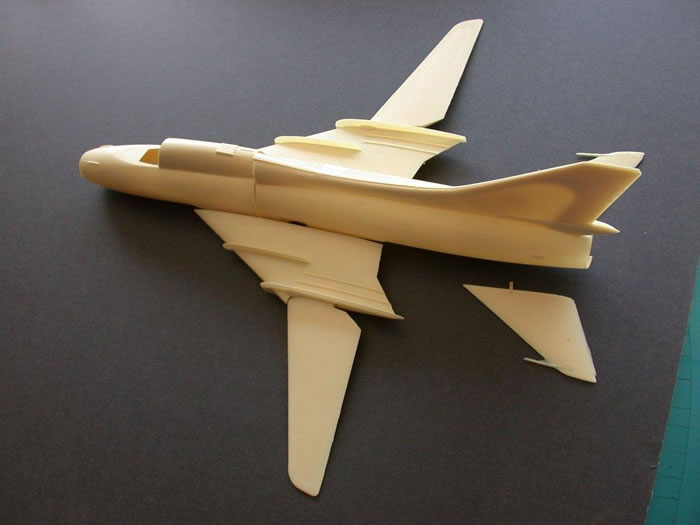
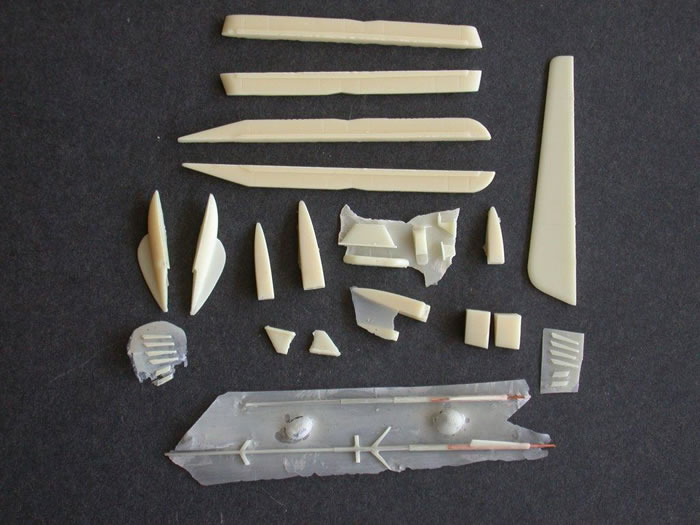
Molding
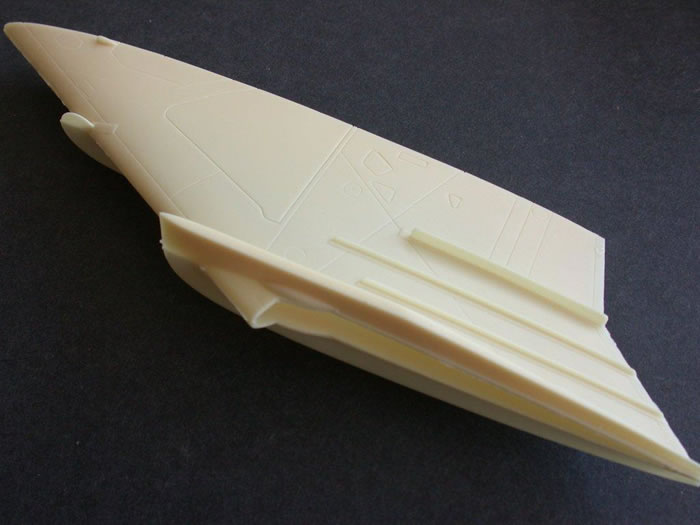
The master modelers at LEM have really got their collective acts together. The smooth, very thin-walled, one-piece forward fuselage (1/16" or less; comparatively, older Collect-Aire “hollow” fuselage sections are positively Stone Age) joins–you get to figure out the joining method--to the split halves of the empennage, with which the vertical fin is integrated. Also hollow-cast as one piece are each of the complex inner wing portions, complete with large, delicate wing fences/pylons. The pivoting outer wings and slabs are each one-piece solid resin, but still fairly thin and light. The folks at LEM realize the low strength of resin, and all small diameter parts (gear struts, antennas, probes, hydraulic rams, etc.) are fortified during the casting process with wire centers.
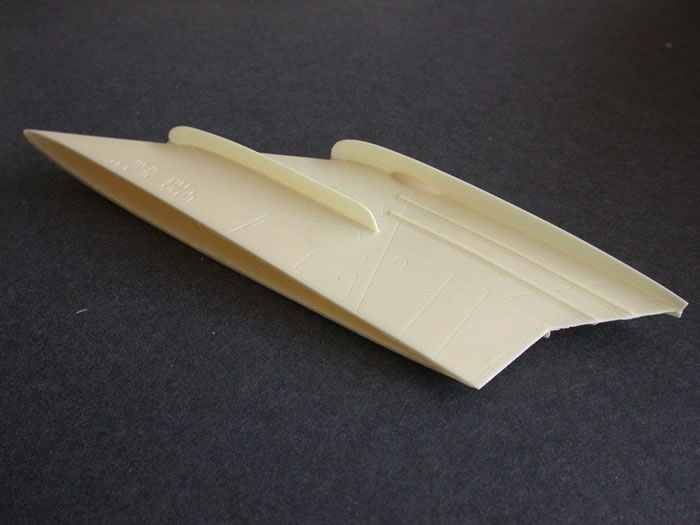
Engraving is very delicate, easily the equal of injected releases. The only resin flash seems to be tissue paper-thin stuff, easily trimmed with a sharp blade around the most delicate, smaller parts such as the two long pitot probes. So far, your correspondent has seen no air bubbles whatsoever.
Fit
To be mostly determined; the one-piece, hollow inner wing sections do mate nicely with the fuselage. Although the single-piece forward fuselage is free of the usual labor of joining split halves and then puttying and sanding seams, the cockpit tub and nosegear well must be inserted way down the hollow center, and then accurately aligned and CA’ed or epoxied, much like building a ship-in-the-bottle; as they say in the South, “Y’all be careful, heah?”
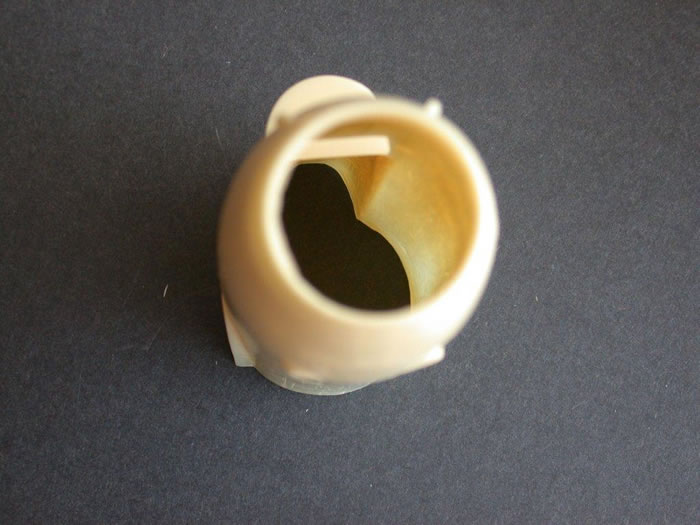
Intake Trunk
A solid resin radome “bullet” assembly (ala BAC Lightning), as in the case of the cockpit tub, must be inserted all the way from back to front in the hollow fuselage, aligned, and glued. There is no additional representation of an intake trunk, and a FOD cover or scratchbuilt block-off plate in front of the cockpit may be the way to go here .
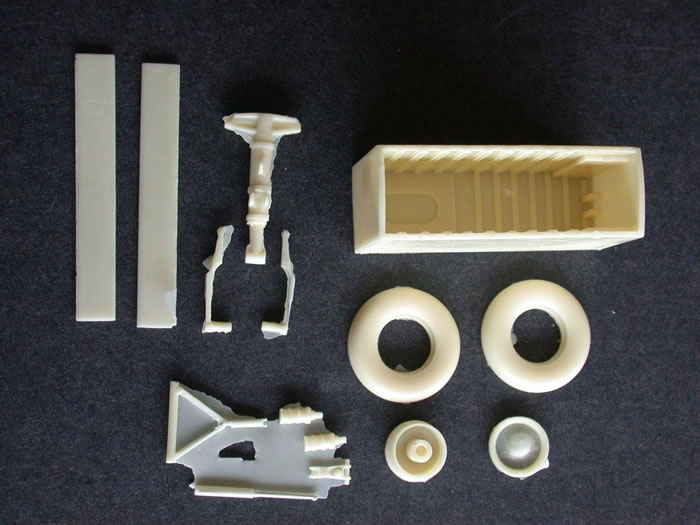
Exhaust/Afterburner
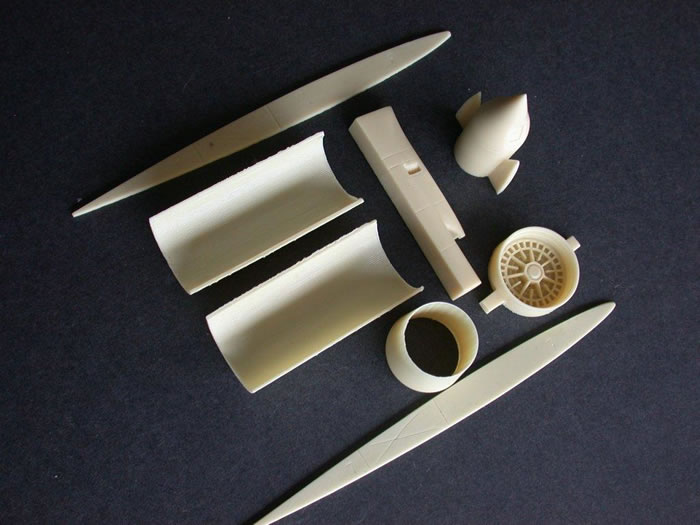
Furnished are: a turbine exhaust face with afterburner ring; a two-piece exhaust housing tube (three inches long, with detailed striations on the inside surface) and an exhaust outlet ring.
Landing Gear
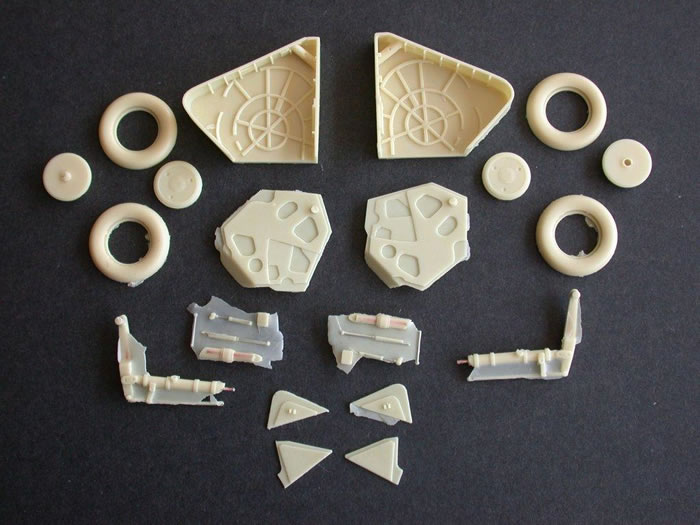
Accurate and very detailed, with many small add-on components. Once again, the thinnest components are strengthened internally with wire.
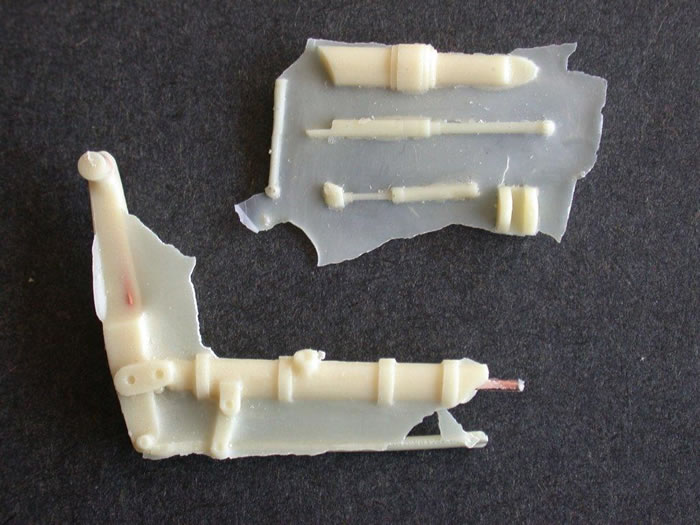
The thin-walled main airframe resin components should produce a finished airframe easily as light as that of an an injected one, and I think the all-resin gear struts will carry the weight. The nosegear strut assembly is particularly delicate, and a degree in neurosurgery may be helpful!
Maingear wells are nicely detailed, as are the large gear doors, but you’ll have to do the resin cutting out of the underwing surface (the outline is engraved) to mount the wells. Same same for the nosegear well.
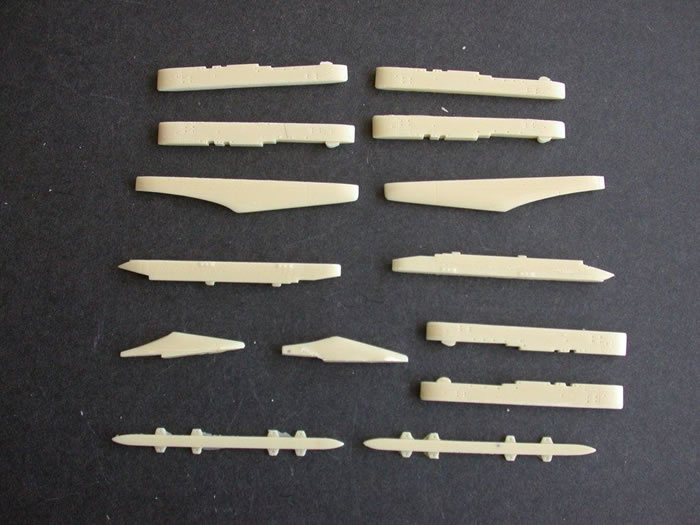
Wings and Control Surfaces
A solid “ear” or pivot cylinder on each outer wing simply slips into the inner, fixed wing portion. In order to make the wings actually pivot, one would have to obliterate some of the very nice wing fence and fairing, drill a hole through both upper and lower wings, and the “ear” (for a hinge rod), and then rebuild the destroyed area. I think I’ll choose a medium sweep setting and epoxy the wings permanently. No movable leading edge slats or flaps are provided, although it would not be difficult to cut out the large inner flaps and fashion leading edges for same. The slabs are inserted into a builder-drilled hole in each rear fuselage side; as stated earlier, the pivot rods are reinforced with wire, as are the prominent probes on the tip of each slab.
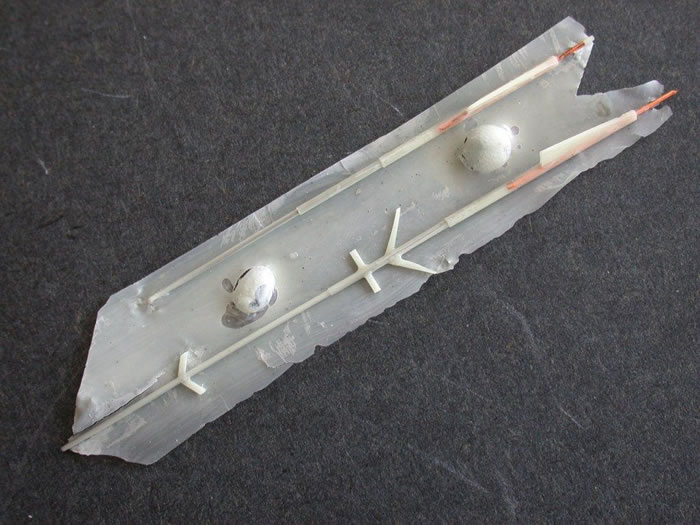
Cockpit
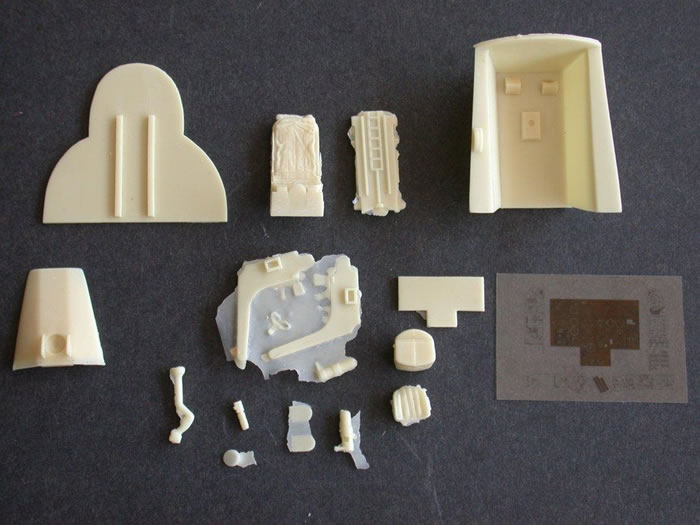
VERY rudimentary tub; basically you receive an undetailed skeleton (with very narrow, probably too narrow, consoles) onto which the builder may add detail from whatever source they choose. An instrument panel film is included, but you’ll have to measure and do the drilling into the blank resin instrument panel. The multipart seat is not bad, but this curmudgeon will use the Avionix flanker seat, and possibly the whole “busy” Flanker tub, modified as necessary to match pix in the Check 4 pub.
Clear Parts
Two nicely vacuformed canopies–one with raised delineations for the windscreen/canopy framing (very faint, though) and one without–are provided; the builder gets to do the trimming. No detail pieces for the inside of the clear parts are provided, just a ticket for the bus to Scratchbuild City. There is also no provision for an open configuration canopy; the builder will have to saw out a notch in the fuselage top, just behind the headrest, and then scratchbuild the rest.
Other Details
Separate airscoops, probes and antennas abound, some extremely tiny and/or thin. All four aft-fuselage-mounted speedbrake openings are only engraved; it’s up to you to cut out the openings and scratchbuild the brake wells/doors. Creating these type components is greatly helped if you have a 1/48 3-D example to emulate: say, the Kopro Fitter K kit or, even better, the Cutting Edge external detail set for same.
Weapons and other Externals
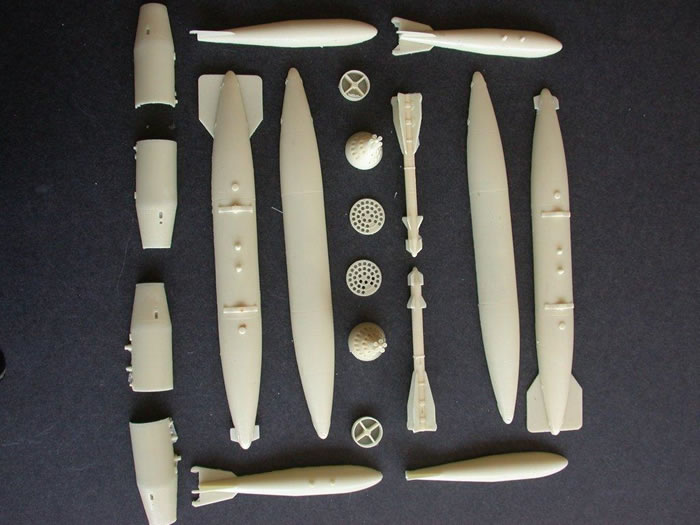
Two large external fuel tanks, air-to-air rockets, two large iron bombs and two rocket pods are included, all looking very much as if they’ve been “cloned” from the 1/32 Trumpeter Soviet jet kit of your choice. I wish the LEM folks had done the large, centerline recce pod, though, because it’s featured in many of the pix on the CD.
Appropriate mounting pylons for all externals are also furnished. With the plethora of weapons that accompany Trumpeter 1/32 modern Soviet jet kits, it should be no big deal to use the injected weaponry and pylons on the resin Fitter.
Decals
None, but then 1/32 Soviet/Warsaw Pact national insignias are not exactly hard to find, either from ze keet stash, or aftermarket sources.
Instructions
If you’re one of those modelers who, from time to time, plaintively ask fellow HSers to scan for them an instruction sheet for a kit that has, say, twelve pieces or so total, this kit is most likely not your cup of tea. What is provided, though, is a nice CD which has many line drawings (some of which appear to have been “borrowed” from the excellent Check 4 pub on the Su-22), as well as many very good color pix of Fitter Ks in various color schemes and national markings. I can’t recommend the Check 4 monograph enough; the material found there is more than enough to build this kit.
This senior citizen’s not gonna kid himself; very few HS brethren will be tempted to rise to the (resin) bait of this very decent limited edition kit, preferring instead to dream for perhaps years, waiting for one of the new model companies from the Far East to crank out an injected version of same.
When they do, don’t forget , y’all owe me!
Text and Images Copyright © 2010 by Phil Brandt
Page Created 1 September, 2010
Last updated
2 September, 2010
Back to HyperScale Main Page |
 Home
| What's New |
Features |
Gallery |
Reviews |
Reference |
Forum |
Home
| What's New |
Features |
Gallery |
Reviews |
Reference |
Forum |