Tamiya + Pavla 1/48 scale
Spitfire PR.I Type F
by Fernando Rolandelli
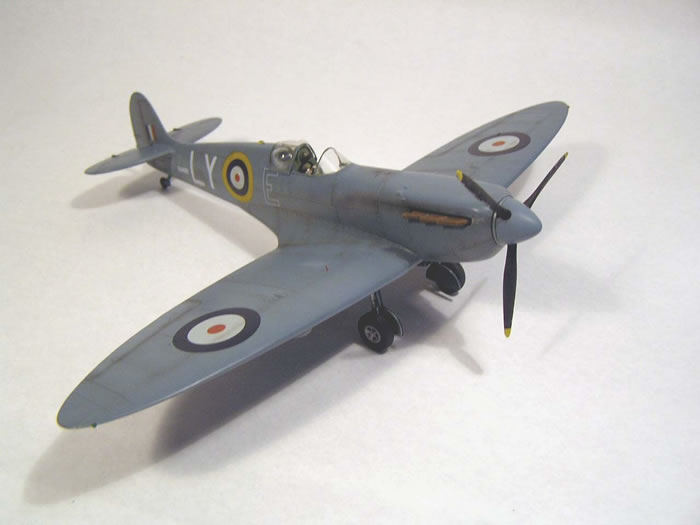
|
Supermarine Spitfire PR.I Type F,
X4498, 1st. PRU, Heston, London, June 1941 |

Tamiya's 1/48 scale Spitfire Mk.I is available online from Squadron.com
Background
Aerial photography was, in Britain in the early war period, much of a secretive and independent activity carried forward by a bunch of men led by a civilian, Sydney Cotton. The unit, called Photographic Development Unit and based at Heston, was allocated machines in small numbers; among these, some Spitfires which were modified for the role almost individually, usually stripping them of armament, armour and usually radios and adding cameras and extra fuel. PDU fought the Campaign of France, losing several Spits, including at least one which was exposed in a “victory parade” in Poland. After that it returned to Heston and was reorganized and put under the command of Wing Cdr Tuttle.
At about that time the Type F, or Extra Long Range, version was introduced. As always, they were hand-made conversions of former Spits Mk I. Fifteen were made, and were the first variant to have the cameras (two F.8 or F.24 with 20” focal lenses) inside the fuselage and the fuel in the wings (they kept the 29 gal tank behind the pilot’s seat and added two 30 gal in underwing blisters); they also had an enlarged oil tank in the forward fuselage, leading to the bulged chin usually associated to the PR.XI. They managed 1250 miles, and, beginning operations in July, 1940, one (X4712) made the first recce flight over Berlin. They also routinely visited main ports in Germany and occupied Europe and one detected the battleship Bismark on 21 May 1941, setting off the famous chase.
In June, 1941, it was decided to convert all Type Cs to Fs, and replace the Merlin III engines for Merlin 45s, with its characteristic rounded oil cooler, changing their denomination to PR Mk V F (though I have never seen them referred in such a way).
The Kit
The base kit is the well known Tamiya Spit Mk I. The Pavla 48008 conversion set provided the blisters, fuselage tank and chin. Canopies came from the Aeroclub ABC 063 set (the Pavla ones are unusable, badly misshapen). Exhausts are CzechMaster. To dress the cockpit, the Eduard EDFE 152 was judged enough. Decals came from the Model Alliance 48131 (though generic decals could have been used).
Of course it began in the cockpit, not with the interior, but with the mounting base frame for the “round” windscreen. To achieve these, the lower part of the kit’s own were sawed off, glued to the still separated fuselage halves and sanded until the Aeroclub vac windscreen roughly fitted. Then, it came the cockpit interior. Tamiya’s is an acceptable one, provided that some PE is used and some scratchbuilding made, and that was the plan.
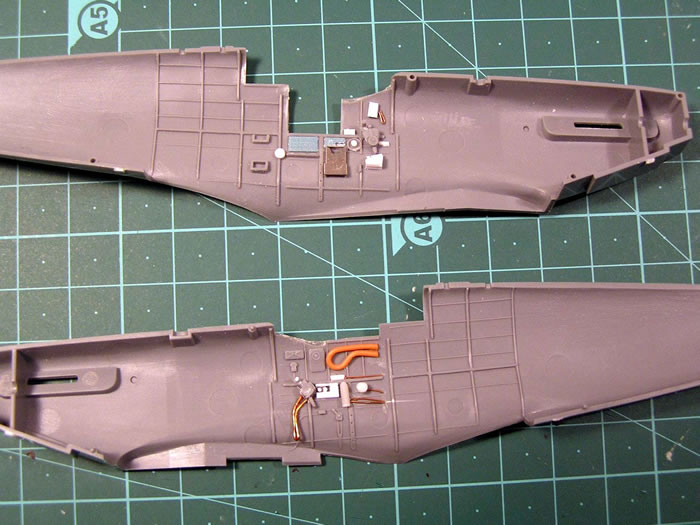
Beware of the way the Sutton harness is shown in the Eduard instructions, though: the central part is inverted. Bread’n’butter Tamiya Spit improvements included hollowing the floor and adding a curved false bottom mimicking the fuselage.
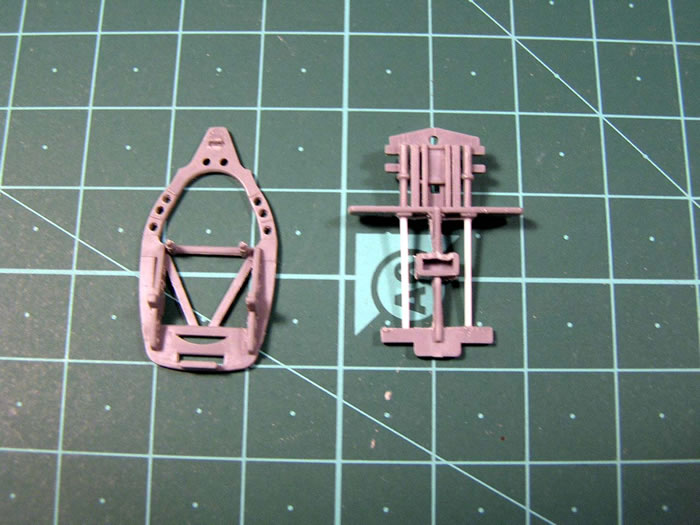
This machine is an early Mk.I which remained in service for long, so I tried to reflect some changes in the cockpit, without completely upgrading it to Mk V standard. Mainly, I chose to add the later oxygen hose, and the IFF destruction buttons (R.3002 IFF equipment reached Spits at the end of 1940. This machine was most probably devoid of the actual IFF device, but I doubt they would have removed the buttons).
I also added the modifications characteristic to a PR.I: the camera master switch below the throttle lever, the camera controls in lieu of the gunsight, and the fuel pipe next to the pilot’s right leg. I also added the Pavla fuel tank behind the seat (a wonderful piece of casting worth the whole set!) In the fuselage I erased the radio mast base plate and added a tiny intake on the left cowling, as shown in the Airwaves instructions (handy double-check reference).
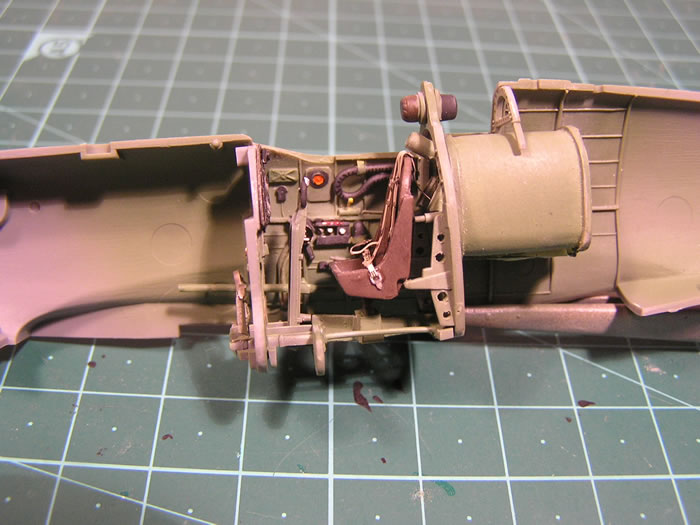
The wings deserved more attention than a normal Spit project. Again, there are some stock Tamiya Spit improvements: diminishing the wing’s chord by sanding the trailing edge, moving outwards the flap separation line, and adding some tiny half-moon shaped pieces of styrene to soften the transition between the Karman fairing and the wing trailing edge. After these, I proceeded to fill the gun ports, the cartridge ejectors, and the armament panel lines. Then I drilled the camera ports, and made clear inserts out of the sprues in the kit for the glass covering the camera lenses. I toyed with reproducing the actual cameras or at least the lenses, but found that painting the back of the clear inserts in Tamiya Clear Green and then Black produces a convincing effect of depth.
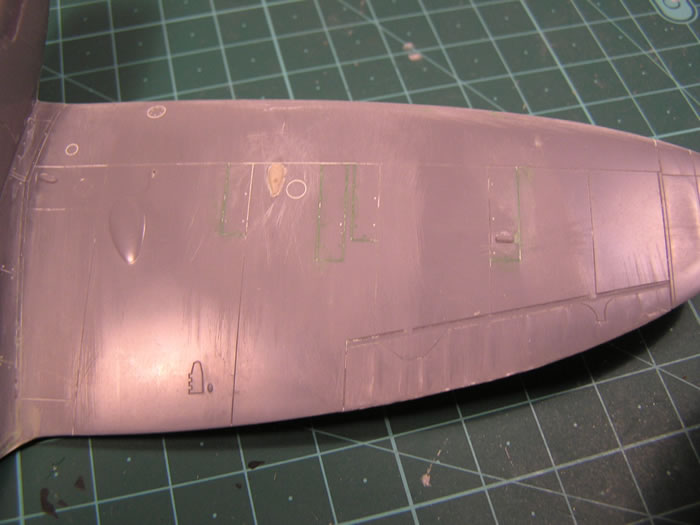
After gluing the wings to fuselage I added the “slipper” tanks and the tiny bulges over the pumps on the upper surface (made of Parsec epoxy resin).
Once I got a good fix I added the lower cowling resin piece, showing the characteristic bulged chin.
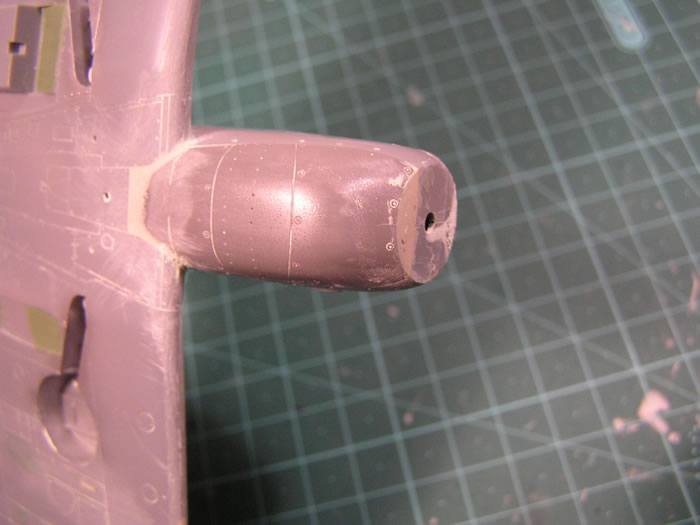
It was a tad short, and had to compensate with epoxy to avoid unsightly gaps at both front and rear ends.
I painted the interior in stock RAF Interior Grey Green, from the Xtracolor range (it is a bit brighter than, say, MM’s). The wheel wells and inside of doors were painted Alclad Aluminium. The exterior of the whole machine is painted in Camotint Blue Grey, later (and better) known as PRU Blue. I gave the model a priming of Light Grey and a preshade in a Black-Burnt Umber mix. The actual paint (Xtracrylixs’) was painted in translucent coats and irregular mottling. It was lightened a bit and then painted in random mottles and stripes, and more consistently on the fabric covered flying surfaces, but I made no attempt at hard defined edges.
Decals came from the Model Alliance sheet. They are not really top quality, being slightly misprinted (I trimmed ugly White borderlines from the flashes, but had to live with one in a roundel). They are glossy, but have flat spots I guess coming from the printing process; they would be buried beneath the many clear coats required before finishing. Otherwise, they are thin and maneuverable, printed in correct colours for the most part (codes in MSG look a bit too light) and the slightly translucent White centers provide instant fading. I have seen mostly Type C fuselage roundels with a thin Yellow ring added, instead of a true Type C1 like the one depicted, but it certainly lives things up.
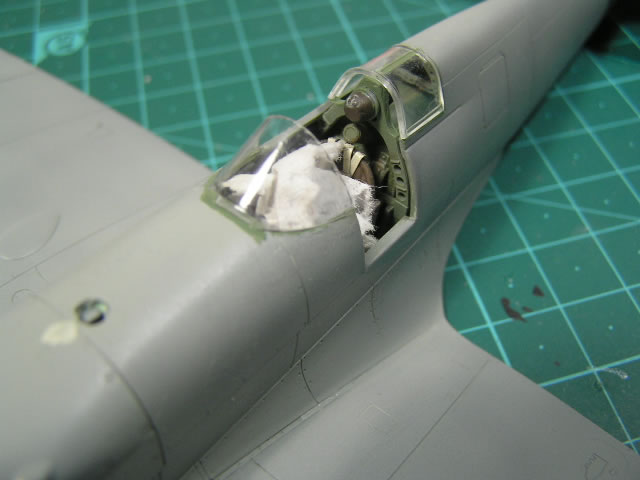
In considering weathering, I accounted that this machine operated from Heston, a permanent base near London, and, the unit never having more than a handful machines, was well entertained, and probably kept clean for speed purposes. Besides, I have never read that PRU Blue was prone to fading, therefore, as explained above, I went light on this; however, I wanted to show the battered look the machine should have after a characteristically long flight, so I dirtied the airframe with oils, pastels and airbrush. All this operations were made easier by the fact that the acrylic finish is virtually immune to oils and enamels. Final coats kept a low sheen on the whole.
This was a different Spit project, and one that encourages you into building a whole series of them. The simple improvements made to the basic Tamiya kit are worth doing and they really show to someone acquainted to the Spit shapes. Xtracrylixs paints and the Aeroclub vacs deserve full marks, the former allowing all kinds of retouching both air- and hand brushed. The result is a model of an airplane as handsome as military airplanes go. In fact, it hardly looks “military”.
References
-
“Merlin PR Spitfires” Classic Warbirds No. 10, Ventura Publications
-
“Supermarine Spitfire, Photo Reconnaissance Spitfire in WorldWide Service”, On Target Profiles 08, The Aviation Workshop Publications.
-
“Supermarine Spitfire. The ANZACs”, Ventura Publications.
Model and Text Copyright © 2010 by Fernando Rolandelli
Page Created 17 September, 2010
Last Updated
17 September, 2010
Back to HyperScale
Main Page

|
Home
| What's New |
Features |
Gallery |
Reviews |
Reference |
Forum |
Search