Tamiya's 1/48 scale
P-47D Thunderbolt
by Doug Esson

|
P-47D Thunderbolt |

Tamiya's 1/48 scale P-47D Thunderbolt is available online from Squadron.comx
Tamiya’s jug was an unlikely choice for me - a kit which actually caught my attention because it was piled amongst the Dragon and Hasegawa boxes on sale at a local hobby store. Serendipitously, an Aires detail set (actually designed with the Academy P-47 in mind) also presented itself so I ordered a couple of decal sheets, an Eduard color-zoom fret and Eduard mask online and set to work. A natural metal airframe finish was to be a learning experience for me…
The kit itself is simply the best model kit I have ever worked with. By that I don’t mean my finished result, I mean the raw components contained within the box. The finish, moldings, panel lines, cockpit & wheel-well detail and overall fit were literally flawless.
The Aires set was a little vague when it came to instructions but I managed to sort most of it out by trial & error. The main potential technical problem is the fit of the bulkhead framing which is provided as a large single photo-etched piece. Perhaps it was my ineptitude, perhaps the result of using a piece designed for an Academy kit on a Tamiya kit - perhaps a bit of both - but I couldn’t make it work so ultimately I cut it into several components and secured each on in place sequentially using cyano. The main potential artistic problem was that despite the beautifully rendered engine, I wanted to show the checkered cowl in all of it’s glory so opted ultimately to open only part of the forward fuselage. I intentionally kept the yellow-chromate finish simple and minimally weathered, wanting mostly to provide a “sense” of what lay beneath.
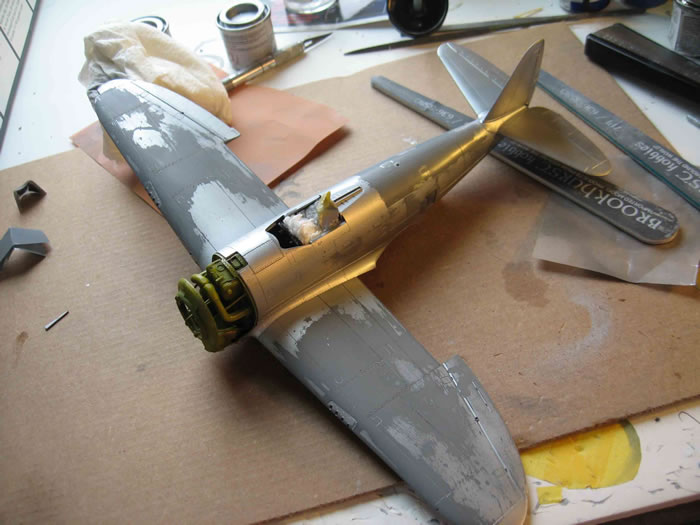
The main challenge for me was my first attempt at a natural metal finish and frankly I failed dismally at first. I executed a nice aluminum coat, only to mask the next round of panels using yellow Tamiya tape. I thought I’d played it safe by repeatedly tearing the tape strips off the back of my hand in order to reduce their “tackiness” but I was unprepared for the experience of literally tearing my underlying paintjob to shreds as I removed the strips after the second coat. The only positive outcome was that based on my ability to speak a couple of languages I might have set some sort of multicultural profanity record!!!

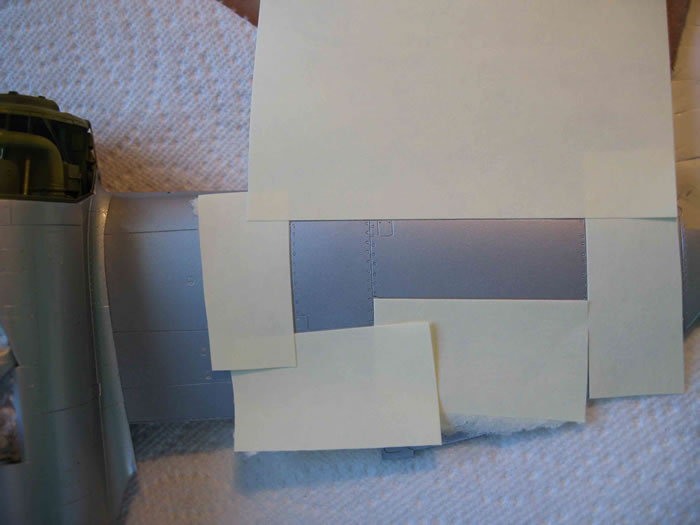
I left the entire disaster overnight and reluctantly tackled it again the next day, sanding and polishing every inch, all the while fully expecting to toss the lot into the trash at any moment. In this frame of mind, I decided to just coat everything with a cheap tin of Humbrol “metal coat” (as opposed to array of more expensive metalizers which I had purchased). Most aircraft finishes are exceptionally unforgiving when it comes to showing underlying blemishes but this stuff literally covered and smoothed out my earlier mistakes like some sort of magical, superfine, surfacing product! I could barely believe my eyes as I airbrushed a couple of coats into place and can’t recommend this product highly enough. Now, both encouraged at being back in the game and “once bitten” by the original taping disaster, I took some advice and used soft office “post-its” to mask a few panels before changing to a different metal-finish. This worked perfectly, not lifting a single spot of underlying paint. Hopefully others will benefit from my painful learning curve - use “post-its” not tape!

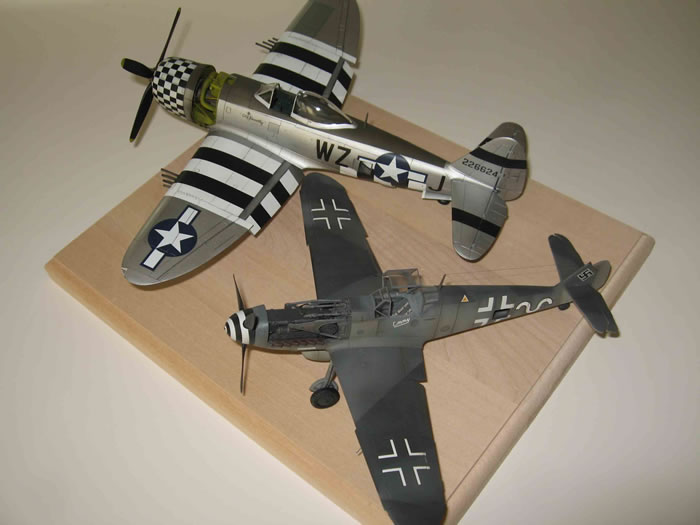
I glossed the airframe and decided to use (Aeromaster) decals to mark the attractive invasion stripes. Biblical amounts of setting solution were required to allow them to settle around several fuselage and wing shapes but ultimately they worked out fairly well. Next time, however, I think I’ll mask and spay them. One issue was the way they “smothered” the fine panel lines on the upper wing surfaces. Once firm, I addressed this by using a soft plastic ruler and extremely fine lead pencil to “trace the panel lines back into place”. A light panel-wash, minimal “Mig” pigment weathering, a light flat-coat and the final attachment of prop, canopy etc using white-glue concluded the project. Overall I’m pleased with the result and decided to place the finished model alongside one of its adversaries in my office (convenient, since the 109 is so much smaller than the P-47 in the same scale). Hope you enjoy the pictures.
On a final note, this weekend I made it to the IPMS nationals in Phoenix where I like to think I personally helped keep both the CMK and Aires trade-stands in business! There were also some beautiful decal sets available in 1/48 scale (notably the eastern block “Hi-Decal” line and the SAM Publications “End of an Era” Sea Harrier set. Now I have to decide whether to tackle an F-117, an F-22, a Mig-29, a SHAR2 or a flanker next (all of which are waiting patiently on my shelf)?
Decisions, decisions…
Model and Text Copyright © 2010 by Doug Esson
Page Created 16 September, 2010
Last Updated
16 September, 2010
Back to HyperScale
Main Page

|
Home
| What's New |
Features |
Gallery |
Reviews |
Reference |
Forum |
Search