Trumpeter's 1/72 scale
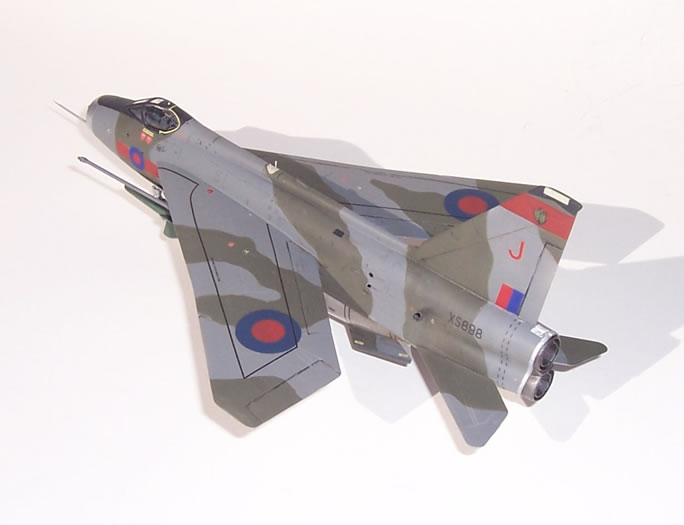
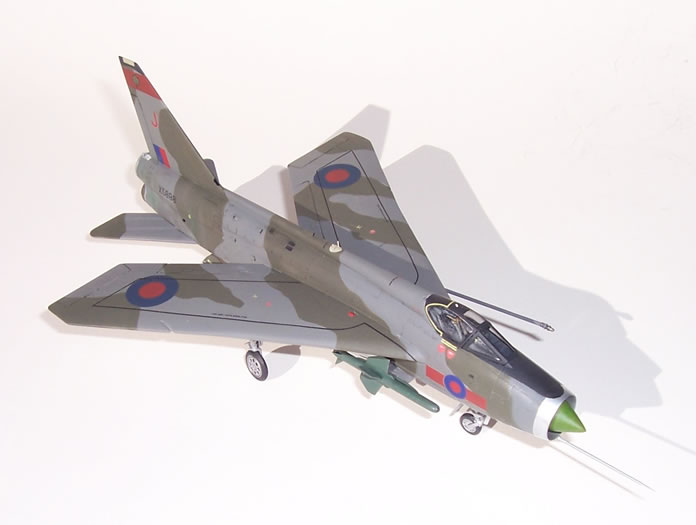
BAC Lightning F.6
by Mark Davies

HyperScale is proudly supported by Squadron
The English Electric Lightning should need no introduction, so I’ll just say it is surely one of the most impressive interceptors of the Cold War years in terms of looks and performance, if not endurance.
I have always admired the Lightning and eagerly awaited the release of a modern 1/72 kit of this impressive British fighter. Therefore, I was very pleased when Trumpeter announced a line-up of the single-seat versions in 1/72 scale.
At first I was impressed with the contents of Trumpeter’s F.2A/F.6 kit, it seemed well moulded with fine panel lines and good levels of detail in the cockpit and wheel wells. This was all good, because at $52 Kiwi dollars retail it was about $15 to $20 more than I would have expected to pay for this type of kit at the time.
Disappointment
This project hung around for over a year with bursts of activity on and off because of my growing disappointment with the build. For this reason I shall keep my account relatively brief as to be honest it’s hard to ramp up too much enthusiasm describing this build. However what I do have to share may be of use to others.

Closer examination of the kit contents revealed some glaring faults, which no doubt many readers are by familiar with by now given their coverage on various forums. The howlers included:
- Terribly pinched in tail area with undersized exhaust nozzles.
- Grossly over-sized belly tank giving a pregnant guppy look.
- Over-sized APU exhaust outlet with a hideously thick lip.
- Complete absence of the triple-kink effect along the wing leading edge when viewed from the side or front.
- Over-sized and wrong shape belly tank fins.
I decided to live with the lack of kinks in the wing leading edge, although I now regret this laziness, and started with the fuselage:
- I was concerned to get a nice smooth interior to the intake trunk. To achieve this I left out the centre bullet that rises form the nose wheel well to carry the shock-cone. This meant I had to remove the upper splitter plate in order to be able to insert the assembly later through the intake after the fuselage halves were joined and the intake’s join lines smoothed. This proved a bit tricky, but I got the splitter plate in the right place in the end.
- I corrected the belly tank by rebating the insides of the fuselage along the cable ducts until the walls were very thin. I then sank the belly tank in to the rebated area (by about 2 mm from memory). The front of the tank had to fit where originally intended, and as a result some horizontal panel lines were no longer quite parallel with those on the fuselage above because the tank sloped slight towards the back when inserted in place. However this proved to not be too noticeable.
- The kit cannon troughs were pretty shallow and lame representations of the real thing, so I made new ones with plastic tube. I did not make the blast baffles fitted to some Lightnings as I couldn’t be bothered as it would have been very fiddly.
- I used an Aeroclub engine nozzle resin correction plug to fix the kit the rear fuselage area. It’s okay as resin parts go, but not the best in quality terms with some panel lines needing scribing and indifferent levels of detail. However for around $10 NZ it fixed the problem it was intended to. I feel the more expensive Aires item is much better.
- I built some internal trunking for the APU exhaust, inserted a short length of tube to reduce is diameter, and replaced the thick plastic lip with a thin scratch-built metal one.
- I blanked and refined some of the various vents in the fuselage and cut the tank fins down to a better shape than the kit’s.
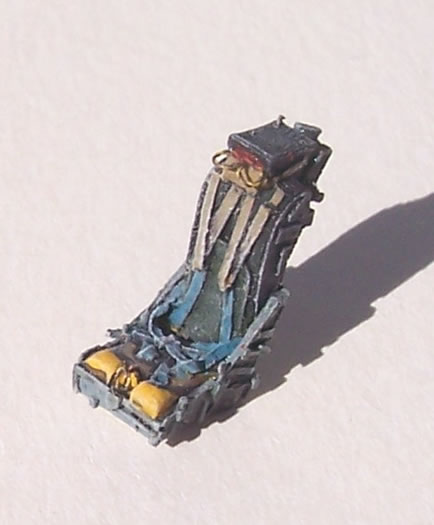
- The kit’s cockpit is nicely done on the whole, and I just added a Pavla bang-seat and a couple of details.

By this stage I thought that I was well on the way to a finished lightning, so I fixed the wings on, inserted the tailplanes temporarily and proceeded to make jet aeroplane noises whilst practising zoom climbs from the modelling bench. After a while during my imaginary air to air photography session I realised that all was not well. Something looked amiss with the position of the cockpit in relation to the wings.
I seem to recall reading on a modelling forum somewhere that wings on Trumpeter’s 1/32 scale Lighting came too far forward. This prompted me to consider my model more closely. The more I looked at my 1/72 model, the more I thought the same could apply to mine. Rightly or wrongly, I had a rush of blood to the head and removed the wing leading edges with the wings fixed on the fuselage. I can’t recall the exact amount, but I’d guess 1 to 1.5 mm was removed, and I fixed the leading edges back on. This seemed to improve the appearance, in my eyes at least.
As a small aside, I also think that the canopy may be a bit too upwardly curved when viewed side on, particularly to the rear where it meets the fuselage spine. I came to this conclusion after finishing and will live with it.
My last modification was to shorten the main gear legs, as not surprisingly the belly tank was now too high off the ground. Also much to my chagrin, and only after photographing the finished model, I realised that the belly tank fins are too inclined from the ground when viewed in profile. Given the nature of my feelings about this project you don’t have to be too clever to guess they’re going to stay that way!
The kit provides Firestreak and Redtop missiles. The Firestreaks are moulded in clear plastic to cater for the faceted clear seeker head, but the Redtops are grey styrene despite these too having a clear seeker head. As I chose to use the Redtops I made the heads out of clear sprue.
Painting was a breeze compared to construction, and I used Xtra Colour for the camouflage and Alclad II for the undersurfaces. The trumpeter decals were excellent to apply, but I had to re-paint the red centres to the roundels, as they were far too bright.

Things were finished off with some light weathering to provide stains on the belly tank, soot around the APU exhaust, small oil slicks from various vents and some fading of the paint in the hot areas.
So there you have it – For me a rather frustrating and disappointing result, but an attractive enough model even if it is still plagued by shape issues. I also have Trumpeter’s 1/72 F.1 Lightning and at a quick glance this seems more likely to deliver the goods than their F.2A/F.6 kit. However, there is still a big gap to be filled until we have a nice accurate 1/72 Lightning F.2A or F.6 out of the box. Wasn’t there some talk of Academy filling this at one time? We live in hope.
Model, Images and Text Copyright ©
2010 by Mark Davies
Page Created 13 August, 2010
Last Updated
13 August, 2010
Back to
HyperScale Main Page |
Home
| What's New | Features | Gallery | Reviews | Reference | Resource Guides | Forum |