|
Kitbashed 1/48 scale
Brewster Buffalo
by Jaroslaw Kierat
|
|
Brewster Buffalo |

Tamiya's 1/48 scale Brewster Buffalo is available online from Squadron.com
Background
The Buffalo was created by the Brewster company of New York as a response to US Navy's 1935 specification to replace the obsolete carrier based bi-planes then in operation. Brewster's design included advanced features for it time, like metal mono wing design and proved superior to the initial (bi-plane) design of the F4F Wildcat. The Navy, as well as the Marines ordered a number of planes, which were first introduced into the service in 1939.
With the improvement of the Wildcat, the Buffalo fell out of favor with the US forces, so the type played just a minor role for the US war effort. In 1940 the Buffalo was also sold to Finland, UK and the Netherlands, the latter two using the type for defending colonial territory.
While the Allies much disliked the Buffalo, which proved disappointingly unsuccessful in the Far East, the Fins – on the contrary - were amazing proficient with the stubby fighter achieving an astonishing kill ratio of (reportedly) 32 Russian planes downed for each one lost Buffalo.
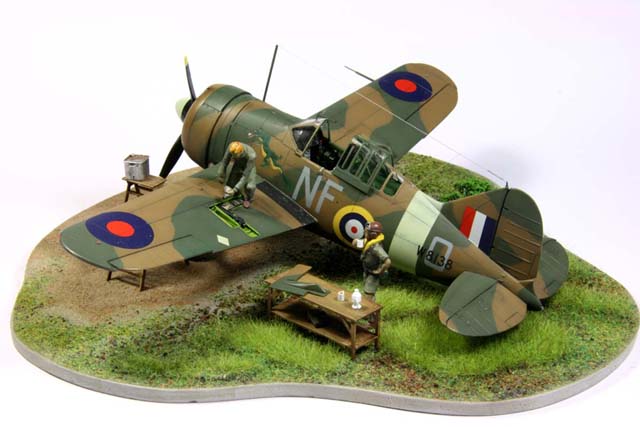
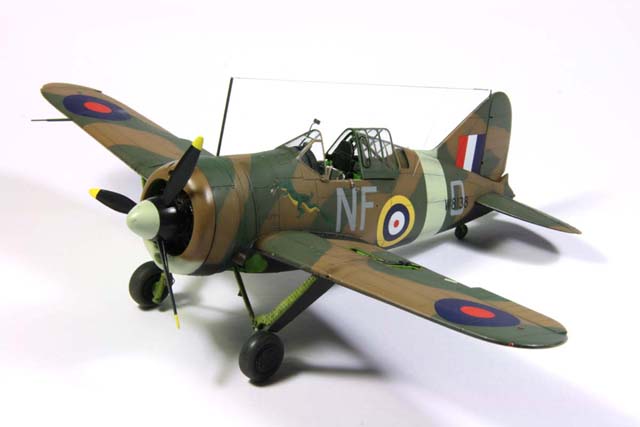
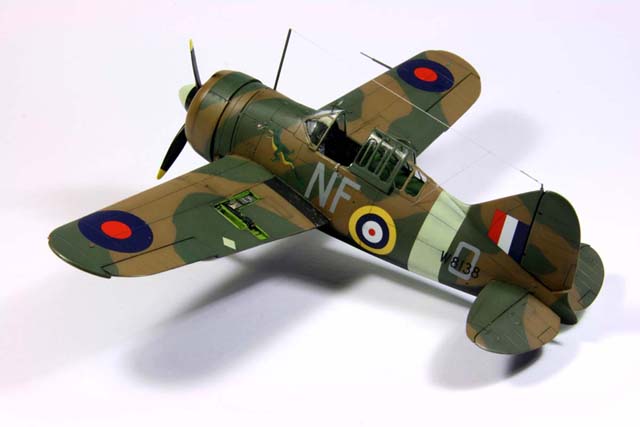
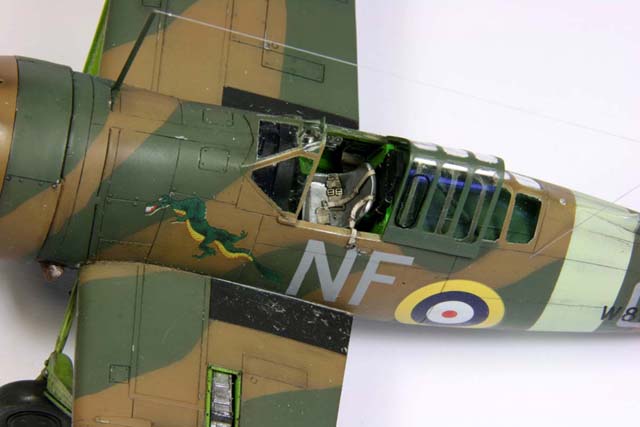
The model depicts a Buffalo W8138 (NF-O) from the B-flight of the 488th RNZAF squadron, stationed at Kallang / Singapore End of 1941. The pilot, F/O Noel C. Sharp shot down three enemy airplanes, before the unit was disbanded. The pilot was MIA in Feb 1942 after his Hurricane was downed by ground fire.
The Kit
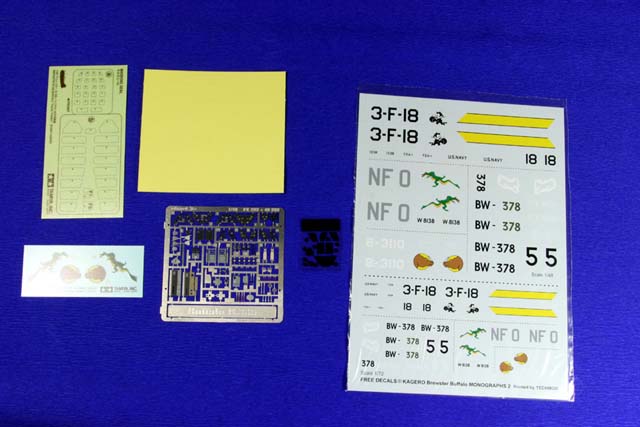
The base kit is Tamiya's B339 Buffalo “Pacific Theater”. The model was kit-bashed with the Special Hobby kit, to correct some missing/wrong features of the Tamiya kit. I added a Quickboost engine, as well as a basic Eduard PE set.
Tamiya's kit has been already a bunch of years on the market, which mostly shows in the deficiencies of the detailing, as well as in a somewhat worse fit, than what is common on their later offering. Still the parts are clearly cast, with no flash, no warping or manufacturing defects. Strangely – some panel lines are recessed, some elevated. In particular re-scribing the ones on the fuselage is tricky due to their two-plane curvature.
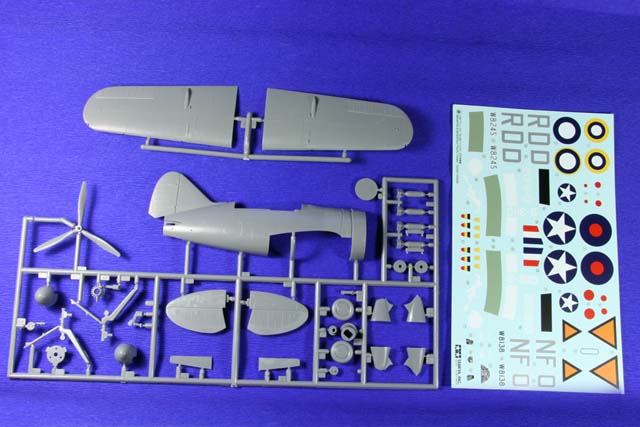
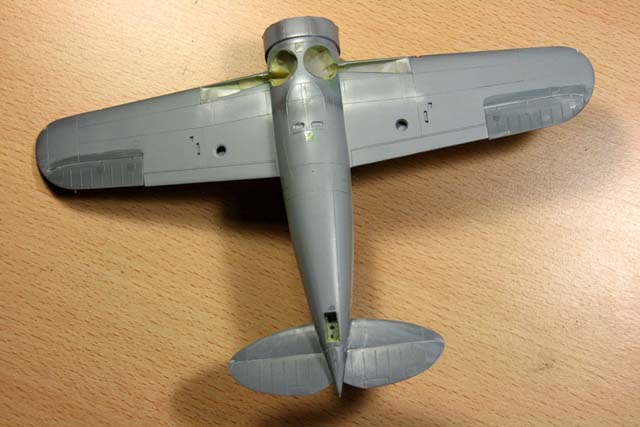
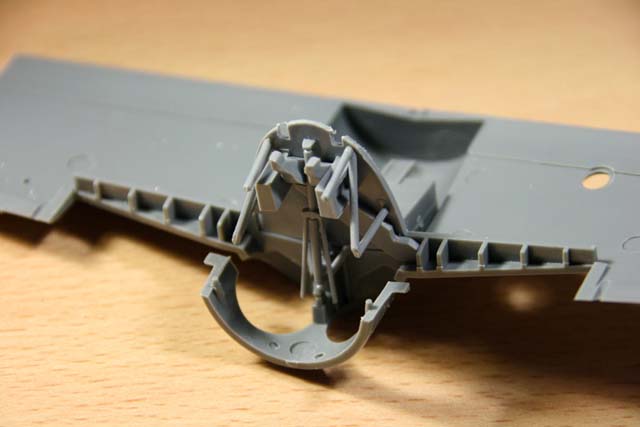
The biggest weakness is the complete lack of structure in the wheel bay. To rectify this, SH kit has been gutted. Not state of the art are also the canvass covered rudders – these are just elevated rectangular ribs. The model is quite accurately fitting the shape of the Mk1 Buffalo is compared to plans. On the other hand – it is missing the second landing lamp of the British variant, as well as the correct type of the ventral window (here again the SH had to fill in).
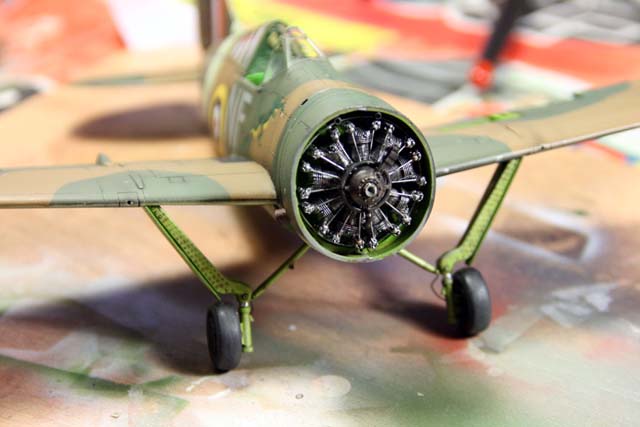
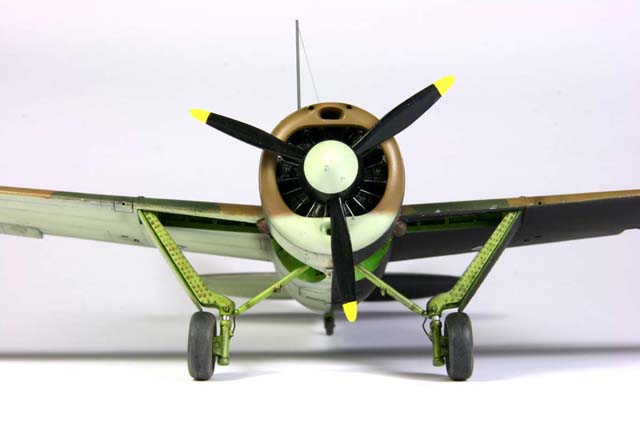
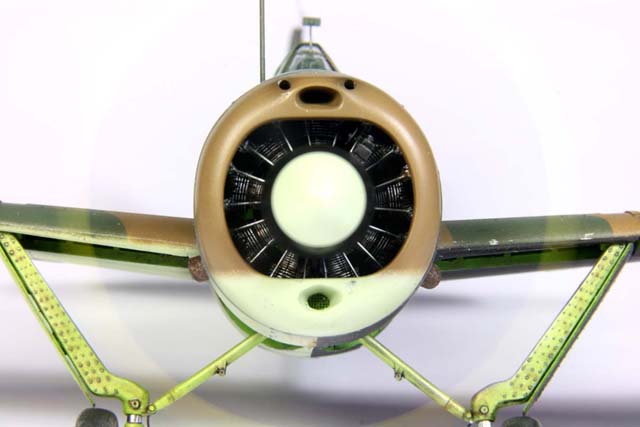
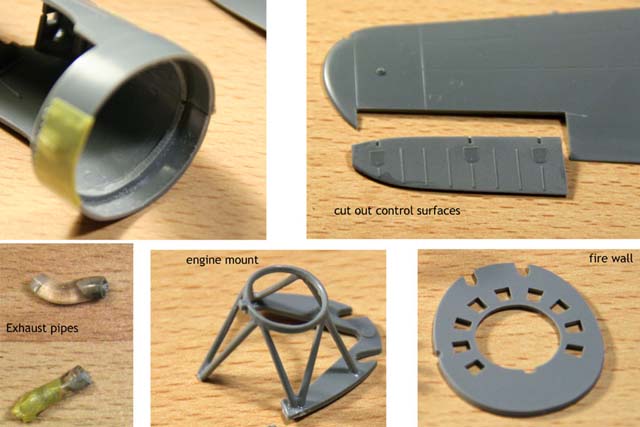
The Quickboost engine provides a nice enhancement to the kit, with finely depicted cooling ribs. The problem is that it's practically only a relief, solidly connected to a back wall.
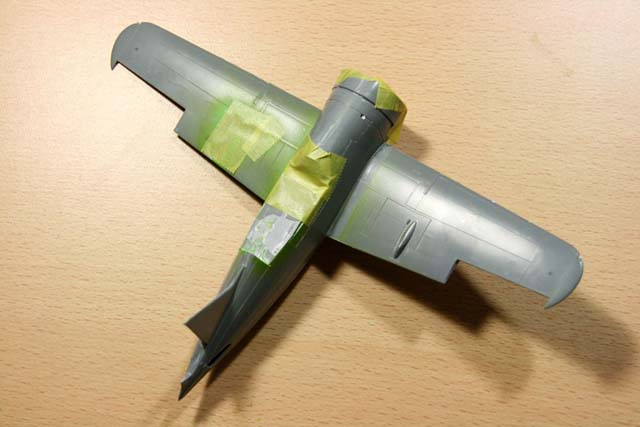
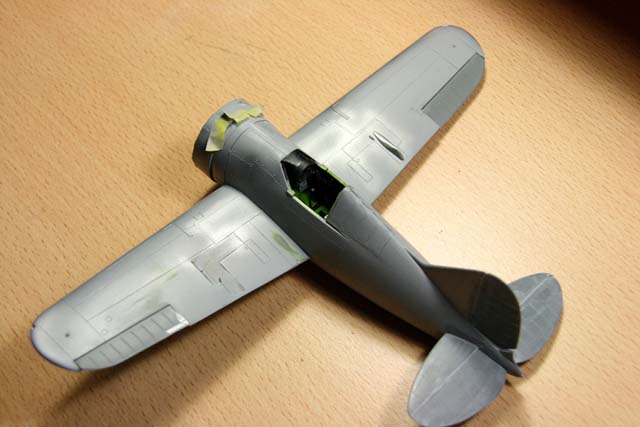
The build started with some rough surgery: all control surfaces were cut out, as well as the walls inside the fuselage.
Then the inner structure was prepared using some parts from the SH kit, as well as plenty of scratch build components.
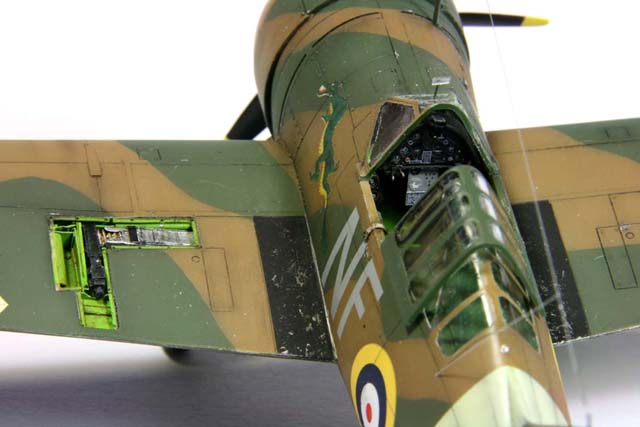
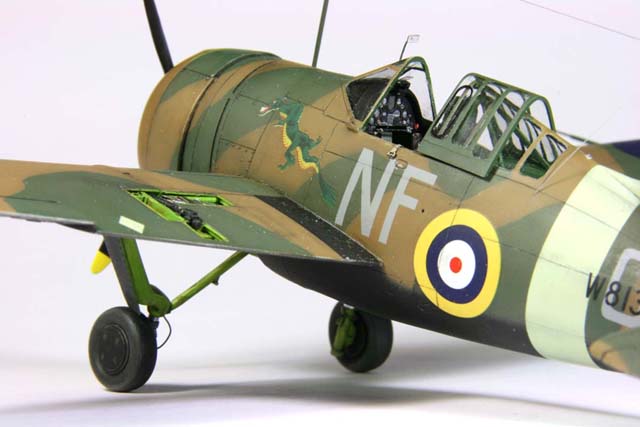
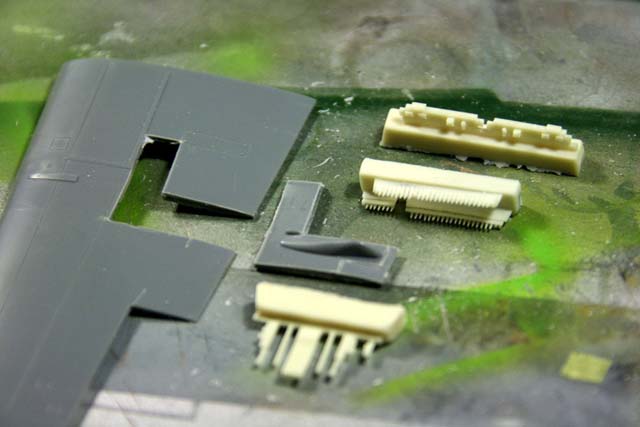
A picture of an open gun bay in the reference book caught my attention, so I decided to include it into the model. I cut out the corresponding panel lines with a micro-saw, and formed the bay from bits of leftover PE frames. The ammo and parts of the gun itself came from the spares box (originally a cal. 50 browning resin set set for the F-86 Sabre).
Tamiya's recipe for zinc chromate resulted is a strangely shining green, which was too much for my taste. While I used the mixed color on the fuselage, gun and wheel bays, I toned it down with red-brown thinned oil paint wash afterwards. There are strong indications that the interior color was a darker green, but after the wash, flat lacker and with the scale effect, it looks OK on the model.
The cockpit was beefed-up with Eduard's PE set. This was unfortunately not enough, because below the pedals the Tamiya kit is basically empty. Here again the SH helped, but the very bottom of the fuselage was amended with pieces of foil.
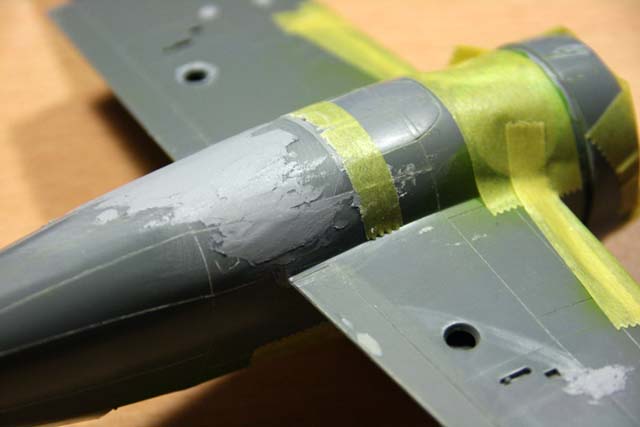
The fuselage fit itself was good, but after fitting the SH parts into the wing assembly, the fuselage and the wing didn't create a flush joint. This had to be fixed with plenty of putty.
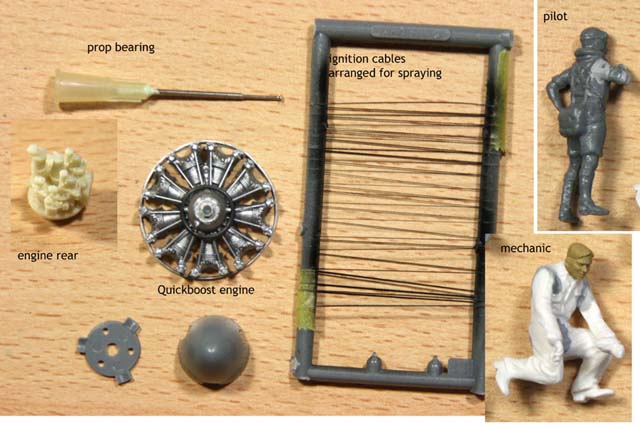
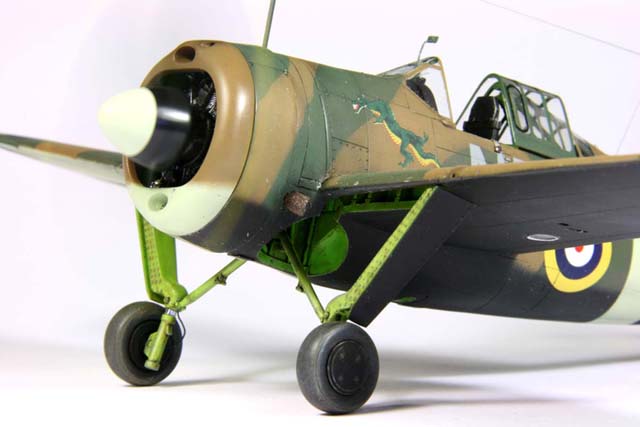
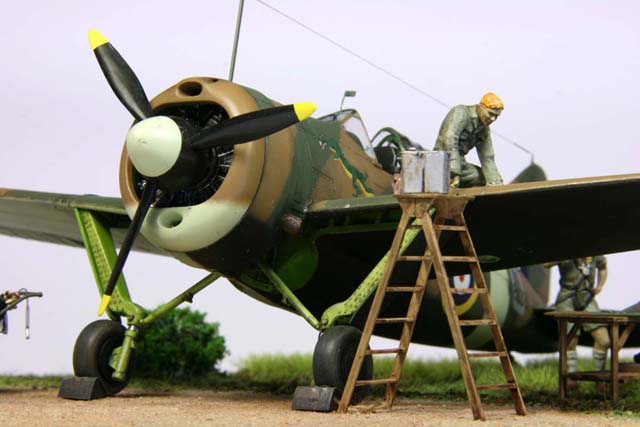
I sanded off the back-wall off the engine to give it more 3D-appeal. Push-rods and ignition harness was added, as well as well as some additional missing aggregates on the front and back of the engine (partially scratch, partially SH).
Painting, Markings and Finishing Touches |
Painting
I used Montex masks for the canopy. They fit well, but on sharp bending radius towards the end of the mask (like on top of the canopy) they tend to peel off, on account of the base plastic being too stiff. I had to clean off the paint which got under the mask.
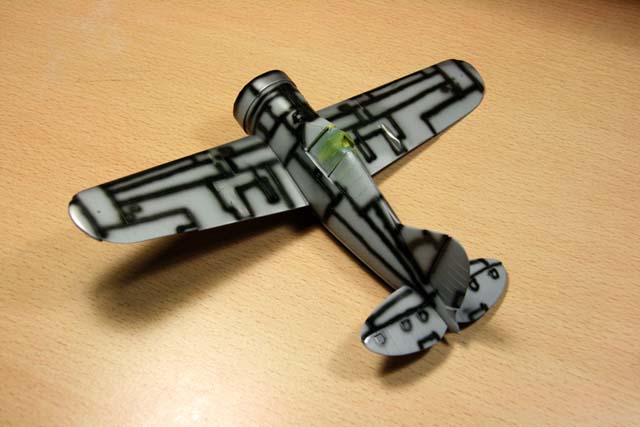
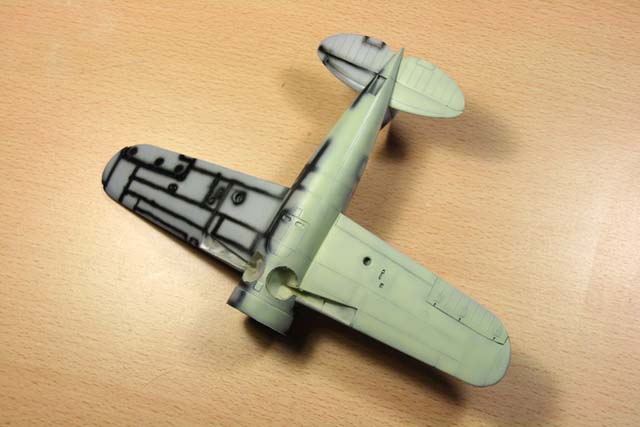
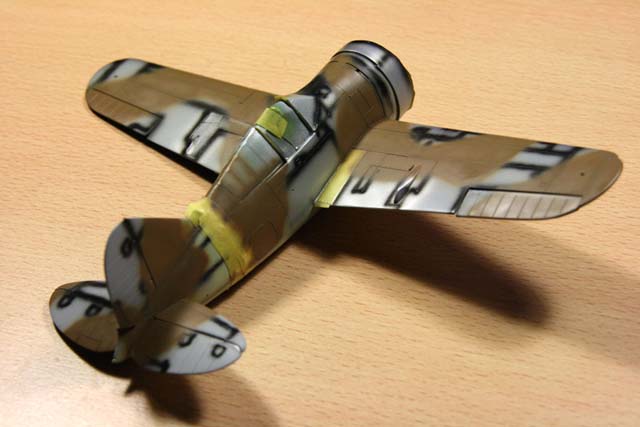
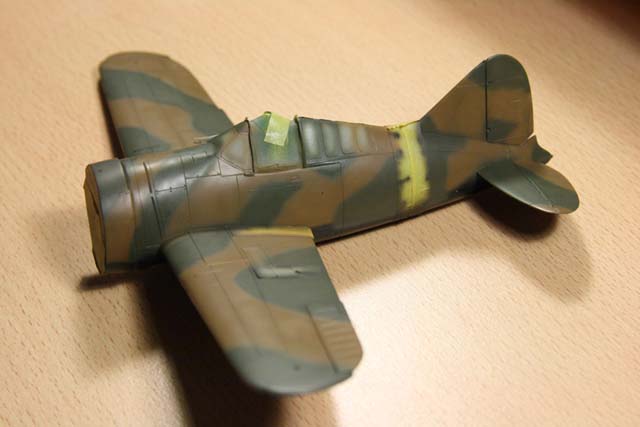
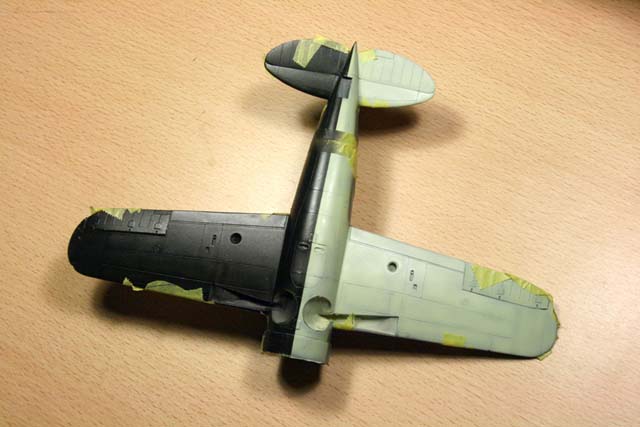
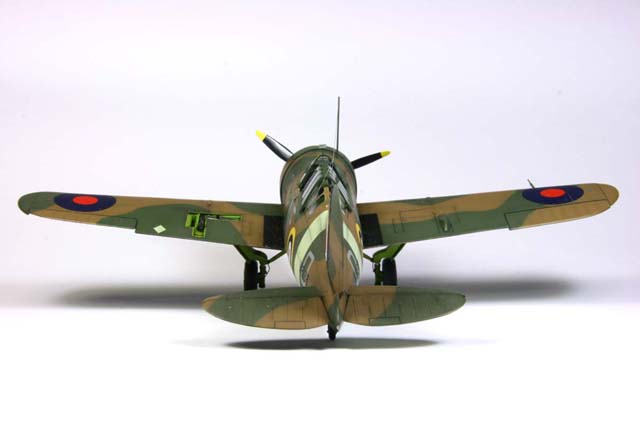
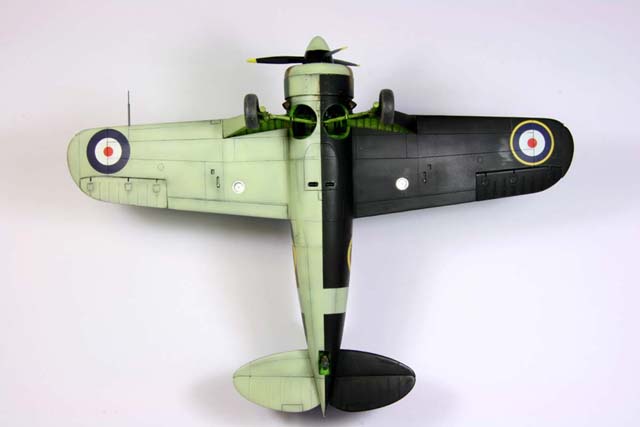
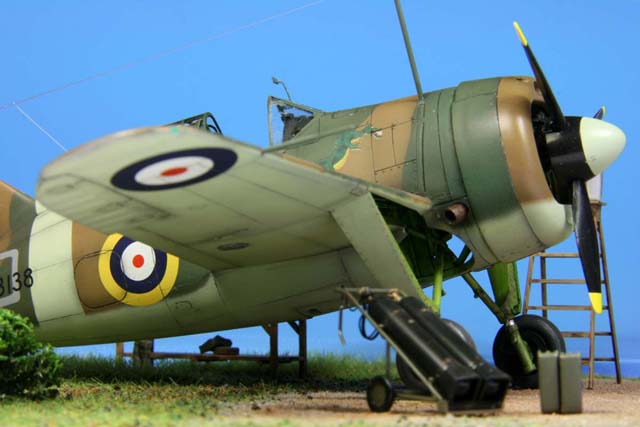
The model was prepared as usual with the help of Mr. Surfacer, then pre-shaded, and finally the base camo was applied using Gunze's acrylics. One of the charming features of this model is the two-tone bright-dark bottom painting. The sky-type-s (or egg-shell-green) same straight from the jar, the black was stretched with some red and brown to achieve a “scale black”. This allows a more plastic appearance of the black side afterwards.
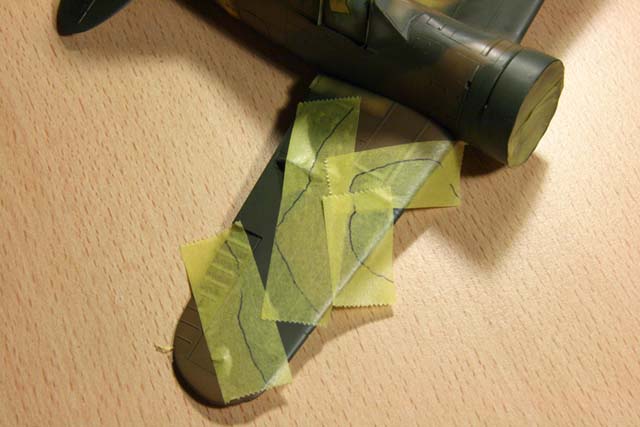
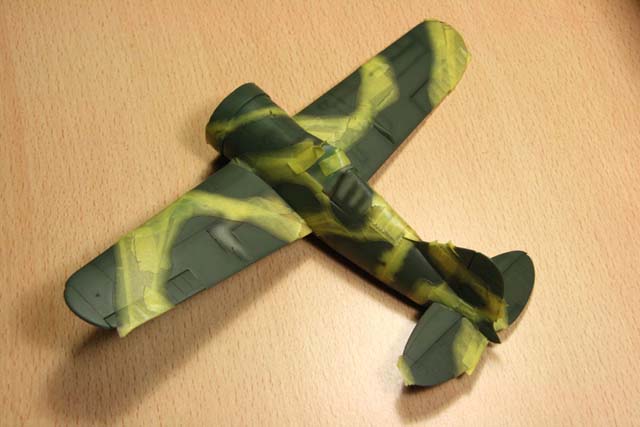
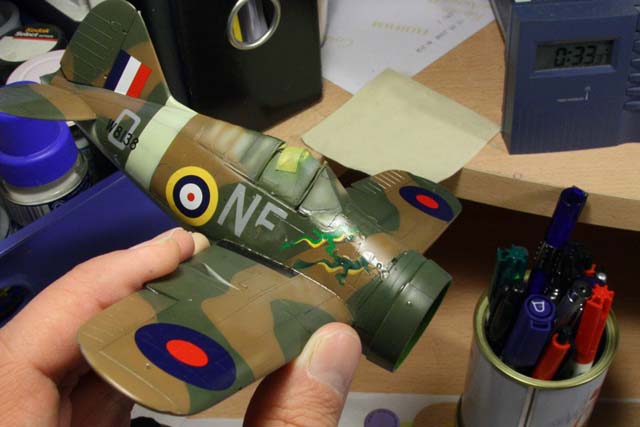
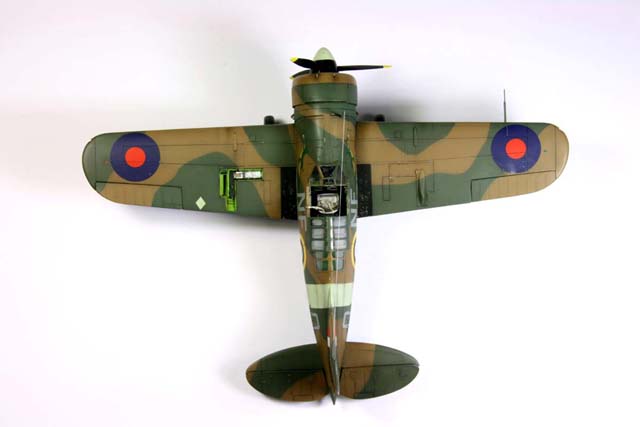
The top side was first sprayed free hand. I tried to stick to the original photographs as far as I could see, then I followed the reference book, since the Tamiya painting instruction was clearly deviating on what was visible on the original photos. As the British camo had rather sharp borders, I used Tamiya tape to mask the areas, and accentuate the edges of the camo fields. The dark earth tone looks OK, but the dark green looks too much olive to me. The reference tables also quote this paint only with question marks. I oversprayed some of the green areas with a thin, inhomogeneous coat of a greener shade, which produced a slightly more plastic effect.
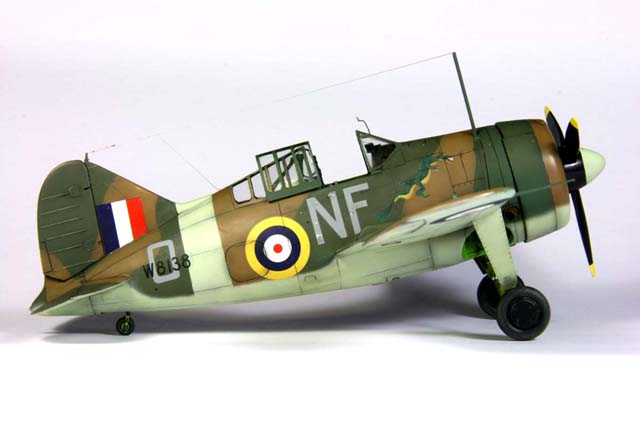
One missing bit on the painting instruction is a bright square on the left wing, which is commonly visible on archival pictures.
The model was coated with a generous layer of future. I applied the decals on the fresh future, before it completely cured. This allows for excellent adhesion and prevents silvering. The decals were set using a strong softener by DACO.
I had the decals from the Kagero book on hand, and was not sure if to use the ones from the book or from the kit, in particular concerning the dragon. I did put both on the model. I liked the Tamiya one better at that moment. Looking now at the pictures and at the finished model, the brighter Kagero dragon seems better suited in the end.
The weathering was performed with turpentine thinned oil paints, then the model was sealed with X-tracolor paint. After the flat lacker cured, I sanded it off above the decals, and re-sprayed, to make the borders really flush with the painting.
Light chipping was done by tooth pick. The wheels got dusted over with artist's chalks and some MiG pigments. Very light fume stains were applied using Tamiya's smoke paint.
The exhausts of the kit were a real joke: basically a pimple. I scratch built new ones from hot bent sprue, which was then drilled out. The paint was silver, the rust was applied with MiG pigment dark mud.
Finishing touches
The prop got a bearing from a pin running inside a piece of syringe tube. The syringe was glued into the spinner, and the pin into the engine. Antenna mast was made from squeezed syringe for extra stability, the antenna itself from stretched sprue. Position lights were as usual molded from bits of transparent colored styrene heated on aluminum foil over a candle. The mirror was made from leftovers of old PE parts.
The landing lights were taken from the SH kit, their frames cut out from aluminum foil.
After removing of the masks, I noticed that super-glue stained the canopy window from inside. Already considering the canopy ruined, I restrained to a feat of desperation: I've found some super-glue de-bonder in the shelf (Legato make), which I then just brushed in on the canopy window. To my amazement, I could remove the super-glue without destroying the clear part.
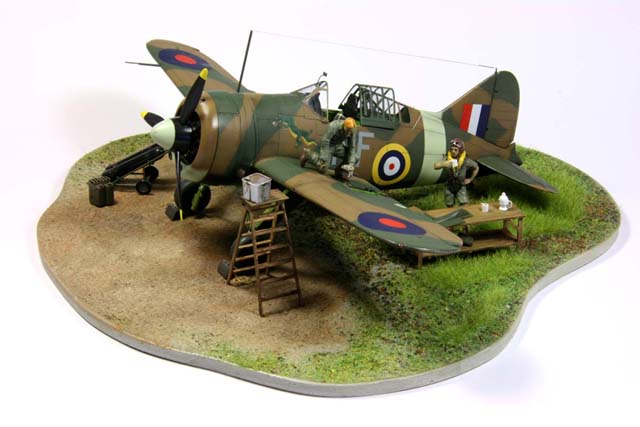
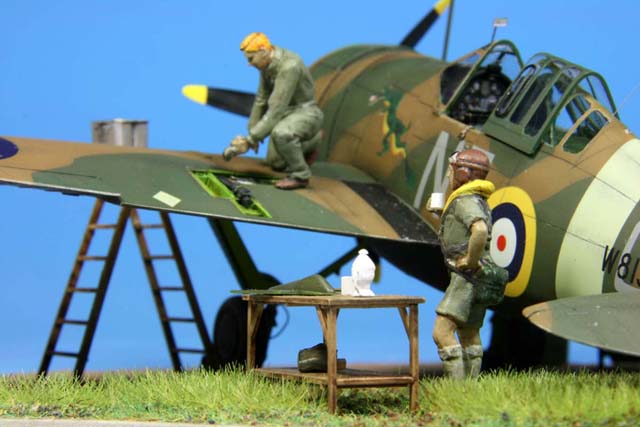
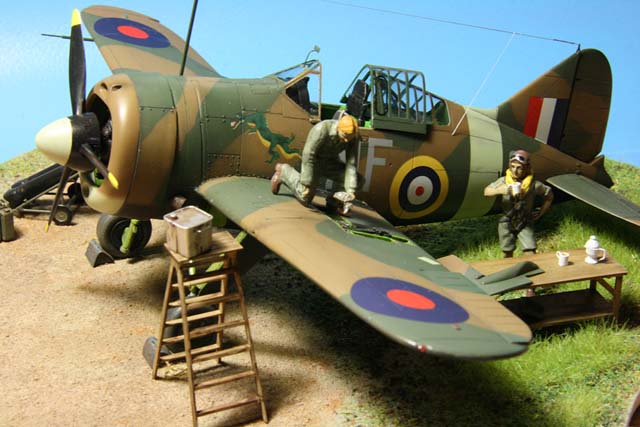
Diorama
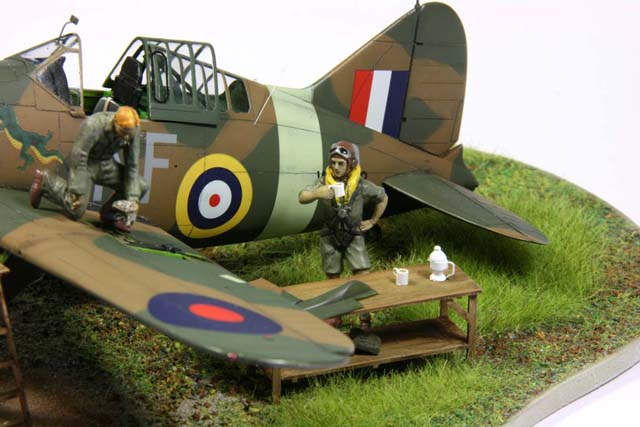
The pilot included in the kit, actually triggered the idea to build this model. Not standing with a hand on the plane, though, but rather, with a cup of tea. Granted, the pilot was a Kiwi, but paying tribute to Commonwealth's tradition, the diorama shows the pilot taking a last cup before the flight (I know, a can of beer would be possibly more suiting ;-).

Therefore the pilot's figure was slightly “operated” to get into the right stance. The tea service was scratch built from bits of sprue.
The mechanic is a blend of parts mostly based on a Preiser set, but with a head from the ICM RAF figures set. This set also contributed the ladder, the table, the canisters and the cart with the tanks.
The chocks were scratch-built, the bush is a re-modeled hedge from railway supply.
The base is bought as is from Marc58.
While not as easy as the manufacturers reputation would promise, the kit didn't pose any major problems in the build. Embedded in the small vignette the Buffalo is a real gem of my collection.
And last but not least, it reminds of childhood days. Back then I built the Matchbox Buffalo, which I got instead of a “really cool” fighter like a Spitfire or a Messerschnitt.
Nowadays I surely wouldn't change...
Model, Images and Text Copyright ©
2009 by Jaroslaw Kierat
Page Created 4 February, 2010
Last Updated
4 February, 2010
Back to
HyperScale Main Page

|
 Home
| What's New |
Features |
Gallery |
Reviews |
Reference |
Forum |
Search
Home
| What's New |
Features |
Gallery |
Reviews |
Reference |
Forum |
Search