|
Eduard's 1/48 scale
Albatros D.Va
by Garfield Ingram
|
Albatros D.Va |

Eduard's 1/48 scale Albatros D.Va Dual Combo is available online from Squadron.com
Eduard is by far, the most outstanding company when it comes to 1/48th scale, injection molded models of Great War aircraft. Patience and determination are the hallmarks of this company - this I say for two reasons. Firstly, if you have seen or built any of the original offerings of Eduard WW1 kits, you will see very simple injection molded parts along with a forest of photo-etch trees to make up most of the fine detail. Fast forward to today and look at their offerings. Their new kits such as the Fokker DVII and the Spad XIII are some of the finest examples of injection molded kits ever made. Photo-etch has mercifully been kept to a minimum but the plastic detail such as rib stitching is fantastic. In my view, it takes great tenacity to push the quality of their kits as they have done. It also requires a great amount of patience. When most mainstream companies overlooked Great War subjects, Eduard took the gamble and filled the much over-looked genre. It took patience to hang in there producing kits that, let’s face it are not as popular as Spitfires and 109’s.
As I have mentioned, there is a world of difference in the quality, (or should I say build-ability), between the first and latest generations of their kits. The Albatross D-V kit lies somewhere in between although it is much closer to the standards that exist today. The kit is readily available and has been offered in numerous marking options over the years. In my personal stash, I have at least four more to build as the variety of colourful markings seems endless. My choice for a subject came from Ospreys’ ‘Albatros Aces of World War 1’, by Norman Franks. I have spent hours reading and leafing through the wonderful colour illustrations, dreaming of building almost every one of them.
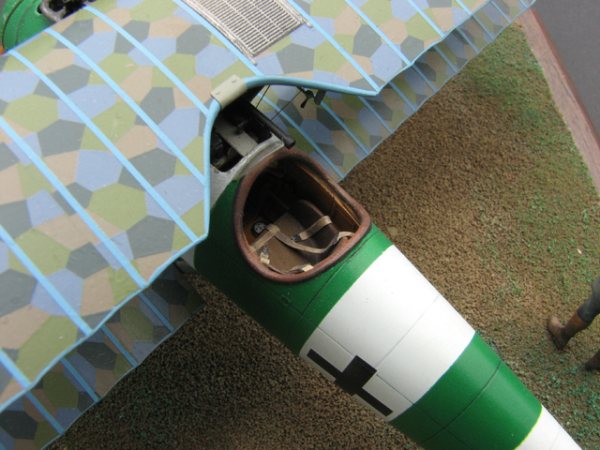
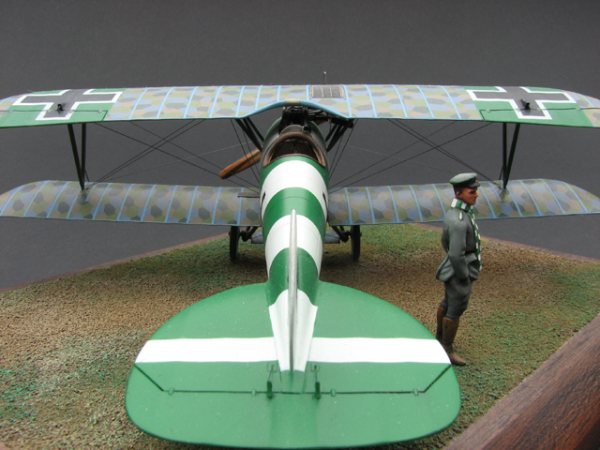
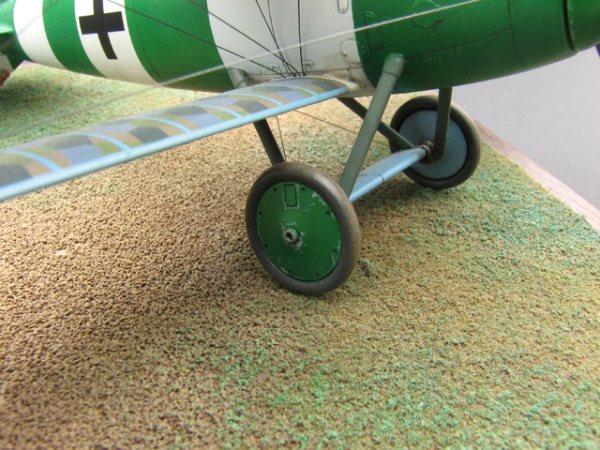
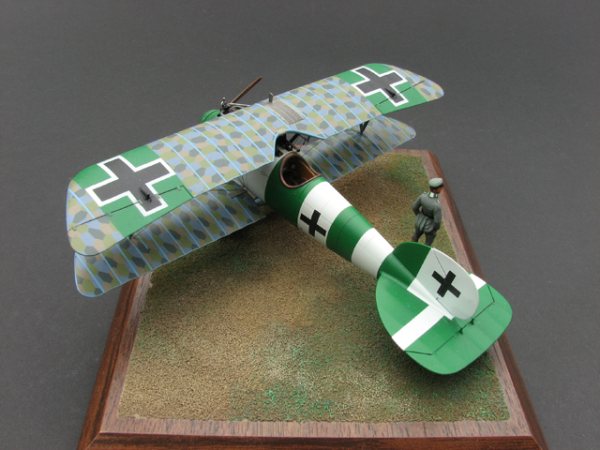
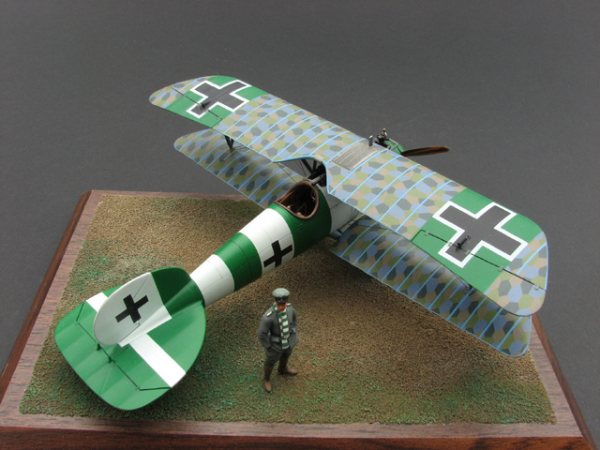
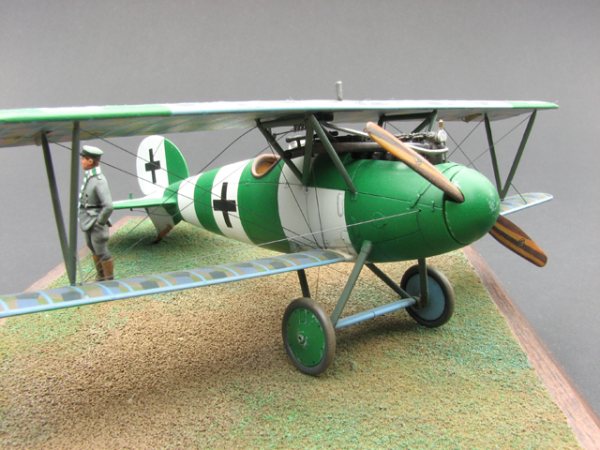
This particular aircraft represents a D-Va flown by Ltn. Helmut Dilthey of Jasta 40. In reading his short bio in the book, I learned the origins of his somewhat outrageous colour scheme. Dilthey was a Saxon and as I found out and the flag is a simply of two equal bands green and white. These colours, he applied down the length of his aircraft and added to the tailplane and wheels.
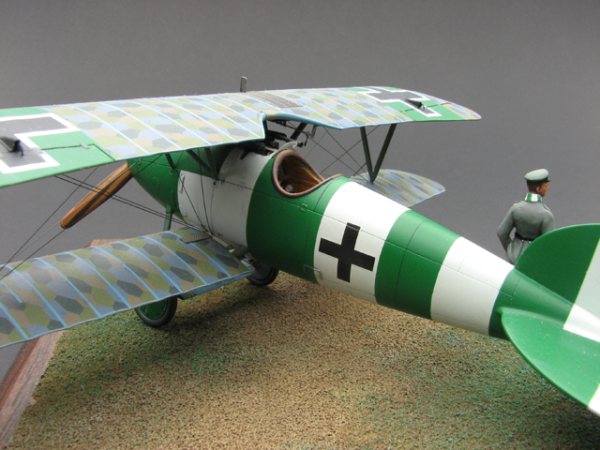
You will find that there is a wide range of interpretation of colours of German lozenge and rib tapes amongst the manufacturers. On-line can be found discussion groups such as ‘The Aerodrome’, where there are people with great knowledge of the subject and it makes for some very interesting reading. I will admit now that my lozenge is probably the wrong colour, direction, shape and in other ways that I am totally unaware. For this stage, I tried to keep as close to the research that I was able to uncover and relied on the colour interpretation of Eagle Strike Decals which to my eye, look ‘righter’, than the rest.
In general, I must say that this was a rather adventurous build for me because of the complexity of the finish. I found it useful to spend a period of time building simpler WW1 subjects such as the Nieuport 17 in order to hone the necessary skills to do rigged biplanes. Building processes are hugely important in building biplanes- rigging, applying rib tape and tricky alignment of struts and multiple wings are not processes that are commonly met when building WW2 fighters. If good overall results are going to be met, it is necessary to stay focused, be precise and above all, to be patient!
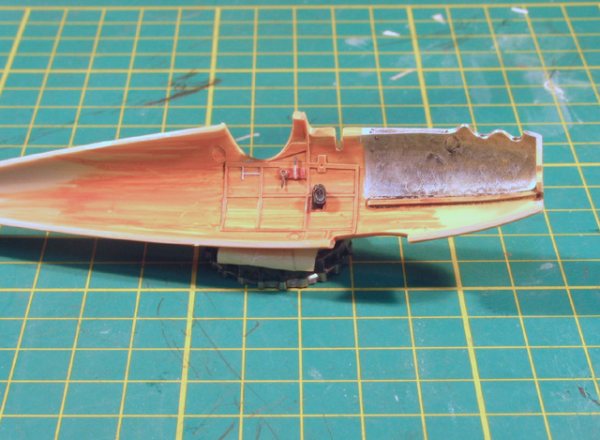
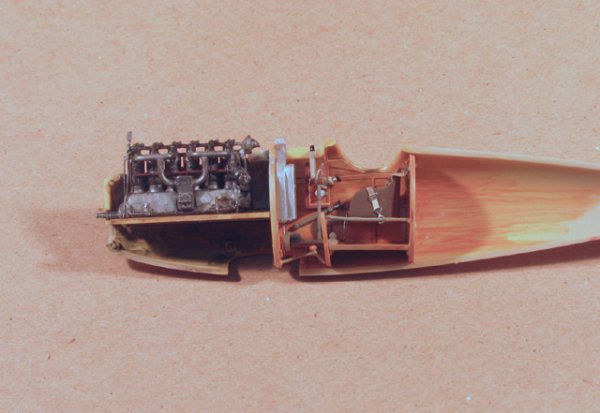
As usual, the first stop is in the cockpit. A base coat of Humbrol flat pale yellow as mixed up and sprayed on the inside. Once dry, a hand- brushed streaking was applied using an orangy-brown acrylic thinned with alcohol. This coat is meant to simulate the clear varnished wood as was often found in these aircraft. If the base enamel is cured, the acrylic was won’t harm it. The basic do-dads were added to the side walls of the cockpit. I wasn’t entirely clear as to what the engine panels are made of, hence I painted them grey and gave the whole area a wash of oily dark grey.
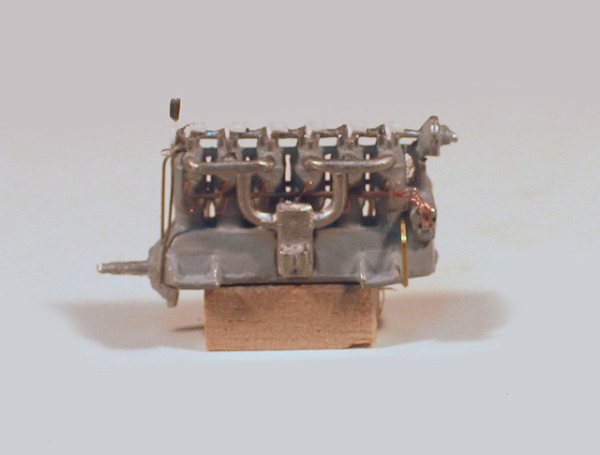
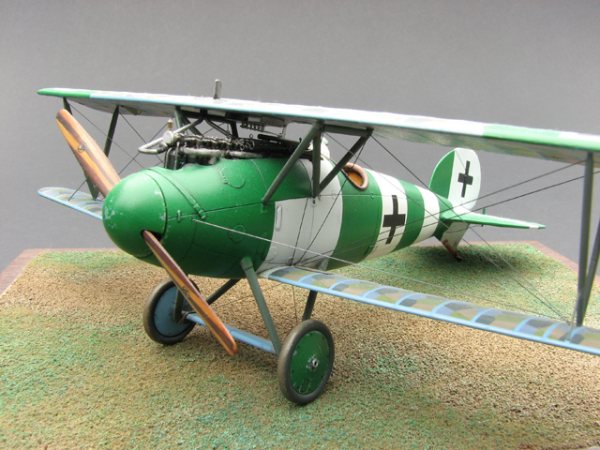
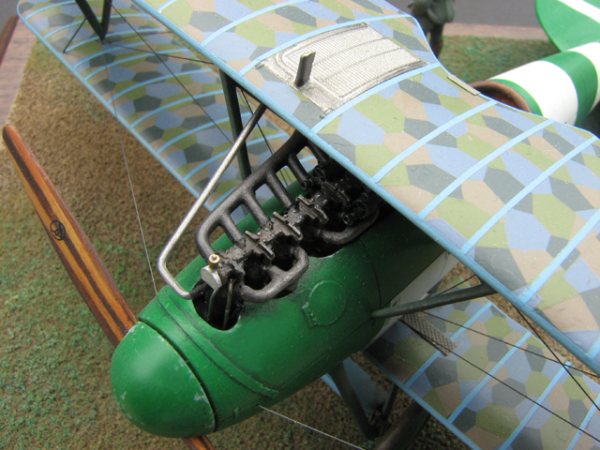
The Eduard engines are rather general in detail as used in the early and middle generation kits. I therefore decided to replace it with an Aeroclub item but with a number of extra wires and gizmos added. There are some excellent on-line reference images available but be careful to ensure which version of engine you’re looking at. Is it a Mercedes DIII or a DIIIa…?
Before closing the halves, I made sure that all of the necessary parts were accounted for and aligned. Once the fuselage is closed, it is very difficult to re-align a crooked seat so test-fit before you glue!
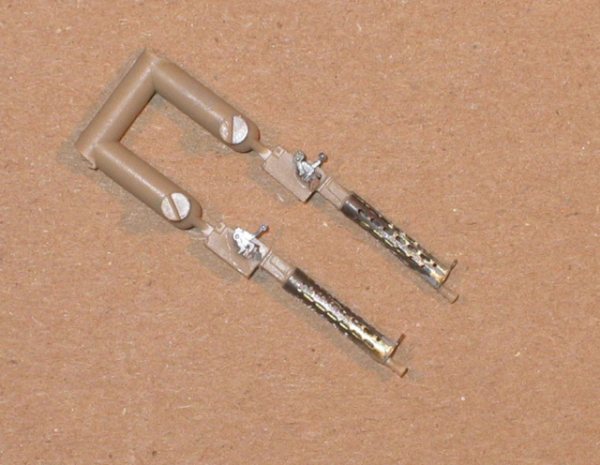
I like to prepare all of my accessories at the beginning. The guns have been detailed with the excellent photo-etch parts that Eduard is famous for. The cooling jacket was formed by rolling the p.e. part around a punch pin of appropriate diameter. The molded on cooling jacket was carved away but I was careful to keep the muzzle. The barrel was replaced with a piece of round styrene stock, the jacket applied and the saved muzzle added last.
Here’s one that you won’t see often. The final success of the work is dependent upon the work done in previous stages. The upper wing and struts will be a real problem to install if the lower wing has not been aligned to the fuselage. I found this out the hard way with an earlier build of a Pfalz D-III. A tab was installed before the fuselage halves were joined having cut away a recess in one of the sides. It is important that this piece is long enough to give a good visual comparison with the lower wing.

You can easily see that the lower wing, dry fitted to the fuselage simply doesn’t align properly with the tailplane and this is with it fitted very tightly. Lego blocks stolen from my children allow the model to be mounted on a stable, level surface.
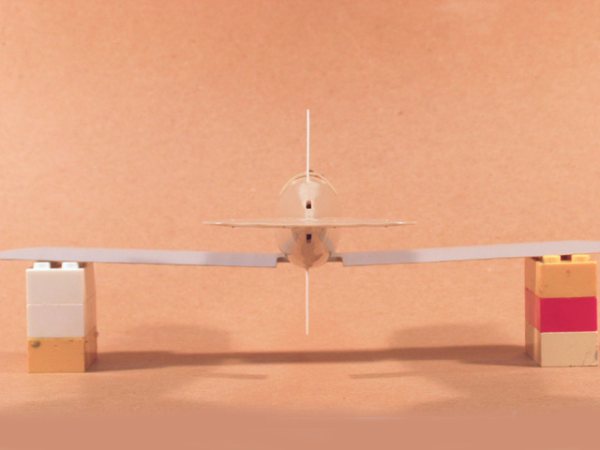
It was necessary to carve away the tailplane/fuselage fillet on one side and add a bit on the other in order to align everything. As a result, it was necessary to do a fair bit of fairing in using Tamiya putty but in the end the results were well worth the effort. Once everything is mounted to one’s satisfaction the tab is cut away and blended into the surrounding surface.
Eduard supplies a number of surface details in photo-etch which must be applied before painting. This generation of kits has more than the present ones and it can be a rather tedious process. I use ca to attach them but a friend swears by Future which allows a bit more wiggle time.
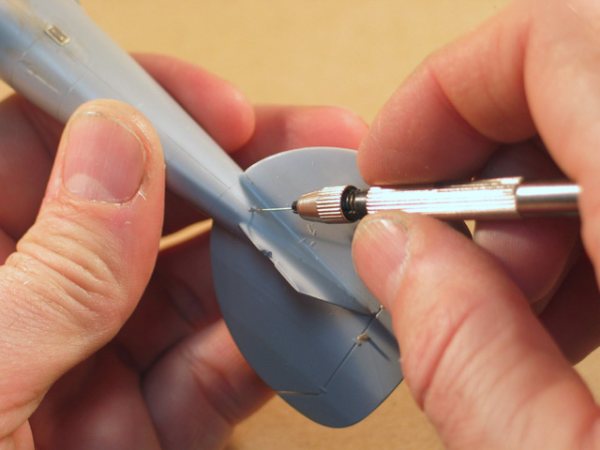
Plan ahead! All anchoring holes for the rigging wires were pre-drilled at this time using a #80 bit. I use a painted mono-filament thread to simulate the wires and this size of hole is fine. When drilling, it is necessary to consider the angle of the thread entering the surface to prevent it from bowing before it enters the hole. It is a good idea to mark the location of the holes before drilling to ensure symmetry.
The wings on the real deal were separate components and so it is necessary to create a nice, clean scribed line to simulate the joint. Compared to WW2 aircraft and especially modern jets, Great War aircraft are made up of obviously independent parts, bolted, laced or strapped together. Close-up photos of real aircraft will often show that what one thinks should be a smoothed joint should in fact be a recessed line or over-lapped joint.
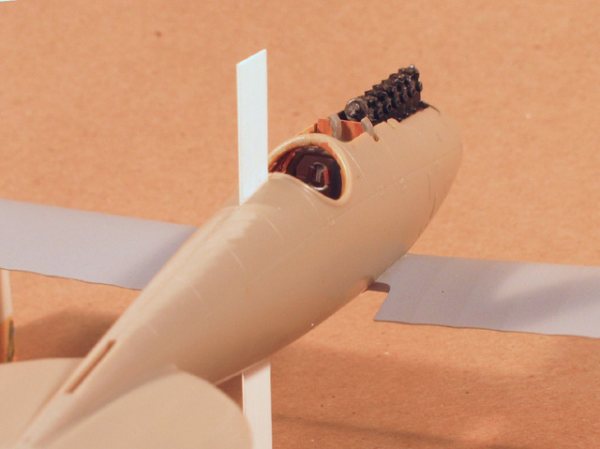
Before primer and paint, it is a good idea to ensure that the cockpit and engine are completely sealed preventing spray and dust from entering.

A piece of masking tape was laid on top of the cockpit padding. The circumference was traced with the side of a pencil, the tape removed, trimmed and re-applied to the model. The tape had little contact surface on the edge and it was therefore sealed with liquid masker.
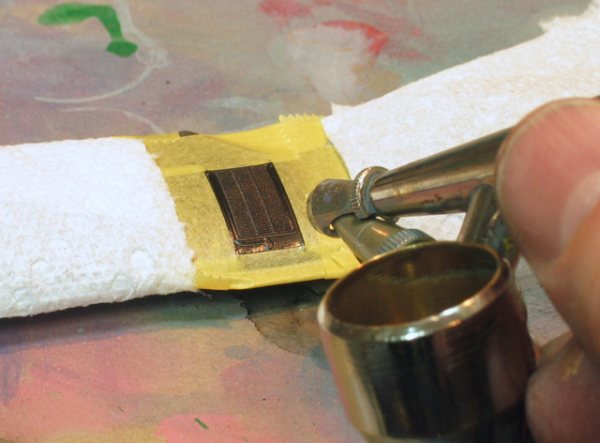
The radiator was painted with brassy metallic paints and given a wash of dark to pop out the detail. It is best to do this before applying the lozenge decal which won’t tolerate much masking.
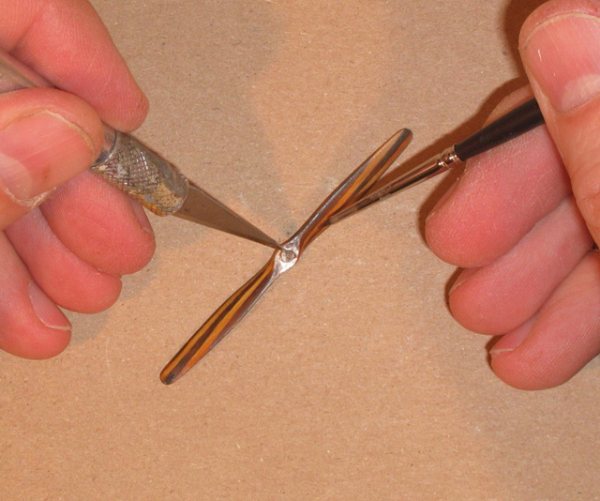
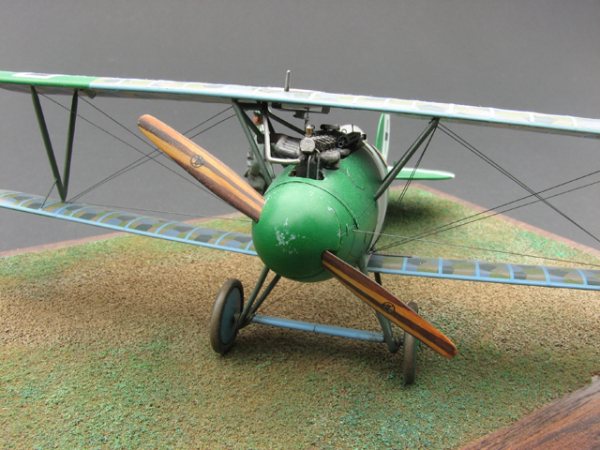
The wooden prop was prepared at this point. The process of re-creating the light/dark laminated wood layers, is one that seems to scare off a lot of modelers. There are available online, laminated wooden props and no work is necessary except installing them. These items are very attractive but expensive and so I chose to do it the old fashioned way. To achieve the finish, the prop was first sprayed with a pale yellow base of Humbrol flat. Once dry, the entire part was streaked in the same manner of the cockpit interior and set aside to dry. And now the tricky part. Dark brown acrylic was mixed up and thinned to a consistency just short of allowing total opacity when applied with one coat. Using a very fine brush, I painted the laminations one side at a time using repeated, long stokes ensuring that the edges are straight and even. The slightly thinned paint will do two things- it will allow a bit of the base colour to show through and give the look of wood grain. Secondly, it will allow the edge of the colour to be very slightly soft and therefore forgiving to a slightly crooked edge. This is one of the afore-mentioned stages that require a lot of patience!
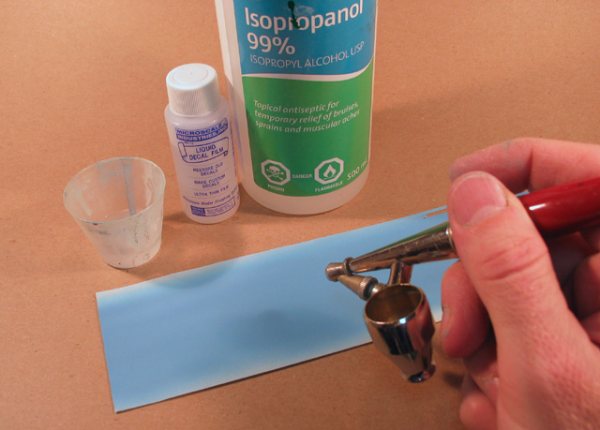
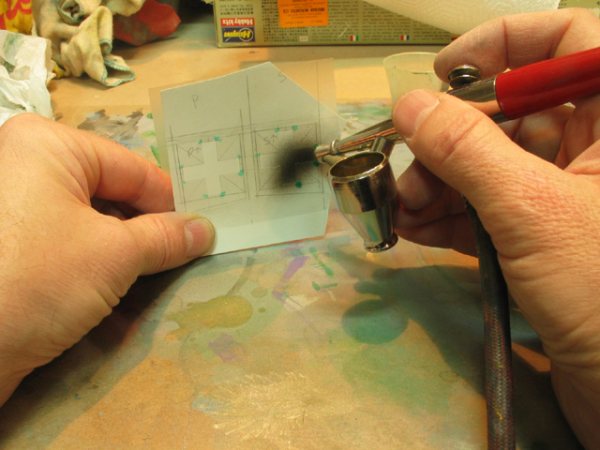
And now, on to the lozenge. I felt that I would be making a lot of mistakes with the rib taping and so decided to make my own. Clear decal sheet was sprayed with a heavy coat of light blue acrylic paint that was later sealed with liquid decal film. This will help to reduce fracturing when slicing the sheet into narrow stips.

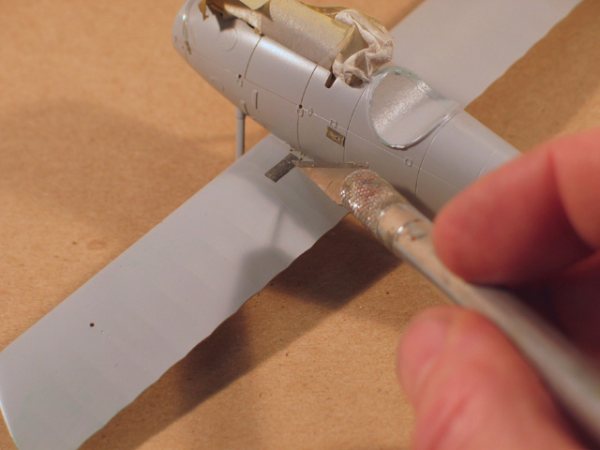
On a number of aircraft, the leading and trailing edges of the wings were finished in tape to strengthen the edge between the top and bottom layers of fabric. The same light blue paint was therefore sprayed along these edges before the lozenge is applied. This will avoid having to use long, continuous lengths of tape which will be difficult to conform, especially to the scalloped trailing edge. If flat paint is used, it is necessary to clear coat it before applying the lozenge decals.
Eagle Strike produced a fine set of upper and lower five colour lozenge printed in standard widths as were the original bolts but they are now out of production. If you find any sheets, I suggest that you snap them up as they seem to be favoured amongst the WW1 modeling community. I have heard complaints from some local guys that they don’t like the look of these decals because of the sharp, raised line between each lozenge cell. Personally, I like the colour interpretation and find that a number of clear coats will reduce the size of these edges.
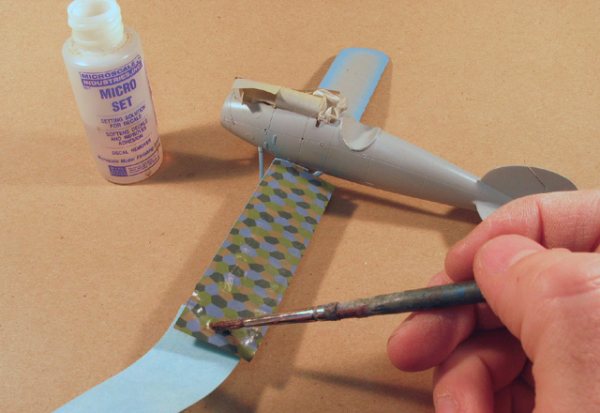
It is my understanding that the upper wing was covered in sections of farbric but the lower in one continuous strip. This makes it a good start if you haven’t lozenged before. Solvaset is like acid to these decals so I recommend a less aggressive decal solvent such as Micro Sol/Set. The edge of the decal is set back a tad from the leading edge, exposing the blue edge tape colour. Once it is down, give a soft dab but let it sit and settle in on it’s own.

Before the decal had entirely dried but was stable on the surface, I lopped off the majority of the overhang and pressed it down to more easily show the edge.
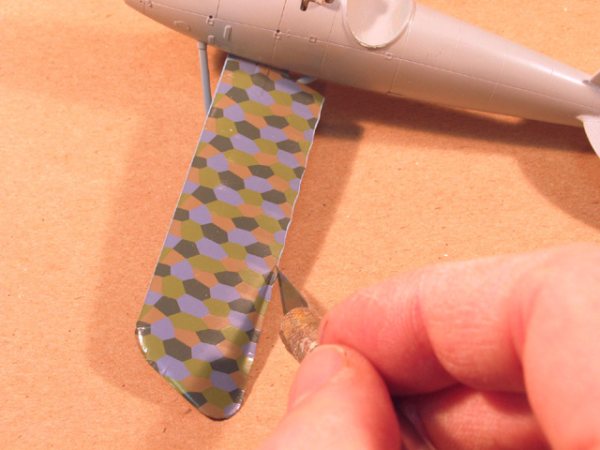
The trailing edge was carefully cut, following the scalloped edge. I used a very sharp #11 blade, ensuring that it was at a very low angle to the surface. If you can make the edge parallel with the trailing edge, nice and even, good for you! In reality, the tape probably has a fair amount of wiggle to it as this was a hand-done process. After the lozenge was completed, the surfaces were sprayed with several thick coats of Tamiya clear acrylic to provide a good surface for the rib tapes.
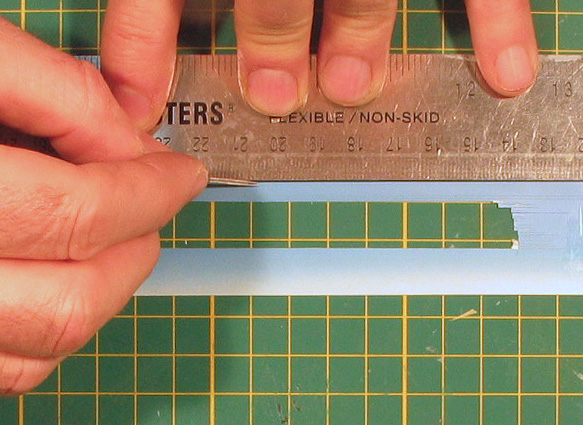
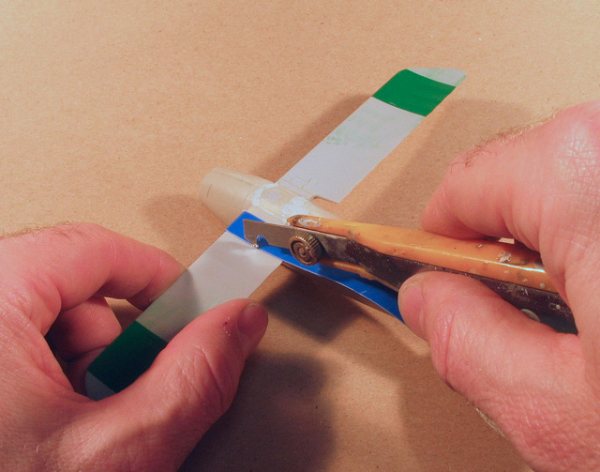
Numerous narrow strips were then cut using a straight edge and two #11 blades ca’d together. Keep the blades at a very low angle to avoid fracturing the edge. I made a lot of these strips as I didn’t want to worry about running out.
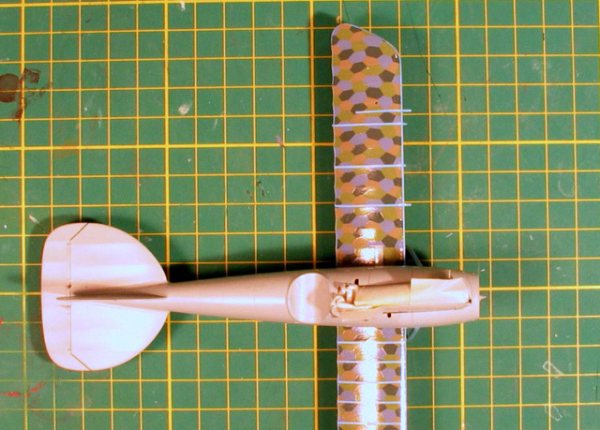
The tapes were oversized and placed on every other rig. If you start at one end and progress along, you may compound any divergence from a right angle and end up with them all being crooked. It is also helpful to lay the model on a grid to verify the set of the tapes. The over-sized lengths reduce bowing of the tape and can be trimmed with a sharp #11.
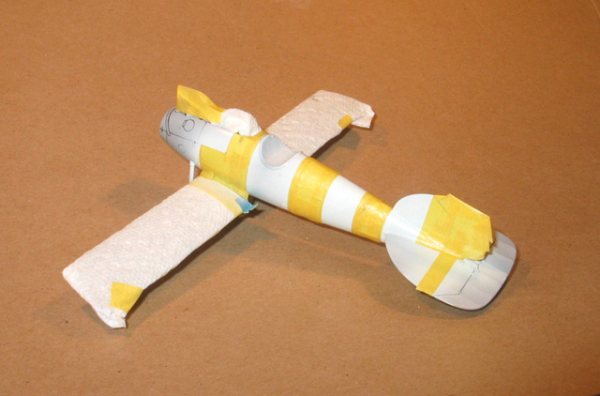
Once all of the lozenge and taping was complete, it was time to paint the rest of the model but not before giving the finished wings cross decals and several sealing coats of clear. It may seem that I have this out of sequence but I did this for a reason. Whilst applying the lozenge and tape, the model was going to be handled a lot. If the fuselage was painted I was concerned that the acrylic paint used would be soft and thus be embossed with finger prints. The danger is masking the lozenge decal. I ensured that the contact edge of the tape was very narrow and that the decal was well attached. Still, I held my breath when I removed the masking. Gunze gloss white was sprayed on the fuselage, let dry and masked using Tamiya tape. Panel lines helped to align the strips of tape.
The remainder of the model was painted with Gunze acrylics, coated with Tamiya clear, decaled and sealed with more clear. The final model was dusted with very light coats of Floquil clear flat, thinned with lacquer thinner to dull the gloss a bit.
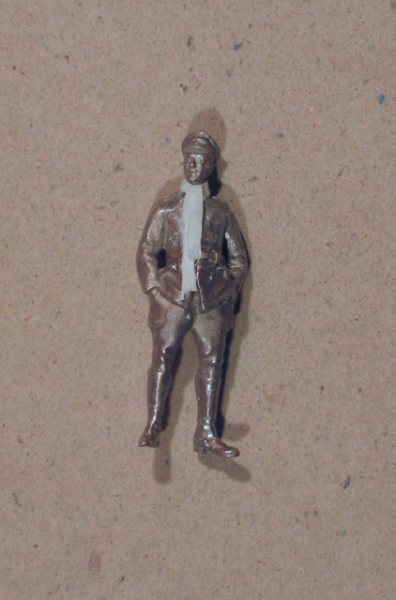
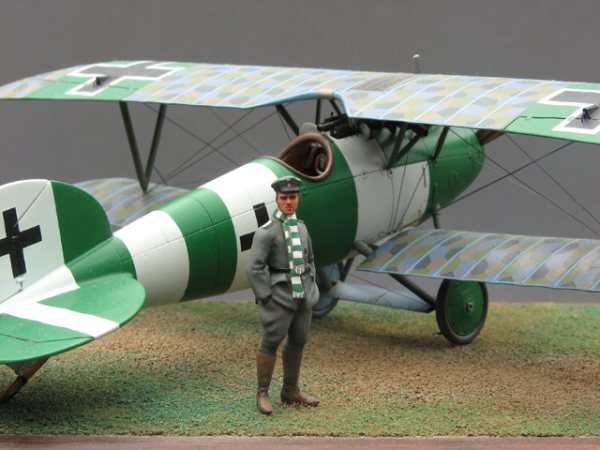
The figure is by Hecker & Goros but was in need of a fair amount of modification. Referring to a photo in the above mentioned publication, parts of the uniform were added and deleted. I had the head painted and was not satisfied with the results. I found the articulation of the face to be too soft and therefore carved it off. I replace it with a nicely sculpted head from an ICM figure. For a small creative touch, I added a long scarf made from Milliput.
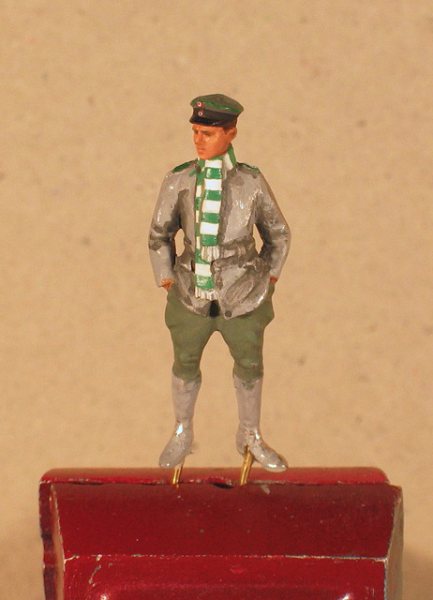
Helmut, please forgive me for my diversion from documented evidence but I couldn’t resist painting your scarf in the same manor as your airplane The grey uniform was a bit dull and simply need a zap of colour! The figure was painted with Humbrol enamels and shaded with oils. Eduard supplied a fret of photo-etched medals with their Fokker DR-1 kit which I ‘borrowed’, for this figure.
Rigging is a whole other article and I will simply say that I used mono-filament line, painted with steel. One end of the rigging was ca’d into the pre-drilled hole and when set, pulled through a hole through the strut or fuselage at the other end. Very thin ca was used to secure it.
The model was mounted on the base to aid handling. A simple surface of sod and soil was created from railroad diorama material.
Models, Description and Images Copyright © 2010 by Garfield Ingram
Images of completed model Copyright © 2010 by Tony Bell
Page Created 24 August, 2010
Last Updated
25 August, 2010
Back to HyperScale
Main Page

|
 Home
| What's New |
Features |
Gallery |
Reviews |
Reference |
Forum |
Search
Home
| What's New |
Features |
Gallery |
Reviews |
Reference |
Forum |
Search