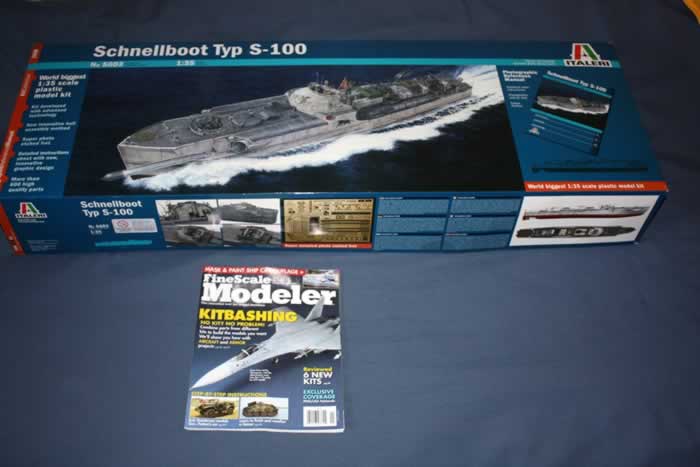
Schnellboot Typ S-100
Italeri,
1/35 scale
S u m m a r y |
Catalogue Number: |
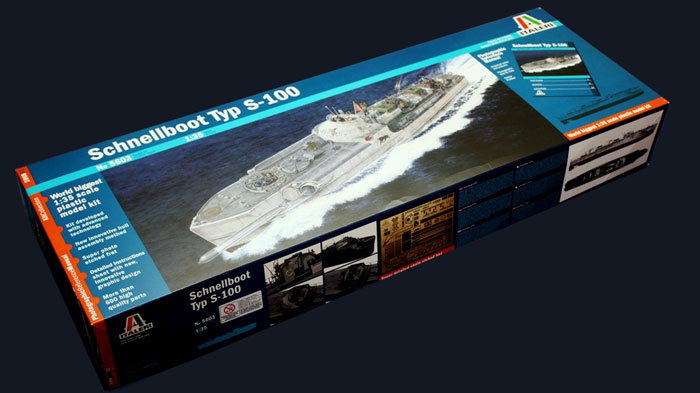
Italeri kit reference 5603 1/35 Schnellboot S-100 |
Scale: |
1/35 |
Contents and Media: |
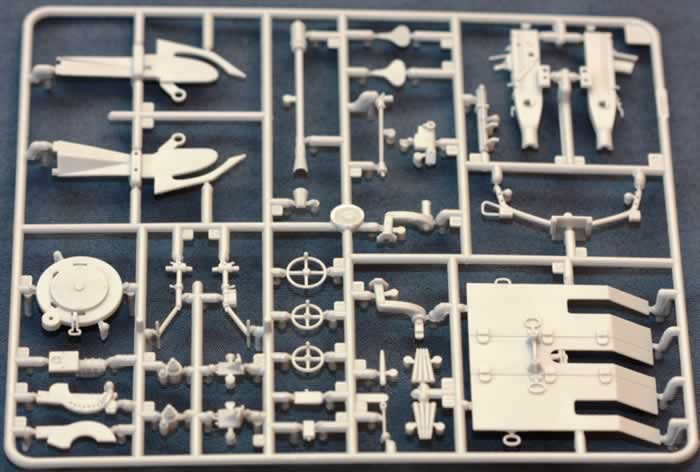
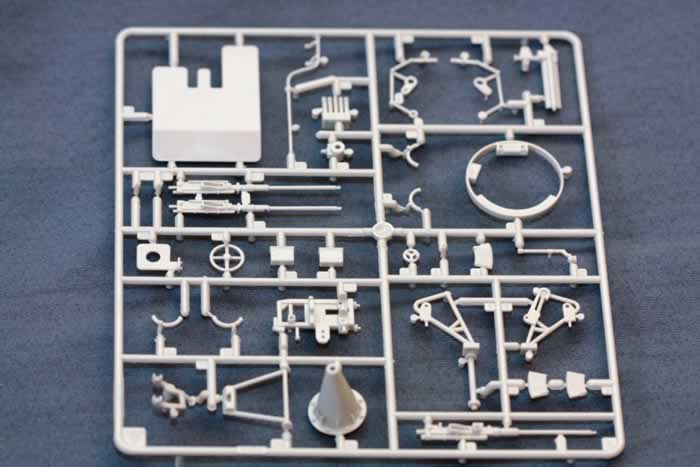
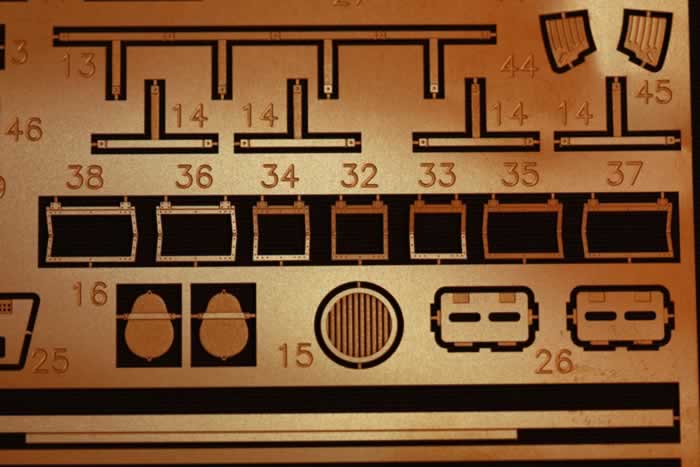
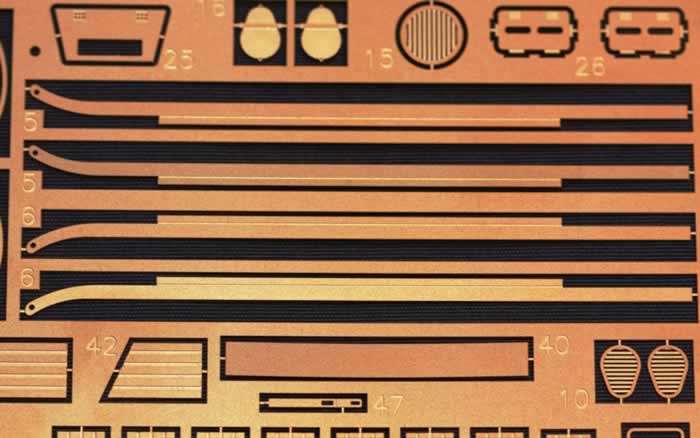
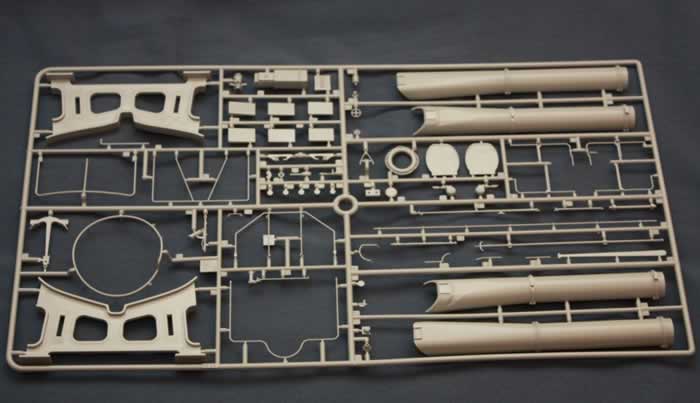
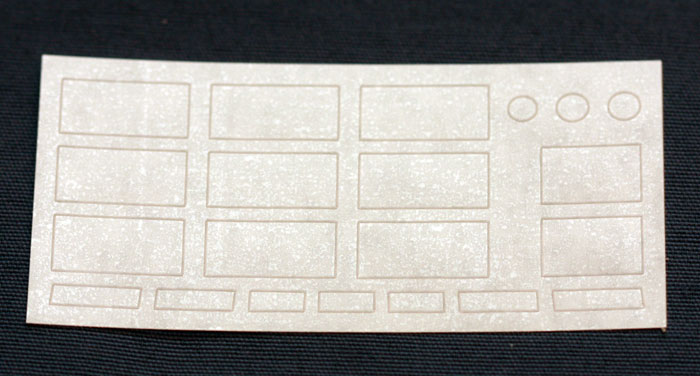
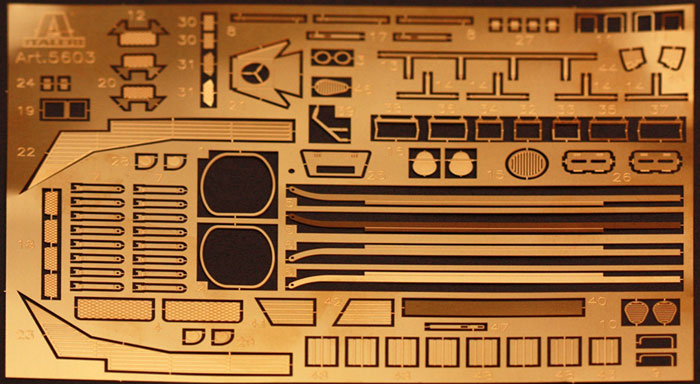
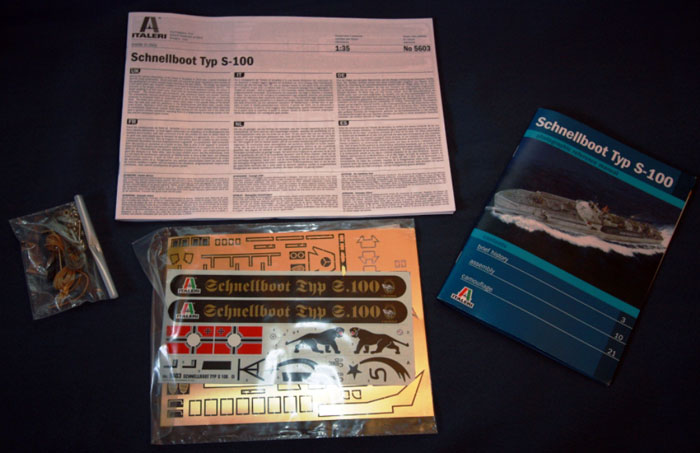
452 plastic parts in grey styrene; 21 pre-cut windows in a clear acetate sheet; 90 photo-etched parts; decal sheet; 2800mm of thick thread; 2800mm of thin thread; 25 screws; 8 Nuts and a small screwdriver; 44 pages of A4 Instructions; Photographic reference mini book printed in gloss paper A5 format with 24 pages containing 16 black & white wartime photographs, 22 color pictures of the model assembly, 2 color profiles, two wartime illustrations, support text. |
Price: |
Purchased in Portugal, directly at the local hobby shop. Price: € 123,47
Worldwide Available at your favourite model shop or mail order house.
USD$224.98 available online from Squadron.com
|
Review Type: |
FirstLook |
Advantages: |
Great subject choice. Giant kit, one meter long (and the box is taller than your legs). Stunning wow effect once finished. Big, however, very well planed and presented to make it quite easy to do. Spectacular box art painting is not marred by typing or logotypes allowing a great framing to d_cor your model room. Professionally presented product. Robust packing. Small book inside. In many key areas this is a highly detailed model. Excellent, in fact outstanding, use of photo etched parts without overcomplicating the kit. Very cleverly designed. Great bridge multimedia design, detail and finished look options. Delicate raised rivets like it should be. Stunning torpedo launchers and exquisitely detailed torpedos. Tremendous realistic depth charge ramps. |
Disadvantages: |
Some may complain that the hull is moulded in two halves. Unlike the previous Italeri PT-596 kit, this Schnellboot S-100 has no aluminium turned guns. Very fragile rails and guards. Few extras. Kriegsmarine decal flag is censored – you will need to search your spares to complete the design. |
Conclusion: |
What a breathtaking kit - Without doubt the one of the best Italeri ever created. This is the perfect kit_ a modeller may wish to model all this long winter nights and the finished model has it all to become the centrepiece of your kit collection. Furthermore, for what’s in the box, it is a tremendous value for money. Highly recommended to all enthusiasts of plastic modelling! |
Reviewed by Nuno Andresen

Italeri's Italeri's 1/35 Schnellboot is
available online from Squadron
Italeri has been issuing
terrific model subjects in their recent past. After the excellent Elco 80'
PT-596 issued last year, now arrives the eagerly awaited Kriegsmarine
counterpart – The German Schnellboot Typ S-100.
Kriegsmarine fast crafts
are well known in the modelling community. In fact Revell issued a staggering
kit of the S-
100 in
the small 1/72 scale back in 2001 and the finished product is already quite
appealing. You may wish to take a look at this previous Hyperscale article
presenting a great model by Chris Wauchup: http://hsfeatures.com/s100cw_1.htm
Now imagine this highly
attractive subject twice as large! As you may have guessed you are in the
presence of a strong museum masterpiece candidate that only appears once in a
while.
I am six feet tall and
this box stands one inch above the belt in my pants! Therefore you
won’t be able to hide it once entering the house. But don’t
sorrow it. In these long winter nights, you may wish to talk with your
beloved one and combine with her a gift... With such a pack you can also
promise not buy anything more until next Summer! It will keep you busy till
then!
The first
moments with the box will reveal a lovely large box art completely isolated
from Typing and Logotypes which will allow you to frame it once the model is
finished. Just protect this gem during assembly. It is too beautiful to be
scratched during normal manipulation. After contemplating for several minutes
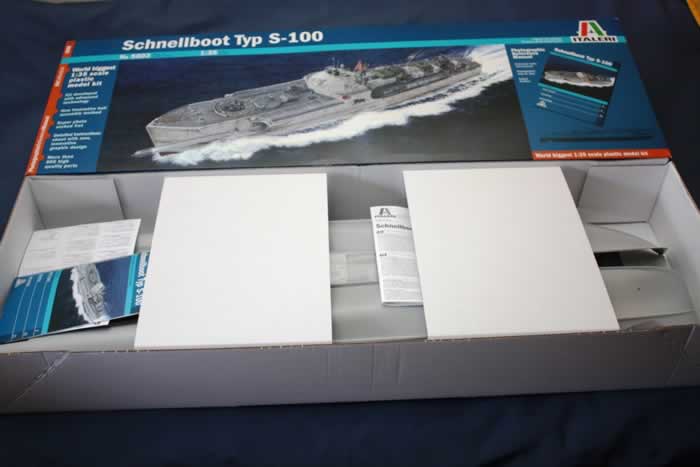
this exquisite painting, box opening will reveal an extremely well packed and
protected kit.
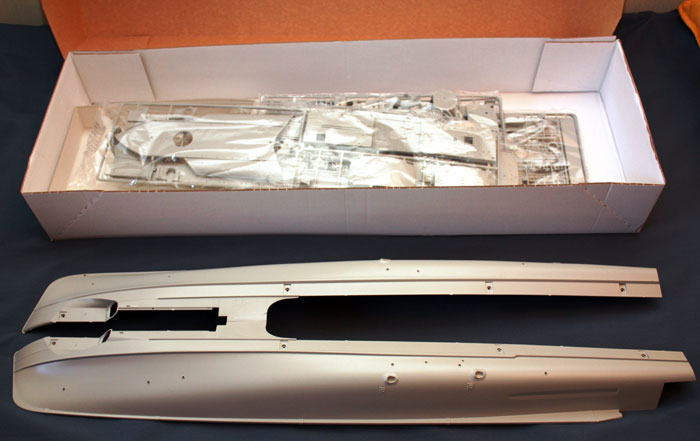
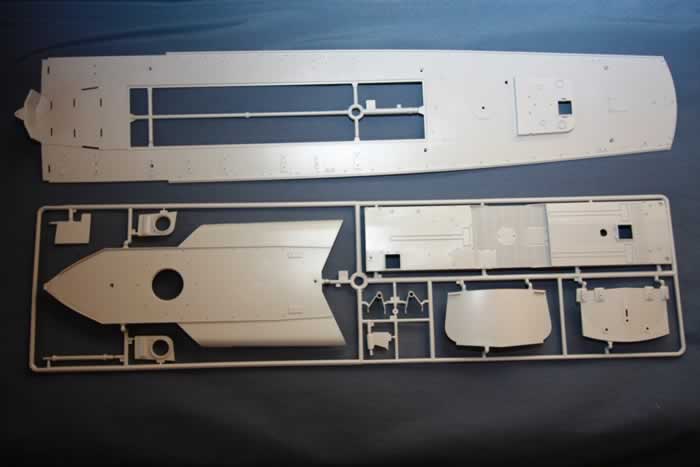
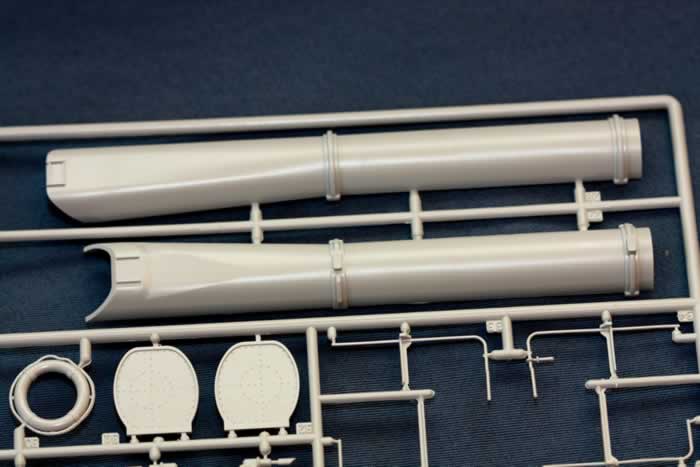
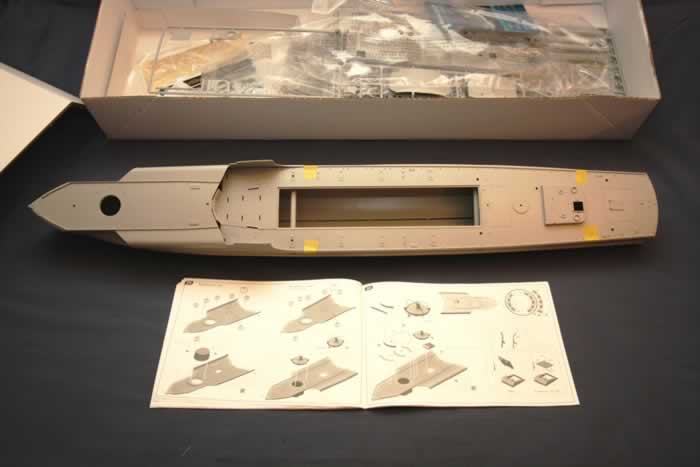
The first logical thing
to do is to inspect the two hull halves. The length of these parts is almost
one meter each.
These halves are
beautifully well moulded with all protuberations exquisitely well made and
blemish free. They fit together perfectly and leave no gaps. Along the keel,
alignment is made easy due to several positive/negative key pins. My sample
shows no warping of any kind. But some will complaint they would prefer a one
piece hull. To be totally honest, so would I! However, we have to understand
that, that would require an even bigger box since a one piece hull and all
other sprues would needed to be placed separately inside the box. As you can
see in the photographs, in this case the sprues are placed between the two
halves making the box width quite smaller than the previous PT-596. Just
remember that a bigger box, most probably, would implicate an extra cost and
in these turbulent days, cost control is a key decisive factor for the
success of any product. So I respect and understand the way the hull is
presented. Thinking this way, I even prefer it!
Gluing such gigantic
pieces may fear some at first glance. However the kit really reveals that
Italeri thought deeply about it and the kit is issued with several helpful
space bars to ensure strengtheness and alignment during the assembly process.
Allow me to say that the
horizontal bars you see here being screwed to the hull, will also serve to
facilitate the assembly of decks ensuring perfect aligning in posterior
steps. Some of you will already be familiar with this helpful screw assembly
if you have past experience with Tamiya large 1/32 aircraft. Remember that
“Large” doesn’t mean “Complicated” and in fact,
checking all the kit, its engineering reveals that is designed to be just as
easy to assemble as it is possible to concept without sacrificing the ever
required precise detail a modeller demands. Through the entire model you
really feel that Italeri is perfectly focusing the modeller ensuring the best
possible assembly success during the whole construction stages.
Well, I didn’t
resist and I checked how everything goes together. In this photograph hull
halves are not glued, only taped. The gap you see in the keel is only visible
on the inside to locate all alignment pins. Look closely and you’ll see
them on each decimetre of that long keel. From the outside, there are
absolutely no visible gaps.
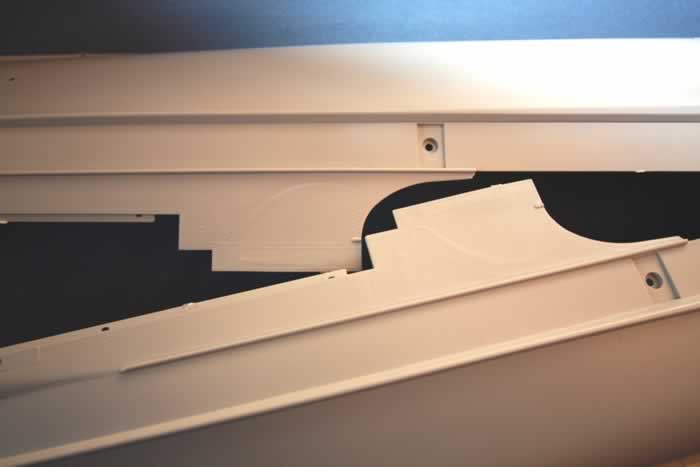
Regarding the aft and
stern decks, fit is also great. The aft deck you see here in this dry fit has
no glue or screws and fits already tight and seamless, stern deck is taped,
however fit is superb too. And quite motivating you start to see the shape of
this tremendous appealing kit coming to life.
If I may pass a small
note wishing your success, even with these helpful side bars, due to the
sheer size of the hull halves be aware that regular xylol based modelling
glue may not create a bond robust enough in the halves. Cyanoacrylate glue is
also not a good option as it may settle instantly but it is also not too
strong and may brake without warning: Brittle joints are not the best in
these situations. Therefore, if I can pass a hint from past experience with
really large joints, assemble the model like you normally make kits, block
everything with low tack tape to dry (like here!), and once the hull halves
are glued to each other and screws are attached use 5 minute epoxy glue on
the whole internal joint of the hull halves – from bow to stern. As
stated, do this only on the internal part of the hull, not allowing glue to
pass to the outside of the model. Just remember that real hull keels are very
sharp, well shaped and well maintained, therefore, the hull joint must be
blemish free. You’ll see how easy it is and how your model will benefit
if you create a strong bond.
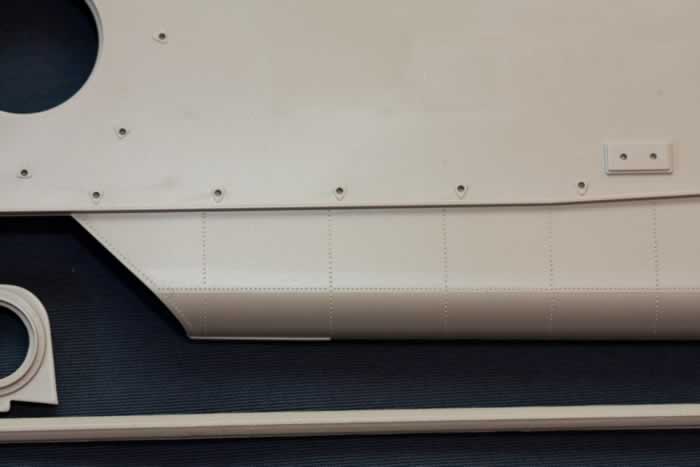
Regarding the detail, and
the delicacy of the whole hull, while it is difficult to show in detail all
the features of these two enormous parts, I picked this close up, near the
foredeck, to show the torpedo
launchers:
While the edges need to
be sanded to polish the tears you see above from sprue removal (it
wasn’t me, these halves already come like this, pre removed from their
sprues) as you see, these parts are superior well moulded and their rivet
representation is really well achieved. These delicate lines of half rounded
subtle raised rivets have an enormous lifelikeness to the real subject. If
you inspect pictures of the real subject you will also see that there are
some missing rivets near the collar of the torpedo aperture (use pages 66, 67
of Warship Pictorial number 15 as reference) but these can be added in
seconds – by no means I am a compulsive rivet counter or measurer, so
if out of the box is your mood, what you have is perfectly enough to ensure
great satisfaction.
Moving amidships, near
the bridge you see how consistence and well made detail is. The parts really
cry out to be assembled.
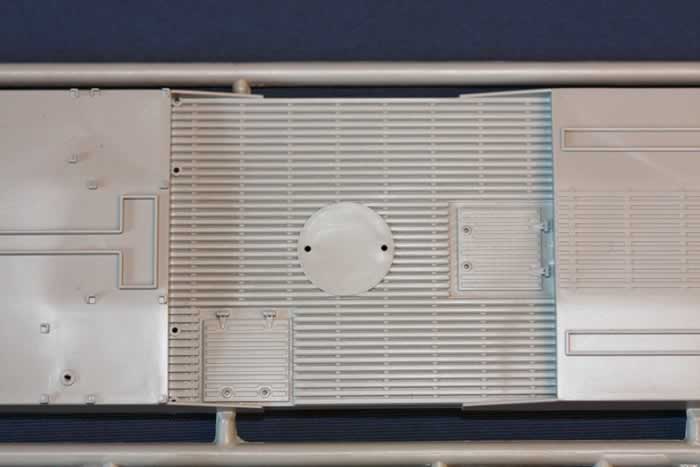
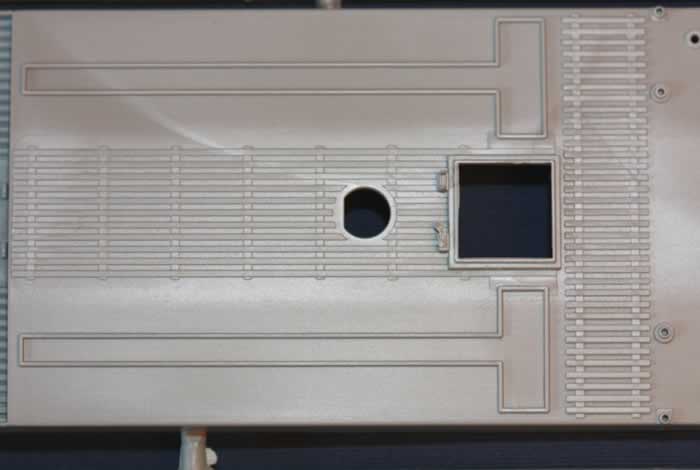
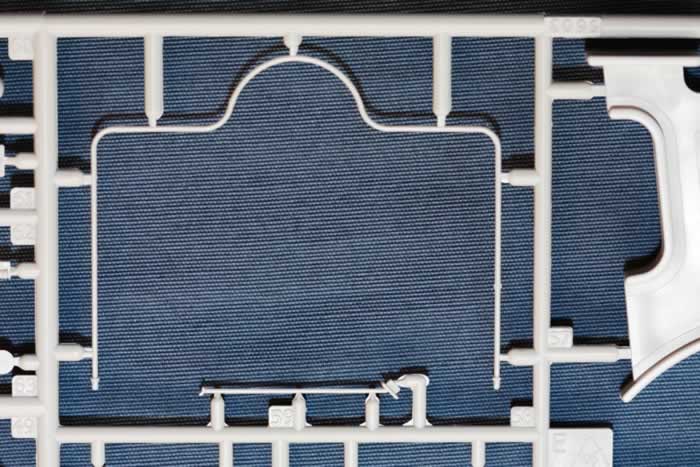
After the hull
experience, it’s time to see the detail in the decks. You saw them
previously detached to check fit.
They are packed together,
opposite faces outwards to avoid scratching. They are not warped and at first
glance they fit trouble free and gap free with the hull halves. Detail and rivet representation is once
again quite well achieved and have in mind that the decks of the real S-100
were almost plain. However, where detail is required, it is all there: From
the exquisite rivet rows at the bow to the anti slippery wood planks around
mid ship combat station. As it is difficult to find room to present all
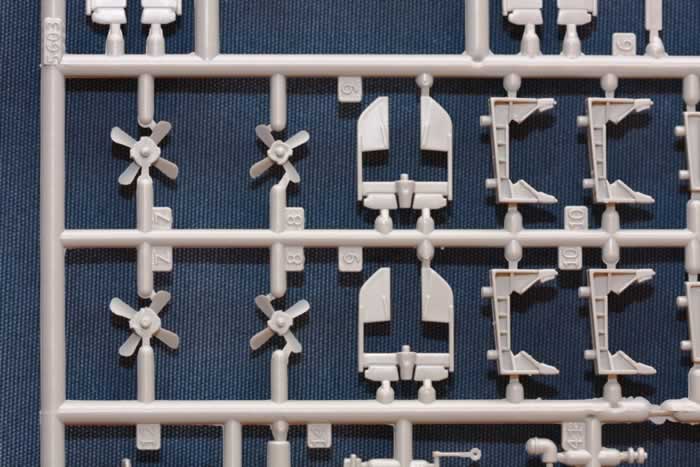
parts, I also placed here one of the three elegant propellers.
Shall we meet the rest of
the ship element by element:
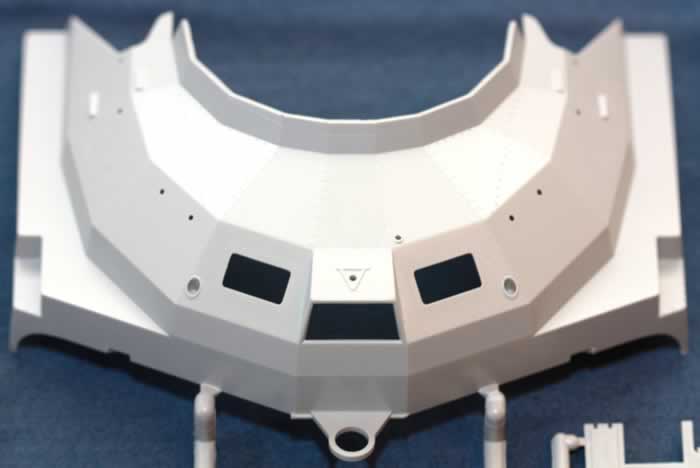
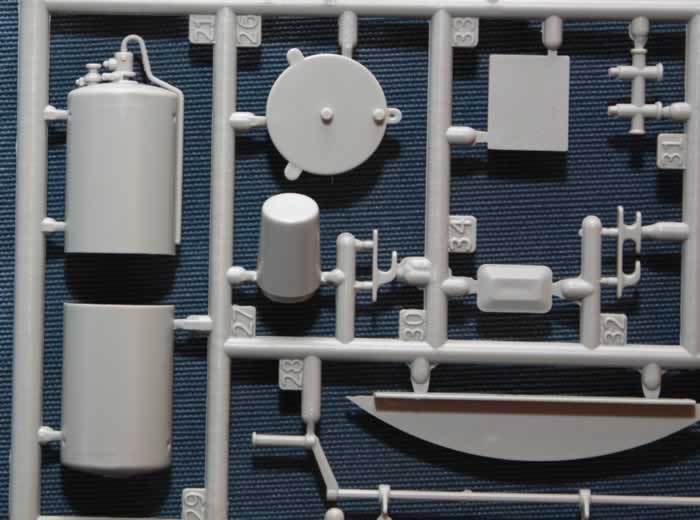
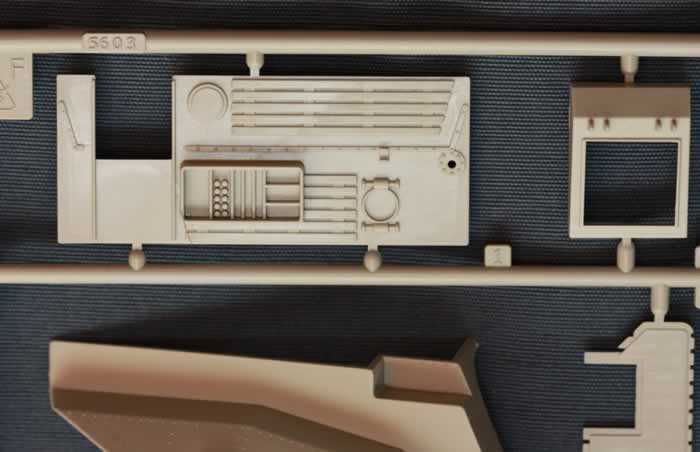
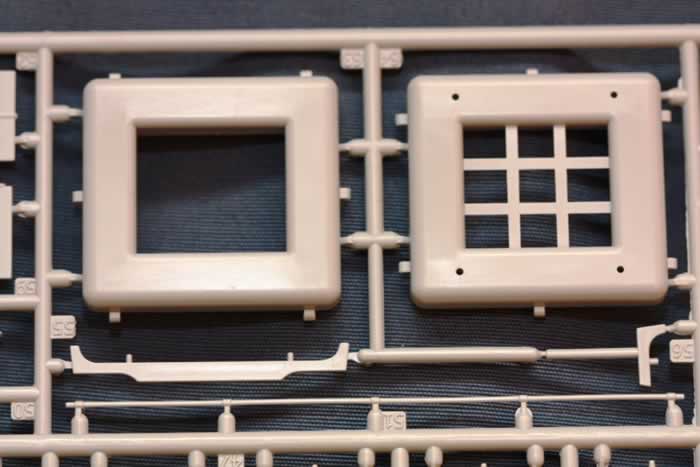
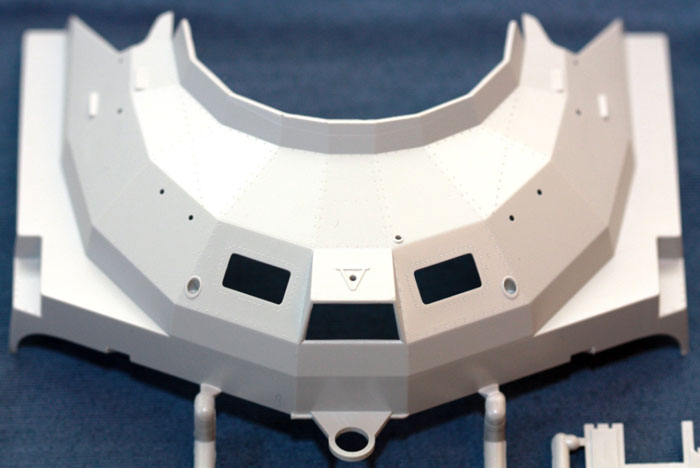
Bridge:
What a design these
vessels had! Even 60 years after development it still looks something quite
ahead of its times!
This bridge is one of the
most spectacular assemblies of the whole kit and deservingly so, as it will
always be the primary focus point of interest in the finished model, just as
a cockpit is to an aircraft. This is a multimedia assembly of around 100
parts: Upper window framings are made of photoetched parts bent in half to
receive on the inside clear acetate windows. Do not fear this assembly. It is
shown step by step in the accompanying booklet and it’s simple to do.
Just remember not to use super glue or you will fog the windows. Take your
time, as this assembly is stunningly life like. Plan your paint work
carefully: The whole bridge may not require
s but you may wish to paint
the frames before you install the acetate windows. Moving bellow, you may
choose to display “open” or “closed” or a mix of both
the central vision ports allowing you to create a customized unique
environment and differentiated look just like the real ones tend to exhibit.
Inspire yourself by looking at the top corner photograph of Squadron Warship
in Action nº 18, page 21.
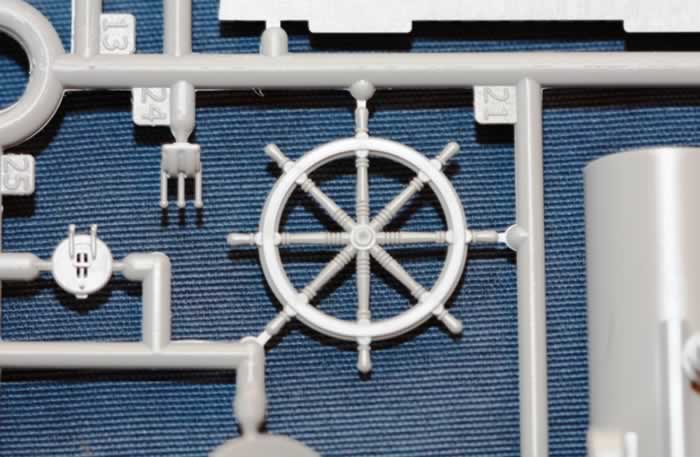
Next, the wooden rudder wheel is quite well
done and one obviously smiles after observing the glamorous look of this
wheel, as after all, it is installed in a war machine and not in a luxury
Yatch as it seams at first glance! I checked my references and, yes, you will
have to paint it to look a highly varnished wood wheel. Control instruments
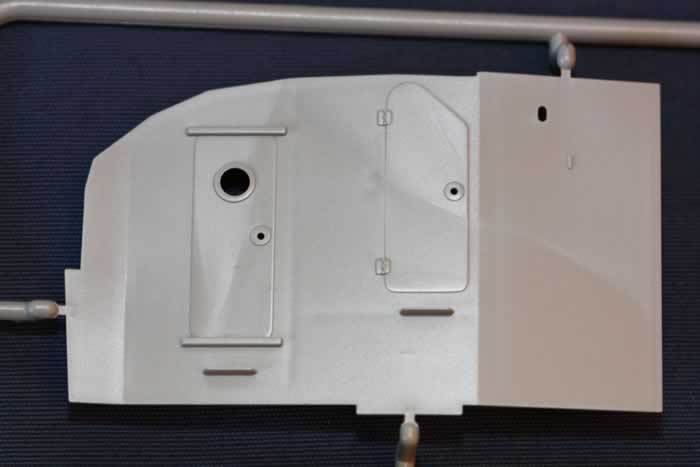
are supplied as decals. My sole complaint is that the side doors of parts
34F
and
35F
are moulded shut. If you
plan a dockyard or harbour diorama you may wish to open these doors. The
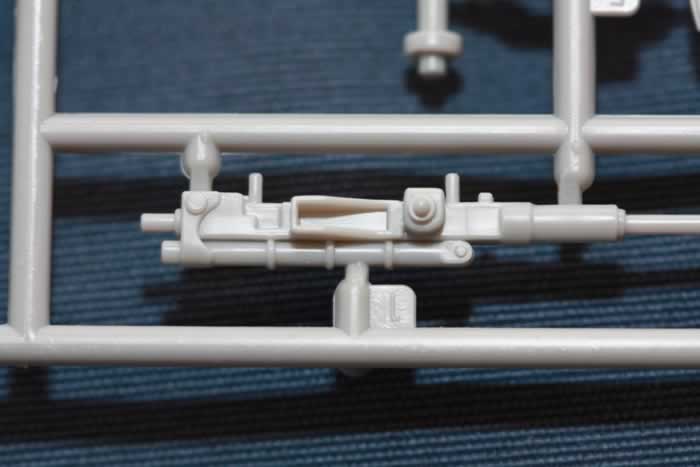
binoculars used on the RZ5 targeting computer will benefit from a little
extra detailing with rod and wire. Gladly the supporting booklet that comes
with the kit has an excellent period photograph to help this simple,
nevertheless necessary job, complementary check too page 42 of the mentioned
Squadron book and also Prinz Eugen website (http://www.prinzeugen.com).
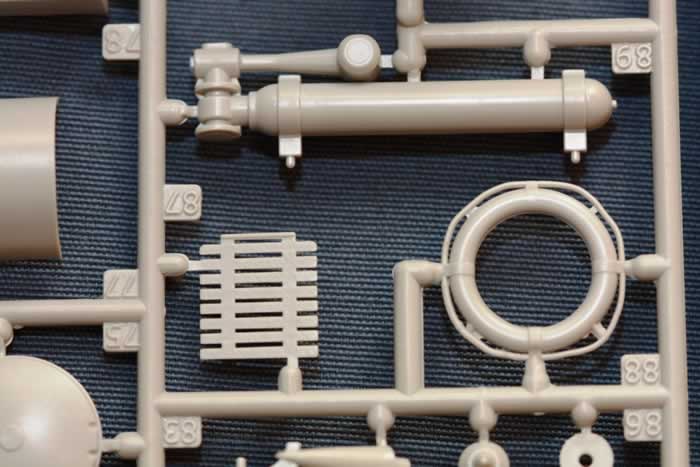
Anti slip steps and some wooden fittings and several attachment belts like
the ones for the life rings are all supplied as etched parts.
As you just red, this
bridge is a mini kit in her own right, and a multimedia one. Just remember,
once more, the key success factor is to plan your work with care and check
the instructions carefully. There are many items when you are allowed to
choose how to display them and these will tell how your model will look like:
Vision Ports shut or open, Seats up or down, Mast raised or lowered.
Furthermore, several parts will have a wood finish, others will be grey and
the majority will be white. You won’t need masking, but you will need
to plan everything accordingly before starting the bridge. In the photographs, I isolated the majority of parts that built the bridge together.
Stuning, aren’t they?
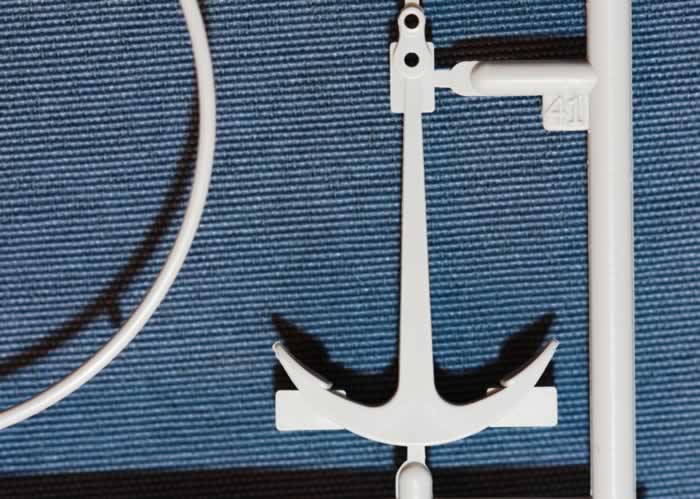
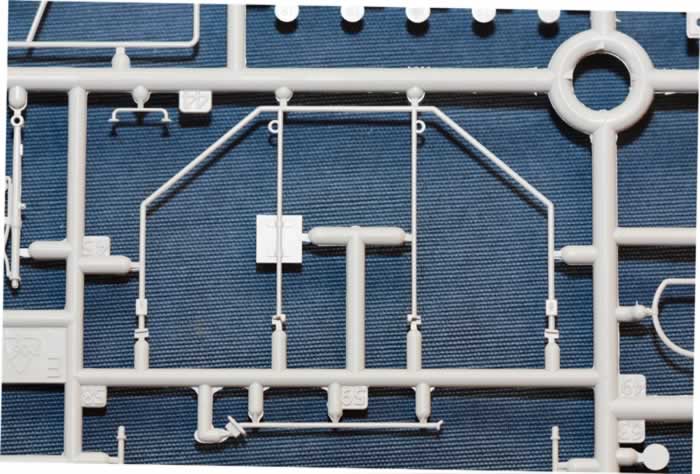
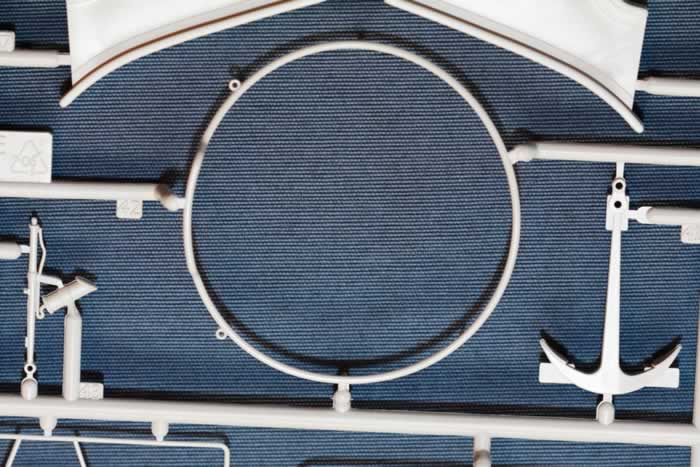
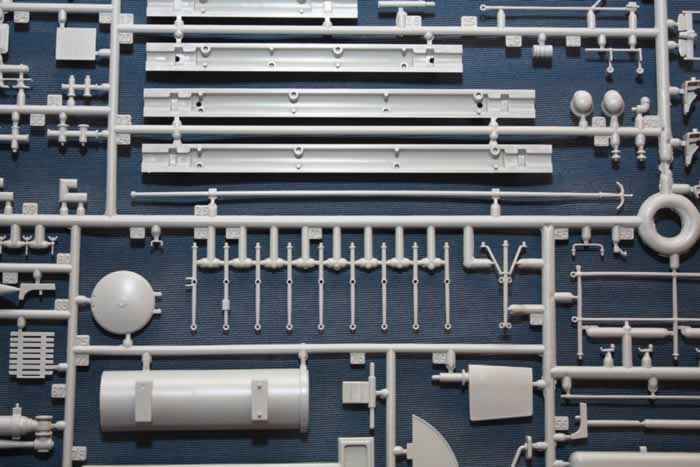
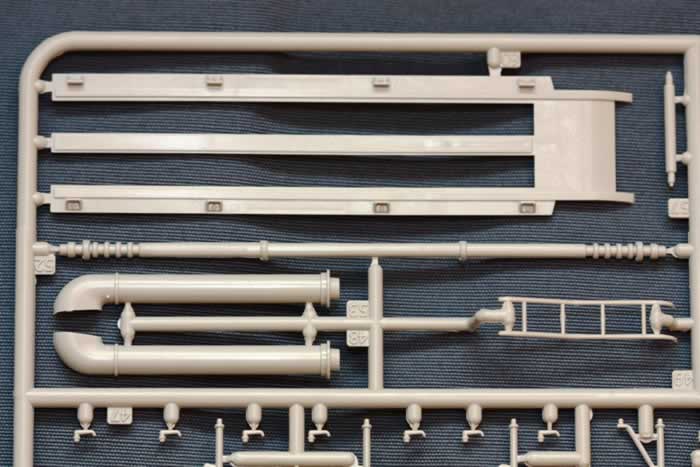
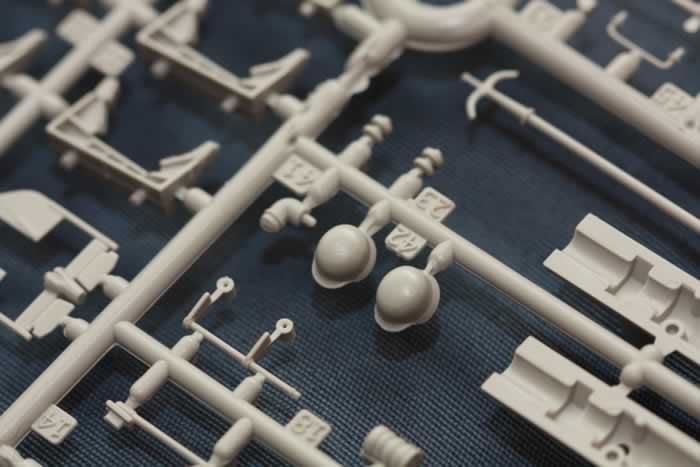
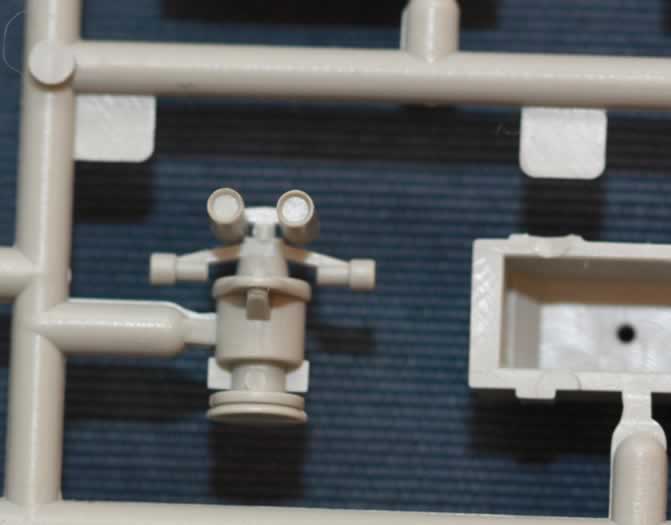
Deck fittings – Rails
and Guards:
Briefly, we already saw
the decks before. Now comes the time to speak about the fittings that cover
these decks from bow to stern. As the subject is a ship, in fact a large
scale ship there are railings and guards a little bit everywhere. While they
are all impeccably well moulded, some are highly fragile and therefore it
will be better to leave them out of the model until the finishing stages (and
not as in the instructions). The two sprues “D” come with this
30 centimetres
long baluster rails to be placed amidships on both port and starboard. Just
remember to use a brand new blade to separate these parts from their sprues.
If you build kits regularly you know what I’m talking about!
They will be individually
placed at stern and then you’ll have to pass the supplied thin rope
thought each hole. While the result is a winner (just take a good look at
that gorgeous corner rod rail, part 70!), take really care here. I
don’t know how many out there have previous experience with kits such
as Tamiya PT-15 or Vosper (whose bows have similar assembles) but the best
advice I can give to non “usual” naval modellers is to previously
remove the stress and peel of the rope you are about to pass through the tiny
and fragile holes by first gently light brushing it with heavily diluted
white glue. If I can use the metaphor, you are going to pass a line of thread
through 22 needles and at two different highs. If the rope has stresses, the
slightest unwittingly pull will break these fragile rods. And that is a true
pity.
Another warning note is
that in the instructions, the assembly sequence doesn’t end with
rigging; after this you still need to assemble and install all the guns and
along the centre line, while the rails are on the outside perimeter. But from
past experiences, I may advise to place all rails and all safe guards only
after finishing the rest of the kit.
Another useful advice to
non ship modellers is that normally, aircraft modellers and armour modellers
are used to manipulate freely their kits while they assemble them. On the
other hand, it is very common amongst ship modellers to fix the finished hull
to a solid base (Yes! Like a scale dockyard! Ships take on average more time
than other subjects, the less you move, the better) in the early steps and
then place parts on the decks without further manipulation of the model. This
is exactly why! Naval fittings are quite fragile and hulls quite large
– Therefore difficult to manipulate. So plan this ahead and fix the
model before attaching the rails to avoid disappointment. A final hint that
many ship modellers take as a rule: Avoid long shirt sleeves. I truly hate when
my sleeves break a part. Remember that this is like having an aircraft with
30+ pitot tubes.
Now let’s speak one
final word about the way rails are presented: In many photographs S-100
Schnellboote are seen with the stern rails covered with canvas dodgers (Revell
1/72 kit has this configuration, check the link). Scoop reference pictures as
probably some of you will want to customize their kit and just remember, if
some nightmare happens with the rails, you can always take this easy path
– cover them with tin foil! Existing images of one of the options in
the decal sheet shows her exactly like that.
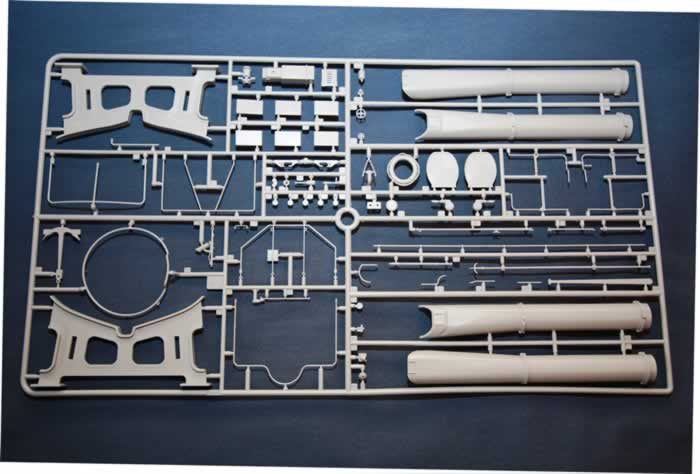
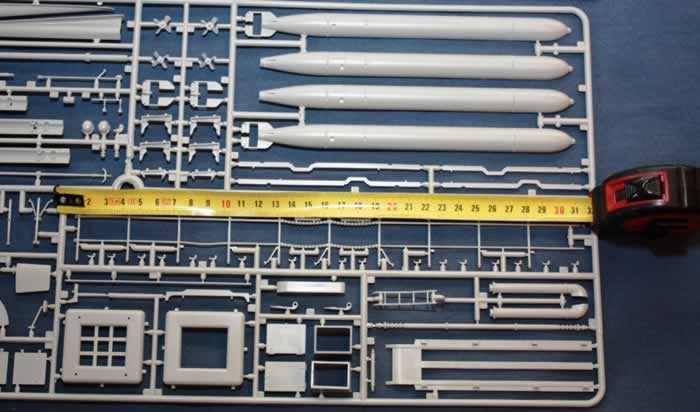
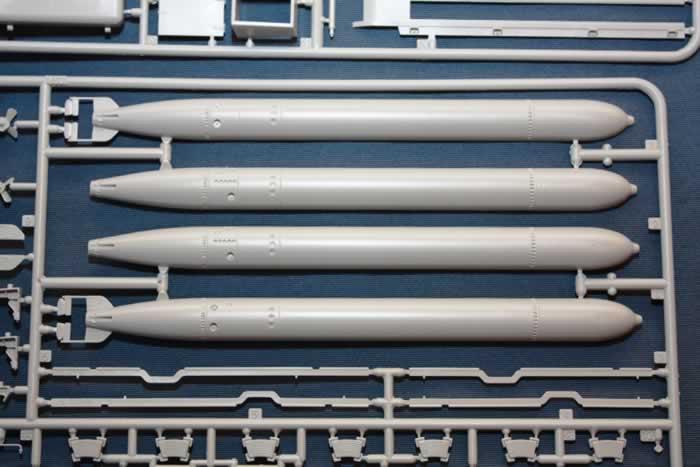
Torpedos and Torpedo
Launchers:
This is one of my
favourite areas in the kit. Torpedo Launchers are simple to assemble and
simultaneously exquisitely detailed and quite appealing. While comparing the
parts with the excellent S-Boote – German E-ships in Action by Jean
Philippe Dallies Labourdete, I noticed there are still some cables and a
manometer to be added on each side but again it will be a quick and simple add
on.
I hope you agree with me.
These G7 Torpedos are gorgeous and true life like. Their engravings are great
and their fins are already quite thin upon the limitations of Injection
Moulded Polystyrene and their propellers are quite well done. You may compare
them with their real counterparts using the mentioned Labourdete book. Now,
one of the features I enjoyed the most is that these torpedoes will be
attached to their supports in the hull using photo etched belts (but simple
additions, not one zillion parts like some other etched belts out there).
Final note regarding
markings. Check photographs as sometimes these torpedoes had chalk “graffiti”
and cartoons. If well done, it may add interest to your model and you may
create another great focal point to your kit.
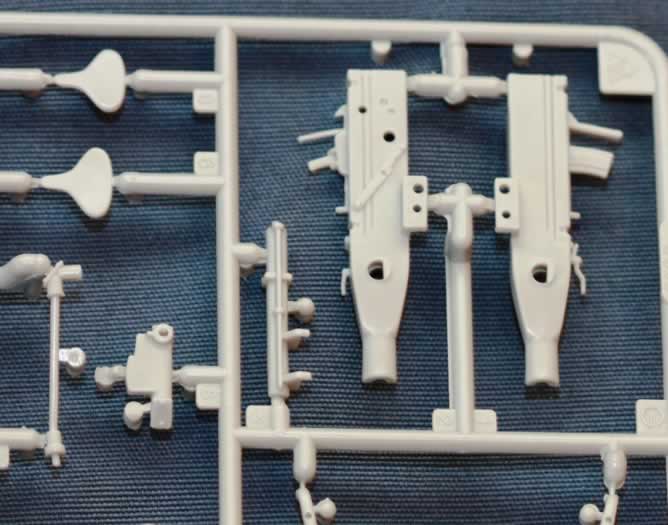
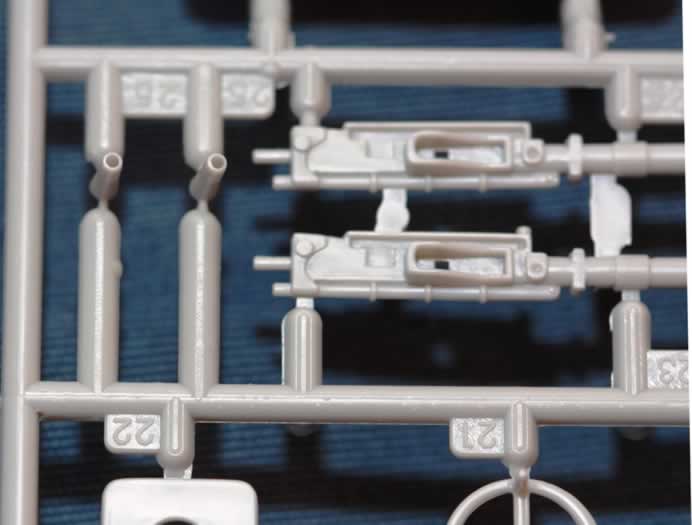
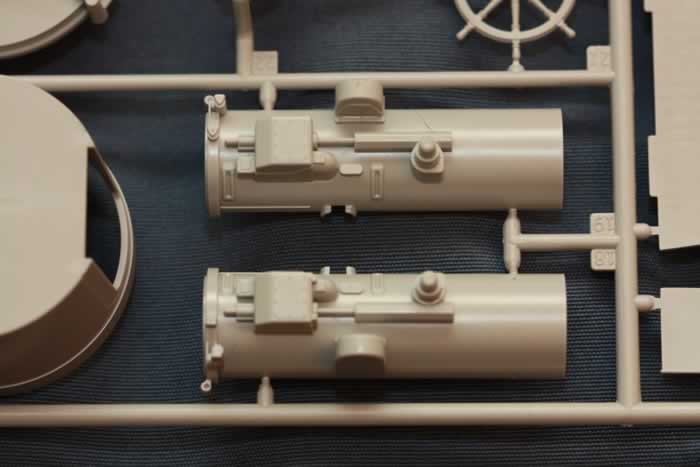
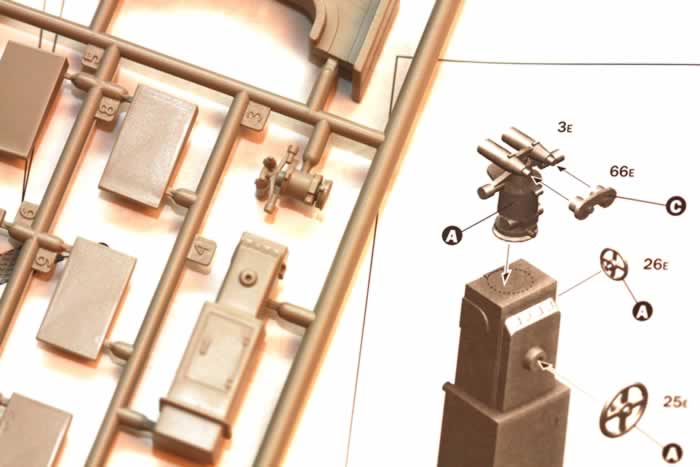
Guns:
As I said before, the
Schnellboot, unlike the PT-596 doesn’t come with aluminium turned guns.
Only injection moulded pieces. And the muzzle brakes of the single and twin
20mm flak guns suffer from the limitations of plastic. See them in the
photographs bellow, they are part 25. If you really want right now turned
metal guns, you’re in luck as the 20mm Flak is milled at extreme detail
by several aftermarket brands. Just check this incredible compare in Perth
Military Modelling Site made to let you choose your favourite: http://www.perthmilitarymodelling.com/reviews/vehicles/flak38/flak38barrels.htm.
The 3,7 barrel is also
available right now as a turned metal gun from several companies, so if you
really wish a replacement you can have it right now.
It is quite easy to
compare these guns, specially the 20mm, to other releases like Tristar and
Dragon. And while detail is slightly softer, they won’t be difficult to
enhance. Gun shields are also a little bit on the thick side and here note
that these were unique to
Schnellboote, so don’t try to find similar ones in armour kits. To see
how shell cartridges look like, see above the photograph of the torpedoes.
The shell magazines are immediately bellow them.
Gun pedestals and gun
mounts are quite well replicated and are a true match of the originals. So
globally everything compares favourably.
Depth Charges/Mine Ramps:
This is another key
feature in the kit as the stern of the S-100 is dominated by this device. In
my honest opinion, this is an area you got to see in person to be amazed like
I did. The rail ramp is a very simple combination of highly thin plastic and
etched parts, however the result is stunningly life like. The photographs you
see here makes this assembly no justice, however trust me, with care, the whole
will become like their 1/1 counterpart. Even if you are a novice, don’t
fear this combination. A bending device may be useful but if you don’t
have one, with a couple of wooden bars (or even two old hardbound books) you
can bend them easily. The accompanying booklet also teaches you with a
photographic sequence of the process, however avoid, as suggested the use of
pliers to bend the metal parts. The final result of this assembly is truly
stunning.
Unfortunately, one of the
things I miss a bit in the kit is that there are no Depth Charges or Mines in
the kit. If this was an Opel Blitz I would never sorrow the missing of
Jerricans or fuel drums in the payload as there are dozens of accessory kits
out there with items to look for. However the reality of this naval world is quite different –
There are no injection moulded naval accessories and anti submarine weapons
in 1/35. And some would be useful, even if it is a rare sight to discover a
photograph of the late types carrying these weapons.
I can almost bet than in
a year from now the Aftermarket guys have already filled all these voids. For
now, to my knowledge RMG already has a mine in 1/35 and Andrea another one in
1/32. In the meantime, I may add that
DM-11 Depth Charges are very simple rounded objects, check your references if
you want to make them on your own. Also UMA mines are spherical (but their
launching ramp carts will consume more work). Pick once again the H&C
S-Boote German E-boats in action and go to page 108-112 if you feel you need
to make your own weapons.
Colors and Markings:
Markings
for 2 well documented Schnellboote: “Ha-Jü” and
“Lang”. Both in Schnellboot-Weiß. Decals are in register.
Check
your library as they may appear in pristine condition and very faded too. So
you have here an enormous weathering potential. Remember to complete, from
your spares, the flag design as it only comes with a white circle in the
centre. An alternative option will be to pick the recently released True
Details Kriegsmarine flags decal sheet.
Accuracy:
May I
tell you that I am not of those who gets digital callipers and starts
measuring the whole hull while compares it to plans to say there is one
millimetre here and another millimetre there out of place.
Shipcraft
6, German S-boats comes with great drawings but as you may have guessed they
are about four times smaller than this kit. Overall dimensions are right, so
are the profile shapes. Most important – everything looks impeccably
right!
If you
look at photographs, be prepared to discover that many of these boats have
small differences between them. Some more visible than others. Continuous
improvement is practically a rule in ship construction: it started many
centuries ago and prevails until today. So, if you plan a different S-100
rather than the ones in the instructions check first your subject as you may
have to switch something or add some bits here and there: Radar, masts, rafts
… you know, the usual suspects. Also, if ambition is your trend, you
can pick that Tamiya quad flak 20 you have in the stash gathering dust and
start building a Typ S-150.
Final thoughts:
I have no
doubts that this kit has an enormous potential to become the centre piece of
a model collection. It may be quite big but her rectangular format
doesn’t take too much area. You don’t need a table to display it,
just a one meter shelve. It is also quite colourful and with careful painting
and weathering it will have a staggering look, even in your living room!
As complex
as naval subjects normally are, this kit is exceptionally well planned to be
trouble free and to let the modeller have true hobby pleasure while
assembling and painting. And first impressions indicate that fit will be
quite good.
Try to
look as much as you can to photographs of the real one, as there are ropes
and cables a little everywhere especially near the bow and these really
enhance the model.
Out of
the box, the modeller has everything he may wish to produce a stunning
replica. If I look back and remember what happened some years ago with the
excellent Revell 1/72 U-boat I’m pretty sure that the Aftermarket
manufacturers will gladly produce an avalanche of new stuff to enhance even
more this kit. But Italeri already places the bar quite high, and also uses
photoetched parts very cleverly and in an uncomplicated way. So it’s
just about the right time to start removing the parts from their sprues.
Speaking
about the price, through all the kit, I had all the time the feel that
Italeri made all possible efforts to put on the market the most possible
affordable product without sacrificing accuracy or detail. There aren’t
out many kits as large and simultaneously as cheap as this is, of that I am
absolutely sure. I hope that worldwide people can feel the same way, even
with exchange rates going up and down everyday,
So,
whatever is your area of interest go out there and take this kit with you. I
sincerely hope you’ll love it the same way I’m enjoying
assembling it right now!
References:
Go visit http://www.prinzeugen.com.
Even Italeri thanks this site in the book they supply. It is a great starting
point to know your subject. Regarding books, speaking only of readily
available publications in English language, I may advise these four books
that were already quoted before:
1)
Squadron Signal Warship 18 Schnellboot in Action by T.G. Connelly and
D.L.Krakow published by Squadron Signal
2)
German S-boats Shipcraft nº6 by Steve Wiper, published by Chatham Publishing
3)
Warship Pictorial nº 15 Kriegsmarine Schnellboot by Steve Wiper published by
Classic Warships
4)
S-Boote German E-boats in action by Jean Phillipe Dallies Labourdette
published Histoire & Collections (and also available in French and German
editions)
All these publications
complemented themselves quite good! There is not a favourite, while some
photographs are repeated here and there if you like the subject you may fell
tented to pick them all.
Now it’s time to
close all words and let action roll. The model really deserves it!
Italeri kits are available
worldwide through hobby retailers and from Squadron.com
Review and Images Copyright © 2009 by Nuno Andresen
Page Created 2 February, 2009
Last updated
3 February, 2009
Back to HyperScale
Main Page
Back to Reviews
Page
 Home |
What's New |
Features |
Gallery |
Reviews |
Reference |
Forum |
Search
Home |
What's New |
Features |
Gallery |
Reviews |
Reference |
Forum |
Search