|
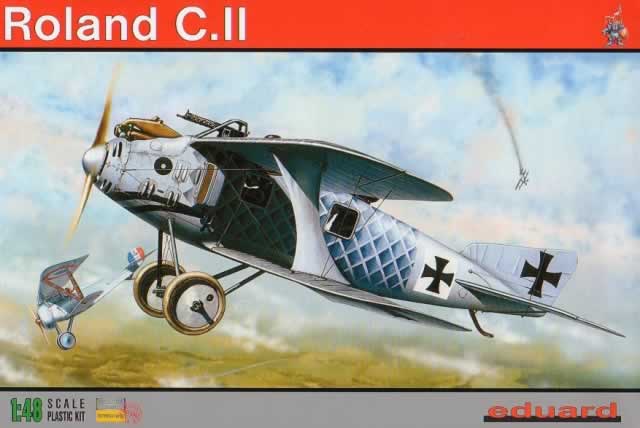
Roland C.II

Eduard, 1/48 scale
S
u m m a r y |
| Catalogue Number: |
Eduard Kit No. 8043 - Roland C.II |
| Scale: |
1/48 |
| Contents and Media: |
80 parts in tan coloured plastic; 82 photo-etched parts; painting maks; markings for four aircraft |
| Price: |
USD$xxxx.95 available online from Eduard
and hobby retailers worldwide |
| Review Type: |
FirstLook and FirstBuild |
| Advantages: |
Nicely rendered detail, good overall outline, both coloured and standard photo-etched frets, optional parts, decals with thin carrier film and in perfect register. |
| Disadvantages: |
Careful study of chosen subject needed for finer details. |
| Conclusion: |
An excellent re-release of a perennial favourite. The mouldings have stood the test of time and the included photo-etched parts a touch of class to an already fine kit. |
Reviewed by
Rob Baumgartner

Eduard's 1/48 Fokker Roland C.II is available online from Squadron.com
Background
Few two-seaters are as elegant as the Roland C.II.
The “Walfisch” (Whale) resulted from the design engineers wanting to produce a much “cleaned up” airframe. The idea was to remove the need for conventional interplane and center section struts, which along with its associated wire bracing, created a lot of unwanted drag.
Allied to this concept was the fuselage, whose radical departure from standard practices created one of the first semi-monocoque configurations. Narrow strips of thin three-ply were spirally wound around a skeleton of wooden formers and longerons. This was then covered with linen fabric and doped to create a “shell”.
The result was an aircraft that initially performed very well and was used in the bombing, artillery spotting, reconnaissance, and escort roles. Its high speed was an advantage but this was soon negated by better designs from both sides as the conflict moved into the early months of 1917.
Contents
There is plenty to inspect when one opens the box. Apart from the 80 tan coloured plastic parts, there are 6 clear items which are used for the camera, windows and windscreen. The detail on all these items is as sharp as they were when the subject was first released 8 years ago.
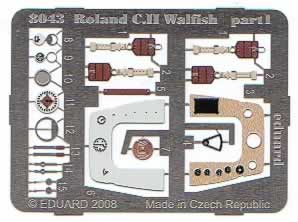
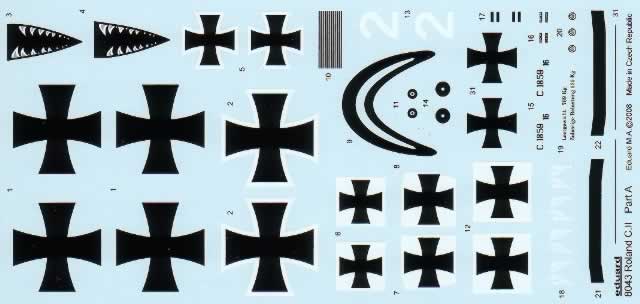
Two photo etched metal frets compliment this kit. One is of standard appearance and contains 62 pieces while the other has 20 items and is resplendent in full colour. A set of masks is supplied as well as 2 decal sheets, which allow for 4 interesting schemes.

To check the accuracy of the contents, the parts were compared with plans from Ian Stair and Colin Owers. These were well within acceptable tolerances and thus the modeller is presented with an excellent starting point.
There’s quite a bit of interior that can be seen inside the two openings and Eduard make the most of it. Apart from the aforementioned camera, the plastic parts used here consist of ammunition holders, trailing wire antenna reel, pressure pump, bulkheads, and magneto. Further items include the greaser, folding rear seat, pilot seat, control column, throttle, fuel tank, and rudder bar.
Each fuselage half has a realistic rendition of the diagonal veneer covering. When the above pieces are added, everything falls into place easily. The coloured p-e fret comes into its own here and provides for the seat belts, instrument panel, dials and throttle quadrant.
The standard fret further improves the interior by enhancing the camera, window frames, panel switches, gun triggers, generator lever and generator drive pulley.
The observers opening is an insert that will need blending into the fuselage, as will the one-piece lower wing. Speaking of the flying surfaces, they contain no blemishes at all and exhibit thin trailing edges. These edges are scalloped and thus represent those found on early C.II aircraft. Later examples replaced the wire with a timber batten, which resulted in a straight edge along this area.
This is important as the options on the decal sheet cover both early and late aircraft.
Another consideration is the aileron control method. Machines from the third production version had this in the upper wing. Instead of the outer inter-wing cables of earlier aircraft, these ones had push rods located behind the radiators. This latter feature is allowed for in the instructions but when it comes to options C and D they neglect to mention adding the appropriate control horns.
Also check the number and size of the access panels on the fuselage. These were seen to vary on machines of different batches and occasionally on machines within the same batch.
Both styles of exhaust are given and the rest of photo etched material makes a good kit even better. It enhances the radiator grill, both “Parabellum” and “Spandau” machine guns, claw brake, compass housing, rear view mirror, and flare cartridge rack.
The fastidious will want to add the distinctive wingtip “washout” that was such an obvious feature of these aircraft. A little hot water and some careful bending will easily put this right.
While you are at it, scribe the apertures for the bombs and camera. These are located under the fuselage and are conspicuous by their absence.
Marking Options
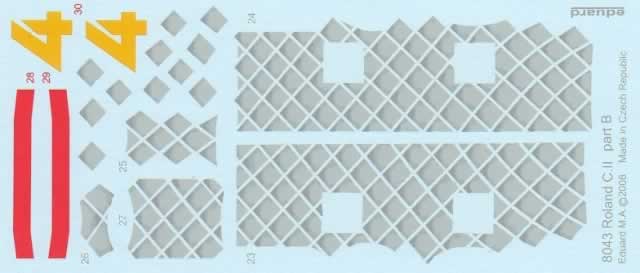
Four options are catered for on the 2 supplied decal sheets.
-
Roland C.II, FFA 5b, Western Front, 1916
-
Roland C.II, “Yellow 4”, Western Front, 1917
-
Roland C.II, “White 2”, Western Front, 1917
-
Roland C.II, Bayerische Flieger Schule 5, 1917
The items were all printed in perfect register with minimal carrier film.

The fish scales are sensibly divided up into 16 parts to allow for the complexities of application. A nice touch is the “curtains” which come in decal form and were seen on a number of different “Walfisch”.

A masking set takes care of the wheels and windows so there is no excuse for sloppy edges here.
The popularity of the Roland C.II amongst modellers is quite disproportionate to the numbers built. In fact at the height of its fame (December 1916), it only represented 4.3% of the 1,508 “C” types at the Front.
Despite this, the Walfisch will always have a place in history due to the innovative thinking of the designers.
Eduard has captured the look of this aircraft very well and the multi-media aspect of the kit gives the modeller a chance to excel. The colourful plumage is more reason to dive into this release but be aware that subtle detail changes may be required to accurately build your chosen subject.
Thanks to Eduard for the sample
Review Text Copyright © 2009 by Rob Baumgartner
Page Created 28 January, 2009
Last updated
28 January, 2009
Back to HyperScale Main Page
Back to Reviews Page |
