|
Fokker D.XXI
Danish & Luftwaffe
Classic Airframes, 1/48
scale
S
u m m a r y |
| Catalogue Number: |
Classic Airframes kit numbers 4153 - Fokker D.XXI "Danish & Luftwaffe" |
| Scale: |
1/48 |
| Contents and Media: |
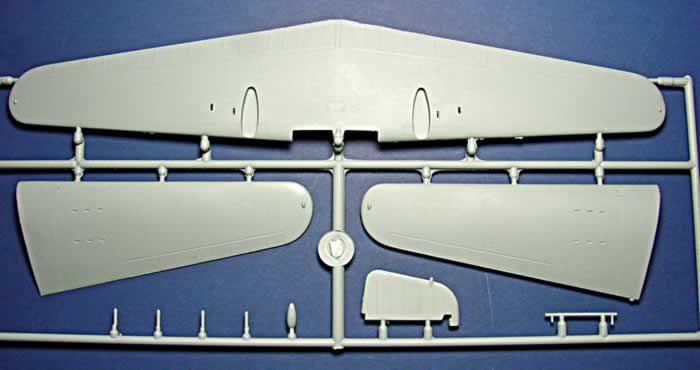
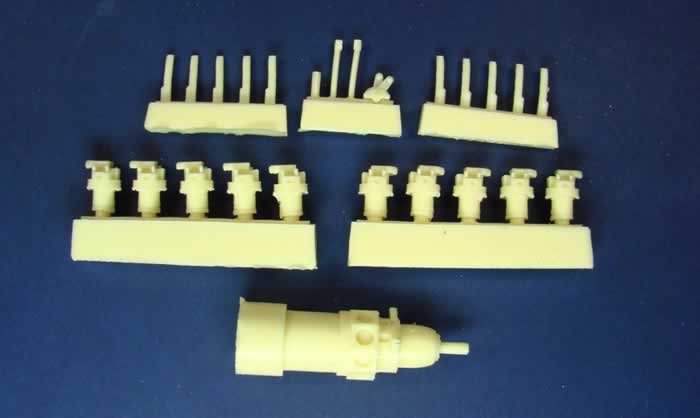
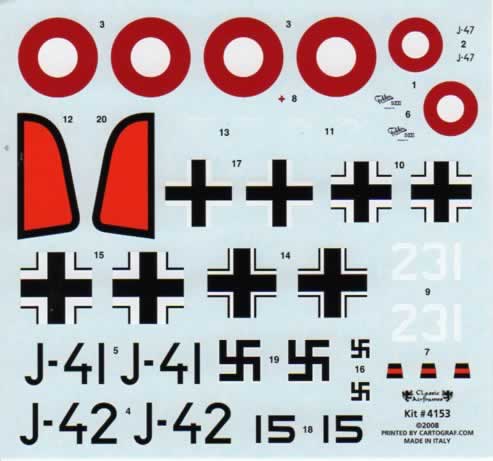
102 parts in grey styrene, 3 parts in clear injection molding, 25 parts in cream colored resin and 31 etched metal parts. Instructions and decal sheet for six aircraft. |
| Price: |
MSRP $48.00
Available online from Squadron Mail Order |
| Review Type: |
FirstLook |
| Advantages: |
Probably one of the easiest limited run kits to build. |
| Disadvantages: |
Some scratch building and modification required |
| Conclusion: |
This model is a must for every WWII aircraft collection. |
Reviewed by
Steven "Modeldad" Eisenman

Classic Airframes' 1/48 scale Fokker D.XXI Danish & Luftwaffe is available online from Squadron
It seems that the model industry has taken a page from Hollywood film making in producing sequels. In the case of this new issue from Classic Airframes, we have “Meet the Fokkers Part 3 - The Great Dane and the Evil Relatives”. This followed quickly on the heels of "Meet the Fokkers Part 2 - The Fokkers go Dutch".
As with all good sequels, it is based on a solid and well produced foundation, "Meet the Fokkers - The Finnish". Oddly, the series begins with the Finnish. Perhaps part 2 and 3 are really prequels?
But this sequel, or prequel, is not without its sinister aspects. For it seems some of those beloved Fokkers were forced into the service of the dark side and appear in the uniform of the evil empire. No, not the New York Yankees or the Galactic Empire; but rather, the Nazi Luftwaffe!
The first issue that must be dealt with is to understand that this Classic Airframes kit presents three different versions of the Fokker D. XXI.
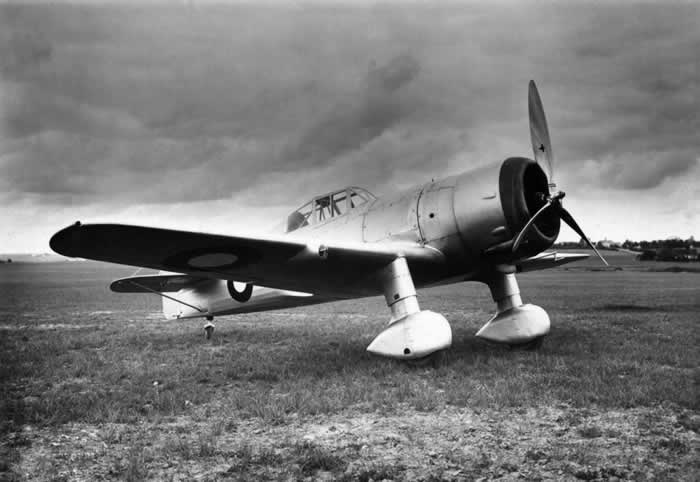
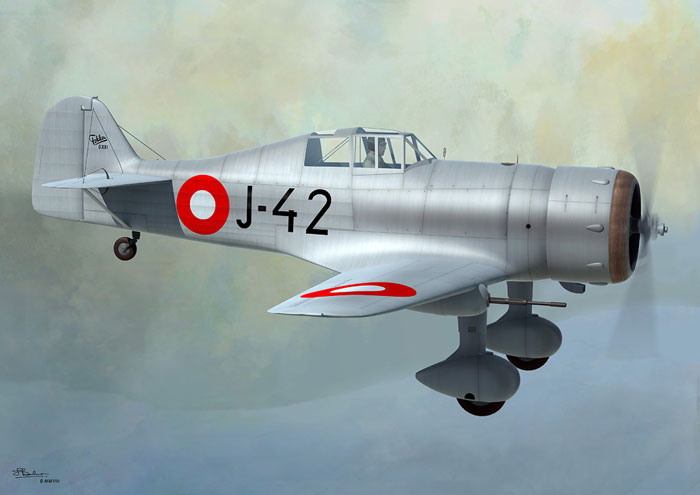
Firstly, there is the Dutch built Danish D. XXIs with serial numbers J-41 and J-42. These first two aircraft were powered by the Bristol Mercury VI-S engine, rather than the Mercury VIII, and had a cowling with distinctive clearance bumps.
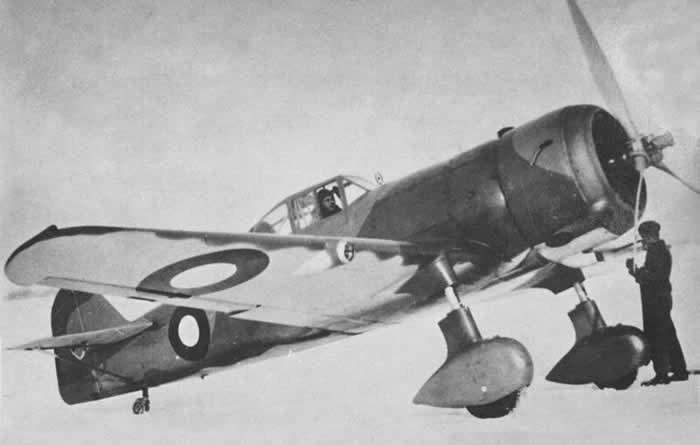
Secondly, there is the Danish license built D. XXI. Ten license built aircraft were produced in Denmark and were numbered J-43 through J-52. These aircraft used the Mercury VIII, and had the smooth cowling, similar to the Dutch aircraft.
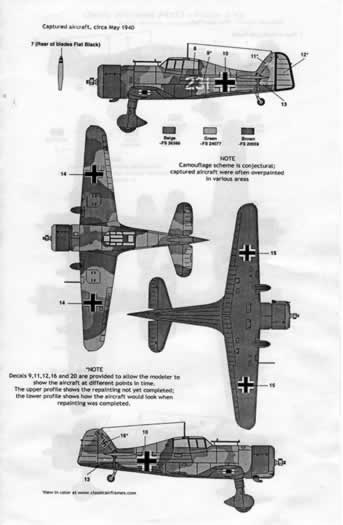
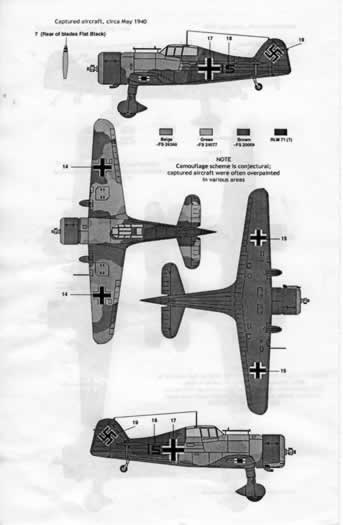
Thirdly, there is the Dutch built D. XXI produced for the Dutch Air Force, and which were taken into service with the Luftwaffe as trainers after the fall of the Netherlands.
The question now is how did Classic Airframes attempt to deal with each of the three versions? For many of the difference among the three versions, the kit addresses the issues quite well. But there are some issues that were not dealt with, and the modeler must put in some work.
Hopefully, I will make clear the major and some minor difference among the three.
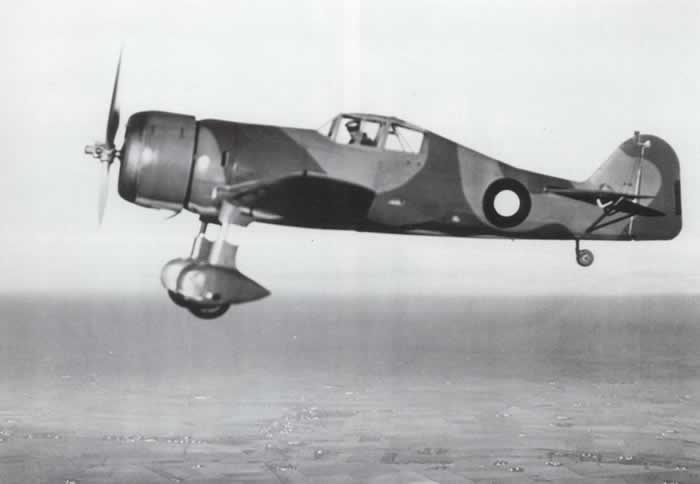
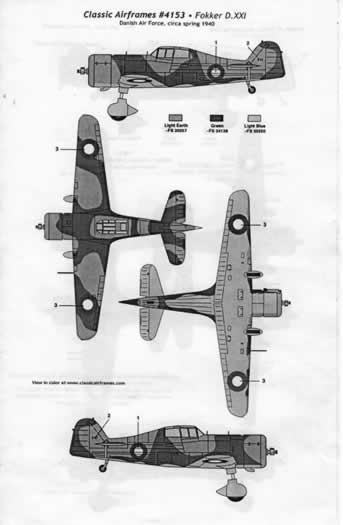
Since, as shown in the box art, the kit is to represent the Danish Fokker D. XXI, including the under-wing 20mm cannon pods, this is as good a place as any to start. As noted, there were two versions of the Fokker in Danish service.
The kit provides both the cowling with the clearance bumps for J-41 and J-42, and the smooth cowling used on J-47.
All Danish D. XXIs, however, differed from the Dutch D. XXI in armament. While the Dutch D. XXI had two machine guns in each wing, the Danish D. XXI had two 7.9mm machine guns that fired through blasts tubes in the lower portion of the cowling at approximately the four and eight o’clock positions.
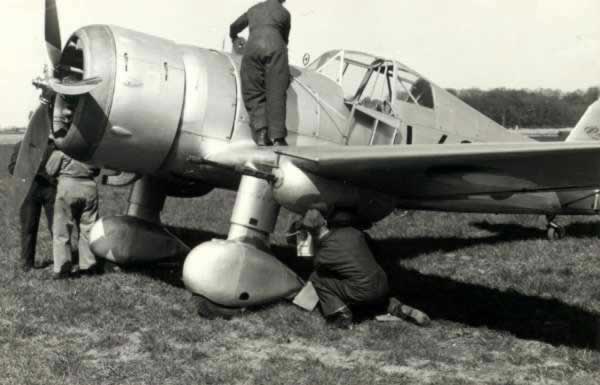
The Danish aircraft were also intended to have one 20mm cannon under each wing contained in a cleanly designed pack that was faired into the leading edge. However, it seems only J-42 carried the 20mm cannons, and only for a short period of time. All the other Danish D. XXIs had only the two machine guns. Presumably, the cannon were a bit too much for these aircraft to handle. The kit provides a separate sprue with the 20mm cannon and pods for use on J-42.
Since the wing included in the kit is the “Dutch wing’, you will need to do some sanding and filling in with small amounts of putty. You will need to sand smooth the top of the wing and fill in the little indentations, the ejection ports underneath and the little insets in the leading edge. For all practical purposes, without wing mounted machine guns, the Danish D. XXIs had smooth wings.
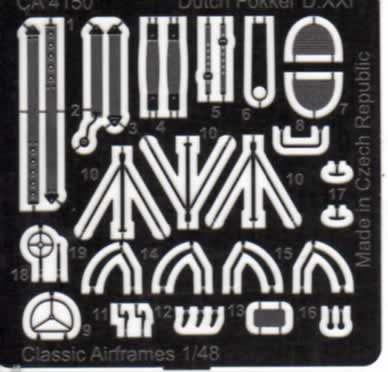 In addition to different armament, the Danish D. XXI had a different gun sight. The Dutch D. XXI used a modified ring and bead sight mounted on a tube that could be adjusted. The Danish aircraft had a simple ring and bead. Both types are provided for in the kit: a combination of plastic and etched metal for the Dutch and etched metal for the Danish D. XXI. In addition to different armament, the Danish D. XXI had a different gun sight. The Dutch D. XXI used a modified ring and bead sight mounted on a tube that could be adjusted. The Danish aircraft had a simple ring and bead. Both types are provided for in the kit: a combination of plastic and etched metal for the Dutch and etched metal for the Danish D. XXI.
As I noted earlier, a bit of work will be needed in modeling the Danish D. XXI. This comes into play with the landing light on the Danish aircraft. The Danish D. XXI had a landing light pod under the right/starboard wing, rather than lights in the leading edge of both wings. This arrangement was substantially similar to the Finnish D. XXI, as were the wing tip marker lights, which were on the edge, rather than on the top and bottom of the wing tip. The kit instructions do not note this.
There are two solutions to the landing light; find a set of Finnish wings, and sand smooth and fill in the inapplicable panels, or scratch build the light. At the moment I’m scratch building one. I’m starting with the rear portion the non-tropical intake from a Tamiya Spitfire; it has a nice taper. I’ll finish with a little putty. There is a clear lens for the front included on the kit’s clear part sprue.
For the wing tip marker lamps, simply remove the lights on the top and bottom of the wing tips, and fashion a small light on the outer edge of the wing tips. This can be done with a small clear part from the spares box, or even a small piece of sprue and a drop of white glue, which dries clear.
The mass balance on the Danish rudder is said to be slightly deeper than on the Dutch rudder. However, one must be aware of this difference to really notice it, and I do find this difference difficult to see in some pictures. The rudder in the kit appears to be a compromise for what is perhaps a mere fraction of a scale inch difference. While there are references to this slight difference, I do not have an exact measurement.
A small detail in the cockpit that you may want to alter is the control stick. For the Danish version remove the little curved piece in the front of the stick and swipe the sanding stick across the top of the grip making is flatter. The Danish version used a button in the top of the stick to fire the guns, whereas the Dutch version used a lever in front of the handgrip.
The kit also has the parts needed to make the odd looking landing gear on the on the camouflaged Danish J-47. There are a number of pictures of this aircraft with its oleo strut cover removed, exposing the strut. The instructions not only show where the cut is to be made, but the gear itself has clear panel lines showing the location of the cut.
As for the Luftwaffe D. XXIs, these are straight builds of the Dutch D. XXI, for which all the parts are in the kit. Since these aircraft were used in the training role, the machine guns were most likely removed; so not using the kit parts might be appropriate.
There is one modification you will need to do for all the aircraft represented by this kit, which may escape your attention. This involves Clear Part 2 (CP2). This is the clear part behind the cockpit canopy. This should become part of the fuselage and sanded smooth with the fuselage and painted over in the color of the fuselage.
Finally, there is one simple modification you should make to the Fokker D. XXI regardless of which version you are doing and regardless of whether it is a Special Hobby or Classic Airframes kit. The flaps on the D. XXI were metal, not fabric. So, you need to sand smooth the flap area (removing the ribbing) from the inboard end of the aileron to the end near the centerline. There is a distinctive scribed line noting the separation between flap and aileron. Thanks to Kari Stenman for letting me know that I overlooked this on my previous reviews.
Markings:
DANISH AIR FORCE:
The decals are well printed by Cartograf. The Fokker factory logo for the fin is very nicely and finely done and quite legible, even for its small size.
J-41 and J-42. These aircraft were the Dutch built with cowling clearance bumps. They were finished in Aluminum paint.
J-47. This aircraft was Danish built with the smooth cowling. The aircraft was camouflaged in an Olive Green and Brown with Light Blue undersides. While the painting guide gives generally accepted FS approximations, you need not worry about an exact match as some references give a range of FS numbers within which the colors fall.
LUFTWAFFE:
The aircraft are shown in the Dutch camouflage scheme of Camouflage Beige, Green and Brown.
“231”. This aircraft is shown at two different times during its repainting in Luftwaffe markings. Although the guide may look like two sides of the same aircraft, it is merely showing the aircraft at the different times, using one side for each due to space limitations. The Dutch markings appear to have been painted over with the Dutch camouflage paint
“Black 15”. Unlike “231” above, which appears to have had the Dutch marking painted over in the same camouflage scheme, this aircraft appears to have had its rear fuselage painted over in a single unknown dark color.
If anyone ever wanted to try his or her hand at a limited run kit, this is the one with which to start. I’m halfway through my second Fokker, doing the Danish J-42, and it is a very easy going build. However, that is not to say that it is a fall-together Tamiya like kit.
What makes the Dutch and Danish versions even less complicated than the Finnish version is that you don’t have to mess with the frame cockpit construction behind the seat, if you don’t want to. With the shelf installed and the spine window painted over, you cannot see a thing back there.
I’ve never been one for glamorous women, and I guess I could say the same about aircraft. Always had a soft spot in my heart (head?) for aircraft such as the Fiat G. 50, Macchi MC. 200, Polikarpov I-16 and, of course the Fokker D. XXI. I still remember both the joy and pain of building that old CA Fokker D. XXI kit about 13 years ago
Modelers who say they “do WW-2 prop” and don’t have some of the less glamorous aircraft in their collection are just fooling themselves, and the rest of us. Even with the little work that is required, I’m looking forward to that Aluminum Danish D. XXI with those gun pods sitting next to the other Fokkers in my collection.
In conclusion, all I can say is, meet the Fokkers, you won’t regret it.
Thanks to
Classic Airframes for
the review sample.
Classic Airframes
kits are available worldwide through hobby retailers and from
Squadron.com
Review and Images Copyright © 2008 by Steven "Modeldad" Eisenman
Page Created 20 November, 2008
Last updated 20 November, 2008
Back to HyperScale Main Page
Back to Reviews Page |
 Home
| What's New |
Features |
Gallery |
Reviews |
Reference |
Forum |
Home
| What's New |
Features |
Gallery |
Reviews |
Reference |
Forum |