|
ARII / Falcon 1/48 scale
Supermarine Spitfire Mk.XVI
by Doug Duthie
|
|
|
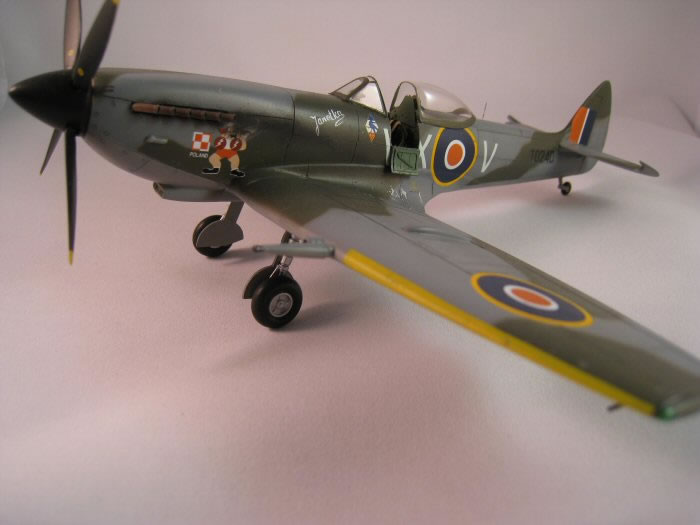
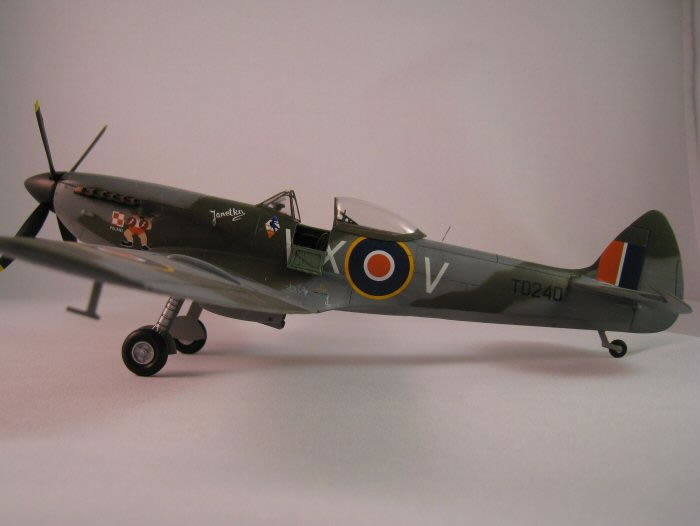
Supermarine Spitfire Mk XVI
TD240, Sqn Ldr B. Kaczmarek, 302 (Polish) Squadron, Summer 1945 |

HyperScale is proudly supported by Squadron
This should really be subtitled "Spitfire XVI - The Hard Way". Shortly after I bought this conversion,
injection models appeared on the market by Italeri, ICM and Airfix. Never having attempted a vacuform kit before,
I approached this with some trepidation.
The Falcon Triple Conversion contains vacuform fuselages for a Mk XII, XI and XVI.
For this article, I'll concentrate on just the Mk XVI.
You get a replacement fuselage, air intake, gull wing section, cannon covers and canopy.
The fuselage has very faintly recessed panel lines. The Arii/Otaki Mk VIII was used for the majority of other parts.
Construction starts with the suprisingly therapeutic task of cutting out the relevant vacuform parts
and sanding down the mating surfaces.
Next, comes the butchery on the Arii kit.
The C cannon covers were cut out with a razor saw and the E covers were pretty much a perfect fit.
The gull wing needs a bit more work as they do not take account of the recesses for the radiators,
so cut outs were required and inevitably some filling was needed.
The ejection ports for the E-wing armanent needed opening up - the port for the cannon was too far back anyhow.
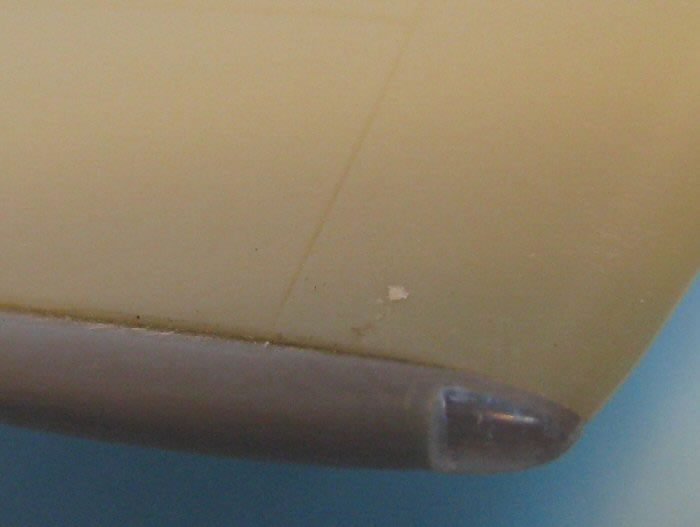
The wing tips were cut off and spare clipped wing tips were taken from a Hasegawa MkIX, which fitted rather snuggly. The lights were cut out
and replaced with clear sprue sanded to shape.
Again, taking leftovers from the Hasegawa kit, the round exhaust stacks and E cannons were scavenged,
the latter being mounted to the wing using suitably sized brass tube. The 50 cal ports were
drilled out and stainless steel tubing used for the blast tubes.
The openings for the exhaust stacks were cut out and backed with plastic card.
The openings for the horizontal stabilizer tabs were measured and cut out.
Despite the fact that this conversion is designed for the Arii kit, the join for the horizontal stabilizers is not quite correct.
The tabs are different lengths for each side and the join is straight, whereas the fuselage has a curved join with recesses for
equal length tabs. Careful measurement and trial fitting was therefore required.
The cockpit was built up using an old Eduard PE set for the Arii Mk VIII.
Framing was built up using plastic strip and some of the PE details backed with plastic card to lessen the 2D effect.
Tabs were added to the fuselage halves to aid alignment and some of the joins strengthened by backing with plastic card.
At this point, things started to go not according to plan.
Test fitting showed that there was rather a large gap between the fuselage and the wing.
Rather cunningly, or so I thought, I made some bulkheads to splay the fuselage at the wing root.
This improved the fit greatly, but I realized rather too late that this caused a noticeable valley at the top of the spine and cowling, and the
fuselage had taken on a degree of middle aged spread. However, it was too late to do much about this.
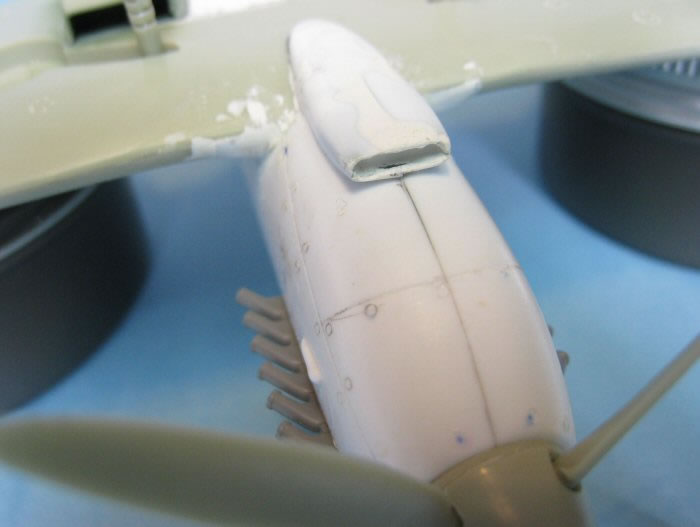
The plastic around the air intake was so thin that it disintegrated. It was necessary to make fill the intake with putty, then recreate the shape with a male former.
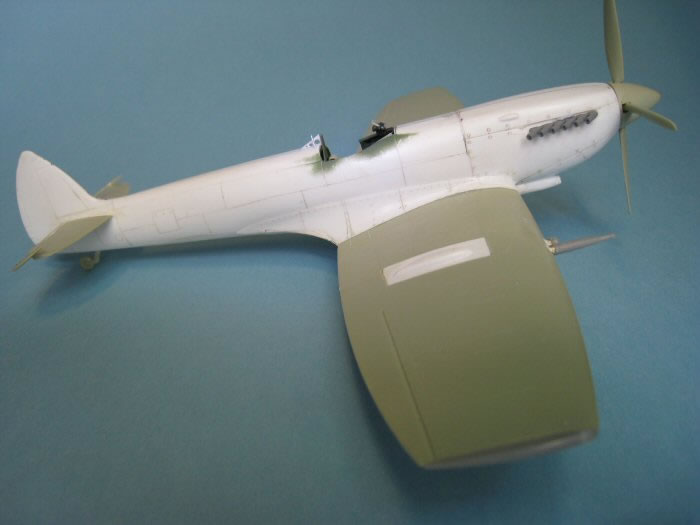
Finally, the fuselage was rescribed as the panel lines on the vacuform parms was rather soft.
The colour scheme was to be for the TD240, Sqn Ldr B. Kaczmarek of 302 (Polish) Squadron. The standard scheme of OG/DG over MSG was painted using Xtracrylix paints.
A base coat of Alclad II Duralumin was used at the wing root and masked with dabs of Maskol to simulate light wear by the cockpit access door.
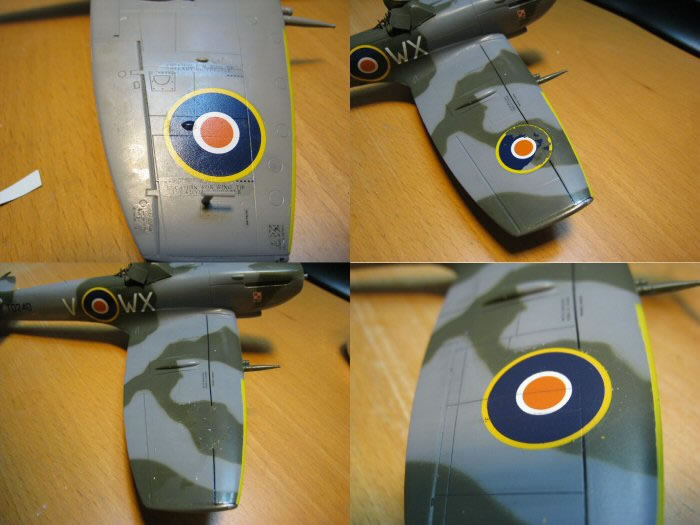
Markings were From Lifelike Decals. At this point, the next set of mishaps occurred.
I wasn't really paying proper attention and managed to put C1 roundels under wing instead of C type roundels.
Also, I completely forgot to paint yellow recognition stripes to the wing leading edges.
I masked and painted these, and sure enough, when I removed the masking film, part of one of the overwing roundels came with it.
As I had to remove and replace it, I thought I may as well fix the underwing roundels as well.
Unfortunately, I didn't have enough spares from the same sheet, so the centres of the underwing roundels are a slightly different colour.
Model, Text Copyright © 2009 by Doug Duthie
Page Created 17 June, 2009
Last Updated
17 June, 2009
Back to HyperScale
Main Page

|
