|
Airfix + Flightpath 1/24 scale
BAe Sea Harrier FRS.1
by
Ingo Degenhardt

|
BAe Sea Harrier FRS.1 |

HyperScale is proudly supported by Squadron.com
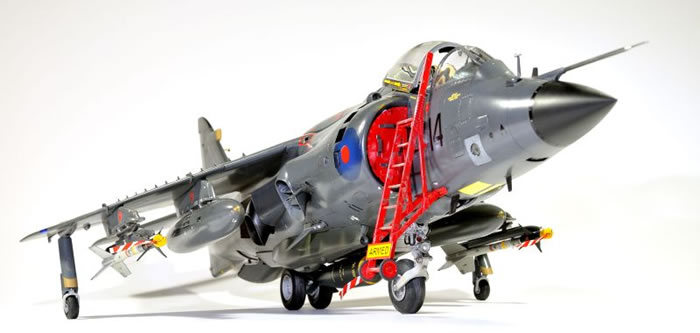
I have had plans to build a 1/24 Sea Harrier for quite a while and in 2008 I finally bought this large Airfix kit. Closer examination revealed what I expected from a kit with most parts dating back to it’s first release in 1974 – a lot of work ahead. Only the specific parts for the Sea Harrier are ‘new’, the rest is still the old parts for the original GR.1.

I went looking for some aftermarket improvements, found several and went for the big Weapons and Detail Set by Flightpath. It contains a lot of photo-etched, resin and cast metal parts, improving, detailing and replacing many kit parts and items. It also contains add-ons like the beautiful (all PE) boarding ladder.
It also adds lots of work but is positively worth it.

My buying of the kit coincided with the trouble Airfix was in at that time and I had some difficulties with a replacement part for a broken windshield but finally received it from Heller of France.
The most unattractive work of the whole process was due first – the filling and sanding of the majority of hundreds of little rivets covering all surfaces. Nicely done by Airfix back then but completely superfluous as the Harrier uses flush-head rivets, barely perceptible on the real thing.
The next step was to cut off the GR.1 nose from the fuselage halves – a bit tricky as the instructions do not show exactly where this has to be done. So you have to measure out the cutting line yourself. The GR.1 nose is then replaced by the provided FRS.1 Radar nose.
The rest of the basic assembly is rather straightforward if not for all the filling, sanding and rescribing of faint or completely vanished panel lines - and of course the integration of all the PE goodies.
These include parts for the cockpit, especially the ejection seat, all wing fences and vortex generators, open auxiliary air intakes, reaction control air valves and a lot more.

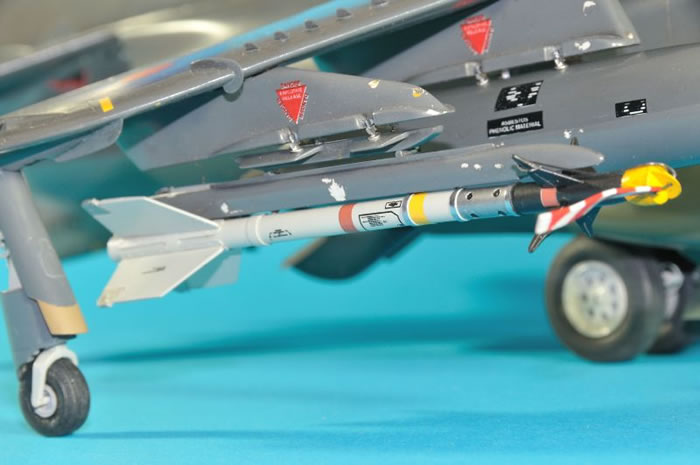
In addition to that the cast metal parts include a complete new nose gear leg and gun muzzles while the resin parts make new AIM-9L Sidewinders (along with PE parts) and new wheels.

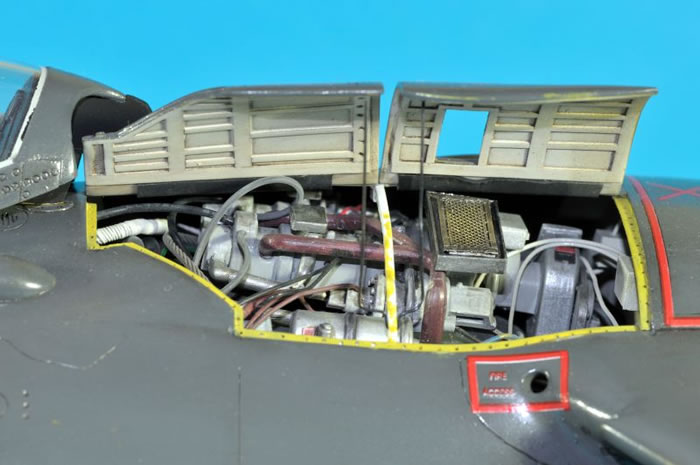
Some scratchbuilt detail was added to the cockpit and the Pegasus engine, the latter partly visible through two opened covers on the left side.
The kit decals offer a wide choice of Sea Harriers but were unfortunately badly out of register. Anyway, my intention was to build an aircraft from Operation Corporate, the recapture of the Falkland islands back in 1982.
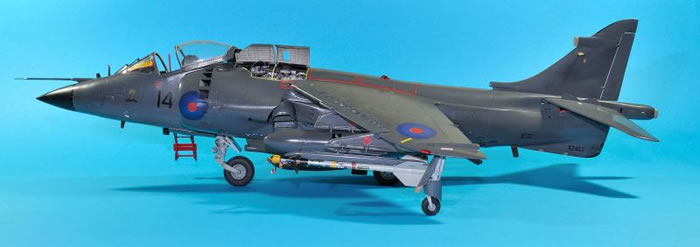
This is Shar No. 14 from 800 NAS on board HMS Hermes – with all it’s white undersides repainted on the way south in the ship’s hangar by brush in Extra Dark Sea Gray. A lot of markings on the upper side where overpainted as well – the white roundel rings in Roundel blue, appearing lighter in colour than the outermost rings. EDSG was brushed over ROYAL NAVY and the winged fist emblem on the fin. (This was a loaner jet from 899 Squadron, hence their emblem on the fin)
So not too many of the kit decals were used – unfortunately there were no replacement decals available for the stencils.

The Sea Harrier is finished in XTRA-Colors Extra Dark Sea Gray in various shades – a little lighter on the undersides (overpainted White) and appearing darker in the overpainted spots on the fin.
I simulated some chipping on the undersides by spraying random areas in Gloss White prior to the EDSG and ‘masking’ them with tiny dots of some grease. After the following EDSG had dried, the paint was ripped off with some masking tape, producing the effect of flaked off paint and showing the ‘original’ White. The same way I treated some areas where the paint is worn off down to the yellow-green base coat – wing tank tips for example.\
A wash, some drybrushing and a final coat of Humbrol Satin finished the painting part.
This big kit is a lot of work but in the end it makes an impressive model. I am quite satisfied with the outcome and hope you like too.
Model and
Text Copyright © 2008 by Ingo Degenhardt
Images Copyright © 2008 by Lutz Degenhardt
Page Created 13 February, 2008
Last Updated 13 February, 2008
Back to HyperScale
Main Page
|
Home
| What's New |
Features |
Gallery |
Reviews |
Reference |
Forum |
Search