Vintage Fighter Series' 1/24 scale
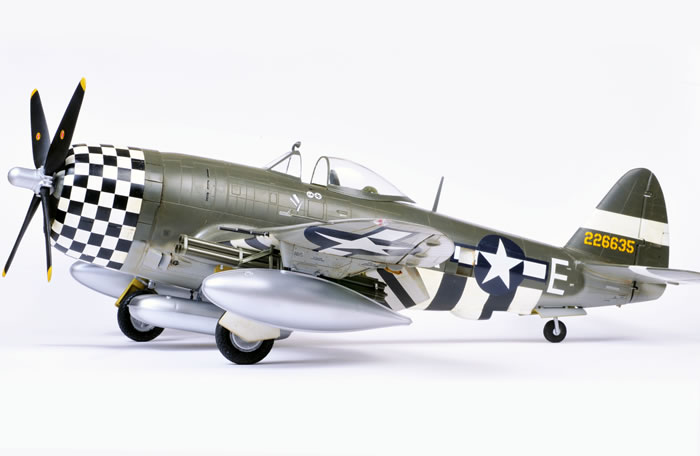
P-47D Thunderbolt
by Mick Evans
|
Republic P-47D Thunderbolt "Bubbletop" |

HyperScale is proudly supported by Squadron
The Vintage Productions Republic 1/24 scale P-47D Thunderbolt was reviewed in the box by Brett Green last year on HyperScale. Brett complimented the kit on the detail and optional fit for weapons, drop tanks and propellers.
When I received the kit to build, I was daunted by the huge box. The kit is enormours and initially intimidating, but my fears were quickly allayed.
The kit engine and cockpit were assembled as per the instructions provided by the manufacturer. The build of the engine is straightforward but quite complex at the same time, as the all of the cooling and intake ducting as well as the exhaust pipes and ducting forward of the fuselage are supplied. The latter is not visible on the completed model though. The engine and mounting is quite detailed with the ignition harness is the only detail missing. I scratch built this from lengths of fine solder and painted it to represent the wiring harness for each cylinder.
The cockpit was assembled using the P-47 Detail and Scale and Squadron “In Action” books as a reference for colour details. The detail, while a bit chunky, was very good with no additions really required other than the seat harness which I added from lead foil obtained from the seal of an old wine bottle.
The fuselage was then assembled with no absolutely no problems, the seam lines requiring almost no filler and only a little sanding. The spine was a bit different though. When installed I was left with quite a large seam line and this required some filler and a lot of sanding whin resulted in some panel line and rivet detail restoration.
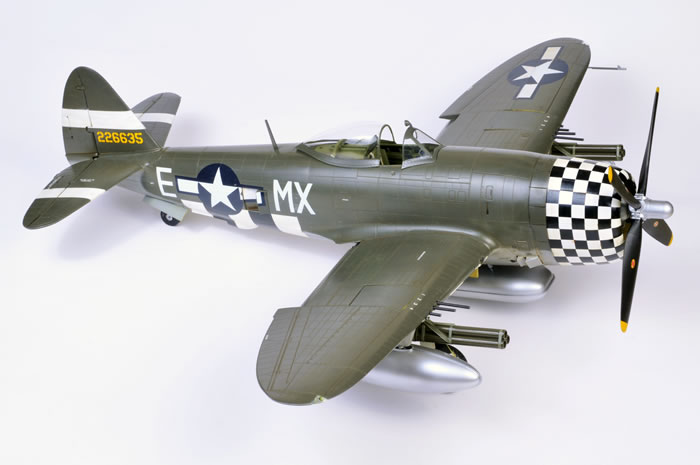
The wings were then prepared for assembly. Two options are supplied for the ammunition troughs for the gun bay; one contains ammunition while the other is bare. I chose to use the bare ammunition trays and built the gun bays fitting all of the detail. These areas could have done with some scratch building for extra detail but I was not going to display the open so I just stuck with the kit parts. Due to the size of the wings, gluing them is a bit of a logistical event - thank goodness for capillary action instant glue. The fit of the wings to fuselage was excellent with just a small amount of trimming required and absolutely no filler was used.
The flaps presented a bit of a challenge. As already pointed out by the manufacturer, the hinges in the early kit need some modification to fit both the flap and wing recesses, but once this is achieved the flaps fit beautifully and look excellent lowered. Another minor glitch was that the inner flap hinges for the left and right flap are moulded identically as I think from memory left hand flap hinges. These are handed, but the remedy is simple, I simply cut off the little cover plate and reattached it in the correct position - 1 minute’s work.
The remainder of the assembly was pretty straightforward with very little sanding or filling required.
The enine cowl is designed to be fixed closed which unfortunately hides the excellent detail that Vintage have supplied here. As I am one that likes to model the aircraft complete with few hatches or bays open this did not bother me a great deal.
The pilot figure looked great and was moulded in vinyl but at this stage I have not used him.
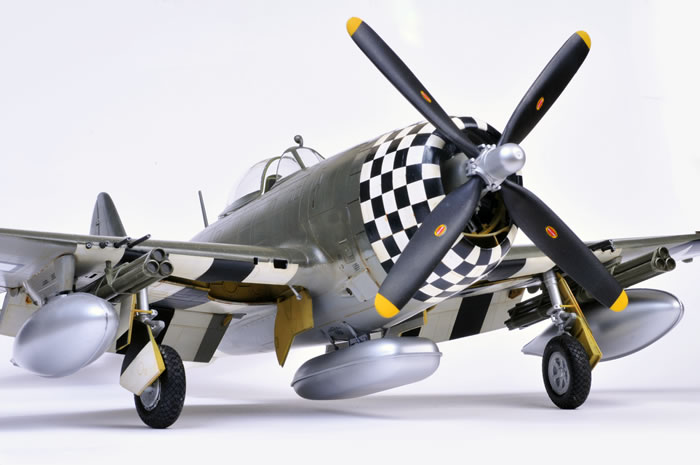
My only major beef with the kit during construction was the vinyl moulded tyres. These look great. The tread detail is sharp and the inner wheel hub is moulded in place in vinyl and requires the solid plastic inner hub to be inserted into the hub. This was easier said than done, as I had pre-painted all of the parts. My efforts resulted in most of the paint rubbing off and I had to reduce the size of the retaining lugs to get the parts inserted easily. It would have been better if the manufacturer had moulded the inner and outer hubs in styrene and sandwiched the vinyl tire between them.
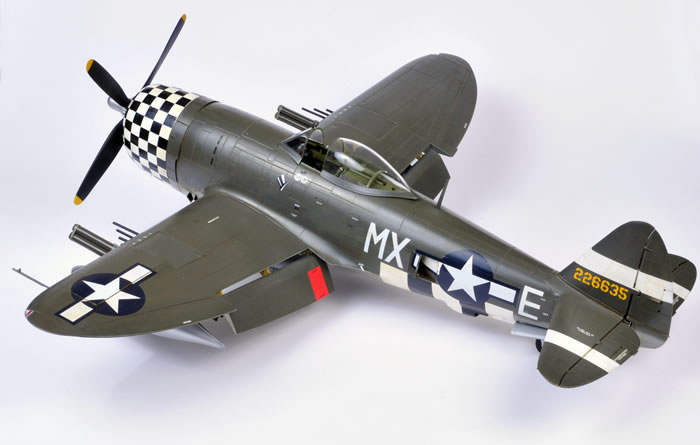
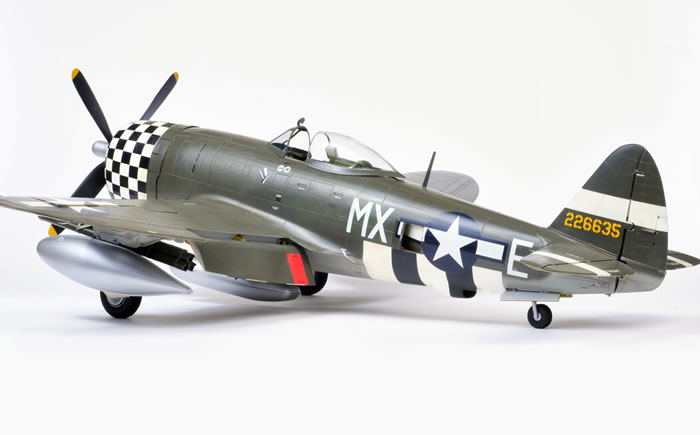
The kit was painted in XtraColor Olive Drab and Neutral Grey before the decals were added. The decals were quite nice and snuggled down into the detail superbly. The only issue was the fitting of the black checks on the nose. I ended up cutting these into strips to allow for easier adjustment to make them fit.
The kit was subtly weathered before a coat of semi-gloss clear was sprayed.
Contrary to its daunting size, Vintage Fighter Series’ 1/24 scale P-47D Thunderbolt is, in fact, an easy build. Overall fit is excellent with very little filler required. The kit has some minor pitfalls as detailed in the review but these are quite easily overcome and two have been corrected by the manufacturer in later releases. I think that Vintage has listened to the feedback from their P-40 kit by not including gimmicks such as retractable undercarriage, moving control surfaces and removable panels and have focussed on accuracy and detail. In 1/24 scale, where things are quite large, detail is paramount. The lessons learned in moulding their earlier releases are reflected in this P-47 kit.
In my opinion, this is an excellent buy and an easy build without the modeller having to do extensive detail or filling and sanding. The finished product looks grand and is sitting in pride of place in my study. For my wife to comment that it looks nice is a compliment to the guys at Vintage.
I am very interested to see what Vintage’s next project will be.
Model and Text Copyright ©
2009 by Mick Evans
Images Copyright ©
2009 by Brett Green
Page Created 13 July, 2009
Last Updated
13 July, 2009
Back to
HyperScale Main Page

|
 Home
| What's New | Features | Gallery | Reviews | Reference | Resource Guides | Forum |
Home
| What's New | Features | Gallery | Reviews | Reference | Resource Guides | Forum |