|
Hobbycraft's 1/32 scale
Mustang Mk.IA
by Tony Bell

|
North American Mustang Mk.IA |

Hobbycraft's 1/32 scale Mustang Mk.IA is available online from Squadron.com
Background
The legendary P-51 Mustang, icon of WWII American airpower, began its life as a design built for the British Royal Air Force as an alternative to the P-40. The British Air Purchasing Commission had approached North American Aviation to licence produce the P-40D for the RAF, but “Dutch” Kindelberger, president of NAA, convinced the British that they could produce a new fighter prototype within the four months that it would take to set up production for the P-40.
Although the prototype NA-73X was rolled out in early September 1940, a mere 102 days after the contract was signed, the truth is that NAA had been working on the design for more than a year. Even so, the speed of development is nothing short of miraculous. Several key design elements of the Mustang contributed to its ultimate success; One was the NACA laminar flow wing, which delayed the onset of boundary layer turbulence to a point further along the chord of the wing, resulting in reduced drag. The other was the arrangement of the radiator which actually used the heat generated by the engine to develop enough thrust from the cooling air to offset the drag of the structure. Other intelligent features such as ease of production were a part of the design from the outset.

What hobbled the early Mustang, however, was its engine. The Allison V-1710 was optimized for performance below 20,000 feet, at a time when most aerial combat in Europe was taking place at higher altitudes. Because of this limitation, the early Allison mustangs were employed in low level roles such as ground support and tactical reconnaissance.
Hobbycraft Canada’s new 1/32 Mustang IA in the box
The test shot provided to me by Hobbycraft Canada was molded in light a grey styrene that is slightly soft and quite pleasant to work with. The surface texture of the parts is slightly rough (“matte” is probably a better description), but under a coat of primer and paint it looks perfectly OK. The surface detail is very good, featuring restrained panel lines and fasteners. Much, much nicer than Dragon’s P-51D.
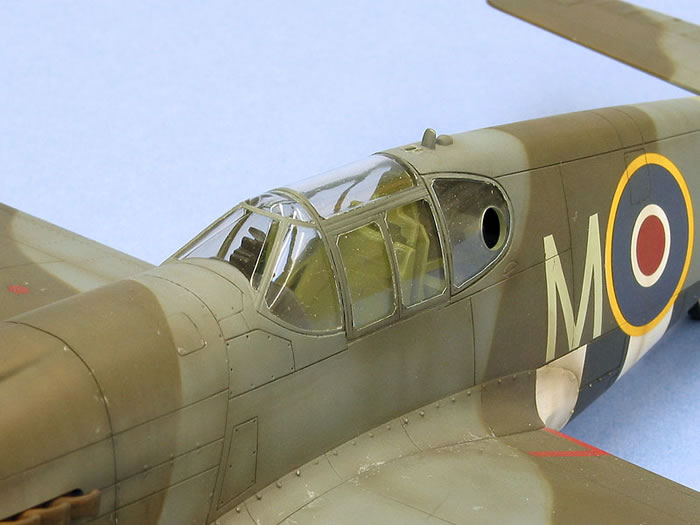
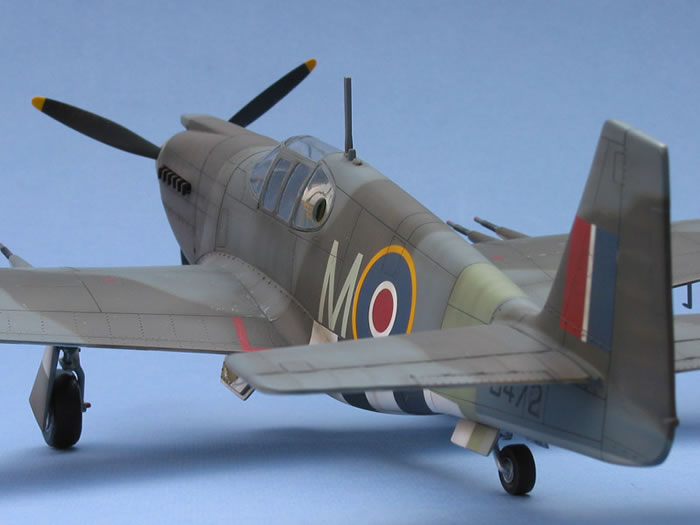
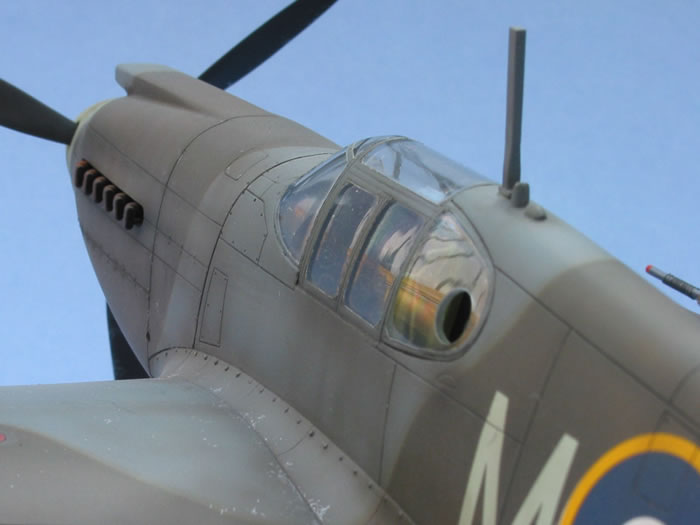
The transparent parts are very clear, with well defined frames. The option for both open, closed birdcage canopies are provided, as well as a Malcolm Hood.
The parts breakdown is similar to – no, make that exactly the same as - the 1/48 Accurate Miniatures Allison Mustang kits. On closer inspection, it quickly becomes obvious that not only is the breakdown the same, but that the HC parts have been scaled up from the AM kits with a few minor exceptions.
Now, before you grab the pitchforks and torches and head up to the Great White North in an angry mob, you should know that the folks at Hobbycraft indicated to me that they have permission from Accurate Miniatures to reproduce their Allison Mustangs in this scale (although Accurate Miniatures did not confirm this for me when I talked to them).
One more thing I should note before continuing on with the review is that the example that I received was a test shot and that some of the issues I raise may well end up being resolved by the time the kit hits the stores. I also did not have the benefit of any instructions, so there might well be errors that I have introduced on my own.
Fuselage and Wings
Each fuselage half is broken down into two pieces, with the join at the engine firewall. This is to allow for the different carburettor scoops of the different versions. The parts were dry-fitted and the mating surfaces carefully cleaned up. After a couple of iterations a perfect fit was obtained and the forward portions were attached with liquid cement. I set aside the fuselage halves to dry thoroughly while I worked on the wings.
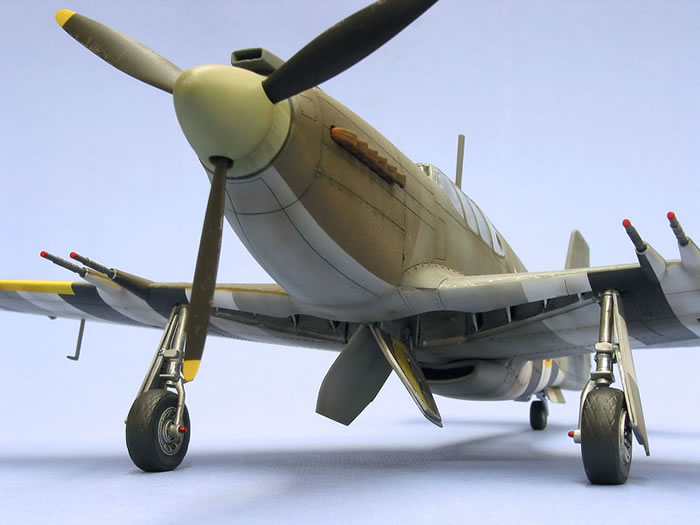
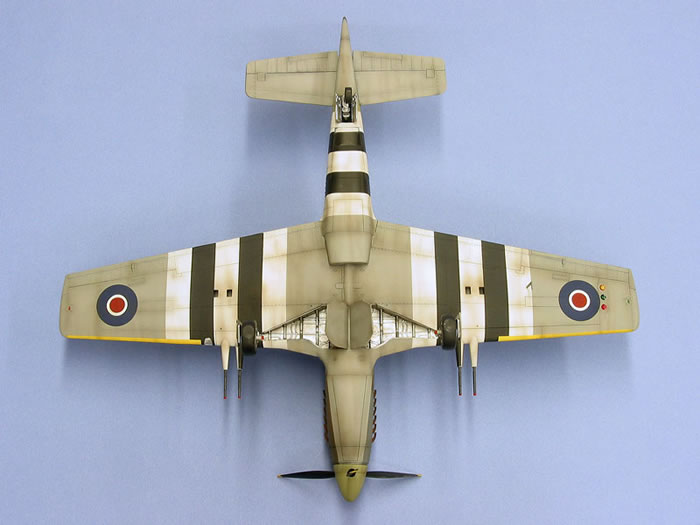
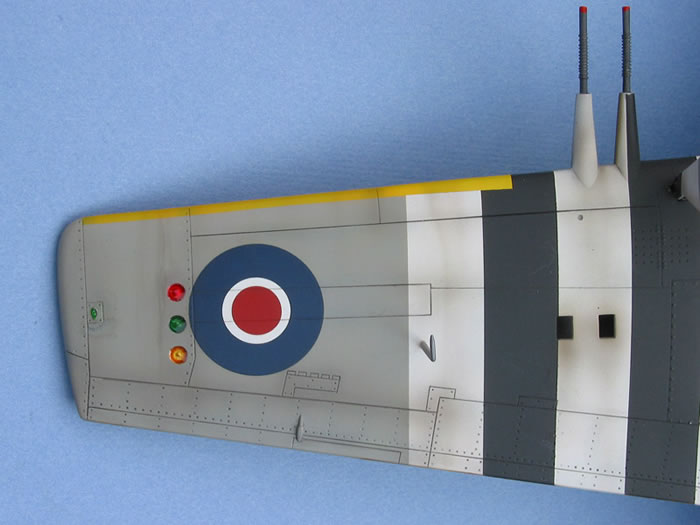
The fit of the upper and lower wings was greatly improved with a couple of light swipes with the sanding stick to clean up the mating surfaces. I attached the trailing edges with liquid cement and the leading edges with superglue and again was rewarded with a near-perfect fit. The Squadron Walkaround book indicates that the P-51/Mustang IA had only one landing light in the left wing leading edge, so I filled in and over-painted the right hand one. Subsequently I turned up some photos showing two landing lights, so it looks like Hobbycraft got it correct after all. I lined the left landing light opening with Bare Metal Foil and attached the clear cover with superglue after coating the inside surface with Future to prevent fogging. The fit of the light wasn’t too good so I filled the gaps with superglue, sanded it flush with the wing and polished it to restore the clarity.
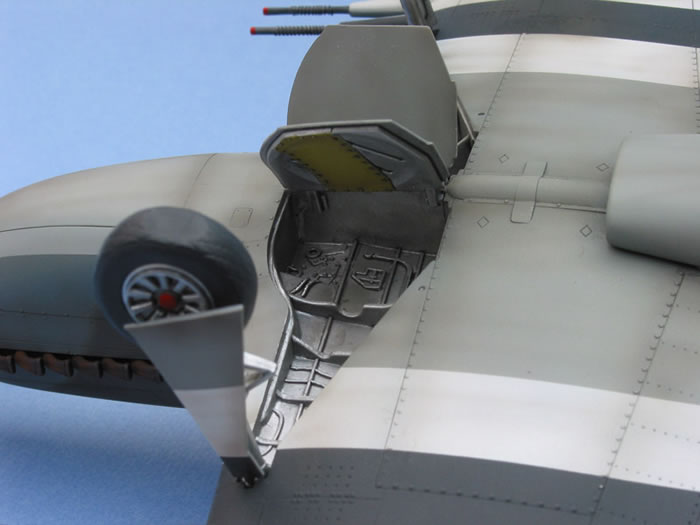
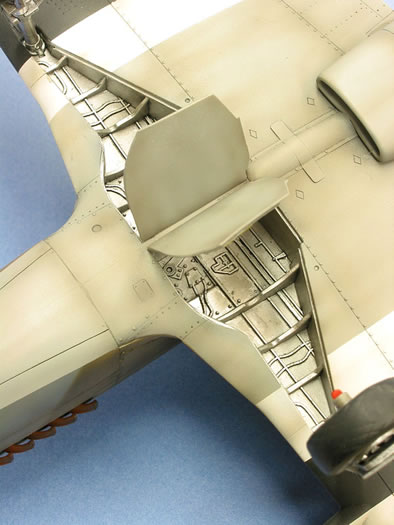
The wheel wells has the same accuracy issue as just about every other mainstream P-51 kit out there, which is to say that the rear wall follows the aft edge of the opening as opposed to the line of the spar.
The Cockpit
The cockpit side walls are molded separately and consequently feature nice depth. All of the major structural components and various boxes and consoles are represented, albeit without a whole lot of detail. The throttle quadrant is a separate piece. What there is looks accurate according to my references, and will provide a good foundation for anyone wishing to do some extra detailing and no doubt the aftermarket folks will provide us with ample goodies to dress up the interior before long. Personally, I approve of this approach. It means that Hobbycraft can keep the price very reasonable (about C$40 MSRP, according to them), and yet allow those of us who wish to expend extra time or money as we see fit to achieve the level of detail we want.
Two seats are provided, both early and later styles. They are a bit on the thick side, but are easy to thin down with a file and sandpaper. Because I built this model OOB for Hobbycraft, I left the seat as-is. The instrument panel is nicely done, featuring delicate raised detail for the gauges. A coat of flat black and careful dry-brushing was all that was necessary to bring out the details. I painted the interior overall Testors US Interior Green and painted various boxes “scale black”. A wash of thinned black acrylic and a dry-brushing of light grey-green artists’ oils followed by some paint chipping drawn with a Prismacolor silver pencil finished off the interior.
The seat interfered a little with the joystick, so some filing and sanding was in order. Also, the locating holes in the cockpit floor for the seat frame appeared to be in the wrong place, about 1.5mm too far aft. I say “appeared to be” because it may well be that I got something wrong in the assembly of these parts due to the fact that I didn’t have any instructions.
Assembly
Trapping the fully assembled interior in between the fuselage halves was a bit tricky, but it worked out in the end and fit quite well. As with the other major components, the fuselage halves required some minor cleanup of the mating surfaces to obtain a near-perfect fit. By using superglue to join the fuselage I avoided the need for any filler. The trailing edge of the rudder is a bit thick and would benefit from thinning from within before joining the fuselage, but as with the seat, I left it alone. Honestly, it looks fine the way it is.
The fit if the wing to the fuselage was also very good, especially along the wing root. It too required some dry fitting and tweaking, but not much. There was one area that needed filling, and that was at the leading edge of the wing fillet where there was a space of about 0.75mm. I filled this with superglue and wiped away the excess with superglue remover, thus avoiding the need for any sanding.
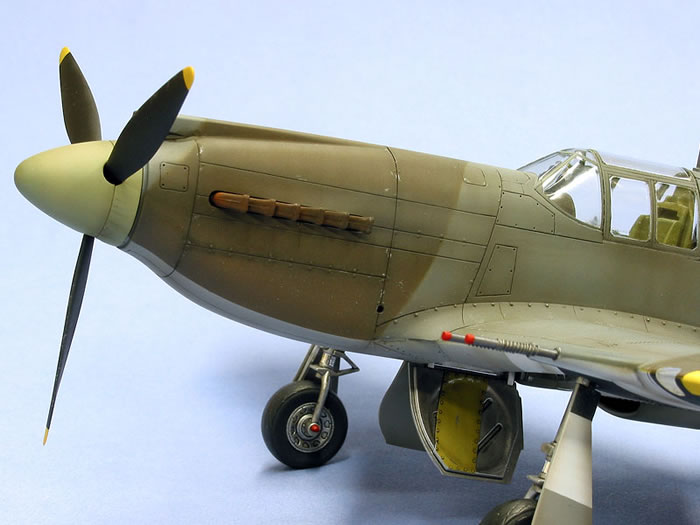
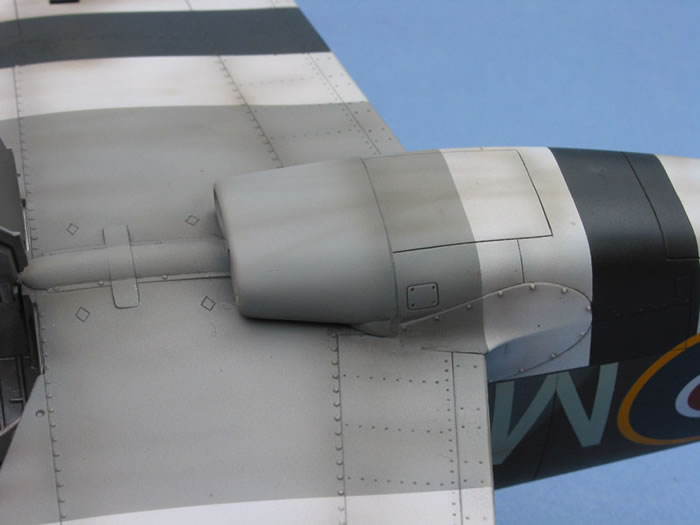
The radiator scoop required a fair amount of cleanup as it interfered with the bottom of the wing. I also sanded the lip of the intake to thin it and make it more uniform. Likewise, the carburettor intake was slightly oversized and needed some filing and sanding to fare it in. Fortunately this only involved removing material, so no filler was needed. The tail planes needed only a little Mr. Surfacer to fill a small gap at the root.
The canopy parts fit well, requiring only a little bit of filler on the windscreen. For this I used epoxy putty, applied with a toothpick and the excess wiped away with a damp cotton swab. No sanding necessary.
| Painting, Markings and Weathering |
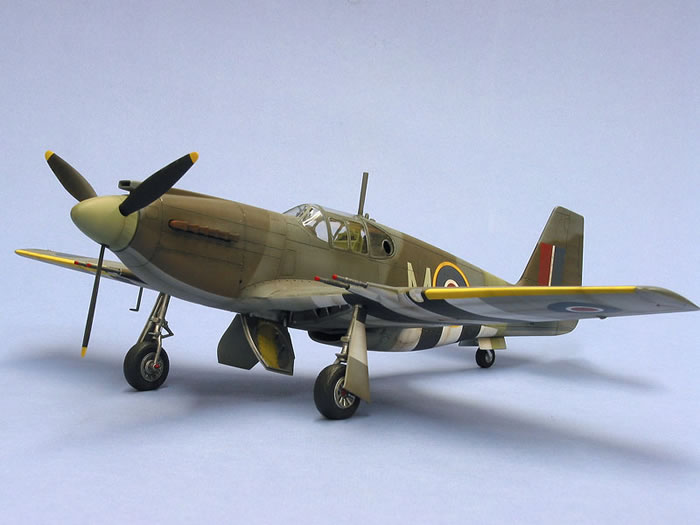
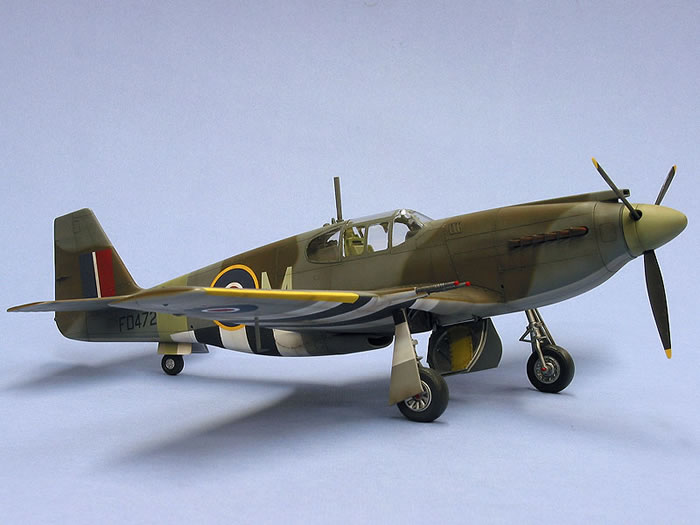
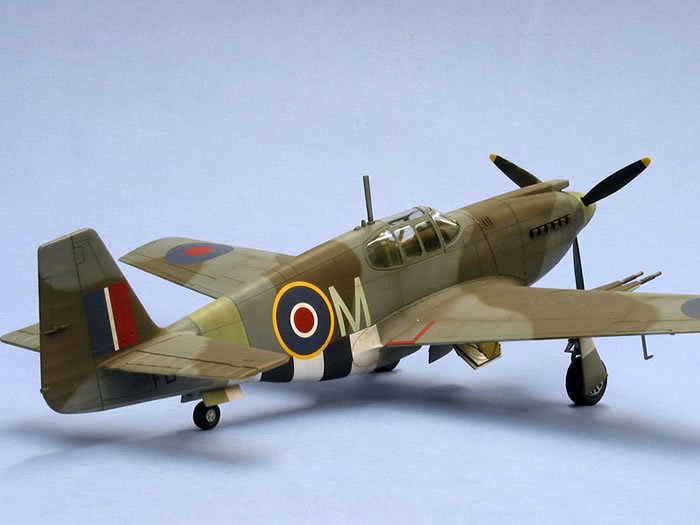
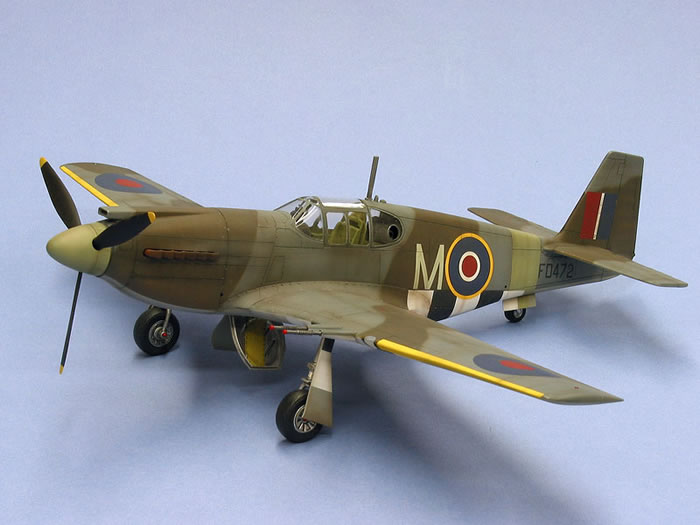
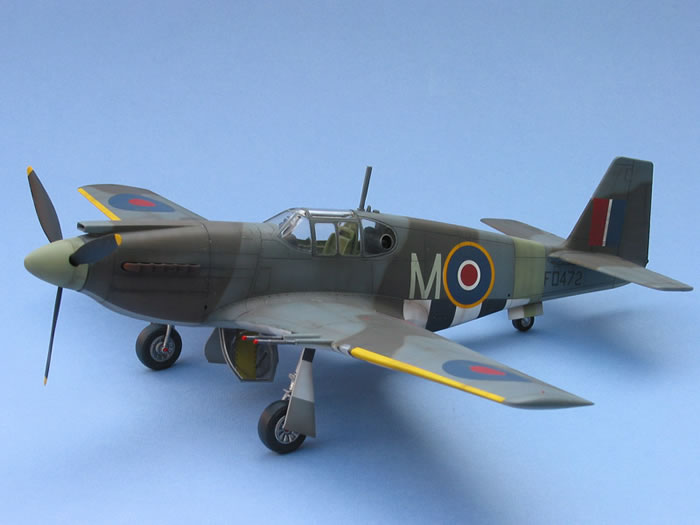
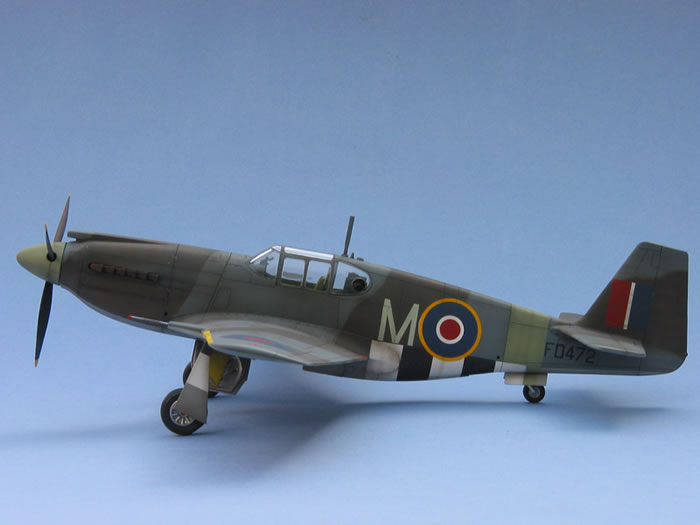
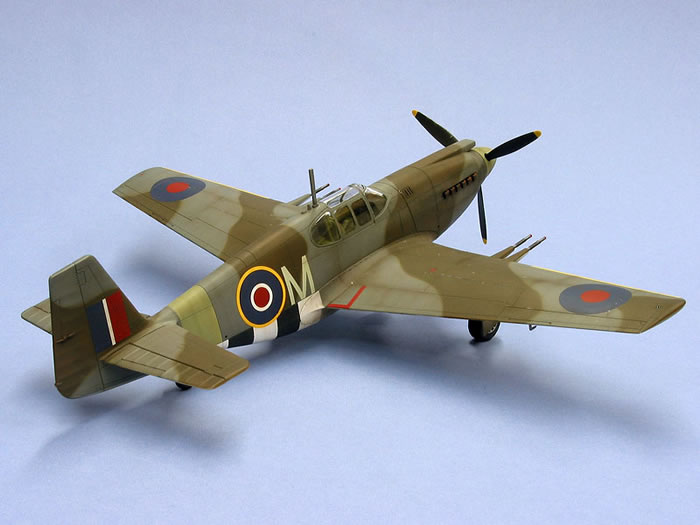
I chose to paint my Mustang up in the markings of a 268 Squadron RAF machine, flown by a Canadian pilot, Flt Lt Bill Tuele on D-Day. This choice was dictated primarily by the fact that it was the only option on the decal sheet for which I could find any information on the internet (that, and I’m a good Canadian boy).
I started by masking the canopy and painting the frames Interior Green, after which I primed the entire model with Gunze Mr. Surfacer 1000 fro a rattle-can. I then pre-shaded the panel lines and recesses with Krylon gloss black, decanted from the spray bomb and airbrushed.
I painted and masked the D-Day stripes with Tamiya Fine White Primer and Krylon black, both decanted and airbrushed. The RAF Sky, Dark Green, Ocean Grey and Medium Sea Grey were mixed from Tamiya acrylics and sprayed on, starting with the Sky band followed by MSG on the undersides. These were masked off and the camouflage pattern outline drawn on the model with Future floor wax and a medium brush. The gloss of the Future provides enough contrast with the flat primer to be seen but yet won’t show through the subsequent coats of paint. Next was the OG, followed by the DG. I used rolls of Blu-Tac to mask the demarcation between the upper colours, which produces a tight spray pattern.
After unmasking the undersides, I sprayed an overall coat of Future to prepare the surface for the decals. Hobbycraft has become known for their excellent decals in recent years, and these are no exception. They are thin, opaque and feature perfect registration and accurate colours. They went on beautifully and snuggled down into the details with just a little bit of Solvaset. There was no silvering at all.
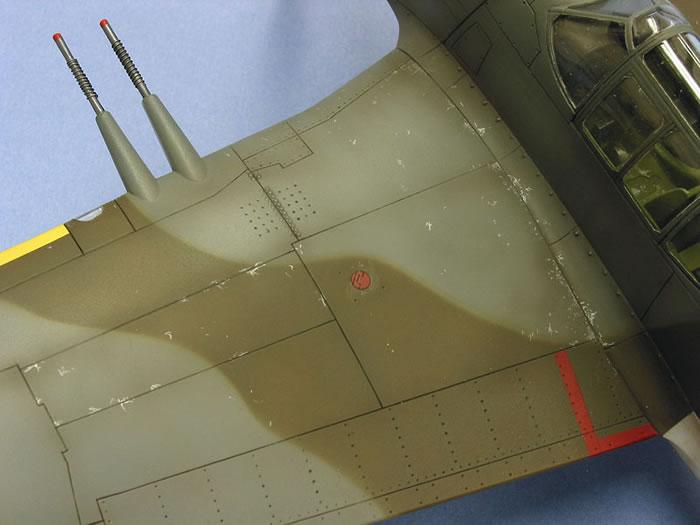
Another coat of Future sealed the decals in and I then applied a panel line wash of medium brownish-grey mixed from artists’ oils and thinned with naphtha. Once the excess wash was cleaned up with mineral spirits, I shot the model with Polly Scale clear flat. I airbrushed streaks and blotches of a mix of heavily thinned (90% thinner) Tamiya brown and black to impart a look of operational grubbiness. The exhaust stain was airbrushed on with heavily thinned Tamiya buff and grey.
Finally, I applied some very limited chipping to the high-wear areas using a Prismacolor silver pencil.
Fiddly Bits
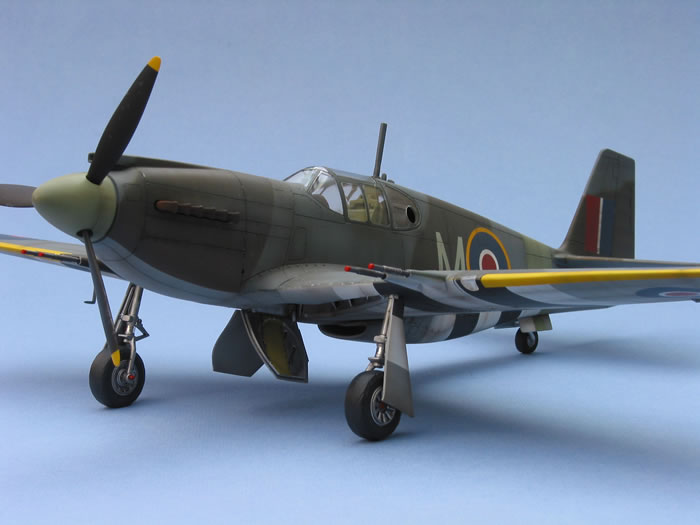
The wheels have separate discs for the hubs, which makes painting much simpler, but in my sample the hubs were too large in diameter and too thick to fit the tires. I simply wedged the hubs one at a time onto a rat tailed file, chucked the file in my drill and sanded the hubs down until they were the correct diameter. I thinned them by rubbing them on a piece of sandpaper laid flat on my bench.
There are two choices of tires: flattened (but not bulged, thankfully) and fully round. At first blush, the tires look too wide, but comparing them to Ultracast’s 1/48 resin wheels and scaling the width up reveals the HC wheels to be a mere 0.5mm too wide. Instead, it’s the too square profile of the tires that creates the illusion of excess width. For grins & giggles I mounted an unused round tire on my rat tailed file and chucked it in the drill. About five minutes with a mill file was all it took to round off the shoulders, after which the tire looked much better.
Accuracy-wise, the spoked inner hubs aren’t quite right to my eye, but look OK once painted up. I painted the hubs, gear legs and doors Floquil “Bright Silver” and emphasized the detail with a coat of Polly Scale clear satin mixed with black ink. The tires (the flattened ones) were painted a dark brownish grey mixed from Citadel acrylics.
The fit of the landing gear legs into their locating holes in the wings was not very positive. There is a tab on the gear leg, but no corresponding slot in the locating hole in the wing, so I had to trim the tab away in order to insert the gear into the hole. I attached them using epoxy which allowed me to line them up properly before the glue set.
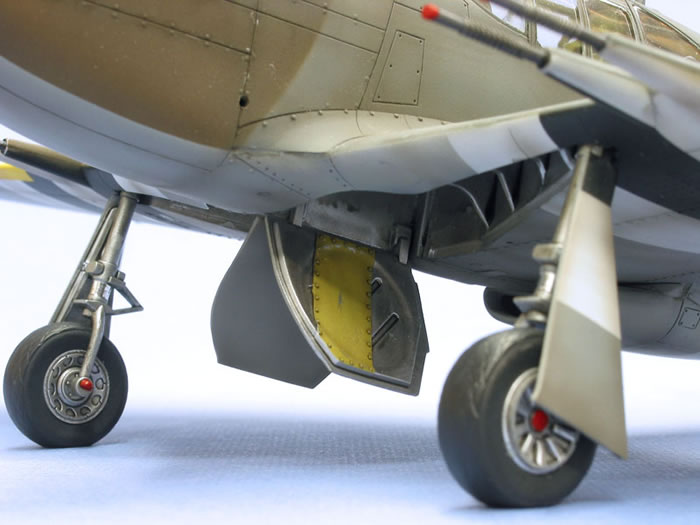
The fit of the tail wheel to its strut was very loose, so I simply filled the hole with gel superglue, brushed some accelerator on the strut and smooshed the wheel on. Worked like a charm.
The canon barrels feature fine spring detail that I had to sand off because I couldn’t get rid of the mold seam without ruining the detail anyway. To replace the springs I wound fine wire around the barrels and fixed it in place with Future. I painted the barrels with a 50/50 mix of Humbrol Metal Cote gunmetal and steel and gently buffed them with a stiff paintbrush.
The IFF lights under the wing were first painted “Bright Silver” followed by Gunze clear red/green/amber, followed by a drop of five minute epoxy. The wingtip lights were finished in a similar manner.
Although there were a handful of small fit issues to contend with and a few minor accuracy nits to pick, overall I thoroughly enjoyed building this kit. At an MSRP on the order of C$40 I feel this kit offers excellent value for the money.
Model,
Text Copyright © 2008 by Tony Bell
Page Created 15 January, 2009
Last Updated
15 January, 2009
Back to HyperScale
Main Page |
 Home
| What's New |
Features |
Gallery |
Reviews |
Reference |
Forum |
Search
Home
| What's New |
Features |
Gallery |
Reviews |
Reference |
Forum |
Search