|
Academy's 1/72 scale
Ilyushin Il-2 Stormovik
by
Chip Jean

|
Ilyushin Il-2 Stormovik |

Academy's 1/72 scale Il-2 is available online from Squadron.com
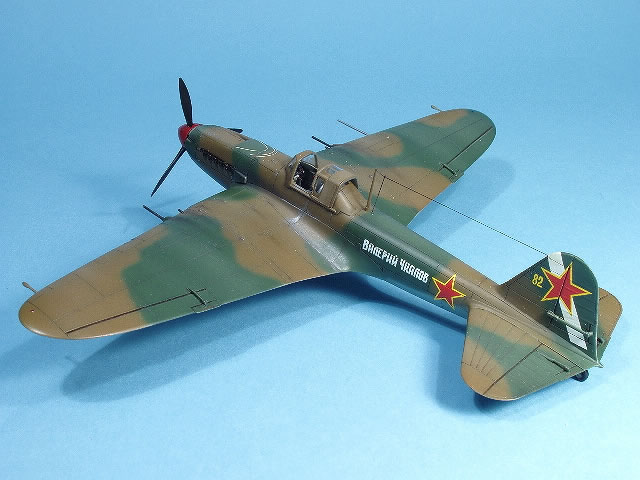
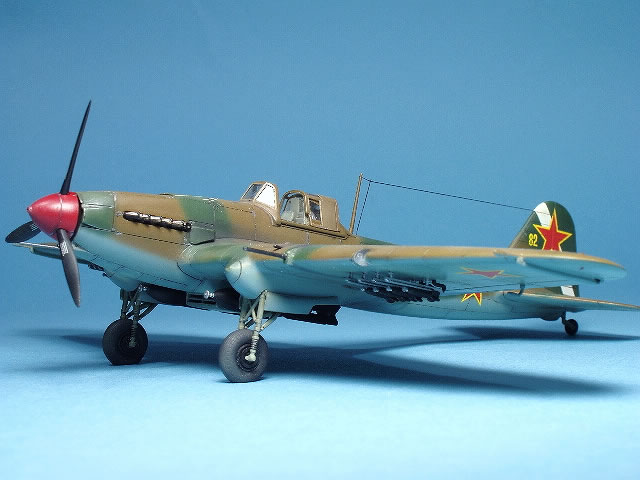
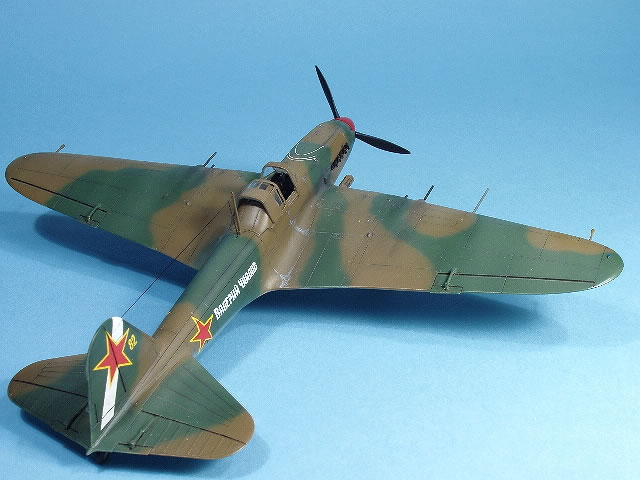
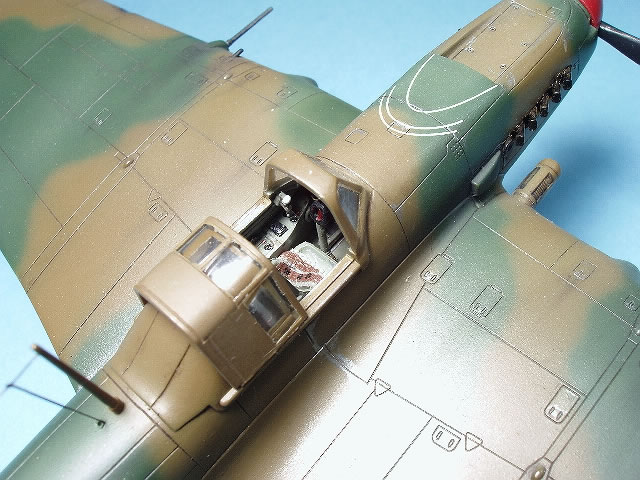
This is the new Academy 1/72nd scale single-seat IL-2 Stormovick. I compared it to the Accurate Miniatures 1/48th scale two-seat Stormovick (I don’t have the AM single-seater) and it appears to me to be a scaled-down version of the Accurate Miniatures kit. This means it’s very well detailed for a 1/72nd scale single engine prop kit. The kit comes with a fully detailed cockpit, very nicely recessed surface detail, your choice of weighted or unweighted tires and underwing bombs.
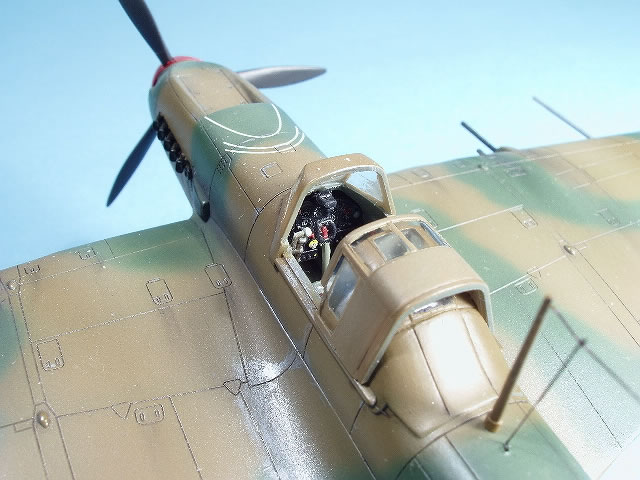
Two nice touches you’ll appreciate are wheel hubs molded separately from the tires and landing gear doors molded in place. The canopy can be positioned opened or closed. Decals are by Cartograph and offer options for 10 birds.
While the fit is generally good, construction is fiddly here and there with two particular areas to watch out for. Pay attention and learn from my lapses in attention and failure to plan ahead.
First are the wings. You get a lower center section, two lower outer sections and a pair of upper halves. What’s unique in this kit is that the wing roots are molded as part of the upper wing halves instead of part of the fuselage. I test fitted the upper wings and they fit very nicely and solidly into large cut-outs on the fuselage sides, which sets the dihedral for you (as long as neither of your upper wings are warped, like my left one was). The lower center wing section, onto which are attached two wing spars, the interior of the radiator and the cockpit interior, fits very tightly onto the fuselage, as I found when test fitting. Sounds good so far, right? Well, no! I screwed up. I didn’t test fit the lower center wing and the upper wings all at the same time and I’m about to get burnt.
The kit instructions have you attach the bottom center to the fuselage followed by the uppers. I figured the bottom fits ok, the uppers fit ok, lets follow the kit instructions. So I’ve got the lower-center wing installed, glued and blended in with CA glue. Then I try to put in the uppers and they won’t fit all the way in their recesses…@#$%^&*!@!!! I trim and I sand and I shave but nothing improves the fit, so out comes the razor saw and off comes the center bottom wing….@#$%^&*!@!!! I’m about to get smart and glue the upper wings to the fuselage until I remember I’ve got a warped left upper wing…@#$%^&*!@!!! So out comes the hair dryer to soften the plastic followed by gentle bending followed by c-r-a-c-k, immediately followed by…..@#$%^&*!@!!! So, I settle down, finish correcting the warp and then fix the crack in the wing and then do what I should have done in the first place; glue the upper wing halves to the fuselage, being careful to get the dihedral right. The wing to fuselage fit is absolutely perfect; the seam look like an in-scale panel line The lower center wing was then re-glued in place followed by the lower outers. There are gaps and steps at the lower center and outer wing joints that will need filling & sanding but don’t sweat ‘em too much because the landing gear sponsons will hide part of them.
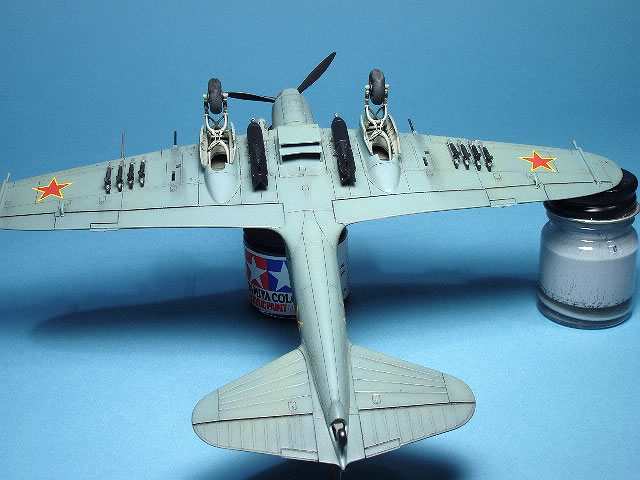
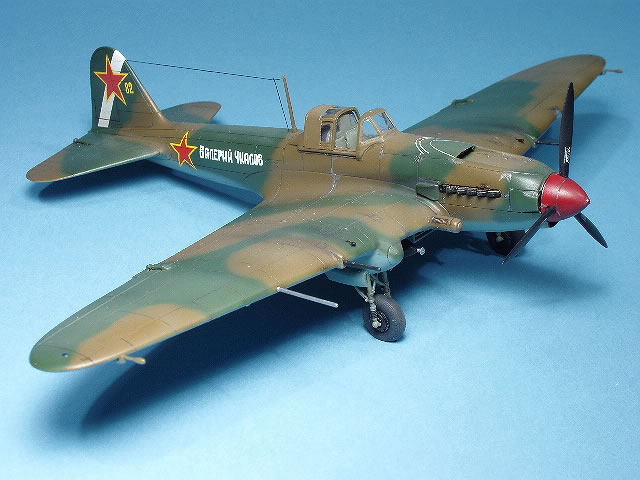
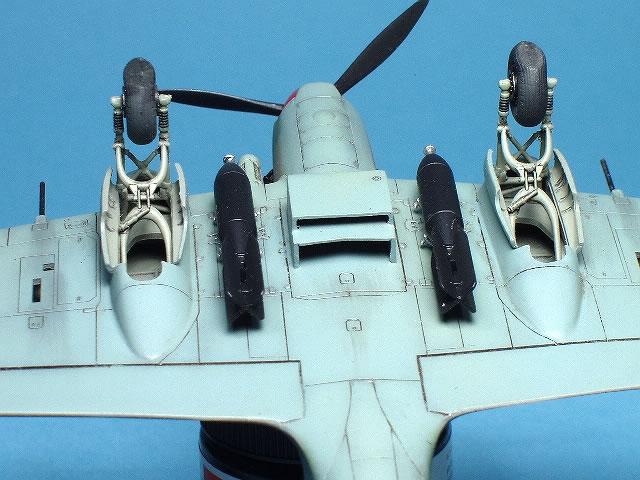
Which brings me to my second fiddly warning; the landing gear sponsons and the main landing gear. Each sponson is molded in halves with the gear doors very helpfully molded in place (a nice touch). Each main gear strut sits on top of a notch on a truss molded onto the forward wing spar. The front of the retraction struts attach to the main gear leg and the rear fits very neatly into holes on the bottom of the lower wing. Can you picture all that.
Without a thought in my head to future consequences and without test fitting all the parts, I blindly followed the kit instructions which have you glue the sponson halves together, then to the wings followed by the landing gear. The problem with that is, with the sponsons already in place, when you place the rear of the retraction strut in their little holes and raise them to meet the main struts, they press against the inside of the sponsons. This pressure pushes the main struts forward and since the main struts only sit on top of the wing truss, you have to hold the main strut in place and align it with the other main strut and use instant glue, all at the same time, meaning chances are, the landing gear probably wouldn’t be aligned with each other. So, I attached the main struts, got them aligned and when they were dry, attempted to install the retraction struts, which caused the next problem in my failure to plan ahead. With the main struts AND the sponsons in place, there was no way I could maneuver the rear of the retraction struts into their little holes on the bottom of the lower wing. It just wasn’t happening. So, I ended up gluing the rear of the retraction struts to the bottom of the upper wing. I know this admission puts me at odds with the accuracy police, but it did the job. NOTE TO FELLOW MODEL NERDS: if you’re building this kit, attach the main and retraction struts first, then put the completed sponsons over them, trimming the inside of the sponsons as necessary.
All other construction is conventional and problem free.
 The decals by Cartograph are gorgeous; beautifully printed and in perfect register. Kudos to Academy for making the switch from their lousy kit decals of the past. You’re given 10 marking options with 3 different color combinations, so now’s the time to make your choice between 1 of 8 Soviet aircraft, a German bird or a Hungarian aircraft. The decals by Cartograph are gorgeous; beautifully printed and in perfect register. Kudos to Academy for making the switch from their lousy kit decals of the past. You’re given 10 marking options with 3 different color combinations, so now’s the time to make your choice between 1 of 8 Soviet aircraft, a German bird or a Hungarian aircraft.
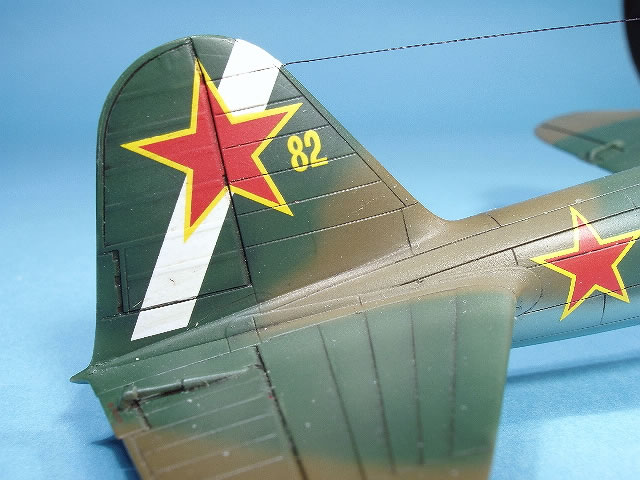
After choosing the box art example, my next step in the painting process was to knock off that prominent little thingy on top of the rudder. A search of the floor yielded nothing but howls of mocking laughter from the carpet monster, so I made another part from scrap. This one also very quickly ended up in those wooly jowls so I decided I’d just take my hits from the accuracy police and leave it off. A side note; to add further insult, 2 weeks after I finished this kit, part of the original thingy magically appeared on my work table…@#$%^&*!@!!! What’s especially galling about that is, when I finish a model, I take everything off my table, scrape up all glue and paint spatters, spray it with Windex, and wipe it clean. So, where’d that part come from?
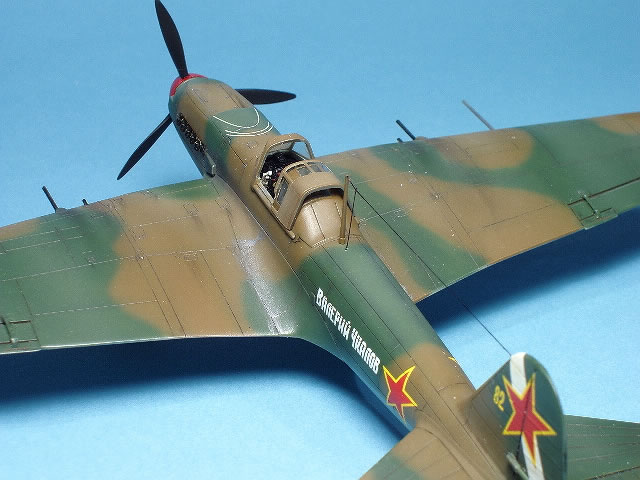
Anyway, back to painting. I use nothing but Model Master paints. First came a black preshading. Next I sprayed the bottom with Russian underside blue and then Russian green and British dark earth on the top, being careful not to totally cover the preshading or to let too much of it show through. All painting was done freehand with my Badger 150. After being satisfied that all overspray was taken care of, the model got 2 coats of Testors Glosscote, and then it was time for decals.
The Cartograph decals are a little on the thick side and took a while to settle down, but with a little prodding from MicroSet, MicroSol and a new #11 blade, they settled neatly into the recessed panel lines and left no silvering at all.
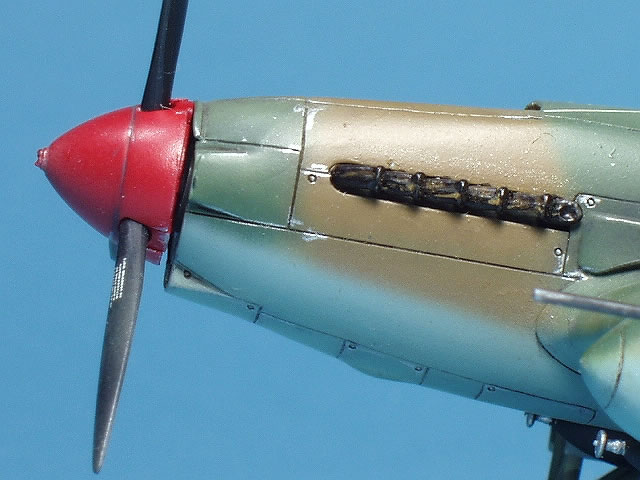
I then sealed the decals with a coat of Glosscote followed by a turpenoid and oil paint wash, the paint being a mix of a black and burnt umber. All of this was then covered with a healthy coating of Testors Dullcote followed by a misting, streaking spritz of very thin, sand colored paint and some stabs with the silver pencil and various mixes of Tamiya weathering compounds. Finally, the last of the little pieces/parts (wheels, bombs, antenna’s, canopy, yadayada) and it’s done. One word of warning about those last few pieces. There are shackles for the 2 larger bombs but no attachment points for bombs to shackles so you have to be very careful getting them angled correctly.
Accuracy? Sorry guys; don’t know, don’t care. I didn’t measure it (my measurements may or may not be wrong), hold it up to any line drawings (which may or may not be accurate) or compare it to any photographs; I just don’t get any enjoyment out of that so I don’t let accuracy determination interfere with my enjoyable hobby.
So, to wrap this up, despite problems of my own making by letting the kit instructions do my thinking for me, this is a very nice little kit. If you want a Stormovick in this scale, I recommend it and say, “Learn from my mistakes and go forth and build.”
Chip Jean
IPMS USA # 13823
Model and
Text and Images Copyright © 2009 by Chip Jean
Page Created 10 April, 2009
Last Updated
10 April, 2009
Back to HyperScale
Main Page |
 Home
| What's New |
Features |
Gallery |
Reviews |
Reference |
Forum |
Search
Home
| What's New |
Features |
Gallery |
Reviews |
Reference |
Forum |
Search