|
Czech Master Resin's 1/72 scale
Bristol M.1C
by Mark Davies
|
Bristol M.1C |

CMR's 1/72 scale Bristol M.1C is available online from Squadron.com
Background
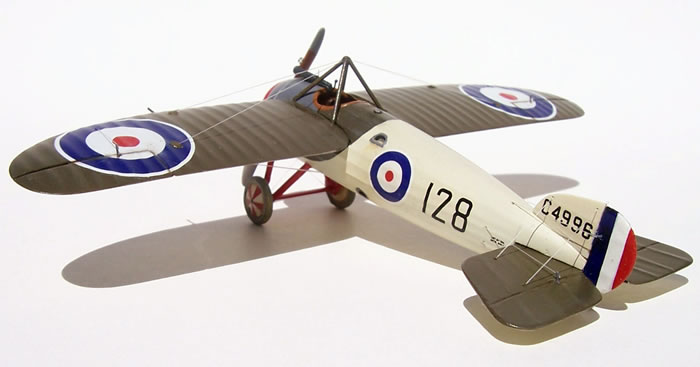
The Bristol M.1 was a well designed, fast and capable monoplane design that came into existence at a time when biplanes dominated in both numbers and favour. It was to only see combat service in modest numbers in the Middle East, which was a bit of an air-war backwater. It was also used successfully in the training role where it was popularly received and its pleasant handling appreciated.
A few found their way into other air arms, and several were used as civilian machines post-war. As modellers we are fortunate that the training role led to some quite unusual, colourful and sometime outlandish paint schemes were applied.
The Bristol M.1C has been one of my favourite WW1 fighters since I first became aware of it in my childhood. So I was really pleased to find CMR had produced a kit of it.
The Kit
The kit provides 21 crisply moulded resin parts with minimal casting residue to be removed, and an Eduard pre-painted Photo-Etch (PE) fret. The parts are sealed in various pouches made from a heat-sealed plastic bag, and then boxed in an end-opening box with attractive profile artwork.
Well printed and clear instructions include a small page with photos of the cockpit interior. Decals for three machines are included, one includes a snake motif curling its way around the fuselage. A more comprehensive in-box review can be found at Internet Modeller.
The kit is cleverly designed so that the one-piece wing and forward fuselage decking slides into position once the fuselage halves are joined. Then the tail plane slides into a slot in the rear fuselage. The one-piece fin and rudder are a simple but join on top of the rear decking. The cowl is a straightforward fit up front. This leaves the simple undercarriage the only constructional challenge; and a slight one at that.
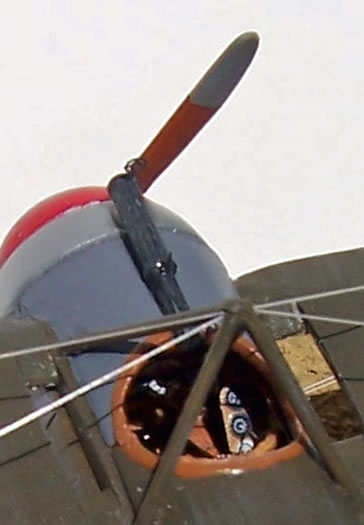
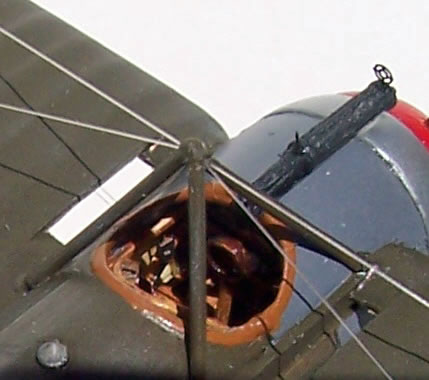
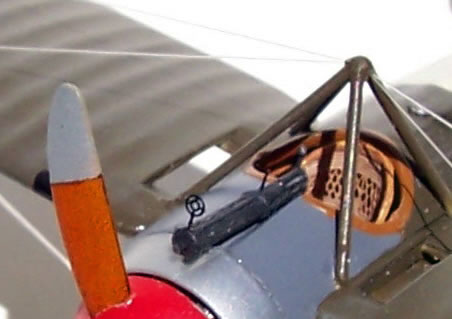
Obviously the cockpit was tackled before closing the fuselage halves. Here the modeller has a choice of all resin, or resin and PE for the interior. I chose to use the PE basket weave seat which was surprisingly easy to roll and glue. I built up the top edge of this with some Tamiya masking tape and Mr Surfacer to represent the thickened top that was a feature of these seats. To this were added to very nice pre-coloured PE lap belts. I used the PE floor, having first cut the resin short to enable a suspended heel board effect over the fuselage bottom. There is resin instrument panel with some instruments that are hard to see when installed, and two pre-coloured instrument panels. One is a thin horizontal affair crossing fuselage’s width, and the other consists of two dials in a wooden panel fitted to the pilot’s lower right. A PE throttle, plus resin rudder bar and stick round things out in the tiny cockpit.
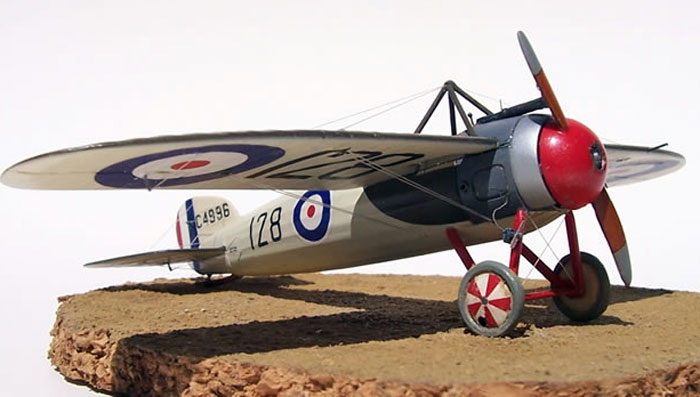
The rotary engine is nicely moulded, but of course very little is seen behind the huge spinner. Some M.1’s flew without their spinner however, so the detail is there if needed. The prop and spinner are moulded as one which makes sense as the spinner had a very close fit to the blades. A nicely detailed prop hub is found in the spinner’s centre. I did find that I needed to remove some resin from the back of the engine to get the spinner to sit the right distance form the cowl.
I knocked off a couple of the resin control horns on the wings during handling, and deliberately cut them off the rudder to make decaling his part easier. I planned to refix the resin control horns, but in the end drilled holes and made them from 10-amp fuse wire. These are not perfect as they are not quite the right flattened shape, but in this scale they are robust for later rigging.
I made three other departures from the kit. Two are in agreement with the photo I mentioned, and one is not:
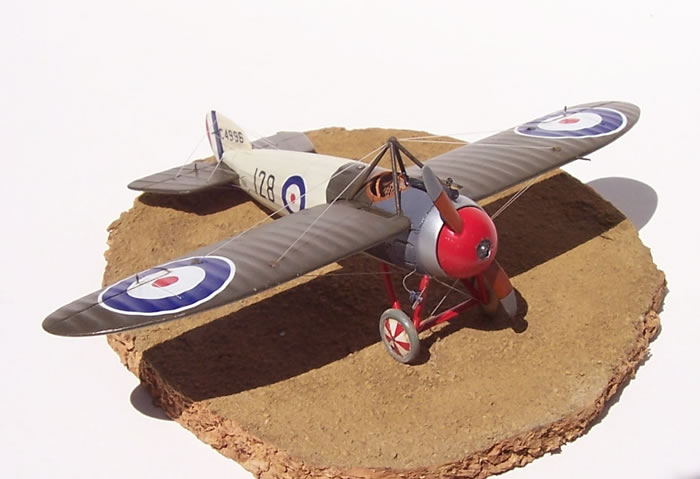
The first was to scratch-build a small slipstream driven generator attached to the starboard undercarriage leg. M.1C’s often had these, and it is a feature of C4996 in the one photo I have seen. I also added a small pitot to the port wing, again based on the photo.
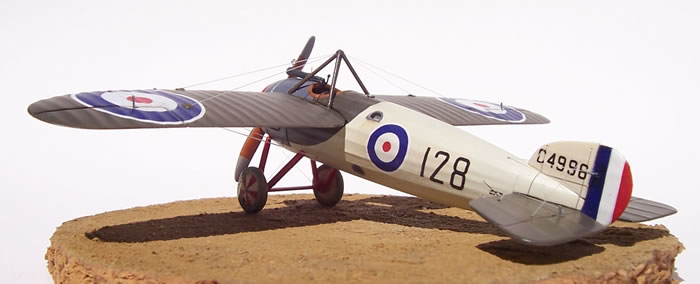
Where I departed from the photo was to add the kit Vickers gun. C4996 is a training machine at the time of its photo and without a gun. However, I have seen photos of several M.1C’s trainers with camera guns. Not to be confused with later gun cameras, these were cameras that looked like guns and were located in the gun’s normal position. I could not quite see enough detail to build one accurately, but I assumed trainees would also at times fly armed, so that is how my model is presented. A PE ring-sight and wire post-sight were added to the gun.
| Painting, Markings and Rigging |
Painting
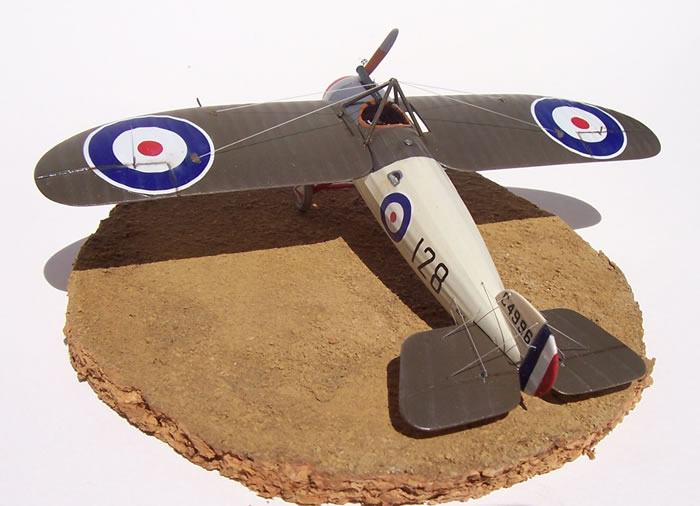
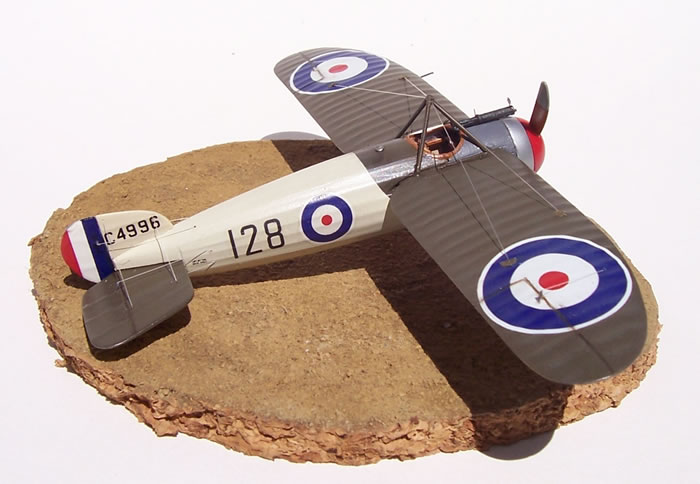
I decided to paint my model in an attractive combination of PC-10 and Clear Doped Linen (CDL) with red spinner, undercarriage and wheel segments. I checked my copies of Windsock and Profile on the M.1 and found a photo of the plane I planned to build: C4996. Furthermore, Windsock had selected this machine as one of a few coloured schematics by Ray Rimmel.
Interpreting old black and white photos is a difficult and imprecise art. Unlike CMR, Windsock called the fuselage colour to be Aluminium Dope and the wing under-surfaces natural doped linen. (CMR listed both as CDL). I felt sure there would be a good reason for CMR to depart from the received wisdom of Windsock and Ray Rimmel, as both are well recognised authorities on WW1 aircraft. So I contacted CMR and asked why they suggested a different fuselage colour to Windsock? The answer is that they sought an independent interpretation by a Canadian aviation historian whose speciality is interpreting colours from black and white period photos. I make no judgement as to who is right, and nobody really can - but at least I can explain why CMR departed from a widely used reference in this case.
I happily paint with many brands and types of paint, all of which I thin with some cheap acrylic & cellulose lacquer thinner (it works with everything: enamels, acrylics, polyurethanes and of course lacquers). For this project I chose Xtracolour enamel as I had it in the right colours, PC-10, CDL, and RLM 75 which about the same as the specified FS36293 grey. Xtra Colour is also my favourite paint to spray. Many complain about its slow dry time, but with my thinners it’s touch dry in 6 hours and completely hard within 24, and the gloss is superb. Humbrol provided the gloss red and matt grey for the tyres. The interior was sprayed in Tamiya acrylic Flesh and then streaked with brown oil paint for a wood effect. The uncovered portions of the prop blades and tailskid had the same treatment, but with the addition of some Tamiya Clear Orange to add to the appearance of varnished wood.
Decaling
The CMR decals go down very well, and are typical of Czech decals in that they are very thin (although still quite strong). However care is needed, as once in contact with a good gloss finish they really stick and can be hard to move or re-float if you need to. The roundels and small decals are easy enough to manage, but if you are using the large underwing serials take care. I found it was easier to cut the underwing serials into their three individual digits and apply them separately.
Rigging
The model was drilled in the various places rigging was required to enter the airframe. I used nylon invisible mending thread for the structural rigging, and stretched sprue for control lines. I don’t colour my rigging in this scale as I like the reflective nature of its raw state, because it doesn’t dominate the model’s appearance the way some dark rigging can. But this is just a personal preference. I added the small blisters that cover the exit point of the rigging from both sides of the wings. I imagine that these will cover a hole and adjustable turnbuckles for tensioning the rigging on the real thing. These were made from small semi-circles of Tamiya masking tape.
This is a superb little kit. It’s easy to build, has very nice levels of detail and offers some attractive colour schemes as supplied, and many options for those who wish to produce their own. I would recommend it highly as a first resin kit for someone who has experience of PE, and anyone who wants this very attractive little fighter in their collection.
Model,
Text Copyright © 2009 by Mark Davies
Page Created 1 March, 2009
Last Updated
1 March, 2009
Back to HyperScale
Main Page |
 Home
| What's New |
Features |
Gallery |
Reviews |
Reference |
Forum |
Search
Home
| What's New |
Features |
Gallery |
Reviews |
Reference |
Forum |
Search