Scale ACT Model Show 2008
Boeing PB2B-2 Catalina
by Brendan Moss
|
|
Boeing PB2B-2 Catalina |

HyperScale is proudly supported by Squadron
My first introduction to aircraft close up when I was a kid were Fletchers – crop dusters - that used the local airport. My dad used to take me out to see them sometimes. One day we saw a Catalina making a promotional tour I think and this is where my love of this bird came from.
Come forward 30 odd years and the Historical Aircraft Restoration Society (www.hars.org.au) based at Albion Park in NSW about 90 minutes south of Sydney is restoring a PBY-6A to represent a “Black Cat” in commemoration of the aircrews who flew these magnificent aircraft. I live about 20 minutes away from the airfield.
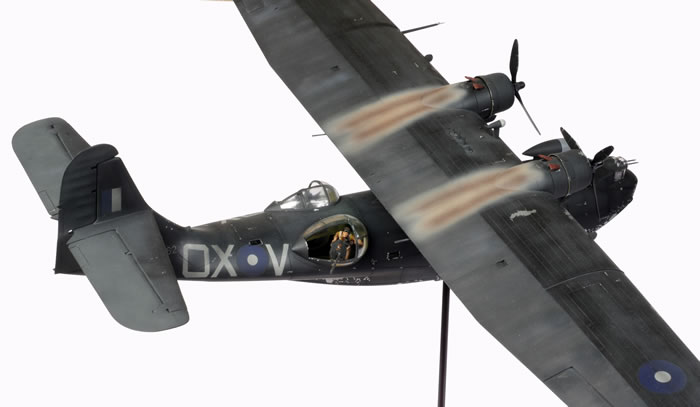
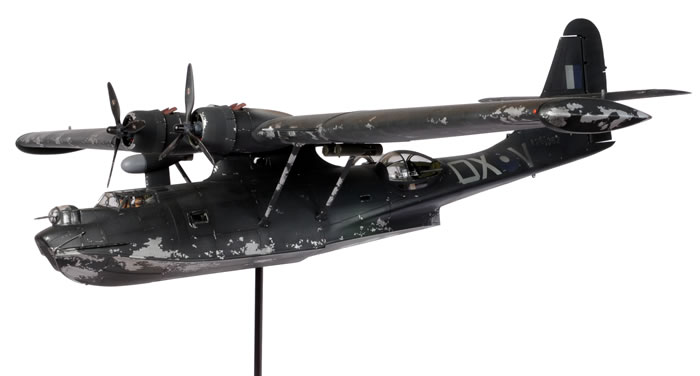
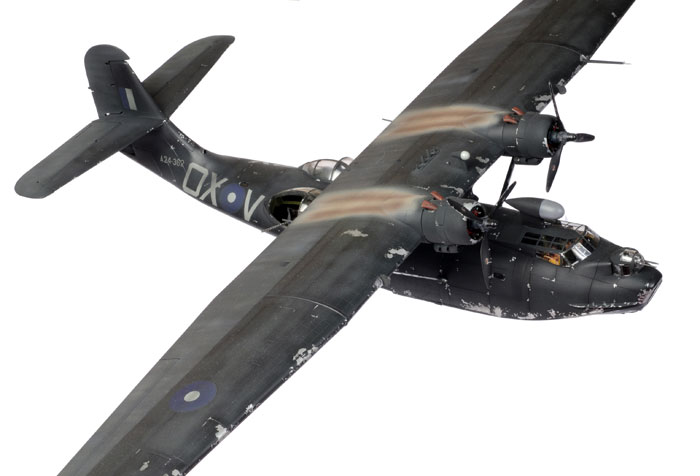
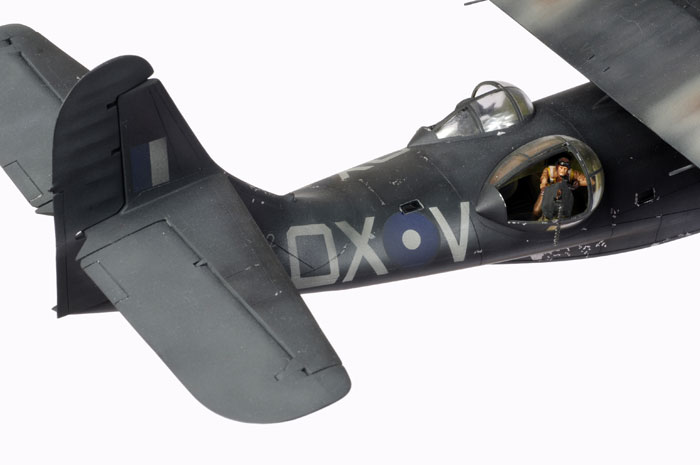
The Boeing (Canada) PB2B-2 was a variant of the PBY-5, in that it was not amphibious but incorporated the tail and larger elevator surfaces of the PBY-6A. It was also equipped with the large radome above the cockpit which effectively replaced the Yagi antennas. This particular aircraft was manufactured as BuAer No. 44288. It was subsequently given to the RAF as JZ835 (as a Catalina IV) and then the RAAF as A24-362 in June 1945. It was sold to Butler Air Transport in October 1946.
The primary purpose of 43 Squadron (based in Darwin) was mine laying missions as far north as the South China Coast. After the war it flew patrol missions before being disbanded at Rathmines in April 1946.
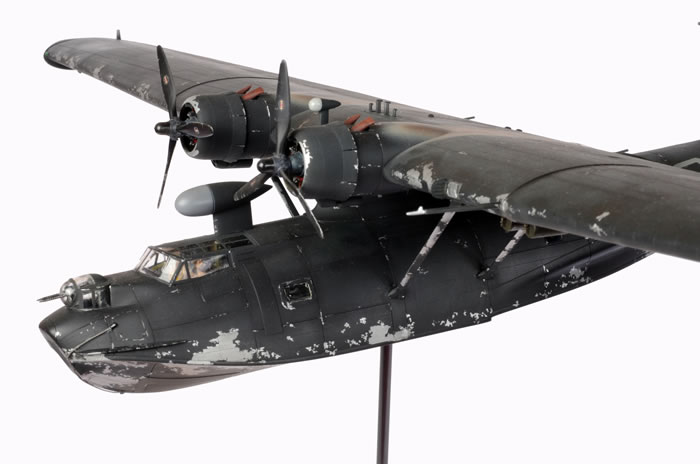
This PB2B-2 is made from an original Consolidated PBY-5A kit made by Revell Monogram in their Promodeler series. The kit includes enough parts to allow the builder to choose one of two Consolidated PBY-5As in US service. It is necessary to convert the PBY-5A to a PB2B-2 by changing the tail profile to that of a PBY-6A and fairing over the wheel wells.
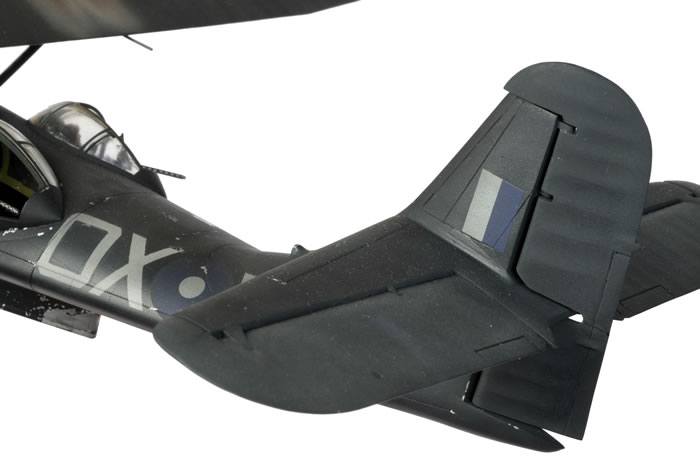
The kit was built up as OX – V (A24-362) of 43 Sqn 1945.
The kit is virtually stock from the original kit with the following exceptions:
-
Wheel wells are faired over with epoxy putty and styrene
-
DF loop has been removed and replaced with a secondary radome on the leading edge of the wing scratched from epoxy putty and evergreen
-
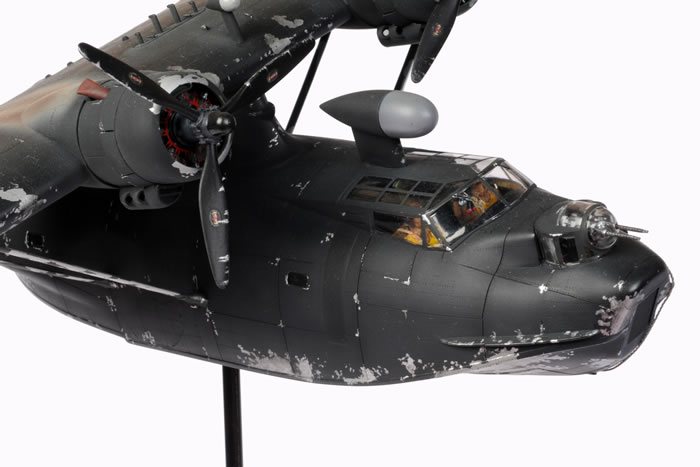
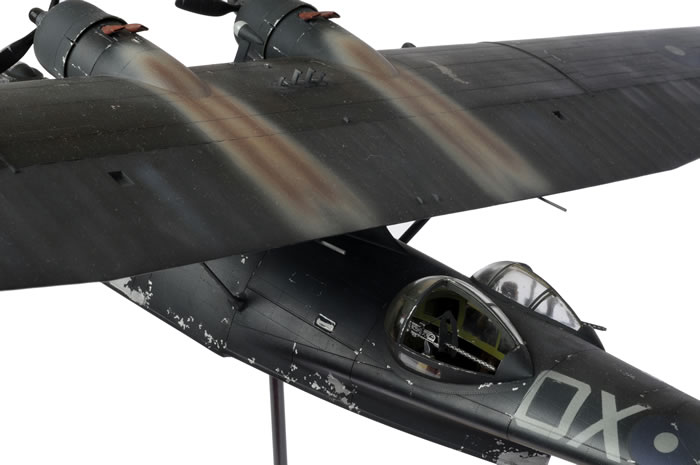
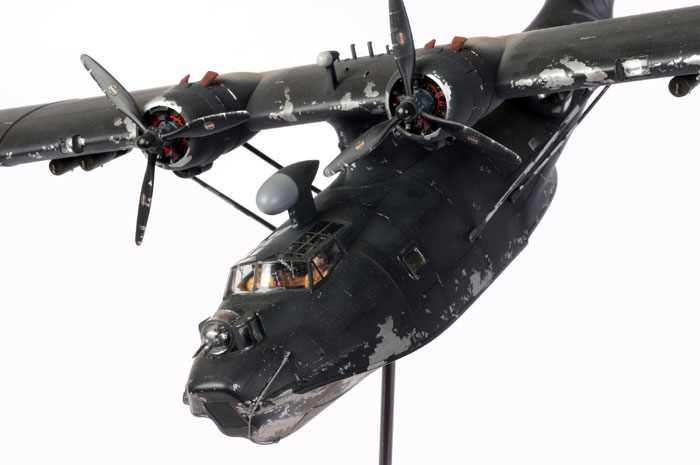
True details cockpit parts were used (although once the glasshouse was in place this is virtually invisible)
-
Cowling flaps opened and oil coolers replaced with styrene tube to give a truer profile)
-
The exhaust stacks are brass rods bent to shape (I still don’t think I got it quite right)
-
Quickboost PBY engines were used
-
Eduard PE for the Catalina was used sparingly (with the most visible being the wiring harness for the engines)
-
Blister bay detailing was rebuilt from scratch, primarily from styrene rod using the Squadron PBY Catalina in Detail and Scale Book
-
Decals are a mix of Aeromaster and Aussie Decals for the roundels and registration. Fuselage codes were painted with self made masks
The biggest challenge was how not to make a black plane black! Considering that the main wing is 2’ long, this was not going to be an easy task.
I started by coating the hull and aluminium sections of the wing with Tamiya AS-12. Based on the limited number of reference pictures available I then masked off portions of the hull and leading edges with Gunze Mr Maskol before spraying the hull with Tamiya Nato black to get a sun faded black. After this I sprayed the major panel lines with a very thin (80% thinners) Tamiya flat black.
Once this was done I pulled up the masking without too much care. The Mr Maskol tends to give rounded edges, so with a very fine brush and a jar of Gunze silver, I painted in the jagged edges of the peeling paint and blended the previously masked areas together. Since this silver is a slightly different shade to the Tamiya, it added some depth to the paint but also gives the illusion that the aluminium surrounding the larger exposed areas is not yet fully oxidised, indicating the peeling paint.
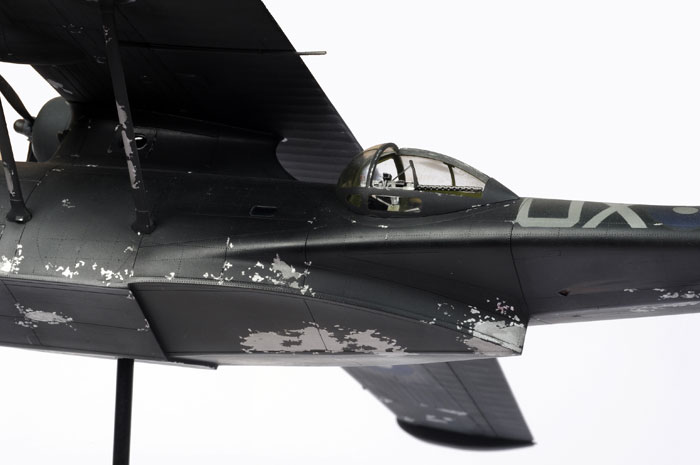
To distinguish between the fabric and aluminium painted surface, NATO black with a few drops of Tamiya Buff was sprayed on to the fabric areas – the material will fade faster than the aluminium. The fabric surface on the main wing surface was then also given a very thin wash of lamp black and burnt umber oils. The thinner which leached into the paint covering the aluminium surface was left to dry overnight and then rubbed down with a cotton bud. This blended the thinners in but at the same time defined the join between the two materials nicely.
After decaling and painting the fuselage codes, I oversprayed everything with Tamiya thinners with a drop of Tamiya flat base and a drop of Nato black to blend everything in.
The exposed surfaces were given a lamp black oil wash. The finishing touch was the exhaust stains. The lighter colour is very thin Tamiya buff, the darker is Brett Green’s scale black – a 50:50 mix of flat black and red brown.
The pilot, co-pilot and gunner were painted with Gunze acrylics and then given a burnt umber wash.
Hopefully I have come up with a decent rendition of one of these incredible machines.
Enjoy!
Model and Text Copyright © 2008 by Brendan Moss
Images Copyright ©
2008 by Brett Green
Page Created 26May, 2008
Last Updated
27 May, 2008
Back to
HyperScale Main Page |
 Home
| What's New | Features | Gallery | Reviews | Reference | Resource Guides | Forum |
Home
| What's New | Features | Gallery | Reviews | Reference | Resource Guides | Forum |