|
Revell's 1/48 scale
Messerschmitt Bf 110 G-2/R3
by
Peter Kormos

|
Messerschmitt Bf 110 G-2/R3 |

HyperScale is proudly supported by Squadron.com
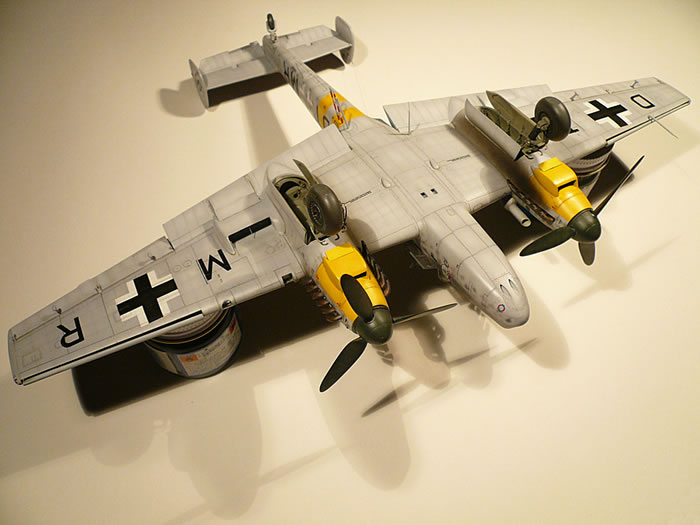
This is my 1:48 scale Messerschmitt Messerschmitt Bf 110G-2/R3 model from Revell.
It was built mostly out of box with extra bits added from Eduard's #48192 Me110G photo etched detail set and Verlinden's #1252 Me110G-4 resin update set.
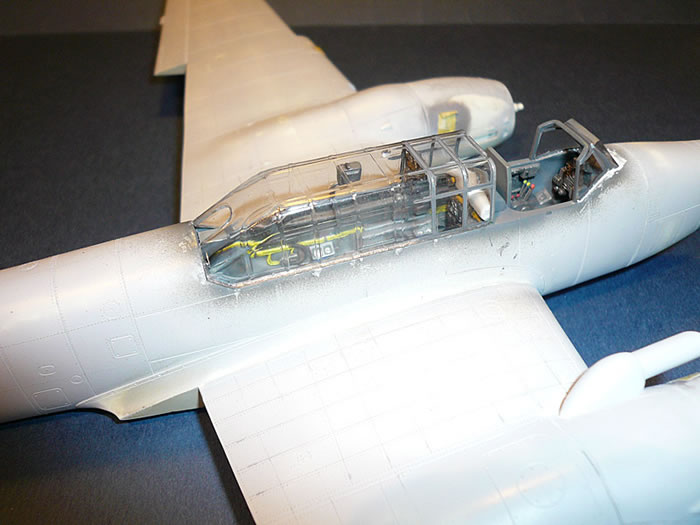
Cockpit
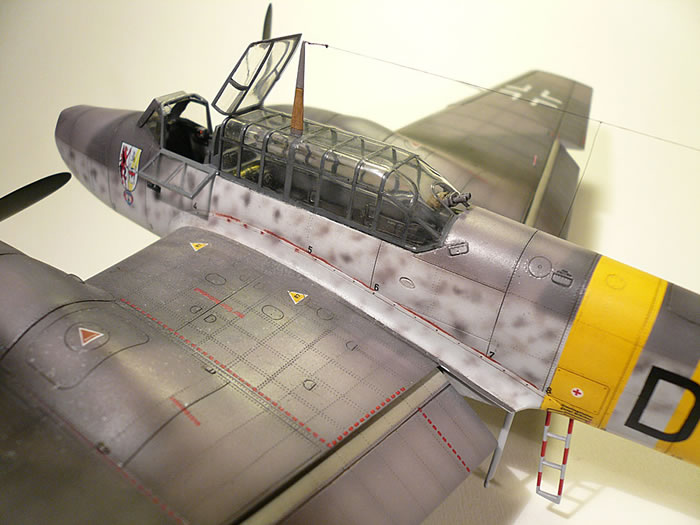
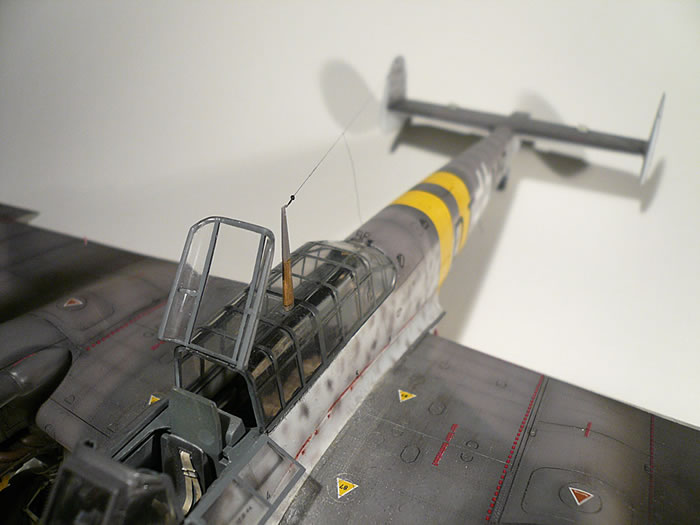
I don't know much about the Me 110 , so I didn't plan to detail the kit much. I think the Eduard PE set that I had at hand is full of useless bits, the only ones I used were the cockpit control levers, seat harnesses and the rudder pedals. On the other hand I added thin transparent foil for the glass of the Revi gunsight, and some handholds to the windscreen.
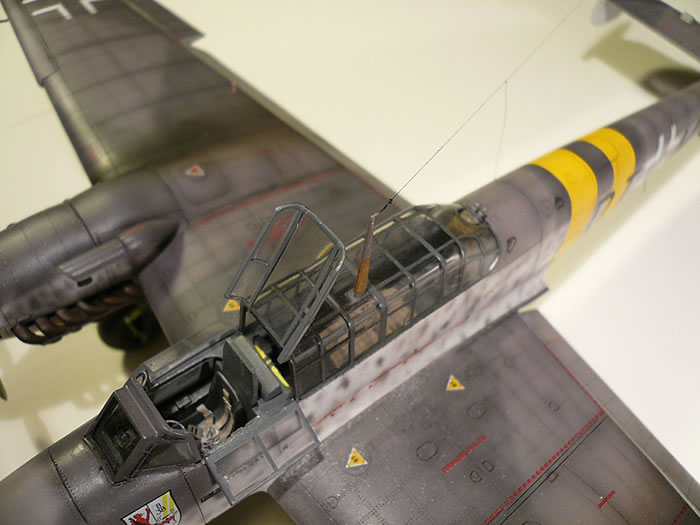
I initially added different gadgets to the greenhouse canopy, but after examining my reference photos I realized that none of these were in place, so I removed them. Luckily I used white glue for these bits, so it didn't mar the clear part. Also, since my model originally was a trainer, it didn't have the rear armament installed, or at least it wasn't in place when photos of DT+MR were taken. So I removed the parts of the MG81Z machine gun, and only the mount remained in place.
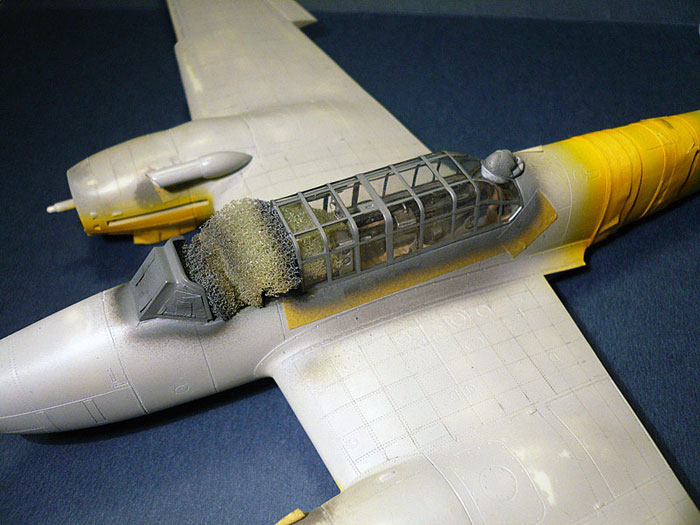
The fit of the windscreen is good, but I cannot tell that for the canopy. The front half is 0,5 millimeters narrower on the front side, and the rear end sits about 0,3 millimeters deeper than the fuselage's profile. To eliminate these problems, I slightly stretched the front half with a piece of sprue cut to appropriate size, and glued the canopy in place with white glue. Since the rear end "normally" sits too deep, the canopy had gaps along the sides once the clear part was in proper position. The gaps were filled up with careful application of white glue, and when the glue was dry, I removed the dry fitted spreader sprue-bar as well.
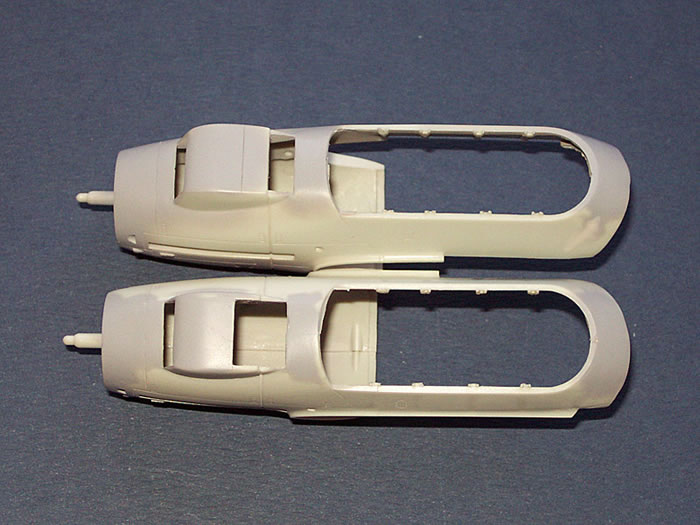
Fuselage
The fit of the nose piece and the fuselage parts are not that great. I had to eliminate a 0,3 millimeter step on both sides of the fuselage, once the - otherwise nice - nose part was glued in. I think there's also something wrong with the fuselage, because by default the horizontal stabilizer sits a bit twisted to one side. A friend of mine noted it on his model as well so it doesn't look like a one-off case.
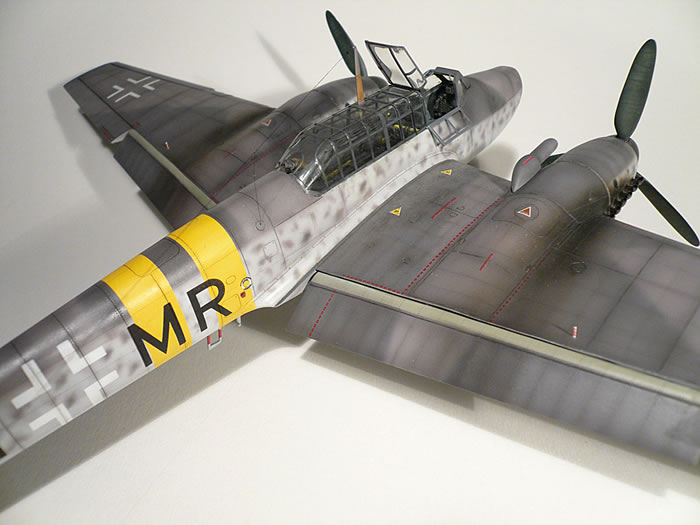
Wings
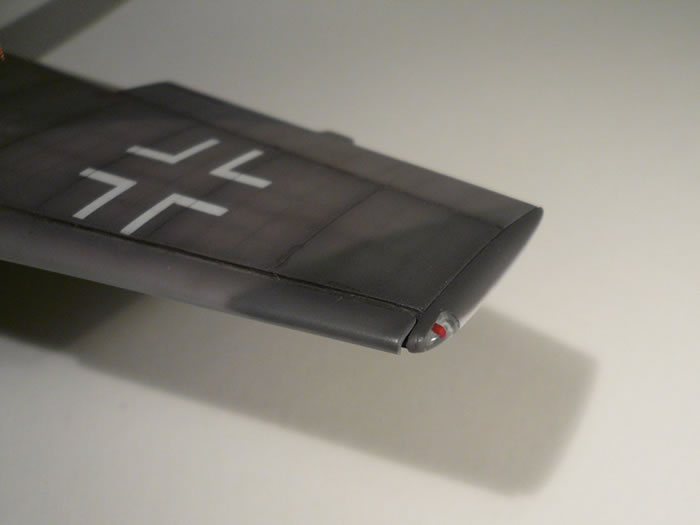
The Verlinden set contains the wing slats, flaps, a few hollow bits for the main gear bay, elevators and a pair of G-4 type enlarged rudders. I couldn't use the rudders and the elevators were no better than the original ones, so I stuck with the remaining bits. Without much hesitation, I quickly cut out the slats and the flaps from the wings. Weeks later, when the wings were assembled and it was time for dry fitting, I felt somewhat horrified. Although the Verlinden set is designed for the Revell kit, the slats were 3 millimeters shorter and because of the tricky shape on the wing facing side, they could not fit into the wing cavity by default. The only thing I could do was to find the original kit parts for the slats, glue them together and use them instead of the "detail set".
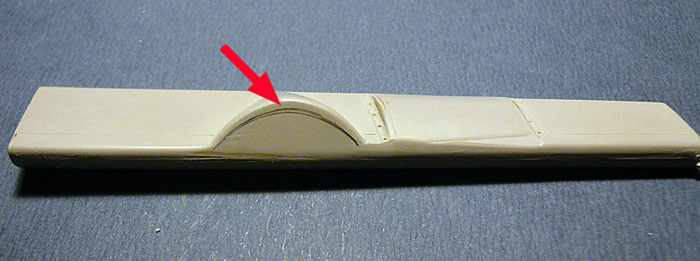
I had no better luck with the flaps either. These are OK in length, only the "half teardrop" shaped fairing on the lower side was about 2-3 millimeters higher than needed. Unless I reshape that, I cannot deploy the flaps because they wouldn't fit under the gear bay gondola. Brrrrrr....
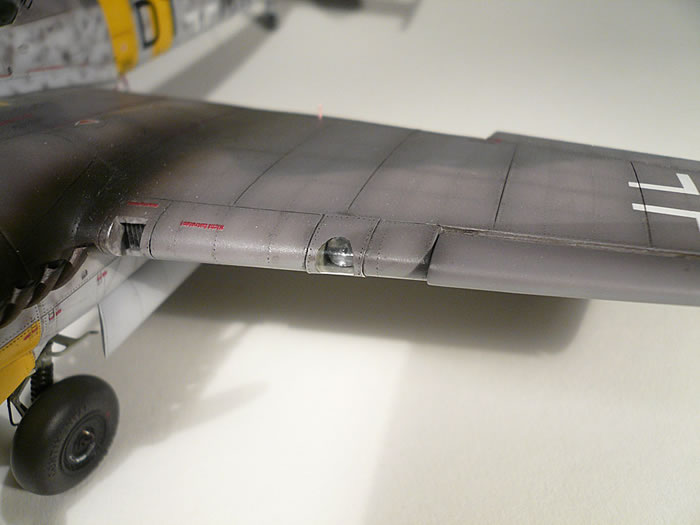
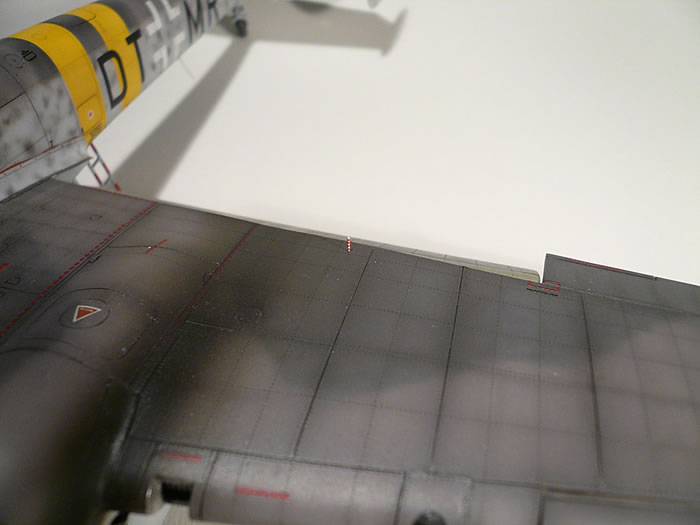
The surface detail on the kit is really great but for some strange reason the panel lines on the outer half of the port lower wing were soo shallow, that they almost disappeared. I had to use a needle to rescribe the detail almost lost there. Although the starboard side wing fits perfectly, the port side one didn't want to. I don't know if it was my mistake, but it took quite some time before everything aligned as it should. I also had some trouble with the wing cooler's covers. Here, I had to eliminate a 1 millimeter gap between these parts and the gear bay gondolas.
I also had to install thin sheet styrene to the inside of these cooler covers, otherwise there would be a gap between the cover and the cooler radiators.
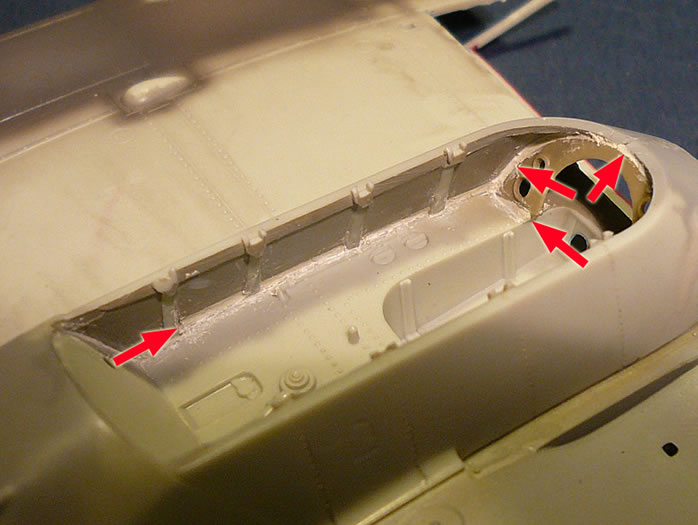
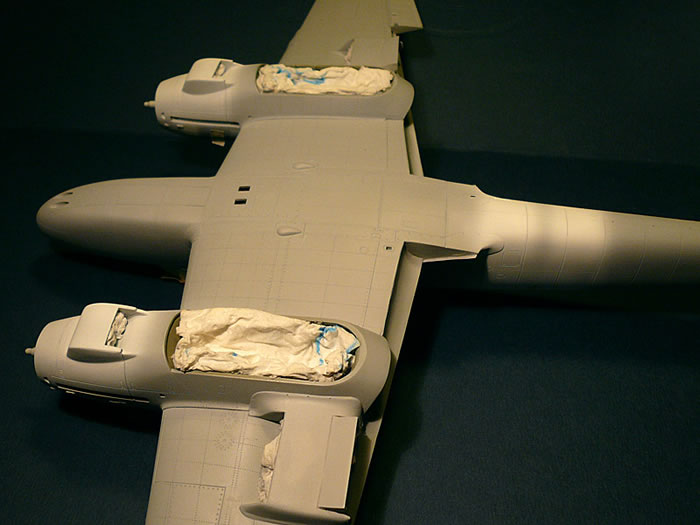
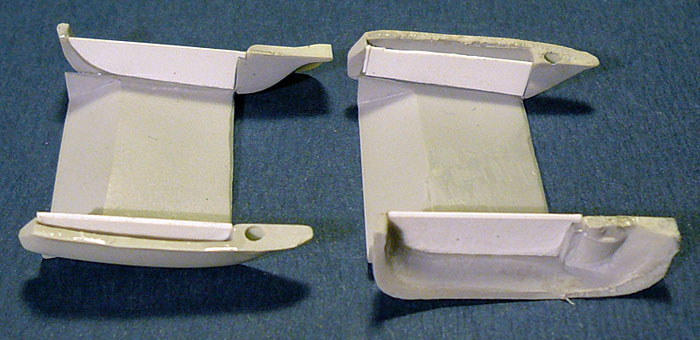
Gear bays
OK, then I moved on to the main gear bays. The Verlinden triangular shaped, resin parts for the sides of the gear bays are looking much better than the flat Eduard PE but the fit there is awfully wrong.
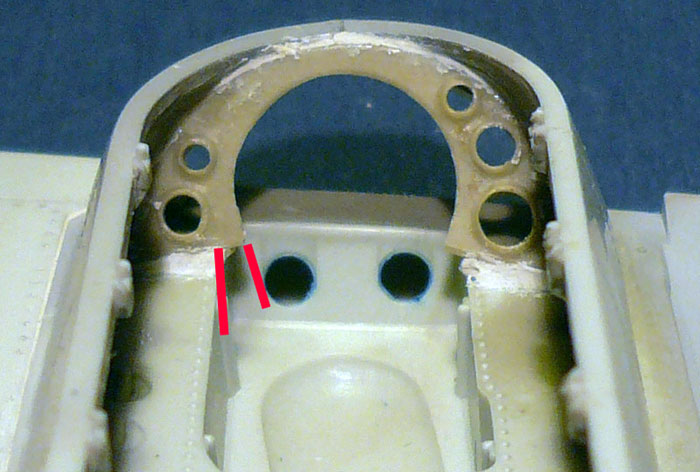
The half-circular shaped resin panel for the end of the gear bay also required trimming and lots of filler. The only extra additions here are the brake lines.
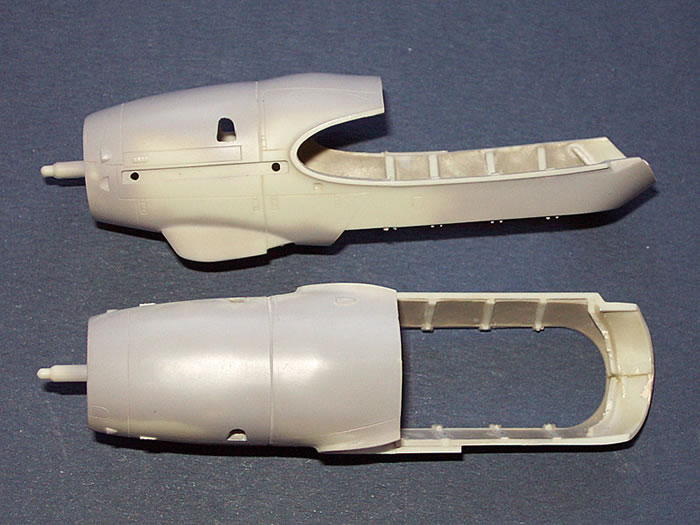
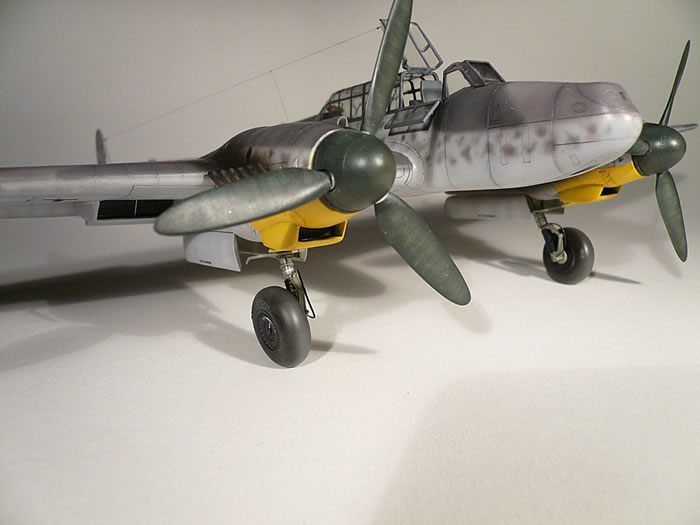
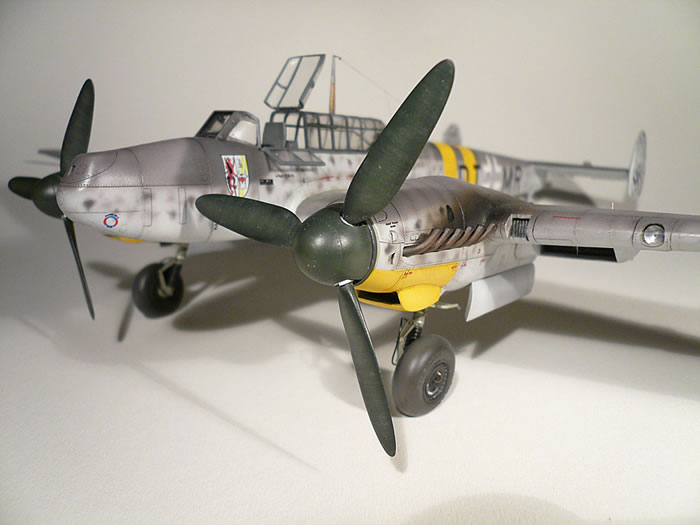
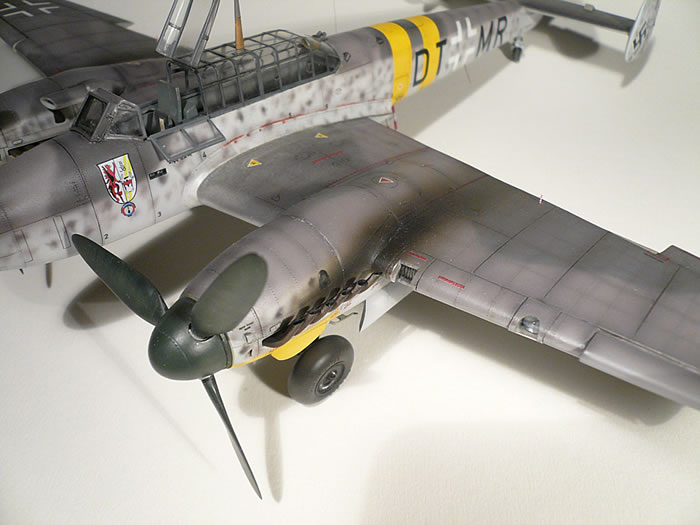
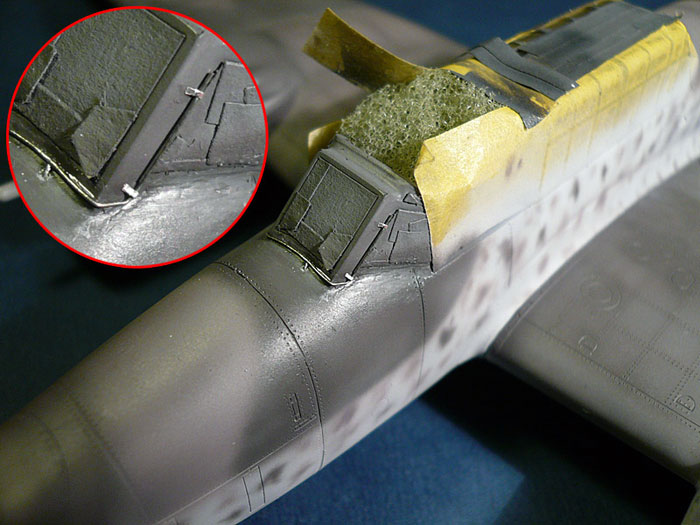
Engine Cowlings
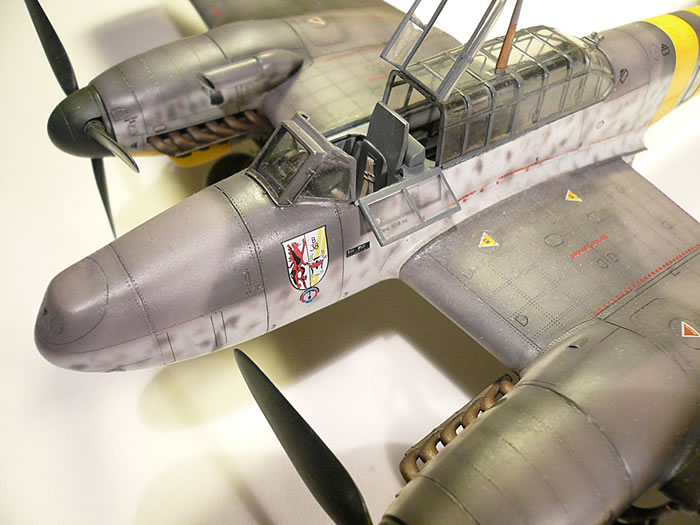
I found the shape of the engine cowlings too flat on the top side, so I used generous amounts of filler to round it up.
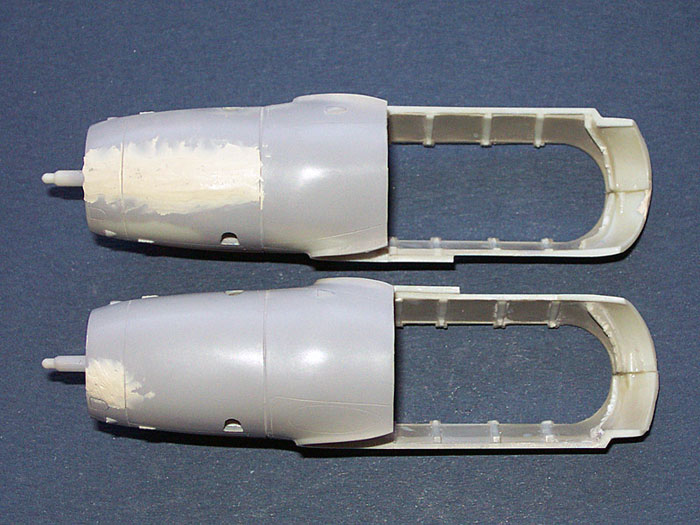
Although quite troublesome, I cut open the inspection windows on the sides of the cowlings, and poured in clear resin to restore the "glass". I also installed a black plastic card to the inside of the gondola to prevent the see-through effect.
To finish off the limited detailing I made to this area, I removed the ventillation doors from the oil cooler housings, and created new ones from thin aluminium sheet.
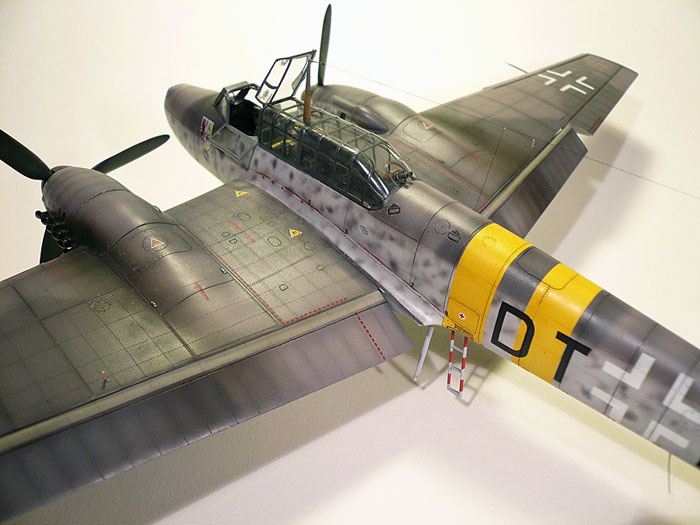
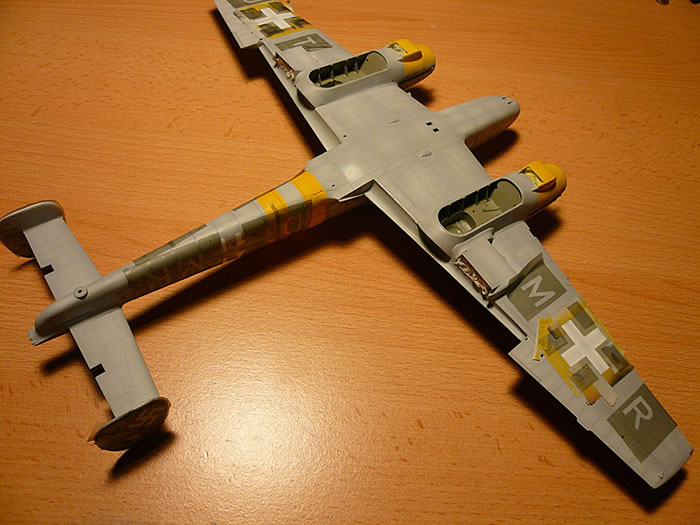
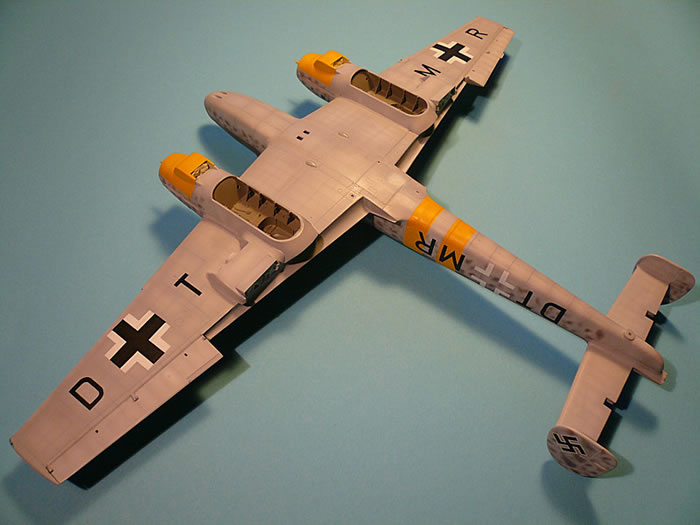
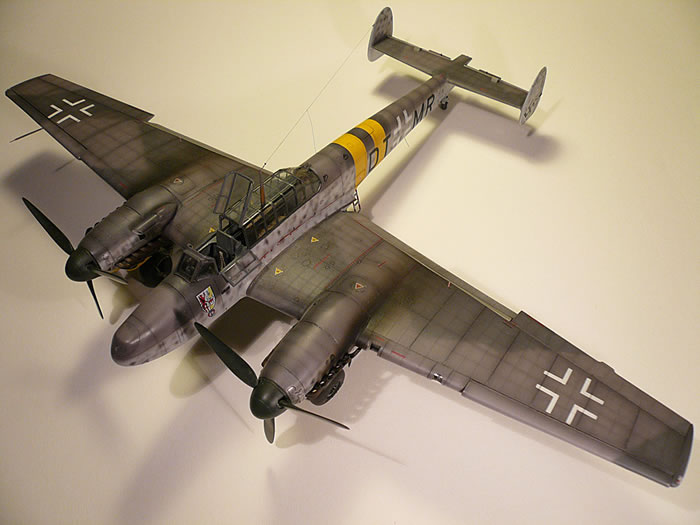
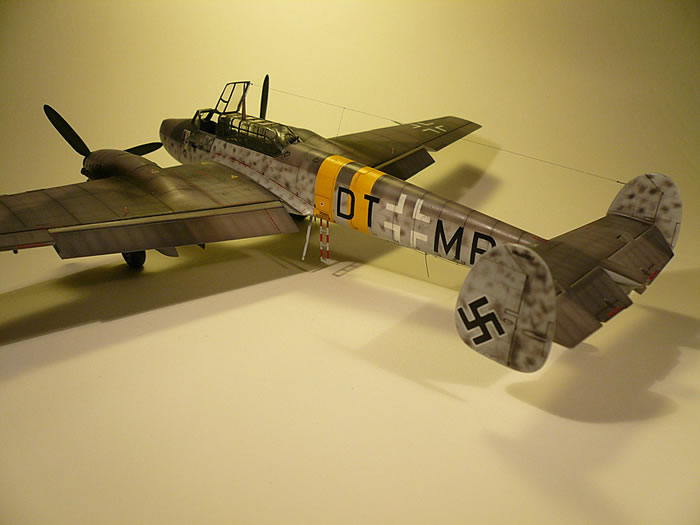
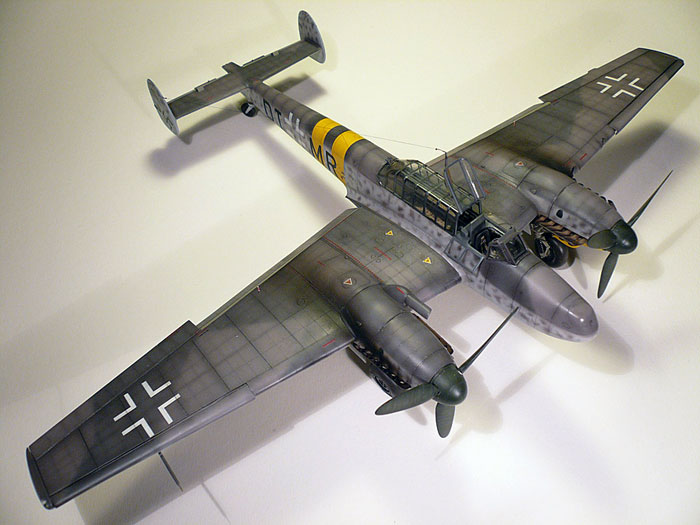
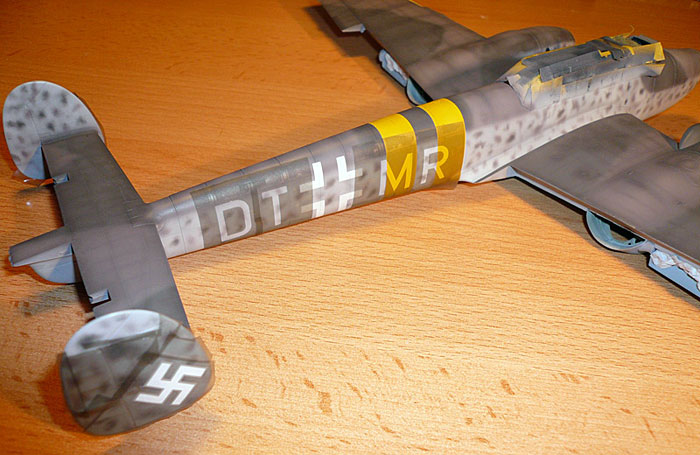
For painting, I used Gunze Acrylic colors. The underside received RLM76, the upper colors are a combination of RLM 74 and 75 with fuselage mottle of 74/75 as well. The yellow ID markings were first base coated with white, and of course all this was done before I applied the camo colors.
After a long search for an attractive looking plane, I selected this one from the not too interesting grey-grey variations.
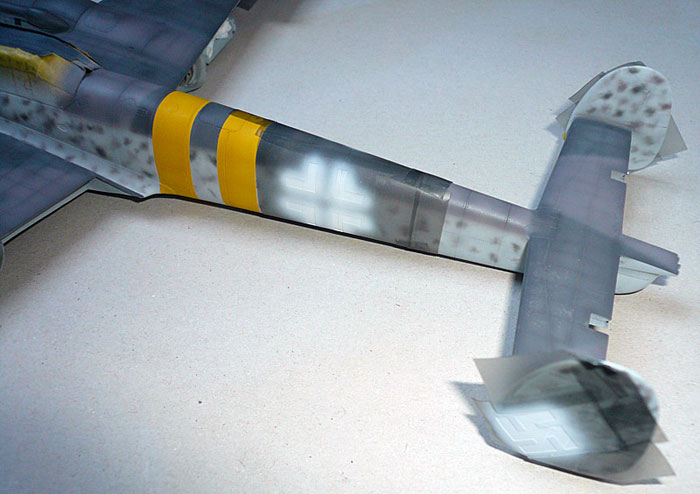
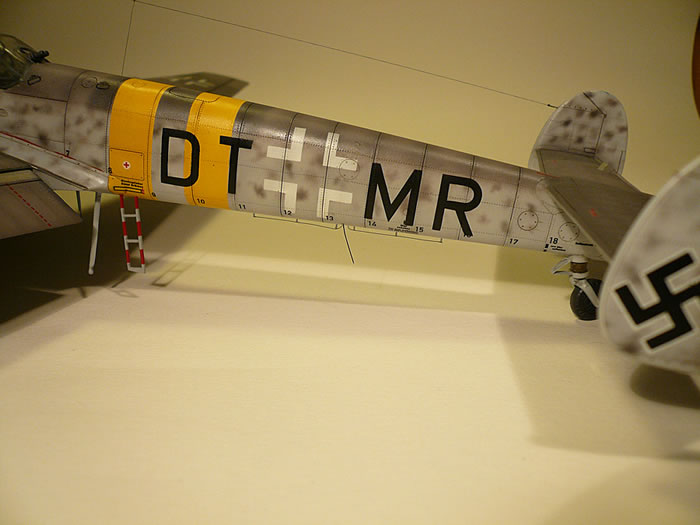
I found a set of photos of this plane in one of the Kagero's Me110 volumes, and the book says that the plane originally served in Blindflugschule B38, 'blind flying' (instrument flying) school. I designed the school's emblem, repair and werk nummer and everything unique to this plane on my PC, since no decals are readily available. DT+MR, along with the national markings are painted on with custom made paint masks. The rest of the markings are a combination of custom decals and Revell's own stencils.
For weathering, I used a combination of well thinned Tamiya back enamel, artists' oils and penciles in various colors.
I am not a big fan of the Zerstörer. I only built this model because I received it as a demonstration piece for a modeling presentation I made in 2006. But the model is well detailed compared to modern standards, although it falls a bit back on the fit side. Although it won't happen tomorrow, but I may build another 110 in the future because there are interesting subjects out there...
Acknowledgements
I'd like to thank Péter Tóth of Toff Decal (www.toff.hu) for making the custom decals and Csaba Bordács for the custom made paint masks. Special thanks goes to Sándor Fülöp and Mihály Molnár for the help on researching the planes's background.
References
- Kagero: Me110
- Aero Detail: Me110
- Squadron Signal: Me110 Walkaround
Model, Imags and
Text Copyright © 2008 by Peter Kormos
Page Created 1 May, 2008
Last Updated
1 May, 2008
Back to HyperScale
Main Page |
 Home
| What's New |
Features |
Gallery |
Reviews |
Reference |
Forum |
Search
Home
| What's New |
Features |
Gallery |
Reviews |
Reference |
Forum |
Search