|
Hasegawa's 1/32 scale
Messerschmitt Bf 109 G-6
by
Maurizio Di Terlizzi
|
Messerschmitt Bf 109 G-6 |

Hasegawa's 1/32 scale Messerschmitt Bf 109G-6 is available online from Squadron.com
I have always thought that Hasegawa’s Messerschmitt Me 109 in 1/32 scale is a perfect model - easy to build, nicely detailed, and it can converted to almost any of the many variants that this 35,000 production fighter was composed.
After building many 1/48 scale Messerschmitts in Italian and German markings, when I turned my modelling of fighters, to 1/32 scale, I decided to make ONLY Italian Messerschmitts, considering that we used almost all the variants.
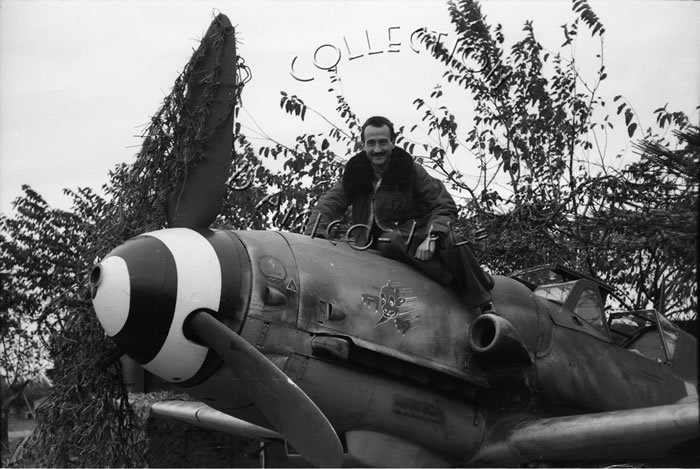
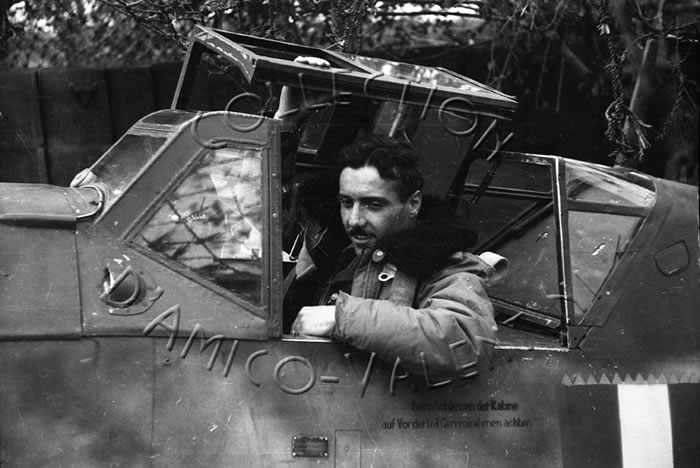
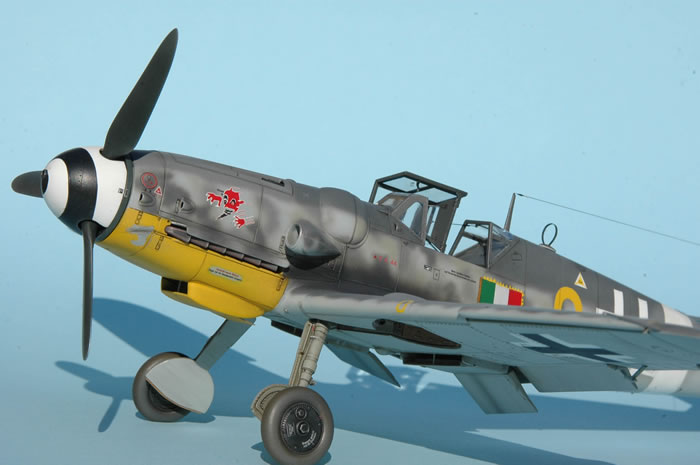
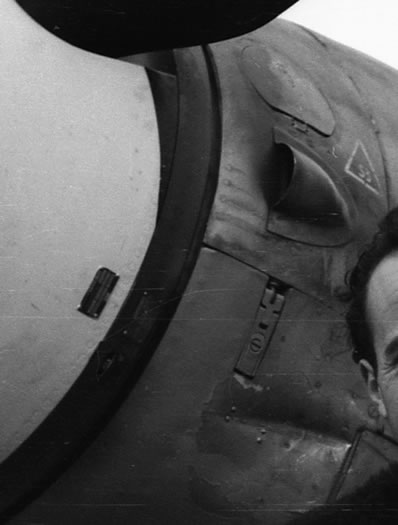
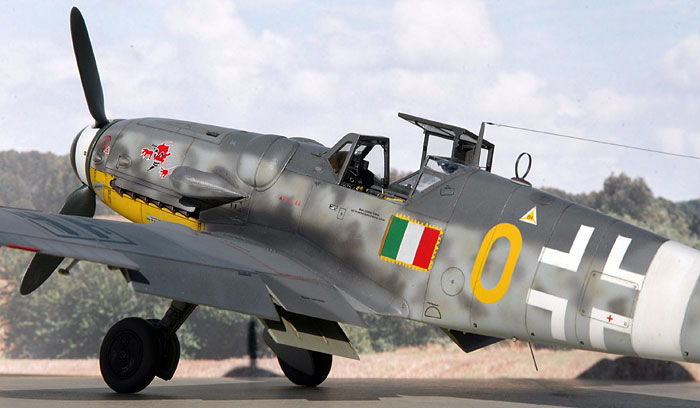
This time, I was attracted by a G-6, W.nr. 163162 coded Yellow 0, attached to Diavoli Rossi unit, during the ANR period. Many picture are available of this aircraft - many of them with the aircraft in its revetment, an occasion for pilots and ground crew to take a souvenir picture. Two more have been published in a wartime magazine, during the aircraft overhaul.
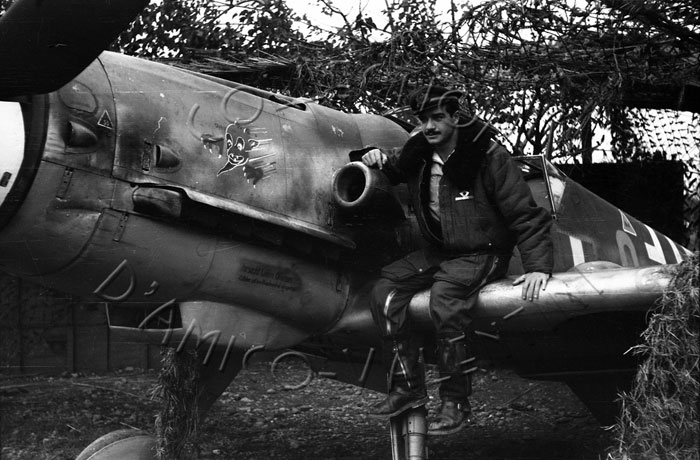
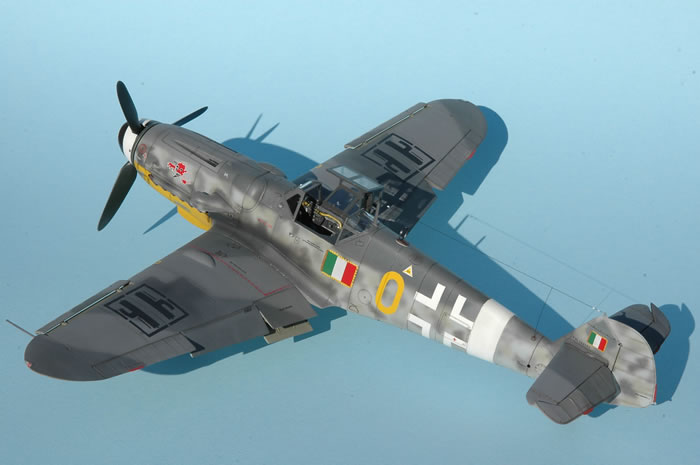
A lot of interesting points attracted my eye, such as the untreaded tires, the “0” as individual number (also repeated onto the leading edge of the wings), the deep scratch over the nose and the strange presence of the white tail stripe. This last particular is unusual because all Italian Messerschmitts had this yellow or white band deleted.
Furthermore, this aircraft has been overhauled, and it is uncommon that the band was survived. But these are photographic evidence, I carefully checked for every little detail in a picture, with the aid of Photoshop. The band is really there, no mistake, but this must be considered an anomaly. Further confirmations come from Ferdinando D’Amico, one of the most skilled and authoritative researcher of the ANR.
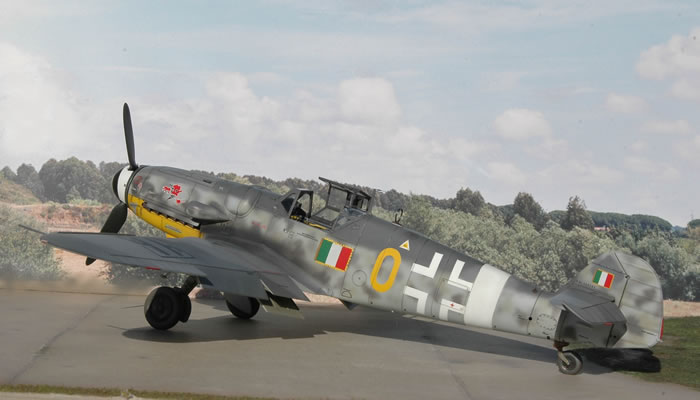
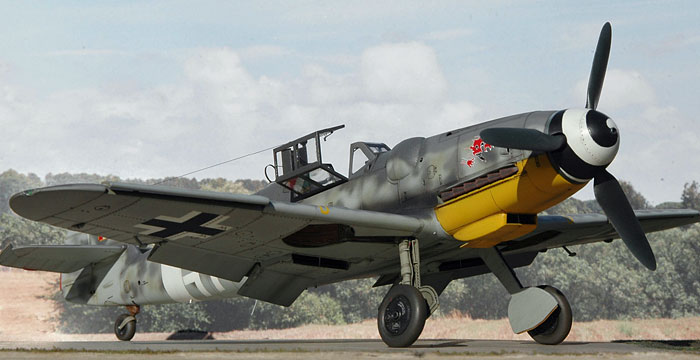
Aside the typical 74/75/76 camouflage scheme, this aircraft also got a beautiful spinner spiral, with the amount of black equal to white, it is difficult to tell if the crew painted a white spiral over a black spinner or vice versa.
The last strange detail relates to the ANR flags. As stated in the pages of D’Amico and Valentini’s last work, ANR flags varied from one aircraft type to another, and from one unit to other. Those used in “my” Messerschmitt had 13x8 fringes, with the unusual mast painted in a different colour, probably brown.
Fuselage
The building phase was no trouble at all.
I used both kit parts and aftermarket spare parts to complete the cockpit, plus some plumbing made of copper wire. RLM 66 for all the interiors, a light dry brush and hand made brush details added.
I usually retain the kit’s instrument panel, because is finely detailed, and after a carefully painting stage, it is quite realistic. My opinion is that many aftermarket items are not completely useful, especially in the cockpit. The fuselage, once completed, has been mated to the lower part of the wings, carefully centered. Before the glue is dry, we can check the fitting if the upper wings, letting them coincide with karman and panel lines.
Wings
In the case of the wing, there one aftermarket item by Aires that is very useful. It is the canvas covers that closed the sides of the main undercarriage bays. The Aires photo-etched parts are provided in one piece, are beautifully detail and include the zip.
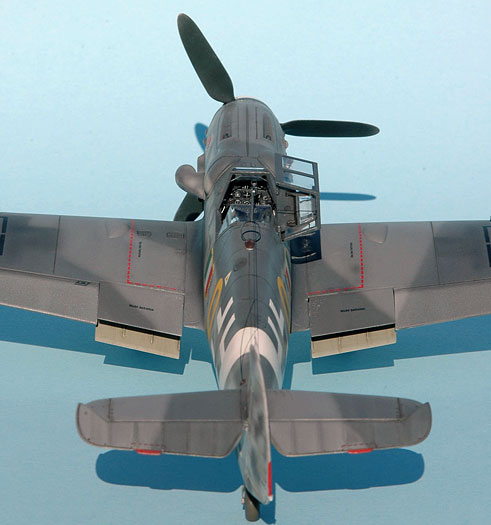
Not so nice is the work necessary to cutaway the kit’s part, and all the trimming necessary to fit. Even so, the result is wonderful and worth the extra work.
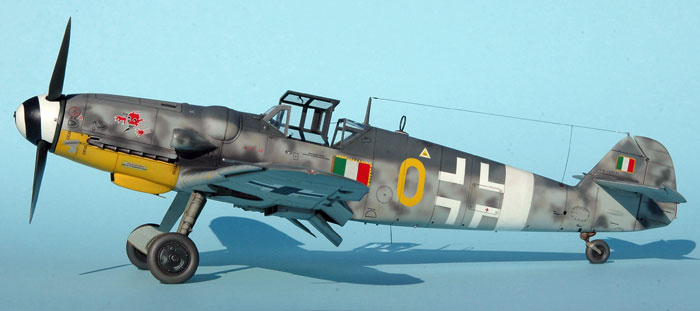
Well, my favourite stage has come. The model has been painted with Gunze Sangyo acrylics. All the national marking has been printed over masking sheet, then cut and airbrushed directly over the model. All the white items, such as crosses, spinner and fuselage band, has been first sprayed with flat white very diluted, then with gloss white: this to avoid the horrible greyish appearance that results when finishing with flat white. Fuselage flags come from a PAC Models Macchi C.205 decal sheet, with ALL the fringes realized from a plain yellow decals piece. It has been tremendous, but allowed me to put some of them a little distorted as in the real aircraft. Lower cowling was scratched deeply with a motor tool, then painted first in RLM 76, then the decals (the one under the left exhausts) applied. Once dried, this decals was ineptly masked, and some part around the scratch painted with Maskol. Then I applied the yellow. After few minutes, I removed the maskol coating, obtaining a convincing chipping of yellow.
Finishing Touches
I would have chosen to use the kit’s wheels (very nice), but my aircraft tires were smooth and so I turn to have the MDC ones, purchased from their website. Everything goes right, from order to receiving with courtesy, but once the wheels were measured, I noticed that MDC wheels were undersized in diameter and in wideness. This probably due to a heavy sanding of the surface to erase the thread.
One was also broken in the hub. I emailed two times to MDC to have a replace, but with NO response at all.
Finally, two light coats of Vallejo Air satin cote were applied, separated by half an hour, to better check the areas of poor coverage. Weathering was achieved with dark brown and black oil colours, heavily diluted with turpentine. Chipping was done with Karisma silver pencil, and dry brushing with some of the camouflage colours, largely corrected with flat white.
The last addition, before the gluing of the canopy and antenna wire, were the exhaust stains, delivered using a mixture of 20% RLM 66, 10 % of gloss black and 70 % alcohol.
I would like to thank Mr. Ferdinando D’Amico, for his tips and for having compared each other our impressions about this atypical white-banded Me 109. The wartime pictures included in this article come from his huge archive.
Hasegawa’s Messerschmitt Me 109 is one of my favourite subject, because is easy and allows you to have fun and to achieve a wonderful results, without having stress in finishing it.
And now….let’s think about my next Me 109!
Model, Images and
Text Copyright © 2008 by Maurizio Di Terlizzi
Page Created 13 April, 2008
Last Updated
13 April, 2008
Back to HyperScale
Main Page |
 Home
| What's New |
Features |
Gallery |
Reviews |
Reference |
Forum |
Search
Home
| What's New |
Features |
Gallery |
Reviews |
Reference |
Forum |
Search