Hasegawa's 1/48 scale
Nakajima A6M2-N (Rufe)
by Bruce Salmon
|
Nakajima A6M2-N (Rufe) |

HyperScale is proudly supported by Squadron.com
I wanted to try and make an inexpensive model with no aftermarket parts and a closed canopy for a change… I got a bit carried away and scratchbuilt most of the things a PE set would have given me and relented just a little, to try out the new Ultracast Zero seats.
Aftermarket Products Used
Ultracast (48185) Mitsubishi A6M Zero Seats (with harness) NOTE: These only good for the early Zeros up to about the A6M5b.
Cockpit / Fuselage
Extra detail was added with wire and plastic card using the Eduard A6M2 Zero PE instructions as a guide.
The Ultracast seats are brilliant except for a slight moulding problem in the LH bottom corner which was too thin and had broken away.
Instrument panel was detailed thus: Paint interior colour, dials painted with black, instrument markings picked out in white with a fine brush and using a 10X hand lens. Botch-ups fixed with more paint or removed using another fine brush and turps. Dials filled with 3-4 coats of Future to look like glass – actually a faster process than having to bother glossing and decaling.
The rudder and elevators were also cut out and repositioned.
Wings
Wing to fuselage join is not good and the gap needed to be bridged with 10 thou plastic card. The underside rear join has a nasty step that needed lots of putty, sanding and a rescribe.
The profile of the wings just doesn’t look right and they have a bit much dihedral. A new pitot tube was made from brass tube and wire and superglued in place. The nav lights were also glued on at this stage and sanded to shape.
Engine and Cowling
The engine was wired up using the Eduard PE plans as a reference. It was then painted black and given a metallic drybrushing. Various details were picked out with Aluminium and other metal colours. The cowling had the cowl flap edges thinned.
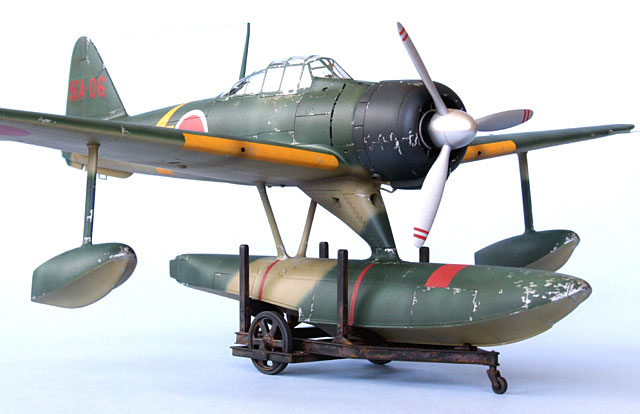
Floats
I scratchbuilt a new oil cooler in the front of the main float support and used epoxy to glue the anti tail-sitting weight in place.
Once attached to the wing I found that the rear struts were a bit gappy and need puttying - then I added the outer wing floats.
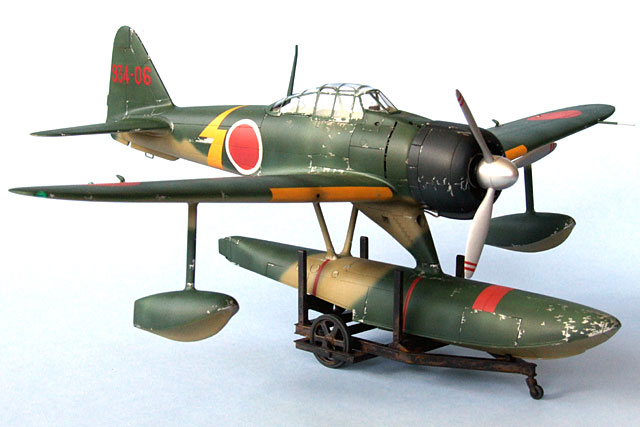
Trolley
The beaching trolley was fully built before painting it matt black. I added rust effect to it with Humbrol 113 Rust and burnt sienna / yellow ochre oils – quite thick in places. When you apply a final matt coat the thick oil paint absorbs the matt and remains shiny giving it that wet rust look.
Details
The machine gun barrels were hollowed out at their tips with the point of a sharp knife.
The canopy was masked with Bare Metal Foil and set aside for later painting.
Bomb racks assembled and thinned to scale then painted black and metalized.
Propeller was painted using Tamiya XF16 Flat Aluminium for the blades (black on the rear) and
Humbrol 27002 Polished Aluminium Metalcote for the spinner.
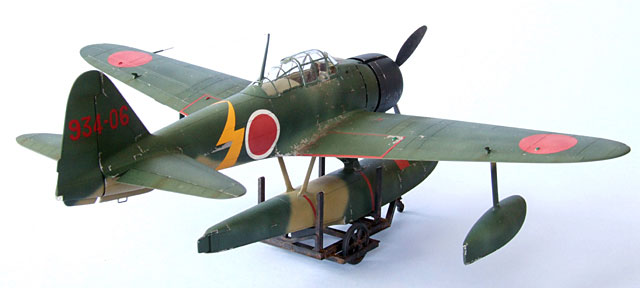
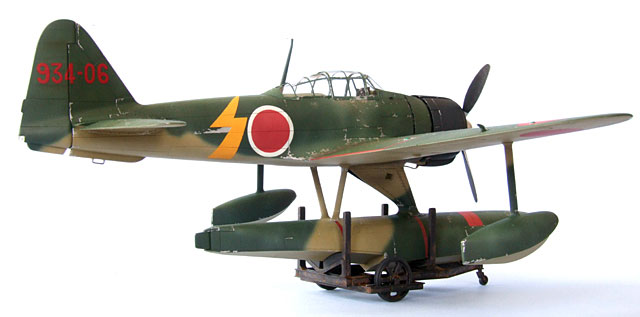
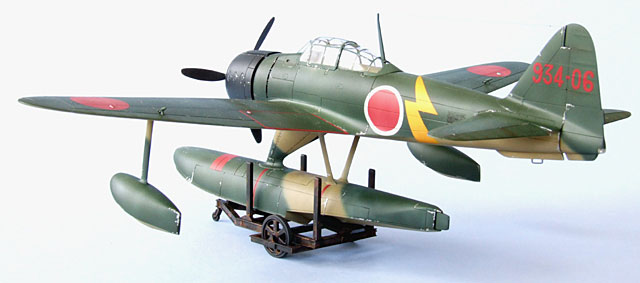
The lower surface was sprayed first; Ame-Iro can be hard colour to achieve! After spraying my mix and post shading lighter patches I tied it all together with a heavily thinned coat of straight XF49 Khaki. This however will make it hard to replicate if you have to repaint any damage. It would have been better to leave the wing floats off until final construction as it was a trial of dexterity to paint the central float without them getting in the way. Next the upper surface was sprayed freehand with Tamiya XF70 Dark Green 2 (IJN). This colour is bluer than the XF11 JN Green – it looks OK on some aircraft but not on others… I repainted using the mix below and then post shaded with lightened mixes.
Once dry the Hinomarus were masked and painted as were the leading edge stripes and fuselage lightning bolt. Next time I won’t add H113 Rust to my Hinomaru mix as it tends to go a fluorescent pink/purple when lightened out heaps. Finally, gloss varnish was sprayed only where the decals would be positioned.
Interior
5 – Tamiya XF71 Japanese Interior Green / 1 – Tamiya XF62 olive drab / 2 – Tamiya XF57 Buff
Lower Surface:
Ame-Iro: 1 – Tamiya XF64 Red Brown / 8 – Tamiya XF12 JN Grey / 4 – Tamiya XF49 Khaki / 7 – Tamiya XF2 White / 1 – Tamiya XF3 Yellow
Upper Surface:
10 – Tamiya XF11 JN Green / 1 – Humbrol 226 Interior Green / 1 – Tamiya XF2 White
Hinomarus:
7 – Humbrol 153 Insignia red / 1 – Humbrol 113 Rust
Leading edge stripes: 7 – Tamiya XF3 Yellow / 1 – Humbrol 82 Orange Lining
Decals
The only decals I used were the tail codes however; the kit decals were misprinted so I sent out a call for help on J-aircraft.com.
A kind Australian, Rene de Koning, came to my aid with another set of tail codes – Thanks Rene!
Weathering
After a coat of satin varnish the model was given an overall wash with raw umber oil with some panel lines darkened with further washes. A few oil stains were drybrushed on and some restrained chipping with Tamiya XF16 Flat Aluminium applied with a fine brush. Exhaust and gun staining was with Tamiya X19 Smoke. A matt-ish varnish was then sprayed to finish the job.
Final Assembly
You have to be careful fitting the engine and cowl otherwise they will easily get off-centre with each other and the fuselage. I fitted the propeller in place to make it easier to line them up and see any positioning problems. This exercise seems to be necessary with all the Hasegawa Zeros as well as many other radial engined aircraft.
The canopy and all the other flimsy breakables went on without a hitch.
This is not a bad kit aside from a few (mainly wing) fit issues – certainly more refined than the older Tamiya version.
This model will eventually hit the water in a Pacific Island lagoon diorama, when I get keen enough. As an aside - most Pacific theatre floatplane dioramas I have seen are incorrect in that the modeller makes the water greenish with lots of weed about. In actuality the water is very poor in nutrients and therefore crystal clear – unless you happen to be at a river mouth or estuary. Remember all those travel magazine photos of boats that look like they are floating on air!
Model, Images and
Text Copyright © 2008 by Bruce Salmon
Page Created 18 February, 2008
Last Updated 18 February, 2008
Back to HyperScale
Main Page |
 Home
| What's New |
Features |
Gallery |
Reviews |
Reference |
Forum |
Search
Home
| What's New |
Features |
Gallery |
Reviews |
Reference |
Forum |
Search