|
Roden's 1/72 scale
Zeppelin Staaken R.VI
by
James Fahey
|

|
|
“Last boarding call for the
flight to London”
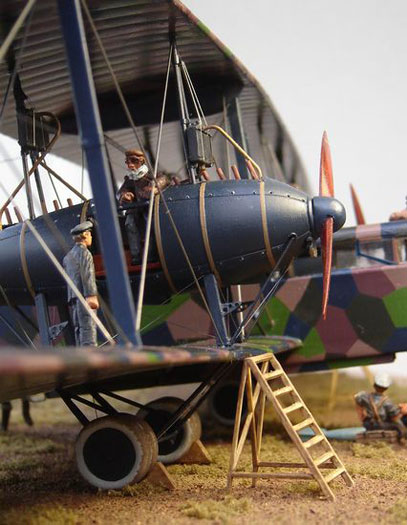
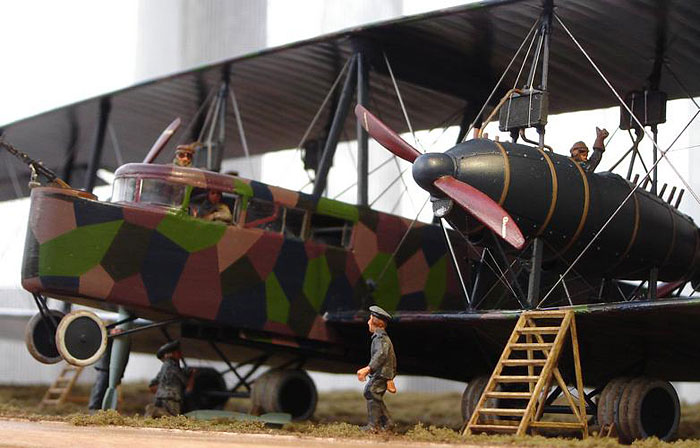
An airfield near Ghent, Belgium, 1917 |

Roden's
1/72 scale Zeppelin Staaken R.VI is available online from
Squadron.com
“Last boarding call for the flight to London...”
I have always been fascinated by
the Zeppelin Staaken R.VI ever since Ray Rimmell built the Contrail
vacform in the Feb 1982 edition of Scale Models. No WWI aircraft
collection could be complete without one! A few years later I was
fortunate enough to get hold of the Contrail kit, only to find on
opening the kit that it was quite beyond my modelling skills. With a
heavy heart I sold it off to another hopeful modeller.
 Fast
forward many years to the release of the Roden kit. Fast
forward many years to the release of the Roden kit.
By the time the Staaken was
announced Roden had established a reputation for fine detail and
beautiful moulding, but with some question marks around their decals,
especially lozenge colours.
On opening the box I was struck
by how complete the kit was compared to the Contrail vacform (ie
hundreds of parts!). Roden had thoughtfully provided a range of
alternative parts allowing a choice of Staakens to be built. The main
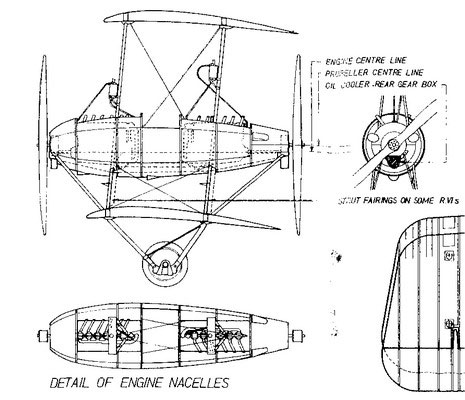
differences were in the radiators (plain/flat or in 3 sections), nacelle
pylons (R.27’s pylons were round section but most other Staakens had
fairings on the lower legs) and propeller spinners (allowing the Aviatik-built
versions to be made).
Unfortunately the 1000kg bomb
had been deleted from the sprue but it indicated Roden were working on
another version of the Staaken (how many modellers do they think
will buy two of these beasts?)
Three large sheets of continuous
lozenge decal are included with patterns for cutting out the lozenge to
fit all the parts. The lozenge shapes look right but according to the
Datafile the colours seemed too bright. If you’re fussy you could do a
massive paint-by-numbers job using darker colours but I opted for a
black undercoat which, combined with the low-opacity of the decals, gave
a dark finish I could live with.
I had been following another
modeller’s online build with interest but was dismayed to hear that
difficulties with the fit of the nacelles had caused his model to be set
aside. On top of that, an article published recently in Scale Aviation
Modeller also alluded to difficulties with fit of the nacelles, causing
the characteristic backward stagger of the wings to be lost, but the
author did say he had not followed the kit instructions for assembly of
the nacelles.
To cut a long story short,
building the nacelles with the correct angle on the pylons is critical
to getting the top wing on. Make sure the gap between the top of the
front & back pylons matches the holes in the top wing (same for bottom
legs of the pylons and the lower wing). If you are modelling a Staaken
with Mercedes engines (most of them) then you can cut away the nacelle
frame which goes over the middle of the engines (only used for Maybach
engines).

The usual rules apply for
fitting the top wing – don’t try gluing all the struts at once or you’ll
go mad. I glued just the four nacelle pylons to the lower wing and when
they were solid I turned the aircraft upside down over the top wing. A
jig is useful to hold the whole model in the right place. I like Lego
blocks for this. When that’s dry the other interplane struts can be slid
into place. Sounds easier than it is!
The lozenge decal is very
elastic and sticky. It is much easier to apply with some decal softening
solution underneath it. There is enough lozenge decal in the kit to
cover the entire airframe if you want to build a different aircraft but
you will need to rearrange the patterns to make more room. Start with
the wing under-surfaces to get the hang of it before doing the top wing
and fuselage where mistakes will be very visible. (Be careful not to
stretch the lozenge as it makes matching the pattern more difficult.)
Other Notes
-
The propellers were covered in plywood so do not have laminations.
Garuda markings are from the Americal Gryphon sheet (unfortunately
no longer in production).
-
Be careful gluing the stabilisers to the rear fuselage – it is easy
to end up with a wider span than the elevator! I used brass rod to
make the stabiliser join strong.
-
The wings are more rigid with the addition of brass reinforcing
rods. It is most important for the lower wing where a spar can be
fitted in the space under the floor and above the bombs.

-
The engine assemblies need to be attached low enough in each nacelle
so that the prop shafts are in the centre of the end rings.
-
The lozenge pattern was hand-painted in the factory (not printed on
the fabric) and the pattern wraps around the fuselage and matches
between the control surfaces and flying surfaces. It took about
three weeks of nights to get all the lozenge on and patched &
matched. Do you like wallpapering?
-
Although very thin, the undercarriage legs are strong enough to take
the weight of the completed model (which is fairly substantial)
provided the rigging is incorporated. I replaced the kit axle with a
piece of brass rod. In the real aircraft the axle was as thick as a
railway wagon axle to take the 12 tonne weight.
Crew Figures
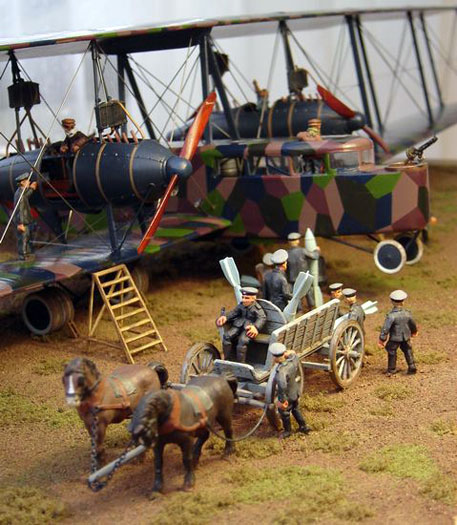
I wanted to model the scene in
the Datafile which has the horse-drawn wagon and bombs being loaded by
ground crew. The figures in my diorama come from a variety of sources:
The staff officer figures are
WWII white metal figures from Lamercraft. Some of the ground crew
figures are from IT Miniatures figures set GN12 Artillery Team (Feldmutze)
and also some of the aircrew figures are from IT Miniatures set P3. Some
others are converted from Monty's Model Railways 1/76 white metal
figures and from the Orion set.

The Horses are from the Italeri
Napeolonic Baggage Wagon (with the collars removed), the wagon is from
Fine Scale Miniatures (Brookhurst Hobbies sell them) set WE11 German
Light Field Wagon and the crewman from IT Miniatures.
In summary,
Roden have done a great job and I would recommend the kit, but
(obviously) it is not for beginners. A fairly large area is required to
display the Staaken (it’s wingspan is nearly the same as a B29).
Click on the thumbnails
below to view larger images:
[../../photogallery/photo00017244/real.htm]
Model, Images and
Text Copyright © 2007 by James Fahey
Page Created 19 June, 2007
Last Updated 24 December, 2007
Back to HyperScale
Main Page
|
Home
| What's New |
Features |
Gallery |
Reviews |
Reference |
Forum |