|
Hasegawa's 1/48
scale
Hawker Typhoon
Mk.Ib
by
Jan Goormans
|
 |
|
Hawker Typhoon Mk.Ib "Bubbletop" |

Hasegawa's 1/48 scale Hawker Typhoon Mk.Ib is available online from
Squadron
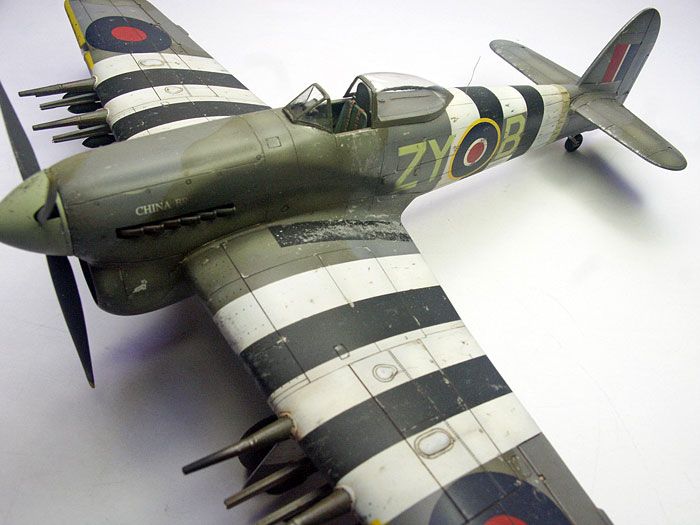
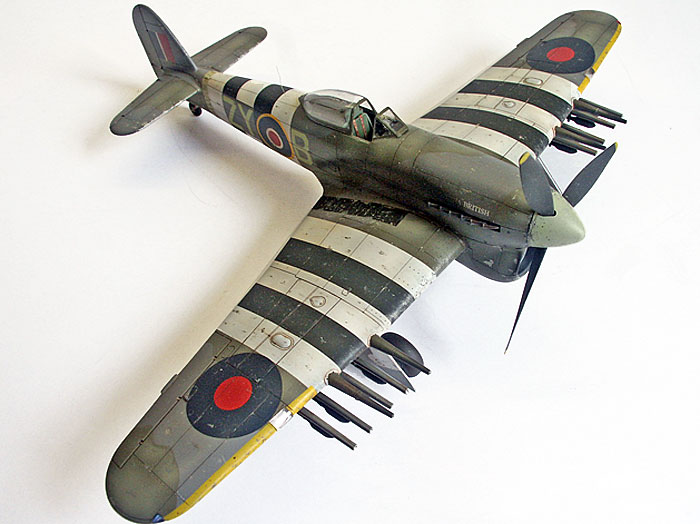
When I decided to make the
Hasegawa Typhoon I already had in mind that it should be finished as a
very weathered one at the end of the Normandy campaign.
As usual for me, the model
was built straight from the box. The only additions are harness straps.
Construction was almost completely trouble free.
The only problem I had was a gap of 1mm between the fuselage and the
wing roots, so I glued two pieces of sprue between the left and right
half of the fuselage to open it further. This gave me a perfect fitting
between wing roots and fuselage.
Tamiya and Gunze paints
were used.
I started with the preshading , then came Tamiya white for the invasion
stripes. These where masked and the black (Tamiya Nato Black) was
sprayed, masking again and I could start with the camouflage.
Camouflage was done with the appropriate Gunze RAF colours, first the
bottom, them the top.
When I had done a base
layer for a colour, the panel s where highlighted directly afterwards
with a mix of that base colour and Tamiya flesh (I personally find
mixing with white to strong as effect).

With the camouflage
finished the only thing left was masking and spraying the yellow
identification stripes.
Now it was time for the Future – decals – Future procedure.
I used the Micro Sol / Set system for the decals.
Weathering
Panel lines where
highlighted with a technique I learned in the KMK modelling club. Take a
very very fine marker with water based ink and run it trough the panel
lines and other parts you want to have a dark edge.
When you make a mistake, no problem, just some slightly wet kitchen
paper is enough to get rid of it, simple and fast, even I can master
that.
To get a dirty look I use oil paints (a mix of brown and grey), thinned
down with Humbrol thinner.
This is very
straightforward, I pint (brush) a large part of the airplane with that
mixture, wait a few minutes and rub it of in the direction of the
airflow. Rub until you have the finish you want.
When it gets to clean,
start this process again.
That done, I spayed the airplane again with future, this to protect the
oil paint.

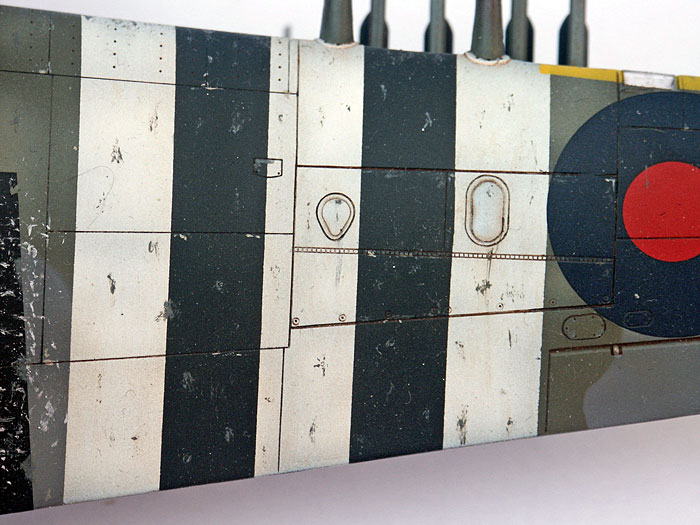
Now it was time to add some chips, I use a light grey to do that.
On the fuselage and the wings it was done with a fine brush.
On the wing edges and the walking strips on the wing I dipped a piece of
3M Scotch Brite in paint, dab the surplus of on a piece of paper and
with almost no paint left in the Scotch Brite dap on the place you want
to have some chips.
Be careful, because you don’t have the same control as with a brush.
The last thing to finish the Typhoon was a layer with a mix Gunze
Flat-Clear.
The Hasegawa Typhoon is a
nice build, and a large plane when standing next to other WWII birds.
http://www.kmk-scaleworld.be/
Click
the thumbnails below to view larger images:
[../../photogallery/photo00001313/real.htm]
Model, Images and Text
Copyright © 2007 by Jan Goormans
Page Created 25 September, 2007
Last Updated
24 December, 2007
Back to
HyperScale Main Page |
Home
| What's New |
Features |
Gallery |
Reviews |
Reference |
Forum |