|
Eduard's
1/48
scale
Mirage IIICJ
by Jose Lucero
|
 |
|
Dassault Mirage
IIICJ |

Eduard's
1/48 scale Mirage III CJ is available online
from Squadron.com
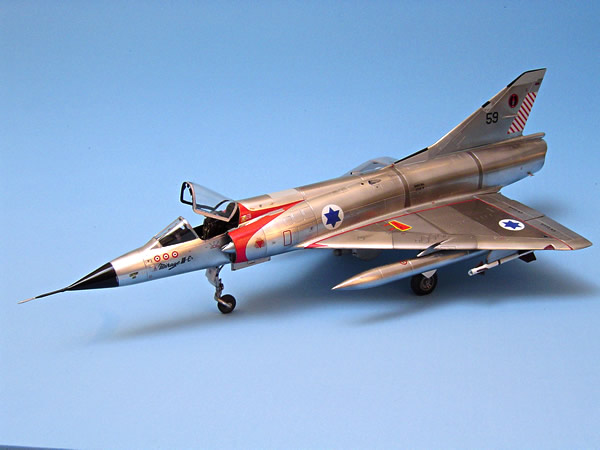
Eduard's Mirage IIIC kit in 1/48th scale is the
best kit of this important French fighter. It leaves it's competition
behind. I used the Profipack version of the kit. It's comprised of more
than 100 finely molded pieces with crisp engraved detail. It offers two
frets of pre-painted photo etched metal that is mostly destined for the
cockpit and ejection seat harnesses. There is also a great lead weight
that fits inside the nosecone, vynil painting masks and an excellent
selection of decals.
The cockpit of this kit is very simple to build.
It's painted black and all the detail is provided by colored photo etch
for the dashboards and consoles. The ejection seat provided is rather
simple so I used a resin one that provided much more detail with the
colored photo etch harnesses instead.
Building the kit doesn't have that many pitfalls if you test fit, clean
and sand to achieve a good join.

There are three critical joins that I would
recommend any builder pay special attention to. The first one is the
tail because it's completely molded on a half of the fuselage, so dry
fitting is necessary to minimize the join. The second point is the
wings. The leading edge of the wing is molded on the top half. A lot of
care is needed so that a lot of the great detail on the bottom of the
wing is not lost. The air intakes is very fragile and tends to break.
Paint
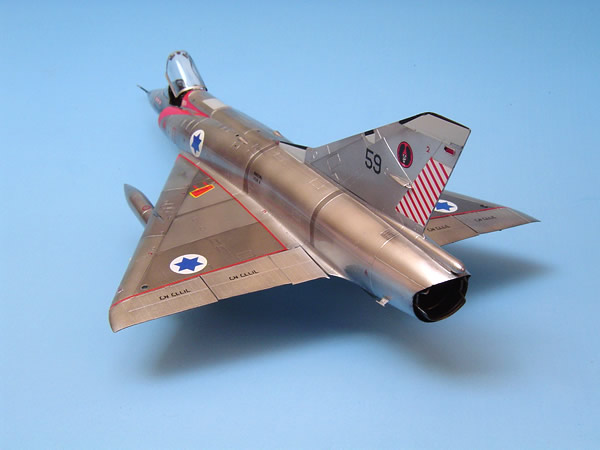
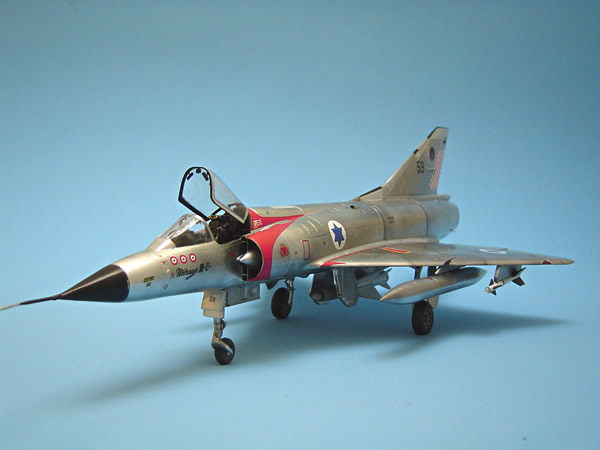
For me, the best way to admire the elegant lines is
in it's natural metal finish. To achieve the elusive effect of a natural
metal finish I used the Alclad II system. A proper primer base is a must
to get good results with Alclad. For this project I used decanted Krylon
Gloss Black to prime the model.

After it had dried, I used a mix of Alclad laquers
based on Yoav Efrati's Mirage IIICJ article published in Scale Aircraft
Modeler to paint the Mirage. After the paiting was finished, I sealed it
with a coat of Future to prepare the model for decals.
Decals
I choose to do No.59 of the 101st Tayaset, Heyl
ha'Avir, during the 6 Day War in 1968. Eduard's decals are excellent,
very thin and in register. The most difficult decals to apply are the
red details in the air intakes. The rest of the decals where applied
without any troubles.
All in all Eduard managed to do a great kit of a very important
aircraft. Very recommended. If you want to read this article in spanish
you can go to
http://www.ipmsguatemala.net/index.php?option=com_content&task=view&id=70&Itemid=3
at www.ipmsguatemala.net
Greetings from Guatemala!
Click on the thumbnails
below to view larger images:
[../../photogallery/photo00013656/real.htm]
Text and Images Copyright
2007 by Jose Lucero
Page Created 22 February, 2007
Last Updated
24 December, 2007
Back to
HyperScale Main Page |
Home
| What's New |
Features |
Gallery |
Reviews |
Reference |
Forum |