|
Eduard
1/48 scale backdate
Focke-Wulf Fw 190 A-7
by Oliver Peissl
|
 |
|
Focke-Wulf Fw 190
A-7 |

Eduard's 1/48 scale
Fw 190 A-8 is available online from Squadron.com
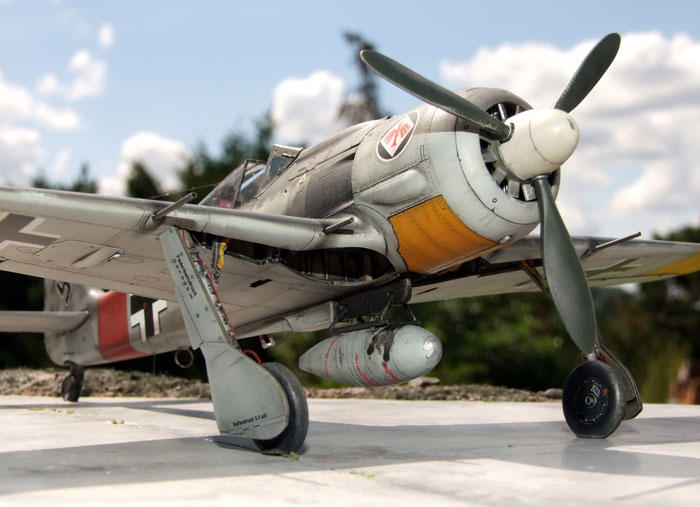
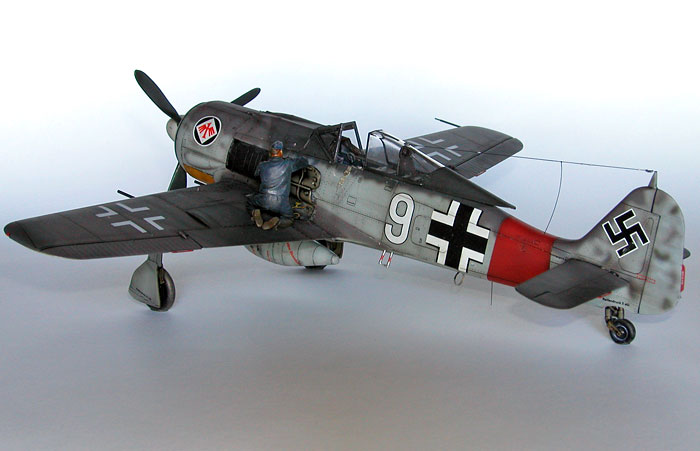
Here is my Eduard Fw 190 A-8, backdated to an A-7.
I finished the model in the markings of Alfred
Grislawski, Staffelkapitaen 1.Grp / JG 1 "Oesau".
He flew it in the “Reichsverteidigung ” from
Colombert, France, in Sept. 1944.
The model was built with following updates:
-
Cockpit photo
etched parts from Eduard (from the box)
-
Placards and
exterior photo-etched set from Eduard
-
Decals from Kagero
(Air miniatures JG1)
Under the circumstances that I have a lot of
pictures from Alfred Grislawski with signatures I decided to build his
Aircraft of JG1.
The kit fitted very well and was a pleasure to
build. I built the cockpit with the included colour photo-etched parts
and I was very happy with them. These colored parts resulted in a very
realistic look!
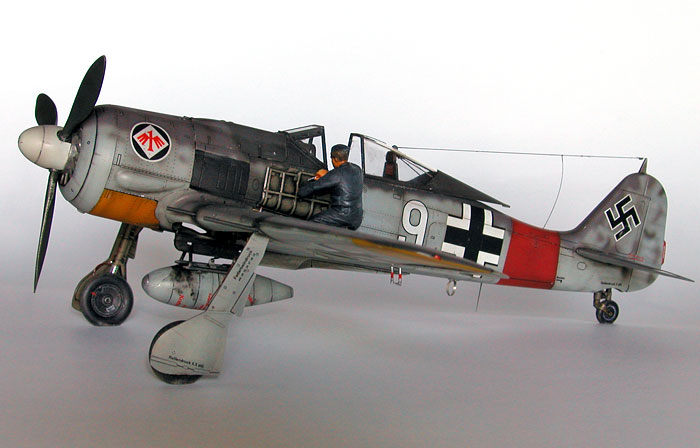
Additionally, I added the parts from the Eduard exterior set for the
wheel well and the open weapon bay on the port side. I also used this
set for the antennas under the fuselage. I used the placards for the
undercarriage, also from Eduard. With all these parts the model looks
very authentic!
The exhausts have also been replaced with fine bent
pipes.
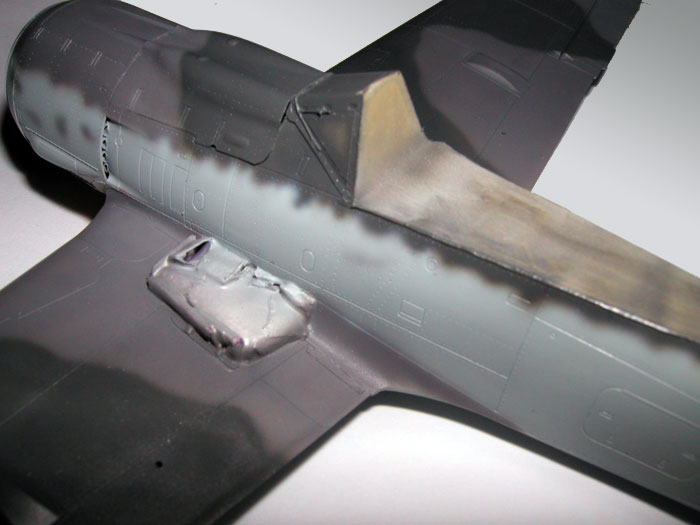
First, Revell 90 Silver was sprayed overall,
followed by Gunze acrylics for the camouflage scheme in RLM 74 / 75 /
76.
I did not mask the straight camouflage pattern on
the wings and the top of the fuselage because, with the combination of
Gunze colours and Harder & Steenback Evolution airbrush, I could obtain
a very fine demarcation.
You can’t see any fuselage mottling in wartime
photos, so I only brushed them lightly on the rudder. I was very happy
with the result!
Then I scratched and rubbed off the top colour with a sharp blade and a
sponge to show the aluminium base.
Click on the thumbnails
below to view larger images:
[../../photogallery/photo00021145/real.htm]
After that I sprayed Tamiya gloss and applied the
decals.
All weathering (panel lines, oil stains etc) was
achieved using grey oil colours.
I sprayed the staining from the exhausts and guns
with my airbrush. Here I used heavily thinned red brown-black mixed
colours for post shadings. After that I applied sublte post shading on
all panel lines and hatches.
 Finally
everything was sealed with Polly Scale Flat, and all small finishing
details such as antennas and wire were fitted. Finally
everything was sealed with Polly Scale Flat, and all small finishing
details such as antennas and wire were fitted.
Greetings and Horrido,
Olli
http://www.erlawerke.de
Click on the thumbnails
below to view larger images:
[../../photogallery/photo00005404/real.htm]
Model, Images and Text Copyright © 2007
by Oliver Peissl
Page Created 22 November, 2007
Last Updated
24 December, 2007
Back to
HyperScale Main Page
|
 Home
| What's New |
Features |
Gallery |
Reviews |
Reference |
Forum |
Home
| What's New |
Features |
Gallery |
Reviews |
Reference |
Forum |