|
Roden's 1/32 scale
Albatros D.III
by Chris Wauchop
|
|
|
Albatros D.III |
images by Brett Green

Roden's 1/32 scale Albatros D.III is available online from
Squadron.com
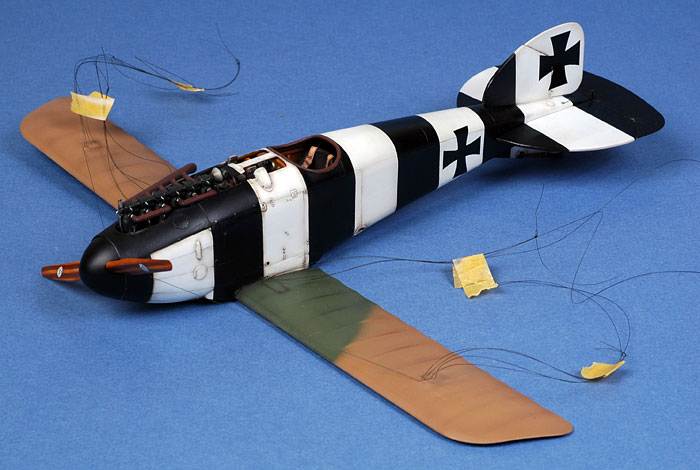
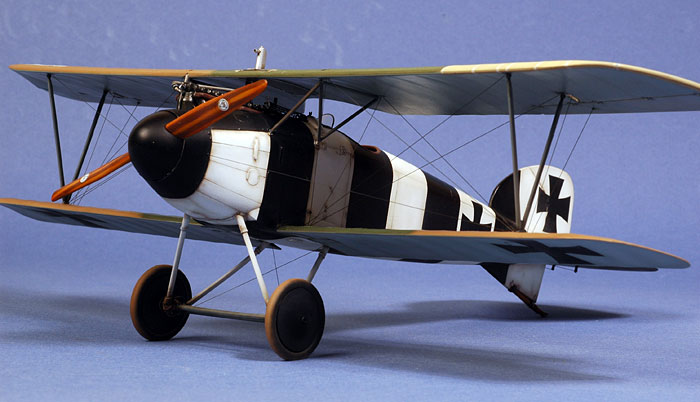
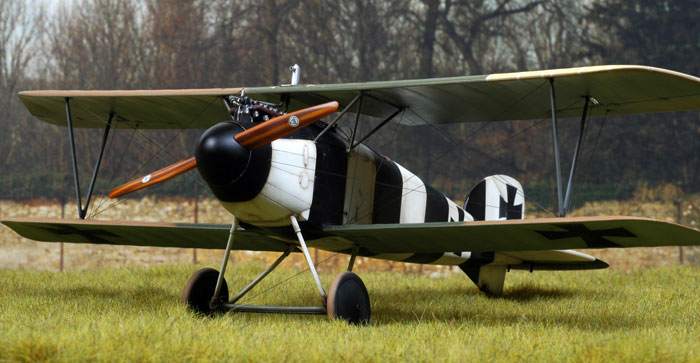
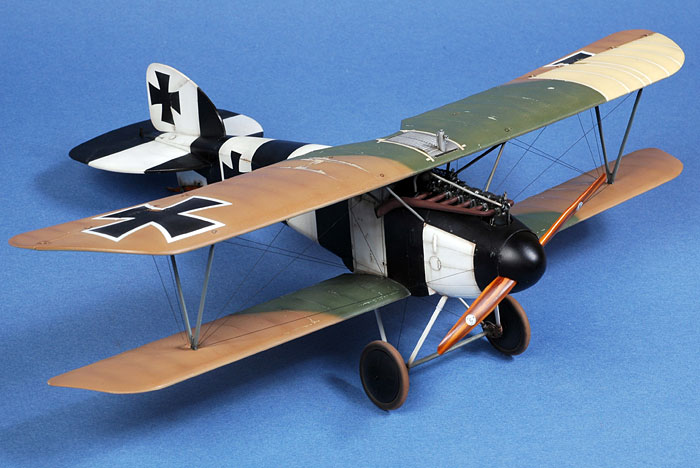
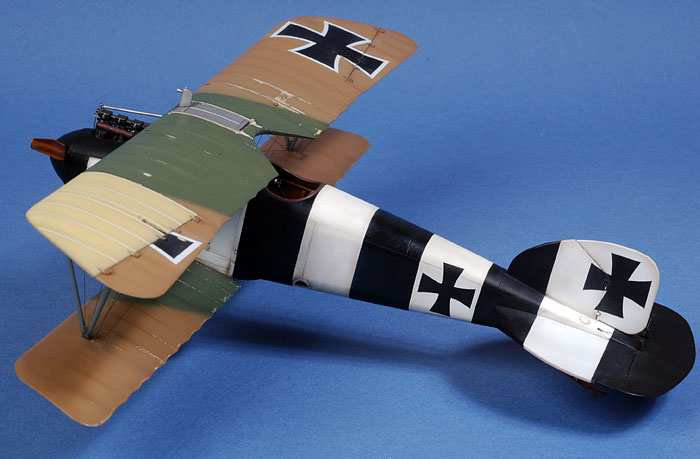
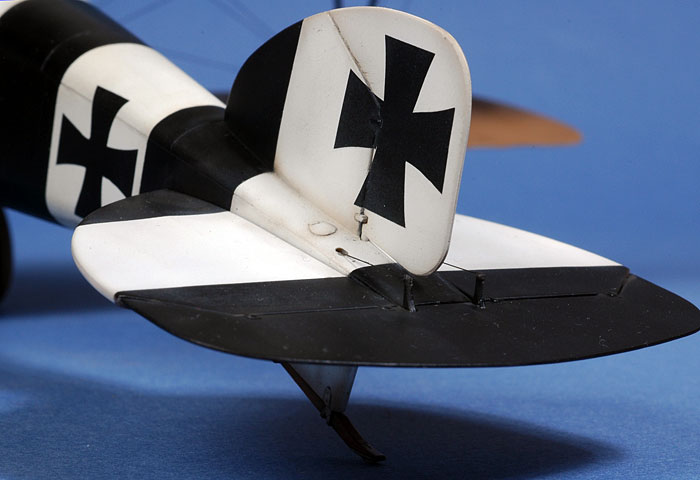
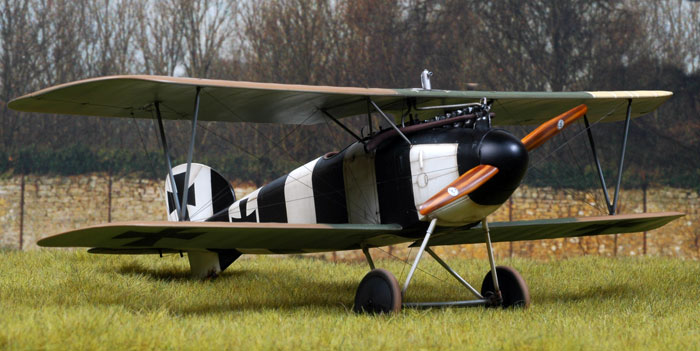
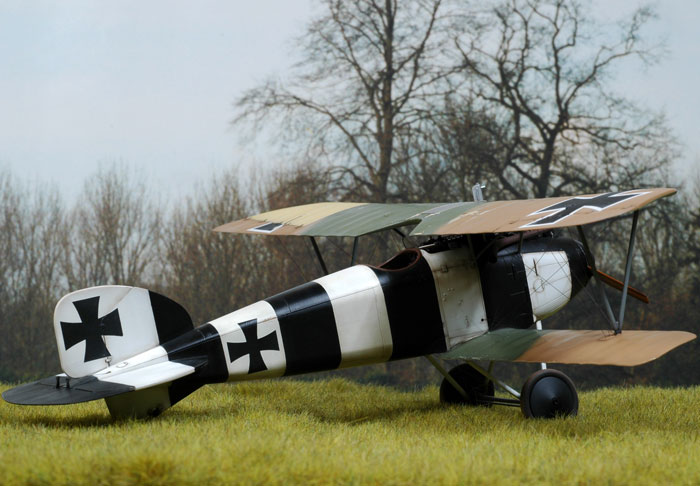
This is the 1/32 scale Roden Albatros D.III , Kit no 606, finished in
the markings of Leutnant Bruno Löerzer of Jasta 26.
Construction of Roden's 1/32 scale Albatros D.III is pretty
straightforward with one or two exceptions.

There are a couple of mistakes in the instructions. In construction
step 10, the propeller shaft part 9Z mysteriously appears in place. Part
9Z should be included in Step 6!
Also, placement of part 7B in Step 6 is incorrect. Part 7B is part of
the radiator plumbing, and should be glued to the wing radiator instead
of the engine block. If glued per instructions it falls short of
reaching the radiator by quite a few millimeters.
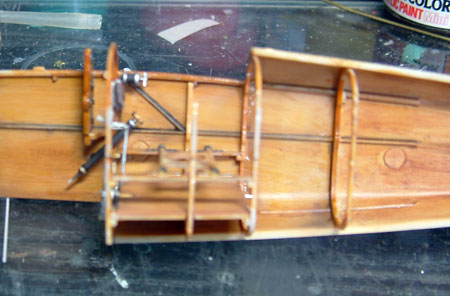
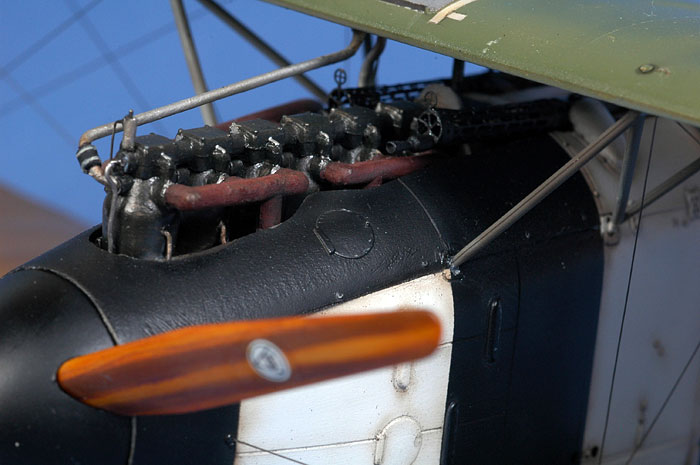
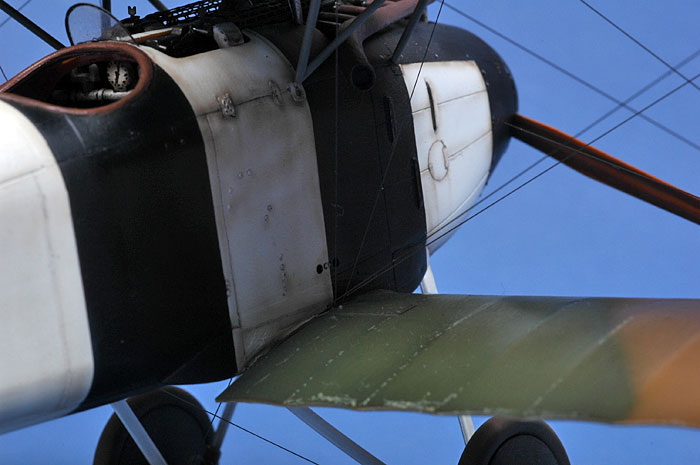
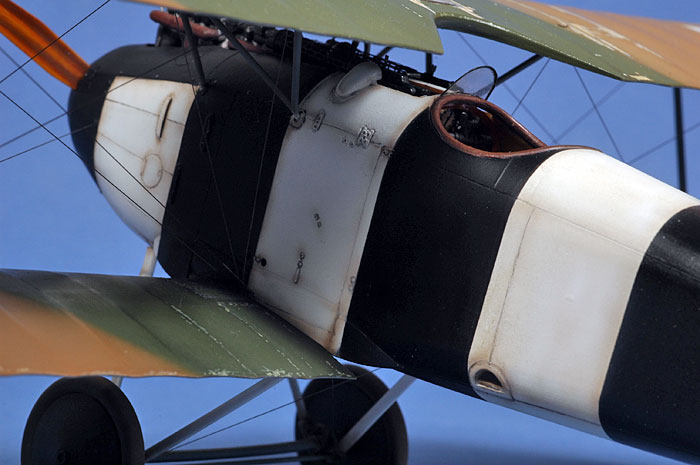
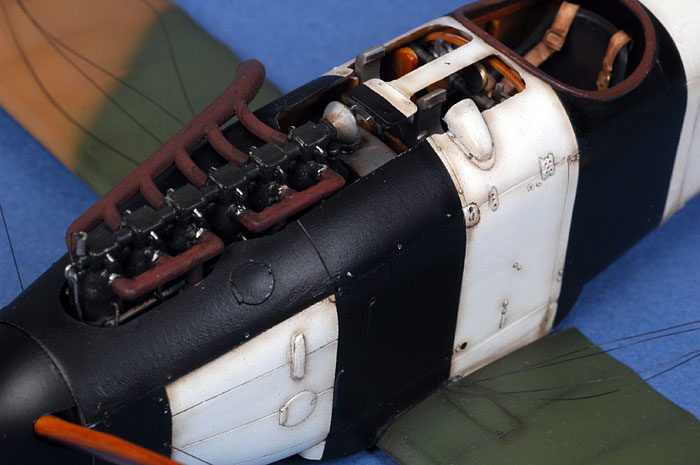
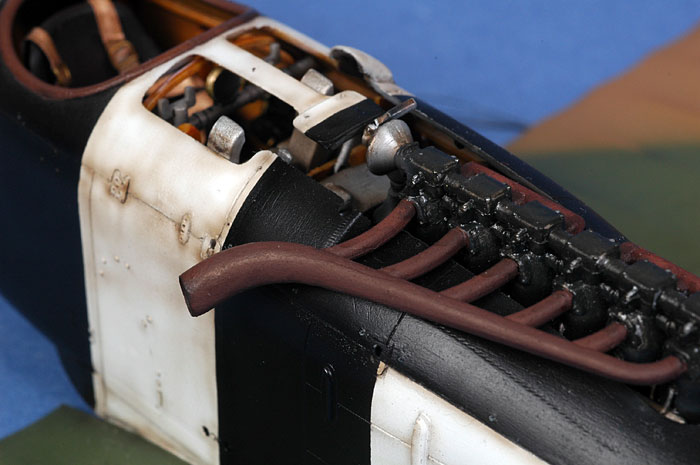
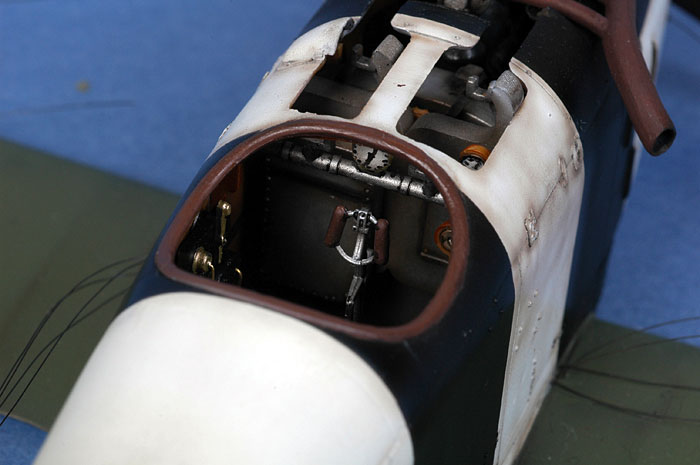
A few extra details were added, mainly to the engine and cockpit
interior. All engine plumbing and electrical was added using various
diameter wire and brass rod.
Seat belts were added using lead foil and brass wire.
With no reference on the harness configuration, I wish that I had waited
for the beautiful Eduard photo-etched set (item number 32-583). This set
was released, according to Murphy’s Law, just after I had finished major
construction and most of the painting. I was, however, able to use the
machine gun cooling jackets. I am looking forward to using the leftover
colour photo-etched parts in the Roden D.V kit when it is released.
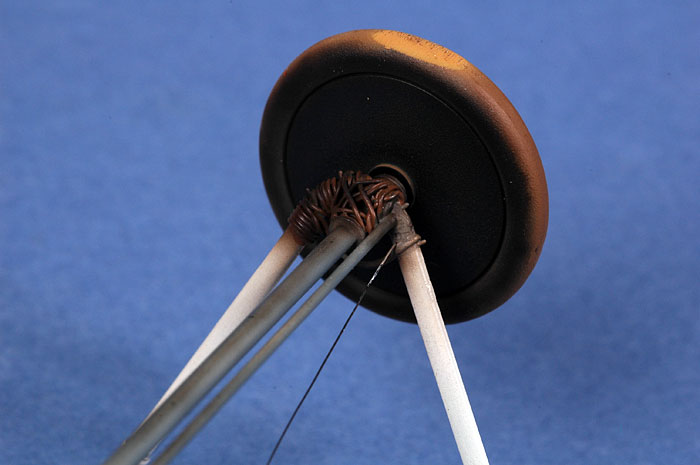
I also added the undercarriage suspension by winding fine solder wire
around and through the ends of the wheel axles. On the real aircraft I
think that these were basically giant rubber bands.
Click the thumbnails below
to view larger images:
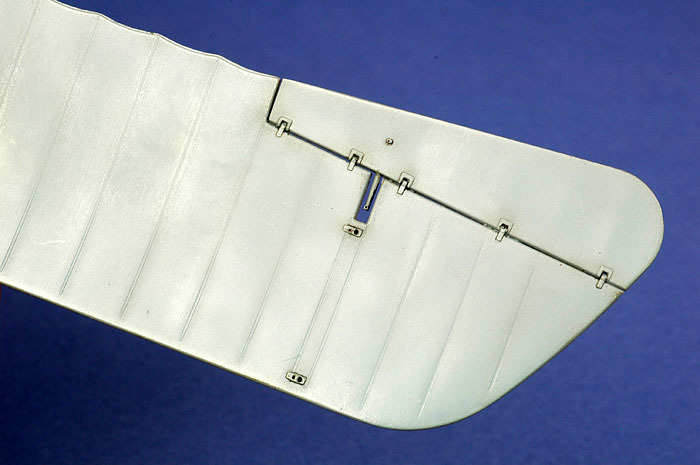
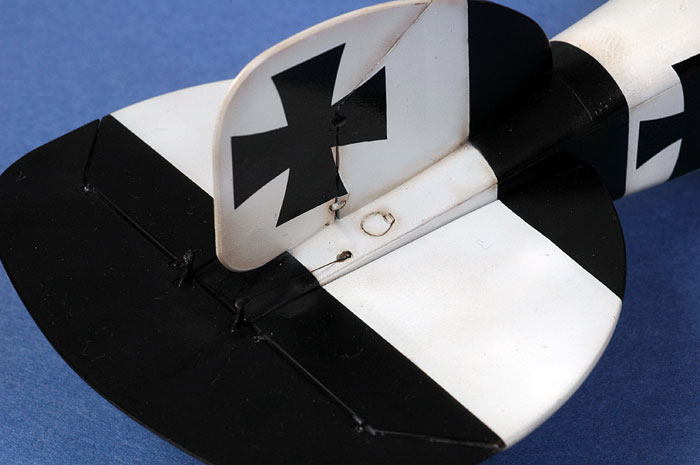
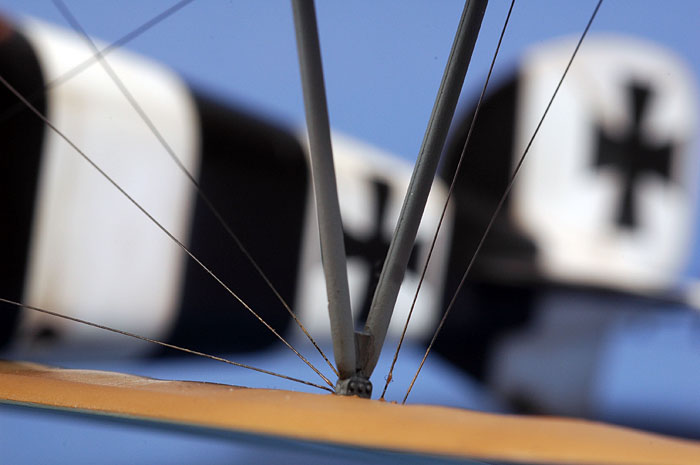
Rigging was added using smoke coloured invisible mending thread.
Firstly, lengths of thread were super glued to the lower wing in the
appropriate positions. Before the top wing was installed, holes were
drilled through in the indicated positions. The top wing is moulded as
full span and is a pretty solid chunk of plastic, subsequently I managed
to snap three no.79 drill bits in this process.
Click the thumbnails below
to view larger images:
Once the top wing was glued into place (which is surprisingly strong)
and the long threads were pulled through the pre-drilled holes, glued
and the excess trimmed off with a new scalpel blade.
 I
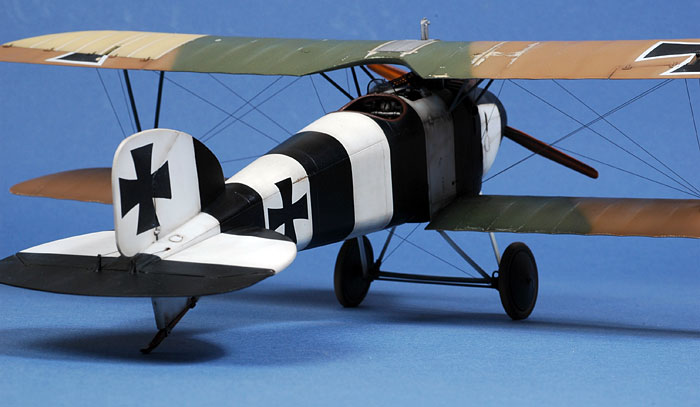
have always loved the Albatros, especially the black and white fuselage
schemes. I therefore chose to finish mine as one flown by Leutnant Bruno
Loerzer. I
have always loved the Albatros, especially the black and white fuselage
schemes. I therefore chose to finish mine as one flown by Leutnant Bruno
Loerzer.
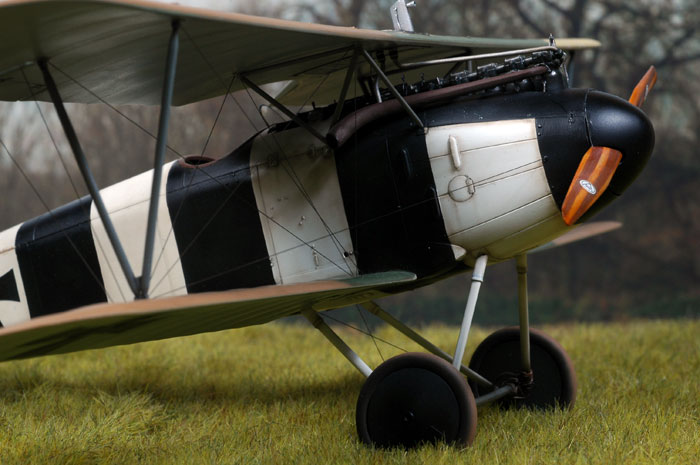
The kit includes the markings and colour scheme for this aircraft.
Fortunately I have a photo of this subject standing on its nose after a
landing mishap. This is just as well because the kit’s painting
instructions are quite inaccurate.
Paints used were mainly Tamiya acrylics, applied with the Testor Aztek
A470 airbrush.
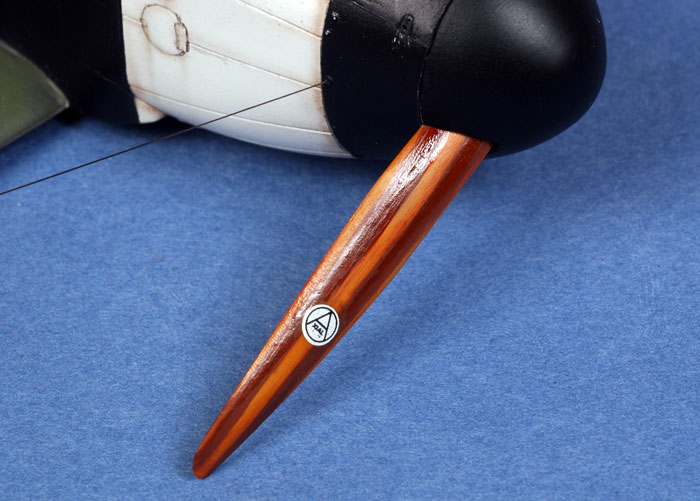
Interior Woodwork – Tamiya XF-059 Desert Yellow as the base coat,
followed by a wash of Tamiya X-26 Clear Orange heavily thinned with
water and applied with a small, flat brush in a streaking motion to
replicate woodgrain.
Click the thumbnails below
to view larger images:
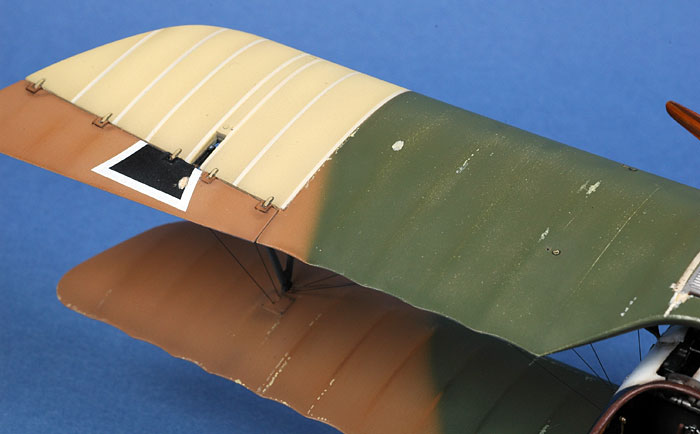
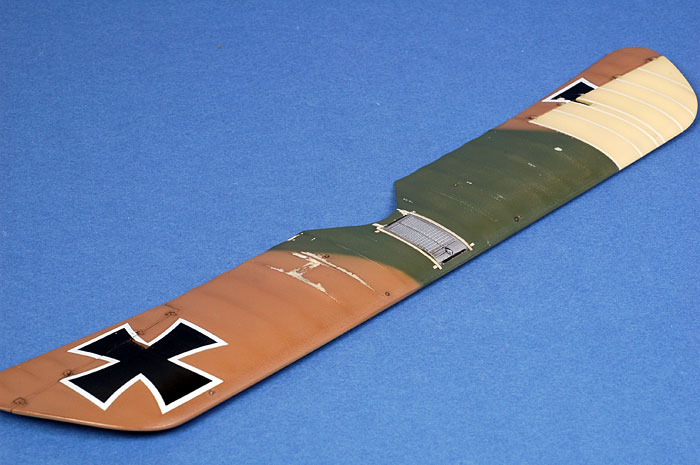
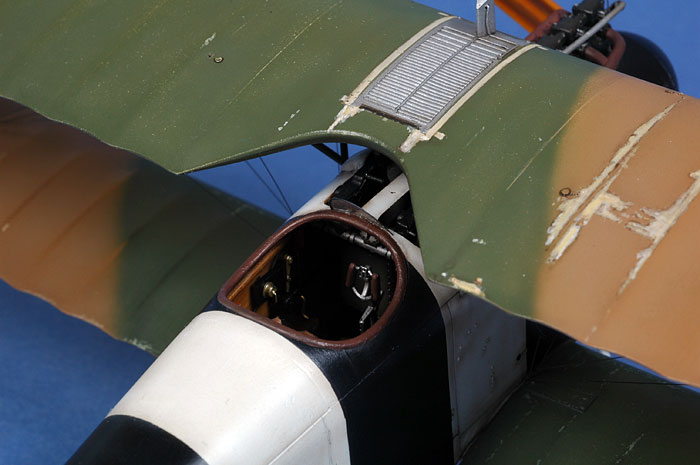
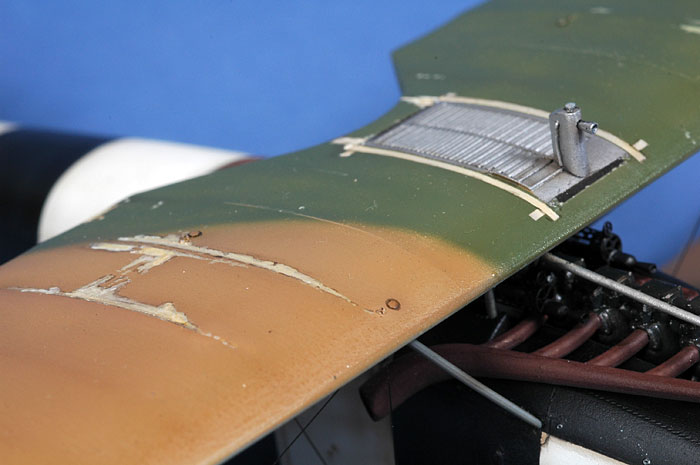
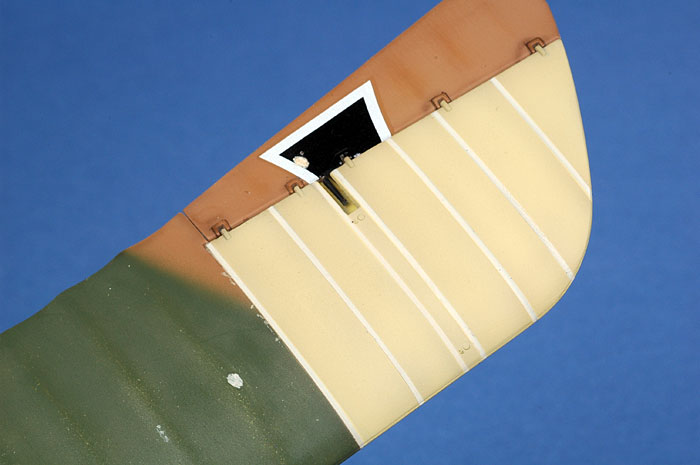
Wing camouflage colours are Tamiya XF-52 Flat Earth with 10% XF-59
Desert Yellow. 50% Tamiya XF-58 Olive Green with 50% Gunze H-32 Dark
Green.
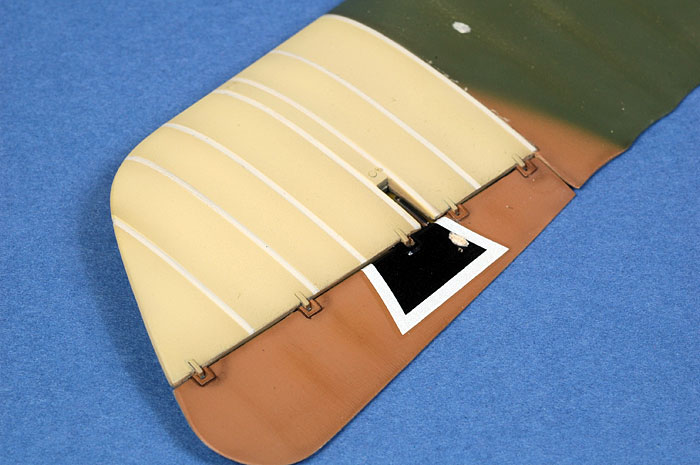
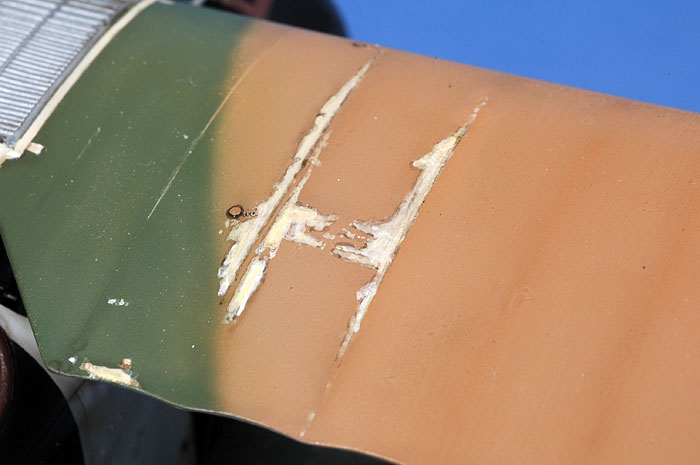
The upper wing repair patch is a mix of Gunze H-85 Sail Colour with
10-20% H-34 Cream Yellow. The tape lines and paint chipping are painted
with Tamiya XF-2 Flat White with a dash of XF-59 Desert Yellow.
Click the thumbnails below
to view larger images:
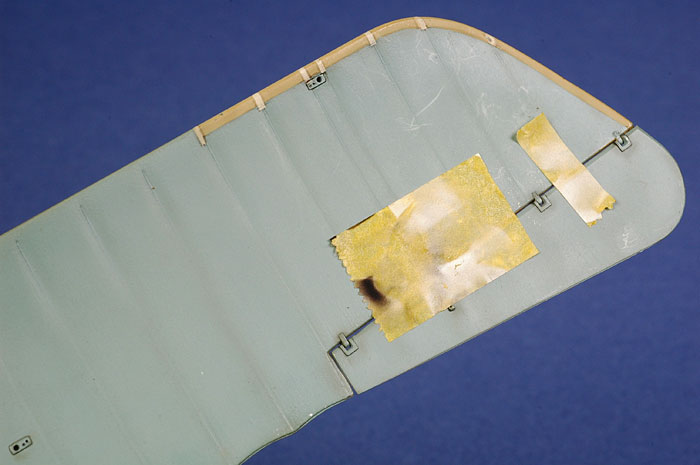
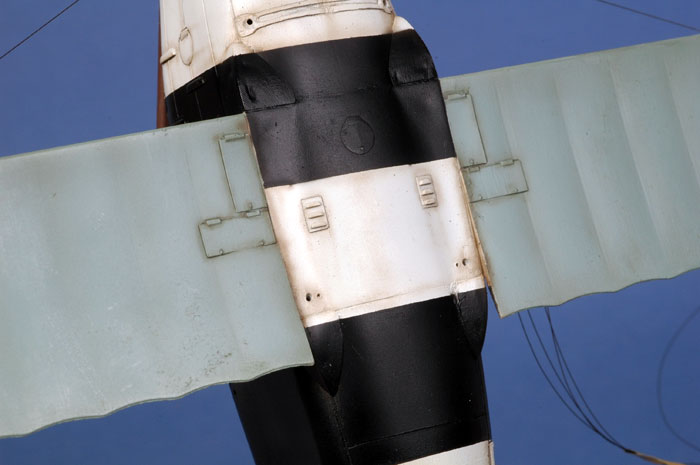
The bottom of the wings are painted Gunze H-67 RLM 65 Light Blue.
The fuselage is painted with Tamiya X-18 Semi-Gloss Black and Tamiya
XF-2 Flat White with 5-% Gloss White to achieve a semi-gloss finish.
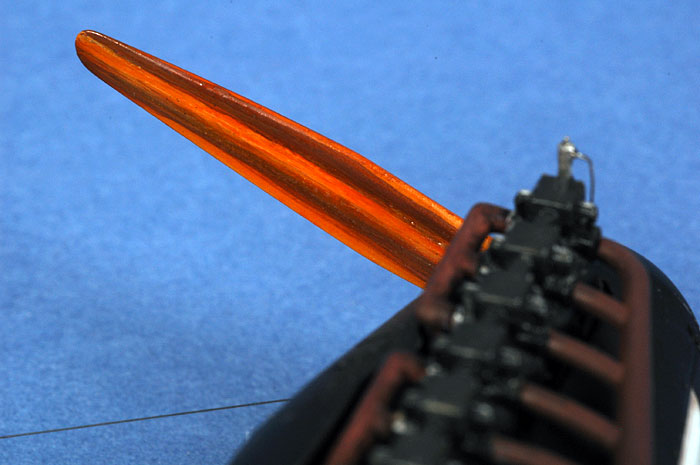
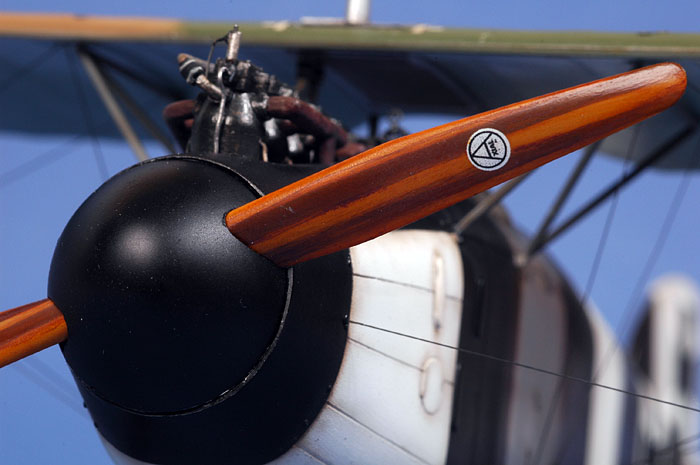
The propeller is hand painted with striped of XF-54 Red Brown and XF-59
Desert Yellow. When dry, a watery wash of Clear Orange was applied.
Click the thumbnails below
to view larger images:
Decals went on perfectly. I did trim the white borders from the
fuselage and tail crosses to avoid tonal differences. All the decals
settled down perfectly with the use of Gunze Sangyo Mr Mark Setter and
Mr Mark Softer. Stupid names but they do work perfectly.
After the decals had set the entire model was sprayed with a moderate
coat of Gunze H-20 Flat Clear to obtain a semi-gloss finish.
Click on the thumbnails
below to view larger images:
Model and
Text Copyright © 2006 by Chris Wauchop
Images Copyright © 2006 by
Brett Green
except two interior photos by Chris Wauchop
Page Created 29 December, 2006
Last Updated 31 December, 2007
Back to HyperScale
Main Page
|
 Home
| What's New |
Features |
Gallery |
Reviews |
Reference |
Forum |
Home
| What's New |
Features |
Gallery |
Reviews |
Reference |
Forum |