|
Yakovlev Yak-25
by
Fotios Rouch
|
|
|
Yak-25 |

HyperScale is proudly supported by
Squadron.com
History
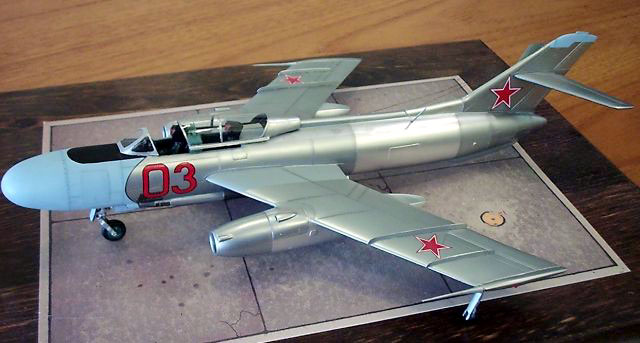
The YAK-25 answered a need for a long range 2-seat, 2-engine all
weather and night interceptor. Production started in 1954. The YAK-25M
carried the "Sokol" radar which made it a capable interceptor. The
YAK-25 stayed in service until the mid 60's because the Soviets had no
replacement for it.
Collect-Aire's 1/48 Scale YAK-25
The kit is made in Slovakia in the usual cream resin. The master must
be pretty good with a lot of detail including all of the air scoops,
access panels, riveting, etc. The decals provided are for two different
aircraft. The model following very-very closely the scale plans included
in the 6/97 issue of Aviatsiya Vremya (Aviation and Time) issue. It
certainly looks like everything is included in the scribing.
The quality of my copy was okay.
|
Click the thumbnails below
to view larger images:
|
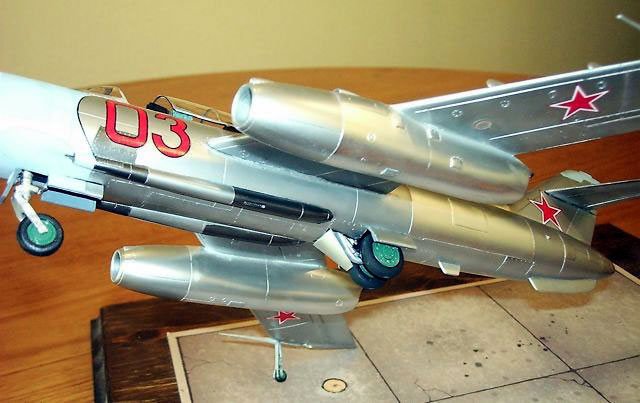
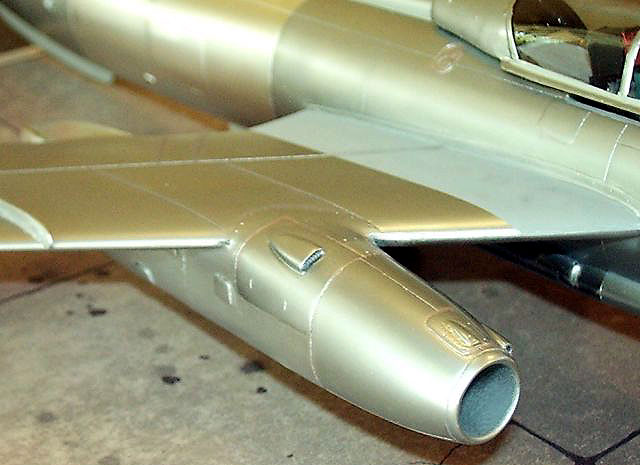
Quite a bit of the very nice fuselage and wing detail was partially
obscured by resin blobs or little gauges. After careful sanding I had to
rescribe the missing detail. The main fuselage parts and wings were
straight. The trailing edge of the wings was razor sharp. The jet pods
had some problems. The maker did not choose to cast them as left-right
with fan blade insert pieces. He chose instead to cast them as two
chunks of resin one for the front and one for the rear portion. The
problem with this, on my copy at least, is that the resin shrunk or
maybe it was pulled out of the molds before it was fully cured. Hence
the jet pods did not fit very well at all. Add to that the fact that the
maker did not chose to define the joint point between the front and the
rear pieces. He could have left a clearly defined portion for us to sand
or cut off so we could get a nice joint surface.
Another problem was that both rear portions of the jet pods had resin
blobs deposited right on the rear fan blades. Difficult to remove and
reconstruct. I am glad it is not very easy to see in there. Another
point of note is that all of the detail that was present around the jet
pod joints got obliterated by sanding in my efforts to get them to look
right. The detail was recreated with plastic sheet and scribing. All of
these problems would have been totally avoided if the maker would have
chosen a multipart construction avenue (or if the casting was better).
Something else to watch for is the relationship of the main wings to
the fuselage. This is critical if you want the outrigger wheels to touch
properly. I chose to enlarge the front view scale plans from Aviatsiya
Vremya and cut templates to help me with the wing droop angle.
Spend time on the tail to fuselage joint. On my copy the width of the
fuselage top hump was greater that the one of the tail root.
All these points are important because the metal finish will not be
too kind on your mistakes. This is why good casting quality and lots of
prep work is important for natural metal planes done in resin.
Pay attention to the nose cone. It is nice and hollow but my copy
needed a lot of putty to get the contours right since the diameter of
the nose cone at the root was not exactly the same as the one of the
fuselage.
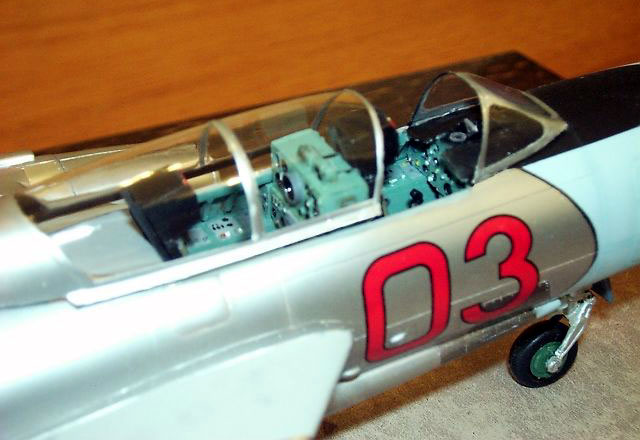
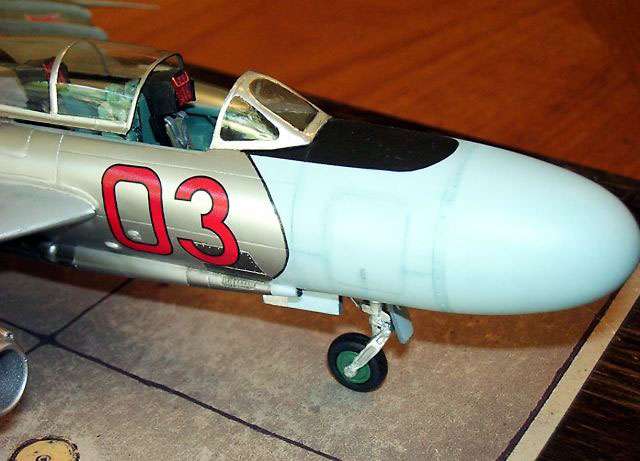
It is easier to pose the canopy in the open position. If you choose
to pose it closed you will have to create your own or modify the
existing piece that represents the rear metal canopy portion. It does
not look right and it does not fit at all when all the pieces are
together. I hollowed out mine after I removed a small portion from the
back of it.
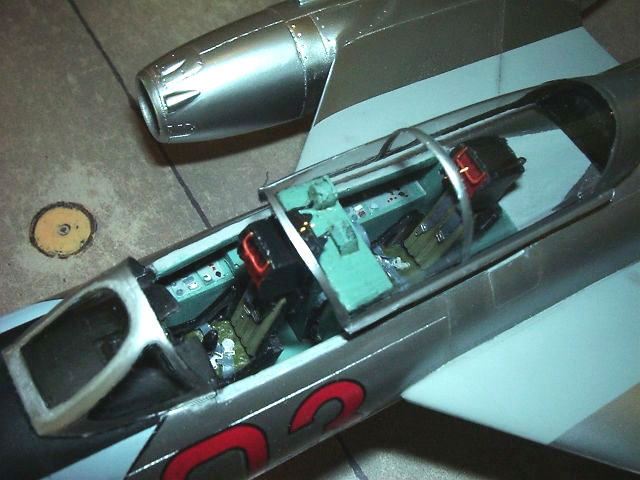
Look carefully at the Aviatsiya Vremya photos that show aircraft with
the canopy open. It was quite elevated when in the open position.
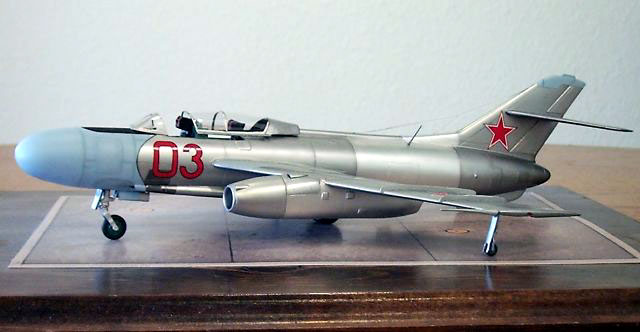
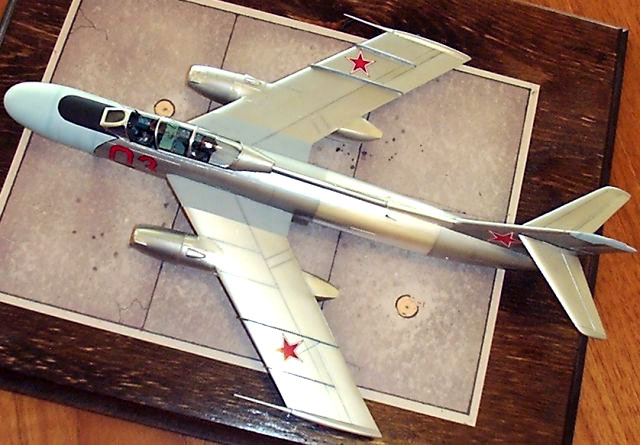
I polished the resin as much as I could before even assembly started.
After the main parts were together I used automotive primer and polished
it in earnest as well. I then used gloss black paint sprayed in thin
coats. When I got a very shiny surface I went at it with my favorite
AlcladII shades.
I weathered with pastels. Light gray for the natural metal areas,
Darker blue shade for the nose and some reddish brown for some areas
around the jetpods and the fuel fill areas.
The decals look good but they are very delicate. Exercise caution.
Hair was provided graciously by the wife again!
Although tough, it proved to be a rewarding kit to add to my
collection. I am looking forward to Collect-Aire's Mig-31 which is
almost done and on its way to the States from what I hear and to the
IL-28.
I am also curious to see how well Trumpeter and HiPM will do in the
long run with the Su-15 and Mig-19 kits. This should indicate if there
is a viable market for more Soviet subjects in the west. If they prove
to be disasters then resin and vac will continue to be the way to go for
those who like these planes!
Click on the thumbnails
below to view larger images:
Model, Images and Text Copyright © 2002 by
Fotios Rouch
Page Created 16 July, 2002
Last Updated 04 June, 2007
Back to HyperScale
Main Page
Back to
Features Index
|
 Home
| What's New |
Features |
Gallery |
Reviews |
Reference |
Forum |
Search
Home
| What's New |
Features |
Gallery |
Reviews |
Reference |
Forum |
Search