|
Yak-1 Early
Production
by Steve Mazzarelli
|
|
|
Yak-1 Early Production |

Accurate
Miniature's 1/48 scale early Yak-1 is still available online from
Squadron.com
 The
Yak series of fighters were produced in many variants throughout the
second World War. Acknowledged as the best fighter the Soviets possessed
at the outset of the war, a strong argument can be made that Yakovlev's
design was of a world class standard. Had the Soviets possessed a larger
quantity of available aluminum, this little kite would have been the
best in the world. But alas, the Aluminum was needed for more T-34
engines, so wood had to be used instead . The fact this type of
performance was achieved from a design using many wooden components is a
testament to the skill of the Yakovlev engineers. Only slightly slower
but more agile that the famed Bf-109F, it is clear that only the
Spitfire and the 109 was on this same level at the time the Yak's
introduction. The
Yak series of fighters were produced in many variants throughout the
second World War. Acknowledged as the best fighter the Soviets possessed
at the outset of the war, a strong argument can be made that Yakovlev's
design was of a world class standard. Had the Soviets possessed a larger
quantity of available aluminum, this little kite would have been the
best in the world. But alas, the Aluminum was needed for more T-34
engines, so wood had to be used instead . The fact this type of
performance was achieved from a design using many wooden components is a
testament to the skill of the Yakovlev engineers. Only slightly slower
but more agile that the famed Bf-109F, it is clear that only the
Spitfire and the 109 was on this same level at the time the Yak's
introduction.
At the beginning of hostilities with the Luftwaffe, the VVS counted
with a limited number of this advanced plane. And, perhaps to it's
ultimate advantage, most of these were stationed in the Moscow military
district. Tus in those critical few hours of Operation Barbarossa, none
if any Yaks were destroyed on the ground. As the Germans advanced
thorugh the Ukraine and Byelorussia, they began to encounter more and
more of these nimble planes.
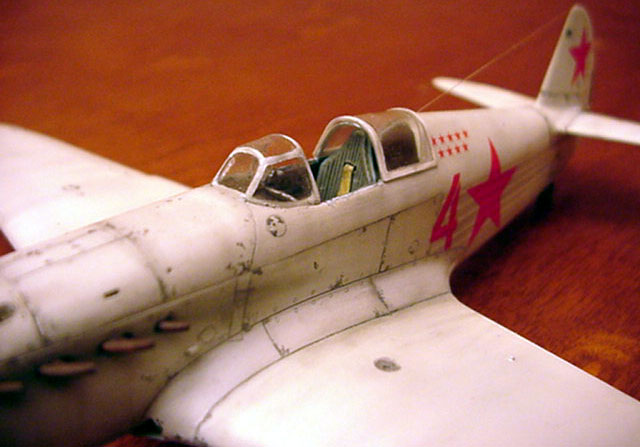
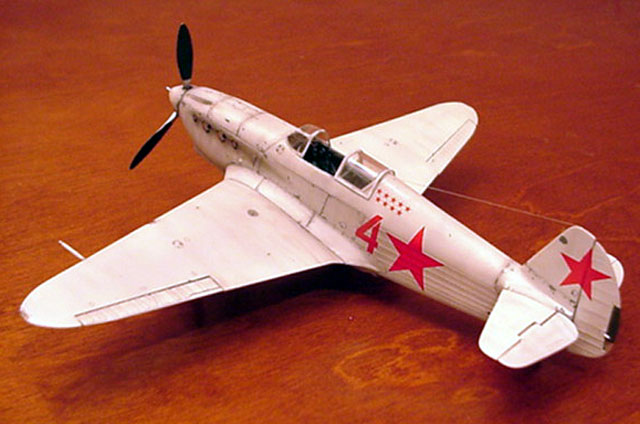
I found a wonderful photo of this early production Yak in the
fantastic Russian language book, "First Yak". In the caption it states
that this plane belonged to a Naval unit and that the photo dates from
the winter of 1942-43. I have some doubts about this, as this is clearly
one of the first production types. Perhaps one example of these early
types would have still around, but by this time most would have been
worn out or destroyed. I'm more inclined to believe this fighter was
photographed in the critical winter of 1941-42 at the time the Soviets
were mounting their epic defense of Moscow. Don't know, it just seems
better for me to think of it this way. The ace who flew it is unknown.
The number four is a speculation on my part, as only a tiny speck of a
number can be seen from the angle of the photo. AS the caption states
that this was aircraft no.1045, I went with the #4. Also, Soviet naval
air units placed their aircraft number in front of the fuselage star, as
opposed to the rear as was the practice of the VVS (air force).
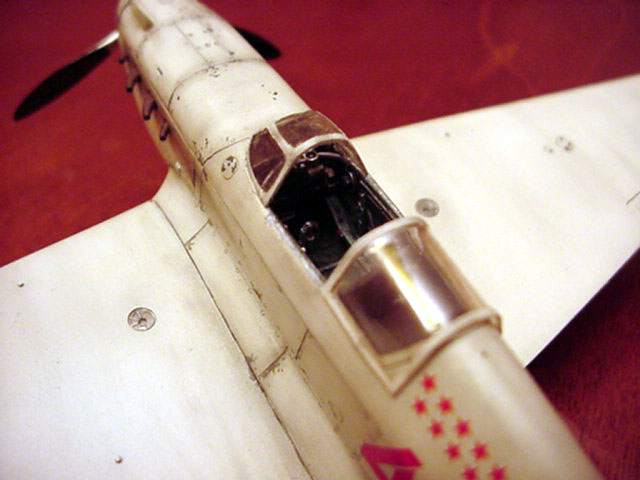
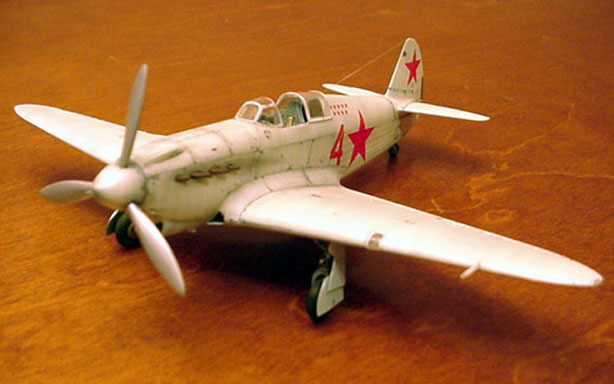
This is the Accurate Miniatures' kit, with a few modifications. I
replaced the top fuselage piece and canopy with the AlphaFlight
correction set. The primary reason for this is the very badly shaped
front windscreen that comes with the kit. This is a result of a overly
wide fuselage top, which must also be replaced. I also used the early
type wheel covers and adjustable tail feathers included in this set. An
additional modification involved re-shaping the spinner and front engine
cowling. The earliest Yaks had a more pointed and longer spinner, and
did not yet include the oil collector ring as provided in the kit. Also,
the new resin fuselage piece corrects a few other minor inaccuracies to
the gun ejector chutes and oil tank access panels. I think these pieces
makes the kit 'look' more like a true early Razorback!
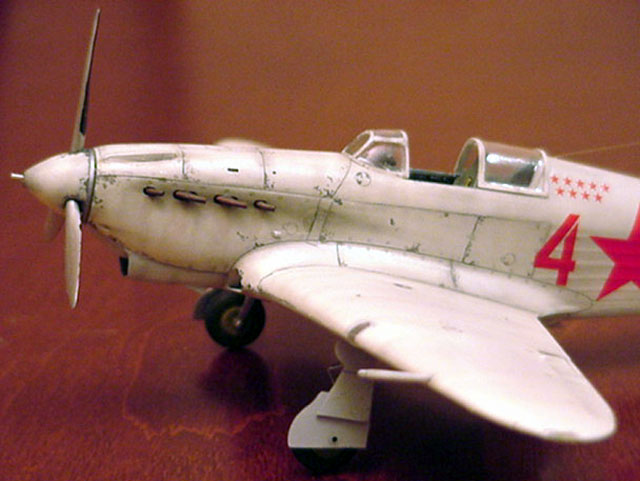
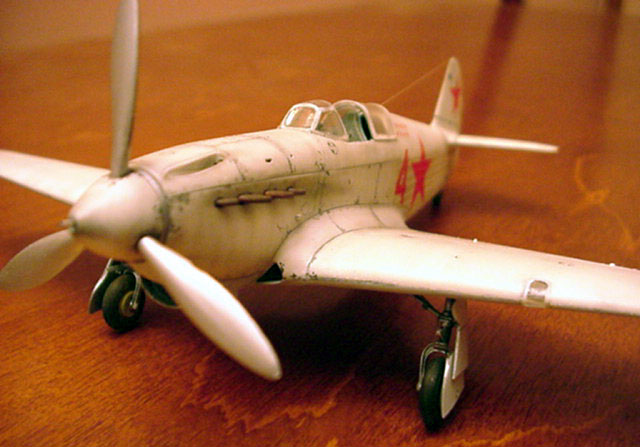
Other bits used were the Eduard set (mainly the seat harnesses), and
the lovely but sadly Out of Production "InSight" gunsight. This was
placed on a slightly modified gunsight brace. I simply thinned the
diameter of the tube as this appeared too heavy and thick to me. In
addition I exchanged the wheels for a set from equipage. These lovely
resin and rubber items are a bit smaller that the kit's but look better
to my jaundiced eye. I also exchanged the exhausts with the excellent
metal items from Moskit. These must be cut out individually and area bit
fiddly, but I really like 'em!
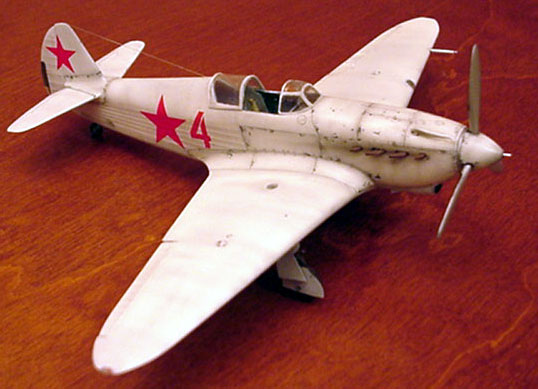
This was done with quite a few coats of differing shades of white. I
also used a technique stolen from the armor boys. This simulates wear
and tear and is very effective I feel. This was accomplished with dark
gray paint and a very fine brush. for the general coloring I use the
Aztek A740, and find it to be an excellent tool. The decals come from
the spares box.
If you are interested in the AlfaFlight set, contact me directly, I
have a few sets left!
Click on the thumbnails
below to view larger images:
Model, Images and Text Copyright © 2002 by
Esteban Mazzarelli
Page Created 21 June, 2002
Last Updated 04 June, 2007
Back to HyperScale
Main Page
Back to
Features Index
|
 Home
| What's New |
Features |
Gallery |
Reviews |
Reference |
Forum |
Search
Home
| What's New |
Features |
Gallery |
Reviews |
Reference |
Forum |
Search