|
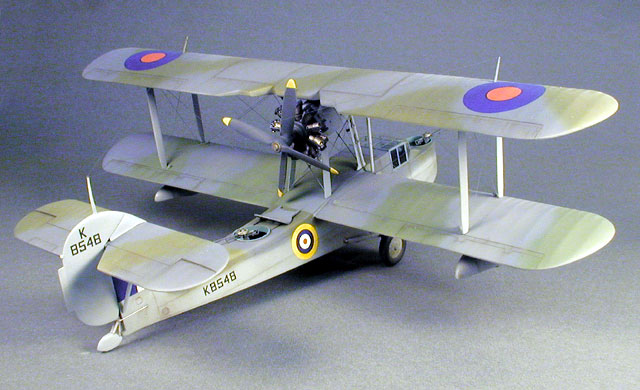
Supermarine Walrus Mk. I
by
John C. Valo
 |
|
Supermarine Walrus Mk. I |

Classic Airframes'
1/48 scale Walrus Mk. I is available online from Squadron.com
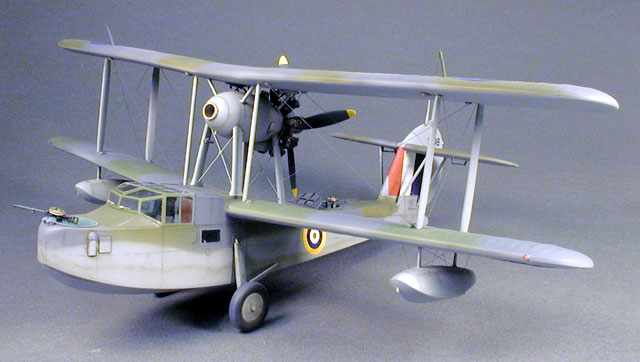
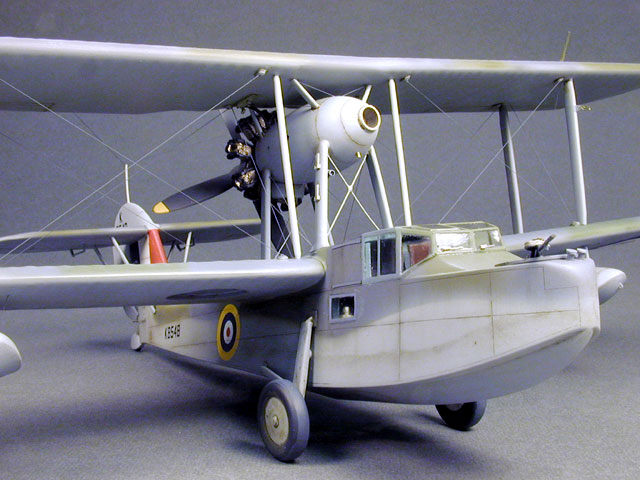
The legendary Walrus really needs no introduction; many are the stories of this
flying boat's achievements. Classic
Airframes recently released a beautiful, albeit challenging kit of the Walrus in
1/48 scale. The kit itself is in the traditional CA mix of well molded plastic
main parts and superbly rendered resin detail parts. Markings for four aircraft
are provided in the kit, and CA has also released an aftermarket decal with four
more marking schemes, which provide some beautiful modeling possibilities.
An extensive assembly manual is
provided which helps to clarify a number of building challenges, but
experience is necessary to tackle this kit.
To cut to the chase, if you are inexperienced, impatient, or if you have
recently quit smoking, this may not be the kit for you. On the other hand, if
you have experience with limited run kits, especially biplanes, go for it - just
take your time.
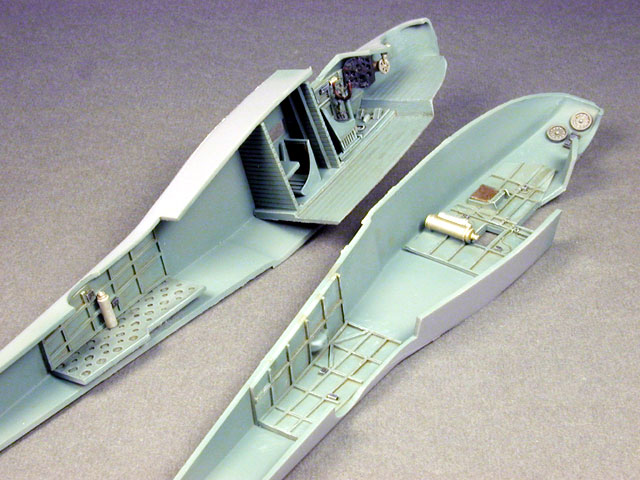
On the plus side, the beautiful resin interior fits very well with nothing more
than the usual cleanup necessary - I had no problems having to reengineer
anything to fit. The assembly of the main injected parts also goes quickly and
cleanly. The fabric detail and scribing are both excellently executed.
The real challenge of this model lies in getting all the fiddly strutwork in the
right place at the same time! This is the first place where I deviated from the
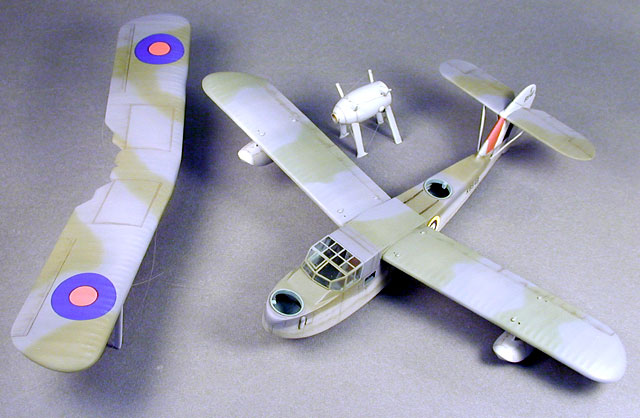
suggested assembly sequence. After studying the instructions and parts, I
elected to build the model as a series of subassemblies, namely the
fuselage/empennage/lower wings, upper wing, and the nacelle and associated
strutwork.
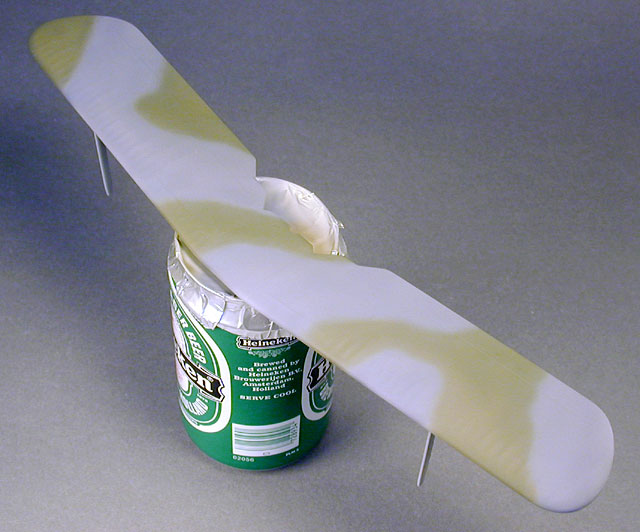
After finishing the assembly of the fuselage, I made an assembly jig from
foamcore board to hold the fuselage perpendicular as I attached the lower wings
and stabilizers.
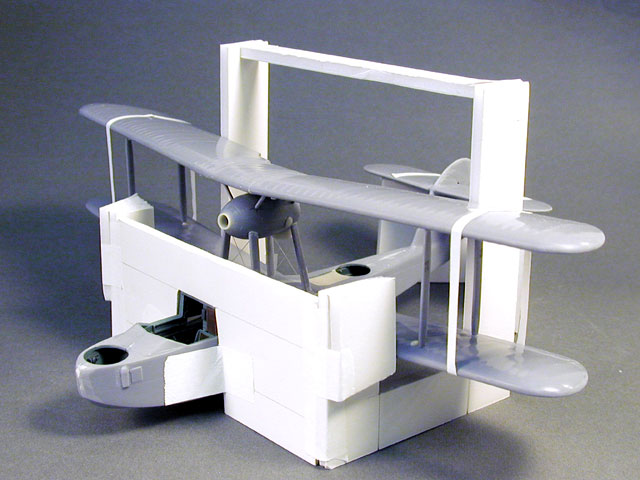
As my photos show, it's pretty quick and dirty, but it did the job. Vertical
extensions forced the upper wing to align with the lower wings, which match each
other in planform. I swapped the interplane struts from the instruction part
callouts, my positioning being as follows: Right rear - part 23, Right front -
part 27, Left rear - part 25 and Left front - part 28. This seemed to be the
logical relationship relative to the strut lengths and taper. I drilled out the
locating holes on the undersurface of the upper wing and upper surface of the
lower wing for a more positive fit of the struts. After assembling the entire
upper wing and pre-drilling holes for rigging wires in the tiny resin fairings,
I glued the interplane struts to the lower surface of the upper wing only, while
the wing was secured in the assembly jig. I then attached parts R11 under both
wings - the instructions only call out under one, but it should be both.
The nacelle of the Walrus (which, because of its uncanny resemblance to a
familiar barnyard animal, I soon referred to as the 'Pig') is offset five
degrees from the centerline of the fuselage, but you are on your own to align
this on the kit. This unique characteristic provides the single most challenging
aspect of assembly, as the Pig is suspended between four rather substantial
lower struts and four rather insubstantial upper struts, plus a cobweb of
rigging wires. After much head-scratching, I used double-stick tape to hold the
four lower struts temporarily to the fuselage/lower wing, then used small pieces
of tape to hold the nacelle itself to these struts. I then placed the upper
wing/strut assembly in place, and thus began the macabre ballet of trimming and
aligning the lower struts to place the Pig in its proper position. Once this was
achieved, I used Contrail strut material cut to appropriate lengths to make the
upper struts. Once all of the struts were glued into place, I removed the upper
wing. I then elected to rig the Pig (so to speak) at this time and used both
stretched sprue and nylon sewing thread to represent the wires.
Although I believe some of these wires may have actually entered the wing or
fuselage proper on the actual aircraft, attaching them to the strut ends on the
model made the Pig a complete subassembly of its own, and quite frankly, you
really can't tell the difference. Note that in the nacelle rigging diagram in
the instructions, the arrows pointing 'forward' are reversed. As all the rigging
is symmetrical, this isn't a problem.
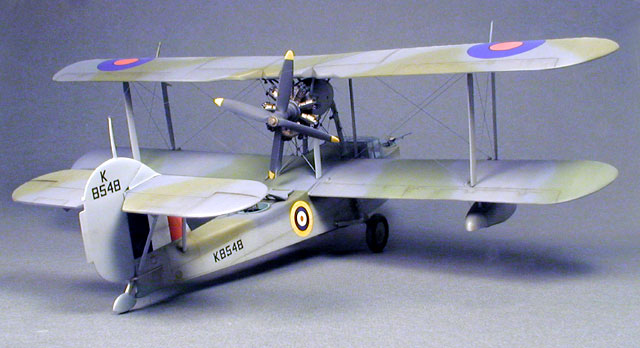
At this point, all the subassemblies were painted with PollyScale acrylics (my
favorite), decaled and weathered before the final assembly. The decals are as
usual printed by Microscale, and worked great. Note that the painting support
for the upper wing/strut assembly was disposed of soon after decaling was
complete. I attached all of the interplane rigging wires to the underside of the
upper wing before assembly, to eliminate as much aggravation as possible.
The actual final assembly was really quite an anticlimax, as everything
basically clicked together. Attaching all of the various rigging wires was a
challenge, but not really more than usual for any biplane, thanks to 'rigging
the Pig' beforehand.
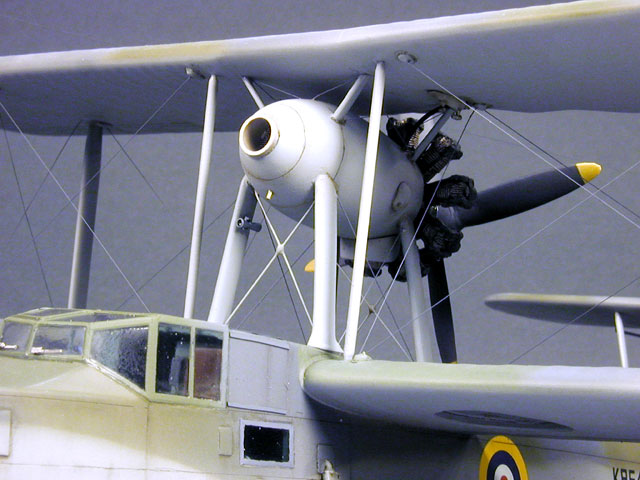
The engine and unique propeller assembly went without a hitch, and they look
great.
The landing gear provided in the kit is accurate, but very weak. I drilled holes
in the top of the main gear struts and inserted small lengths of bent brass rod.
These in turn were inserted into holes drilled in the fuselage at the strut
attachment points. I also added two very small reinforcements between the main
gear struts and fuselage. While not 'to scale', they helped to keep the landing
gear from collapsing.
The kit provides a two-piece rear hatch cover, but it doesn't correctly
represent the articulation of the open hatch. I simply cut off half of the
circular section and replaced it with clear styrene, glued at the proper angle
for the open hatch. The vacuformed canopy fit beautifully. Two exquisite little
Vickers 'K' guns completed the project.
OK, I suppose it's time for the Big Question: Is this kit worth buying?
Big Answer: Absolutely!
The Walrus is by far the most challenging kit CA has ever released, but the
challenges lie in the design of the actual aircraft, not so much in the
execution of the kit.
If you don't have too much
experience with biplanes, perhaps you may want to buy the kit and set it aside
until you feel confident about tackling it. Otherwise, I recommend this kit.
It is complex; it is time-consuming, but the end result is truly worthwhile.
Click the thumbnails below to view
larger images:
Model, Images and
Article Copyright © 2002 by John C. Valo
Page Created 29 January 2002
Last updated 04 June 2007
Back to HyperScale
Main Page
Back to
Features Page |
 Home
| What's New |
Features |
Gallery |
Reviews |
Reference |
Forum |
Search
Home
| What's New |
Features |
Gallery |
Reviews |
Reference |
Forum |
Search