|
SAAB Viggen
by
Darren Roberts
|
|
|
SAAB Viggen |

HyperScale is proudly supported bySquadron.com
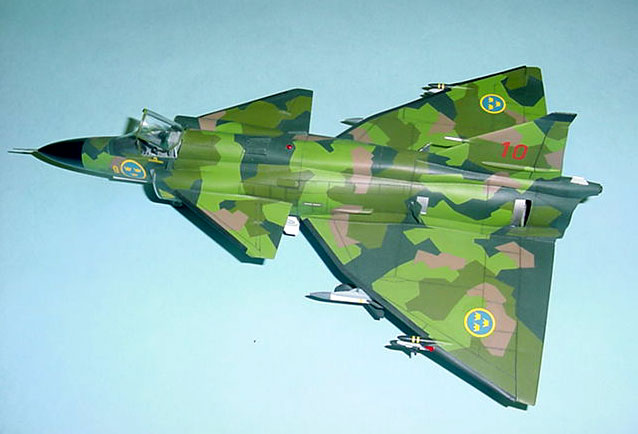
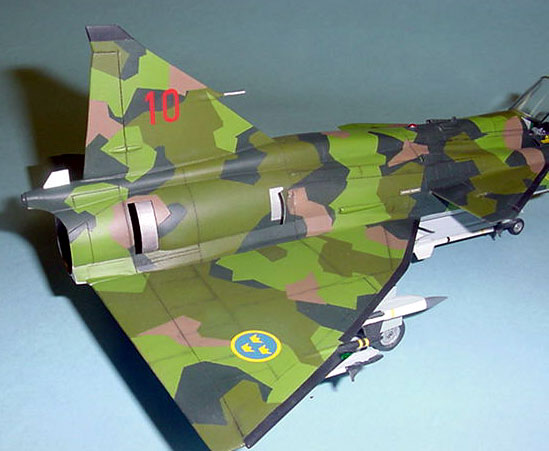
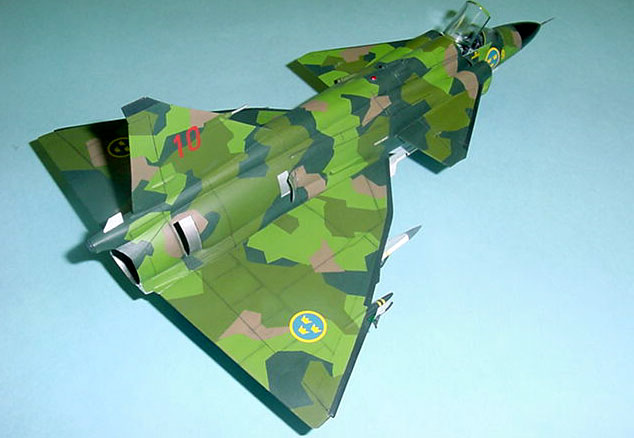
This is ESCI's 1/48 scale SAAB Viggen. The camo scheme was just
too cool not to try. It is a shame that this kit has been out of
production for some time.
Of course, Advanced Modelers' Syndrome struck and I couldn't just
build it straight from the box.
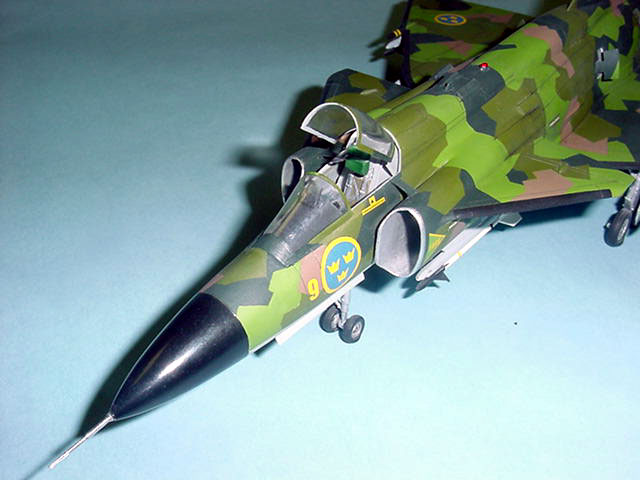
I decided that recessed panel lines would be nice, so I rescribed the
kit using a TriMaster scribing tool. With that completed, I set to work
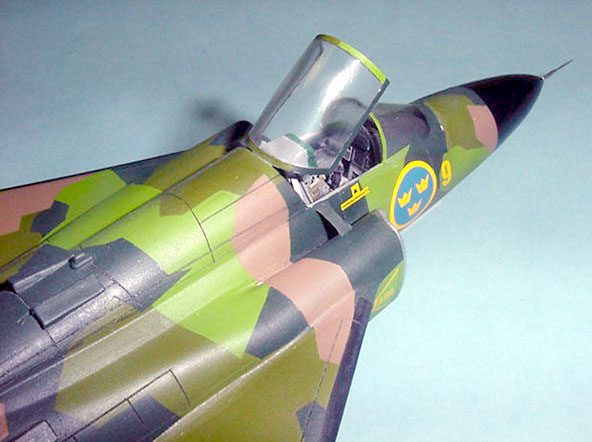
on the cockpit. I scratchbuilt the seat and used photoetched odds and
ends to detail the side consoles and front instrument panel.
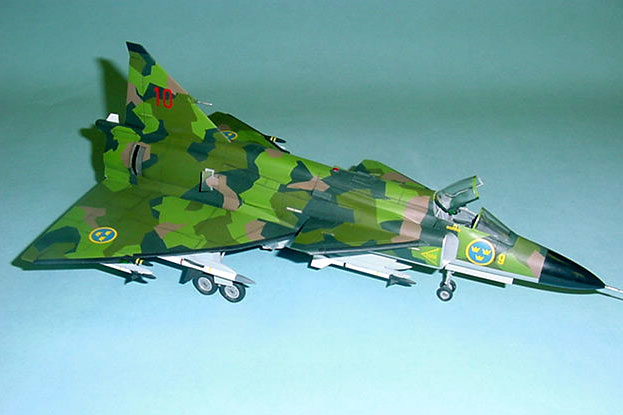
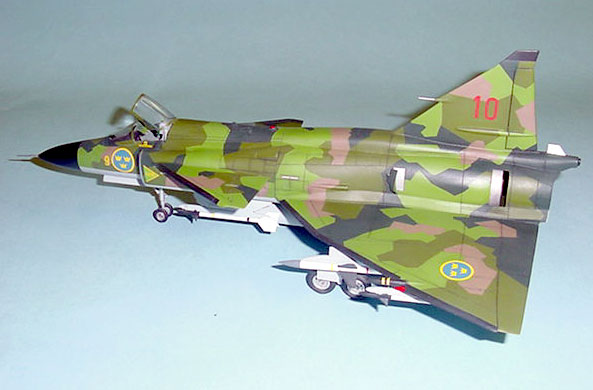
The next decision was to convert the model into the fighter version.
My references were scarce on the Viggen, so I had to work off of
pictures that I had in books. I increased the width of the tail section
by adding a styrene piece to the leading edge and then shaping it. That
also created the dog-tooth edge I needed. I repositioned the pitot tube
from on top of the tail to midway down.
From there, I added the antenna
that goes behind the rudder and scratchbuilt the gun pack on the belly
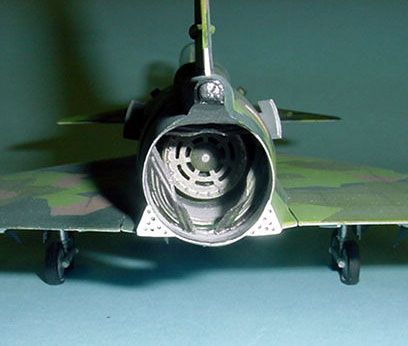
of the plane. I also wasn't quite satisfied with the engine area or the
wheels. I cut open what I assumed to be the thrust reverser and
positioned the three section open. Then I robbed the flame holder
section from a derelict ESCI F-104 and fit it into the fuselage section.
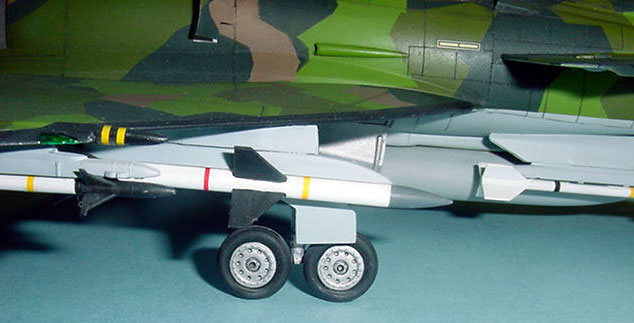
For the wheels, I looked through all of the True Details sets at my
local hobby store. Amazingly, the F-4B/N wheel set looks remarkably
similar to the Viggen wheels, so on they went.
With the basic construction finished, now came the really fun part -
painting!
 I
started by enlarging the camouflage pattern from the instruction sheet on a photo
copier so that it was in 1/48 scale. I
started by enlarging the camouflage pattern from the instruction sheet on a photo
copier so that it was in 1/48 scale.
I sprayed the tan areas first, the cut masks using the plans as a
guide. I used 3M blue painters tape, since it has a low tack and doesn't
tend to pull off paint. I continued this for the rest of the painting.
I
used a combination of acrylic paints so that I could get colors that
were a good match. These included Tamiya, Polly-S, and Model Master
Acryl.
When the paint was dry, the usual decaling process took place.
Before I dull coated it, I ran a .005 Micron Pen through the panel
lines, then took off the excess with a wet Q-Tip. I dull coated using
Model Master Acryl flat coat, then finished off with some burnt umber
pastel work through the panel lines.
In the end, this was a very satisfying project of a subject you don't
see very often.
Click
the thumbnails below to view larger images:
Model,
Text and Images Copyright © 2002 by
Darren Roberts
Page Created 05 March, 2002
Last Updated 04 June, 2007
Back to HyperScale
Main Page
Back to
Features Index
|
 Home
| What's New |
Features |
Gallery |
Reviews |
Reference |
Forum |
Search
Home
| What's New |
Features |
Gallery |
Reviews |
Reference |
Forum |
Search