|
Tiger II (Late
Production)
by Richard Fisher
|
|
|
Tiger II (Late Production) |

Tamiya's 1/35
scale King Tiger Late Production is available online from
Squadron.com
It has been about six years since I completed my
last armor project. It took a tick bite, the resulting Lyme disease and
bad daytime television to get me to start and finish this model.
Like most of us I have accumulated a large number of “Want to do
someday” projects. This Tiger II is a prime example. I had several gun
barrels, track kits and PE sets boxed with the kit.
I wasn’t sure what I wanted to do. I did
know that I wasn’t up to doing zimmerit. After doing some research I
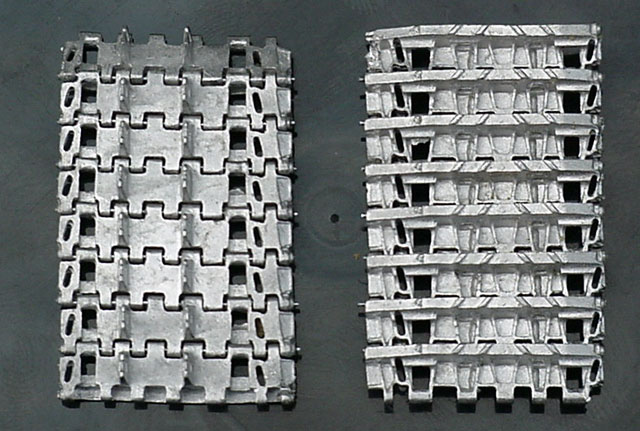
decided on a very late war machine. I had a set of the Fruilmodel late
war 73/800/152 tracks(ATL-37).
I also found a photo of a Tiger II with many but
not all of the last production features. This machine was from Schwere
Panzer Abteilung 507 and was more than likely one of the last machines
completed by Henschel.
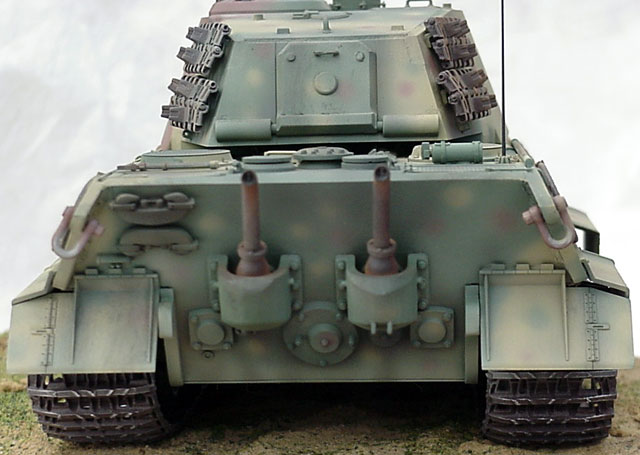
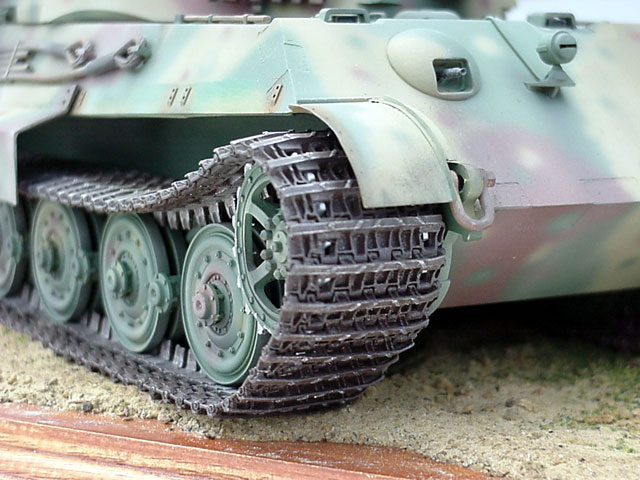
This machine had the late single link tracks with
the eighteen tooth sprocket, reinforced front mud guards, rain guard
over the sight aperture and the four fuel vent lines.
Although I can’t see it in the photograph, my guess
is it had the late war rear turret access hatch. And with the planned
production schedule, it would also have dropped the jack and wooden
block from the rear end.
I used the excellent 1/35 scale Tamiya King
Tiger (#35164). I started by building the lower hull per the kit
instructions. I omitted the kit drive sprockets and substituted the
Fruilmodel 18 tooth sprocket. The small polycaps need to be trimmed to
fit inside the sprockets.
Next the jack mount and wood block holes were
filled. I then added the rest of the details for the rear. I added the
small lifting lugs to the armored exhaust covers and drilled out the
hand crank starter support.
Wire was used for the electrical cable to the
headlight. On the rear deck there are four vent lines for the fuel
systems. (earlier units have only one) I used small plastic rod and wire
for the lines. Evergreen styrene was used for the brackets and guards.
The Tamiya after market screens were added next. Small pieces of styrene
rod were added to simulate the bolt heads. The reinforced fender guards
were made from five thousands sheet styrene.
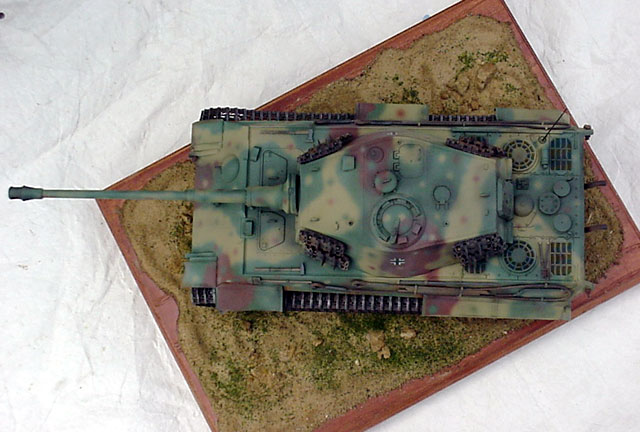
On the turret I added a barrel from Czech Masters. Made a rain guard
from sheet styrene. Modified the rear access hatch by filing the corners
to an angle and adding the two small round plugs. The sighting rods were
added to the front periscope on the cupola and a small blade site was
added to the back of the front guard as well. Next the small mounting
tubes for the commander’s rain shield were added.
Periscopes were added under the gunner’s periscope
cover and the commander’s cupola.
By now I wasn’t so itchy or shaky and felt ready to
paint. But first I needed to do the tracks. I have to admit that I was a
little intimidated. But after I got started I found the assembly to be
straight forward and really quite easy. I started by doing links of two,
then joining groups together until I had the tracks completed. If I
remember correctly there are 86 links per side.
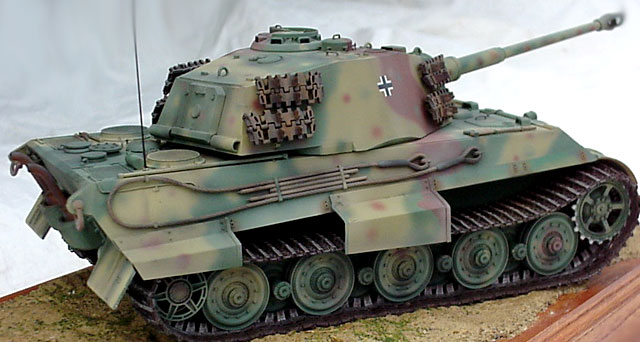
Now I could start painting. The tracks were paint with Floquil Roof
Brown (Lacquer) and weathered with Rub N Buff.
 By
the time this unit was produced an overall green (RAL 6003) was the
standard factory finish. I used Floquil Hunter Green (Lacquer). It was a
very close out of the bottle match to the color chip in Chory’s
Camouflage Color book. Next small bands of yellow were sprayed on using
Humbrol (Enamel) German Overall Sand (RAL 7028). The red brown was a mix
I had from another project and I can’t remember much about it other than
I started out with Tuscan. By
the time this unit was produced an overall green (RAL 6003) was the
standard factory finish. I used Floquil Hunter Green (Lacquer). It was a
very close out of the bottle match to the color chip in Chory’s
Camouflage Color book. Next small bands of yellow were sprayed on using
Humbrol (Enamel) German Overall Sand (RAL 7028). The red brown was a mix
I had from another project and I can’t remember much about it other than
I started out with Tuscan.
From the photograph all you can see are the national markings on the
turret. I decaled these using the kit supplied markings.
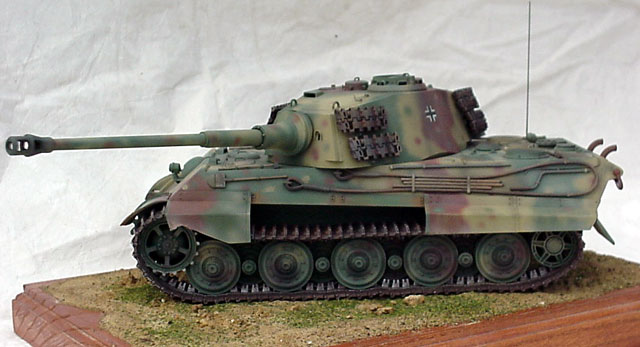
For weathering I use Testor’s clear flat tinted with Floquil Earth (Both
are Lacquer based). I spray this on to simulate dirt and dust. Next,
clear flat with grimy black was lightly sprayed around the hatches and
engine access panels.
Once dry pastels were used for highlights, rust and
other effects. Once complete a final clear flat coat was applied to seal
the finish.
Put the tracks on and set it on a base. Done!
Sanity retained, feeling better, back to work. Next maybe I’ll get to
that Tunisian Tiger I. Now what color is that thing?
Click
the thumbnails below to view larger images:
Model, Images and Text Copyright © 2002 by
Richard Fisher
Page Created 24 October, 2002
Last Updated 04 June, 2007
Back to HyperScale
Main Page
Back to
Features Index
|
 Home
| What's New |
Features |
Gallery |
Reviews |
Reference |
Forum |
Search
Home
| What's New |
Features |
Gallery |
Reviews |
Reference |
Forum |
Search