|
Tunisian Tiger I
of PzAbt 501
or
Airplane Guy Gets Dragged
Through The Mud…
by
Gregg Cooper
|

|
|
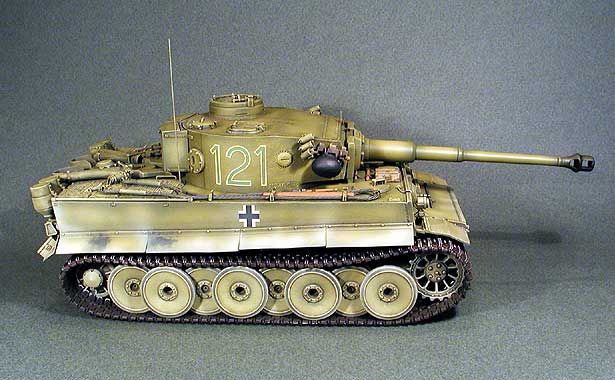
Tiger I
PzAbt 501, Tunisia, 1943 |

Tamiya's 1/35 scale Tiger I (Initial Production) is avaialable
online from Squadron.com
Well, now I’ve done it; I’ve built a tank!
Before I had a family, I was all over the place
with my models, including a rather long stint into 1/43 scale resin
racing car kits and Formula One models. Each month there was and IPMS
meeting in three different locations, and I never missed a one. I
worked in a local hobby shop, and it seemed like I had one each of
EVERY new kit out there, and I had started nearly all of them as well.
About eleven years ago, my first son was born
with some severe birth defects. Family matters forced me to
consolidate my modeling down to just my favorite subject, 1/48 WW II
airplanes. I sold off nearly everything, and withdrew from the hobby
aspect of modeling to spend time with the family. Gradually, over the
last six or seven years, I have increased my involvement again, and I
have decided to branch out again from the WW II airplanes. Like most
of us, I am a die-hard history nut, and just about anything military
can inspire me. The last armor kit I built was in 1984 (Tamiya’s
then-new M4A3 Sherman kit) so I was eager to have another crack at it.
Initially, I thought that Tamiya’s Tiger I would be a great subject to
start with, being a new kit, with adequate detailing. On reflection
though, I probably should have started with smaller, simpler kit.
I apologize in advance for incorrect terms or
descriptions of hardware. I’m just learning “tank talk”.
Click
the thumbnails below to view larger images:
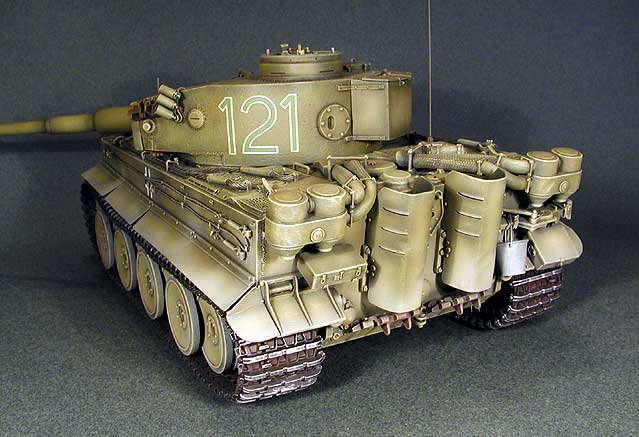
My best buddy, Dave Kovach, who is very much into tanks, showed me a
copy of a new book entitled Tiger I On The Western Front by Jean
Restayn. The Tigers of PzAbt 501 serving in Tunisia intrigued me. I
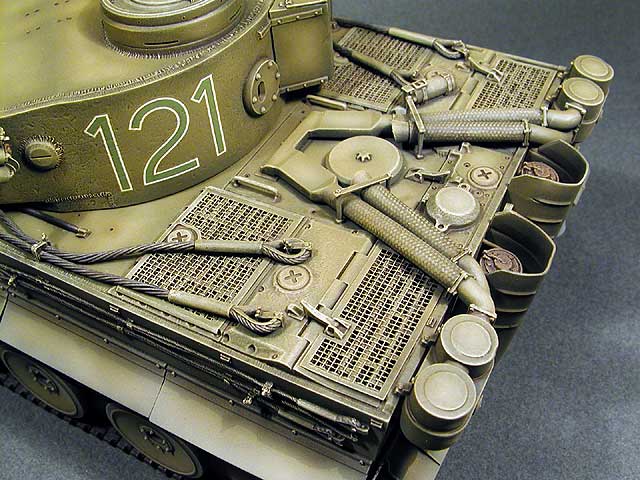
particularly liked vehicle 121 with a huge stain on the bow, and a
great selection of photos from all angles. These Tigers are so
different from any other Tigers that saw combat. I had a blast
researching all of the little details of these Tigers. They had a
completely different bow, different fender arrangements, headlights,
tool stowage, cable stowage, exhaust shields, spare track stowage, and
lots of other little things. I discovered that these Tunisian vehicles
have somewhat of a mystique about them. Nobody knows for sure what
color they were, and Tiger aficionados are quick to dissect models of
these particular Tanks. I took a good stab at it, and I know that I
missed something somewhere, but that’s OK. I had fun.
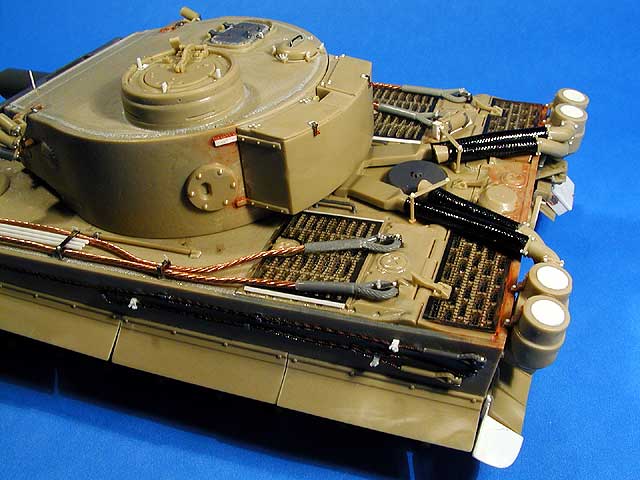
You will notice that the pictures of the vehicle
before painting show two different colors of plastic parts. That is
because I started the project with Tamiya’s EARLY PRODUCTION TIGER
kit. Only after I got started, did I find out that Tamiya also made an
INITIAL PRODUCTION TIGER that features many of the little details that
I planned to scratch-build. So, I acquired that kit as well, and
swapped-out the parts I had already worked on.
The first thing I did was enhance all of the existing welds, followed
by adding all of the missing welds with a “hot knife” that had a
specially shaped #11 blade. After filling in all of the holes in the
hull for the tool stowage and cable stowage, I added texture to all of
the surfaces with a ball cutter in a motor-tool.
Click
the thumbnails below to view larger images:
The turret had these additions: Enhanced smoke
dischargers & wiring, drain holes on inside and outside of cupola
ring, tubular periscope mounts on cupola, enhanced hatch latches,
slightly dented stowage bin, new hinges and latches on stowage bin,
“iron” sights for the commander, detailed ventilator cover, new
co-axial MG 34, serial number on mantlet, over-travel stop on mantlet,
and detailed gun-muzzle.

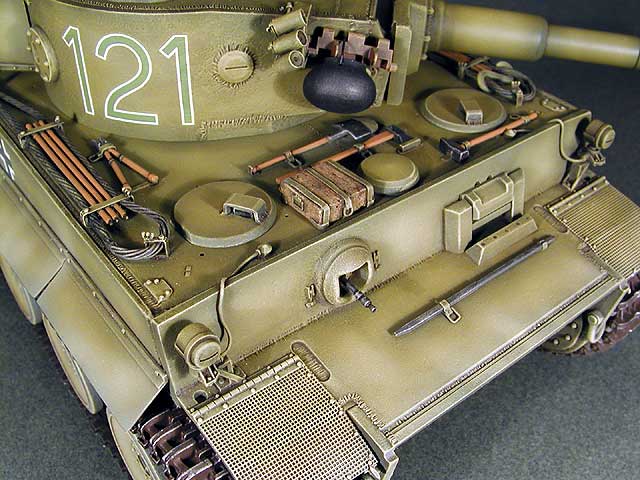
Down on the hull is where things got interesting.
Apparently, there were two different styles of very-early front
fenders. Both styles feature an embossed “grid” pattern that runs
either diagonally (diamond) or laterally (waffle). Tiger 121 of PzAbt
501 featured the waffle style, so guess which ones came in the Tamiya
kit? Yep, I had to scratchbuild a set of “waffle” fenders. I used a
sheet of etched brass mesh from Aber and styrene strip and scribed rod
for the hinges. Rivets from a punch-and-die set finished both the
hinges and the fenders. The side fenders were separated from each
other, thinned, tweaked just a little, and attached to the hull. In
the back, the rear fenders needed a little help. I removed the outer
curved portions, and replaced them with sheet stock, tweaked them a
bit, added rivets, and then mated them to the hull as well.
Click
the thumbnails below to view larger images:
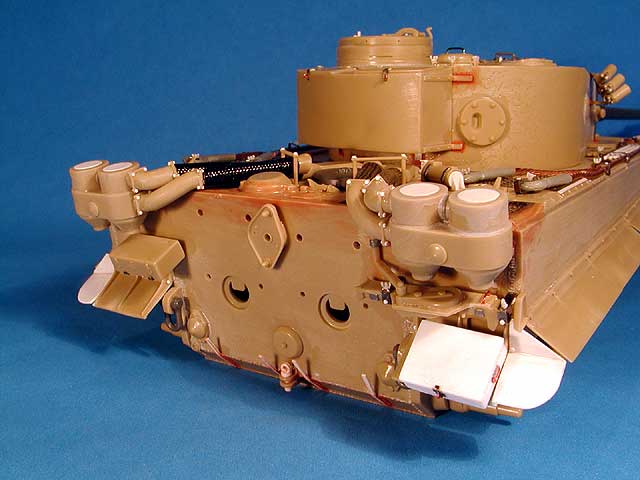
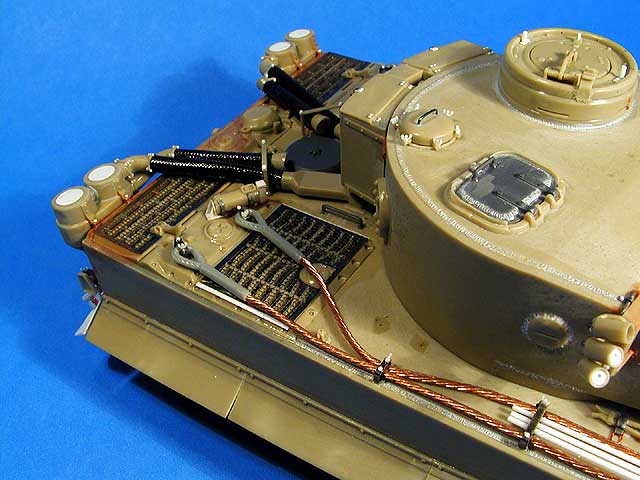
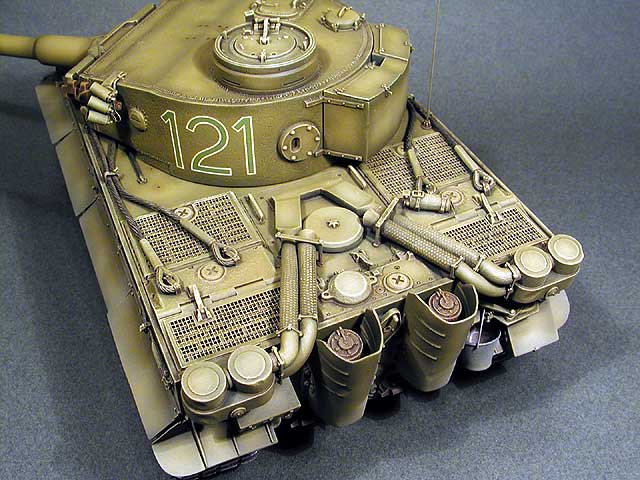
I thought that things would be visible in the engine bay, so I decided
to add interior details. I “borrowed” the radiator, fuel tank, and
cooling fan from Dave’s Academy Tiger kit. After casting duplicates,
and detailing them a bit, I installed them into the engine bay. Eduard
etched grill covers capped-off the bays.
Click
the thumbnails below to view larger images:
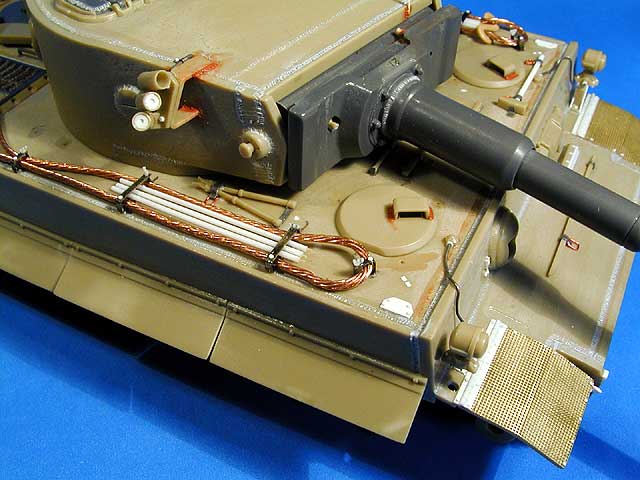
The tow cables of these Tigers were a little different than others. On
most Tigers, the standard stowage method of the tow cables was to
attach the tow-eyes into brackets on the front of the upper hull.
These Tigers had them reversed, with the tow-eyes on the rear of the
hull. This cable arrangement shows up very clearly in photos of PzAbt
501 Tigers. Tiger 121 shows evidence of stowing them both ways
throughout it’s short career. I chose to install them with the
tow-eyes to the rear. Copper picture-hanging wire for the cables, and
tow-eye sections from Karaya worked well here. Eduard’s etched cable
holders were used to attach them to the hull. For the track cables, I
used some miniature cable that I found in a fly-fishing supply store.
Lead foil clamps hold them down.
Click
the thumbnails below to view larger images:
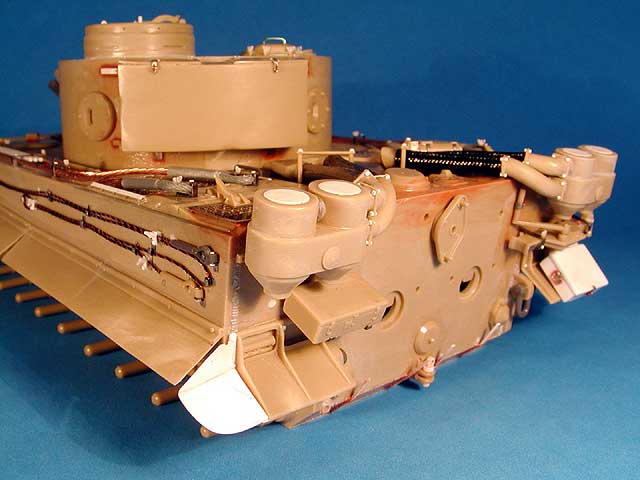
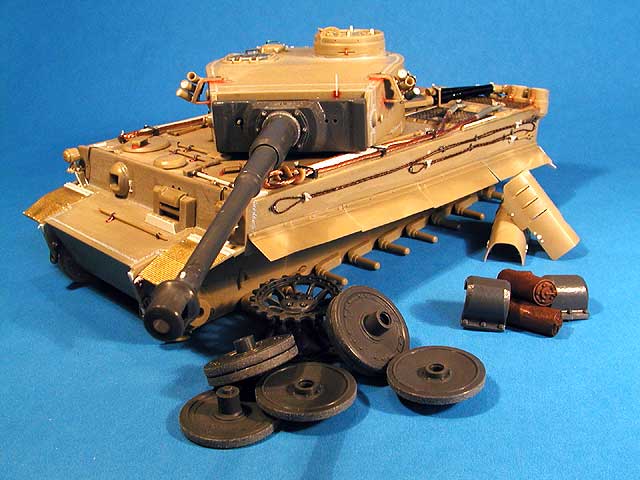
In the front, these Tigers still showed evidence of an early armored
shield that covered the front of the tracks. The angle of the side
armor at the very front edge is slightly different, and a little round
notch in the upper corner is where the shield mounted. This had to be
extensively modified from the kit parts. The towing rings were also in
a slightly different location, and were also modified.
Other details include: scratch-built
tool clamps, modified tools and stowage, real wood jack block,
detailed headlights, LOTS of little rivets and weld seams, wing nuts
on the cable clamps and bow MG cover nuts, more details on the air
filters along with dents and dents in the exhaust shields. Tamiya
provides the hoses for the air filtration system, and the embossed
pattern on these look great when drybrushed. The hose couplings
however needed 64 individual rivets added to them.
Details peculiar to Tiger 121 include extra track stowage on the
turret side and lower rear hull, a second toolbox added to the right
rear fender, bucket in the rear, and a cooking kettle hanging from the
extra track on the turret side.
Finally, the Tiger was ready for
paint. I agonized over when to install all of the tools and
cables-before or after painting. They went on before painting, and I
am happy with that decision. (Besides, it looks better in the “before
paint” pictures.) My best research determined that these vehicles MAY
have been painted in “pea green” at the factory especially for service
in Tunisia. They arrived with large white outline style numbers on the
turrets. PzAbt 501 decided to repaint the vehicles in a more
appropriate color once they were using them in Tunisia. The identity
of this color remains a mystery, with speculation ranging from
captured U.S. Olive Drab, desert brown, and gray-green. I opted for
the gray-green as speculated in the Tiger I On The Western Front book.
The author further speculates that the interior of the numbers was
left in the original lighter “pea green” color. I chose Tamiya XF 59
Khaki as a base color. A little white was added to the base color and
sprayed inside the major panels. Some darkened color was added for the
larger shadow areas. The interior of the numbers was sprayed using the
kit decals as guides for masking templates made from Tamiya tape. The
kit decals were used for the white portions of the numbers. They
worked fantastic with Gunze’s Mr. Mark Softer solvent. Oil washes and
drybrushing with Poly Scale acrylics finished the basic paint job.
Tiger 121 features prominent stains on the bow and some of the
fenders. I replicated these stains using thinned oil paints. To finish
things up, a little “dust” was airbrushed here and there with some
very light tan.
The tracks were the last item I tackled. These
are one-piece tracks that are very, very nice. They are detailed on
the inside as well. What I REALLY liked was how they glued together
with liquid cement. Nice, neat, and sturdy. Dark brown paint, silver
drybrush, and some dust finished these off.
After months of research and construction, this
project suddenly just ended. It seemed to me that once the model was
to the painting stage, things went very smooth and quick. Maybe this
is because I was on more familiar ground. I never intended to detail
the model as much as I did, but the more I researched the actual
vehicle, the more I wanted to enhance the model. As I got into it, the
project became an endless parade of little things that still needed to
be done. If I detailed this, then I had to detail that. If I detailed
stuff to a certain level in one area, then I had to be consistent with
the details everywhere. But like I said in the beginning, I had a
great deal of fun. And I needed to have some fun! Now I have to decide
whether my next model is going to be another tank, or back to the
airplanes…
My thanks to thank Dave Kovach, Bob Oehler, Steve Munroe, and my
uncle, Mike Mason
for helping me throughout this project.
Model, Images and Text Copyright © 2002 by
Gregg Cooper
Page Created 12 March, 2002
Last Updated
04 June, 2007
Back to HyperScale Main
Page
Back to Features
Index
|
 Home
| What's New |
Features |
Gallery |
Reviews |
Reference |
Forum |
Search
Home
| What's New |
Features |
Gallery |
Reviews |
Reference |
Forum |
Search